Crispy Cheesy Bites: The Secret to Gooey Perfection
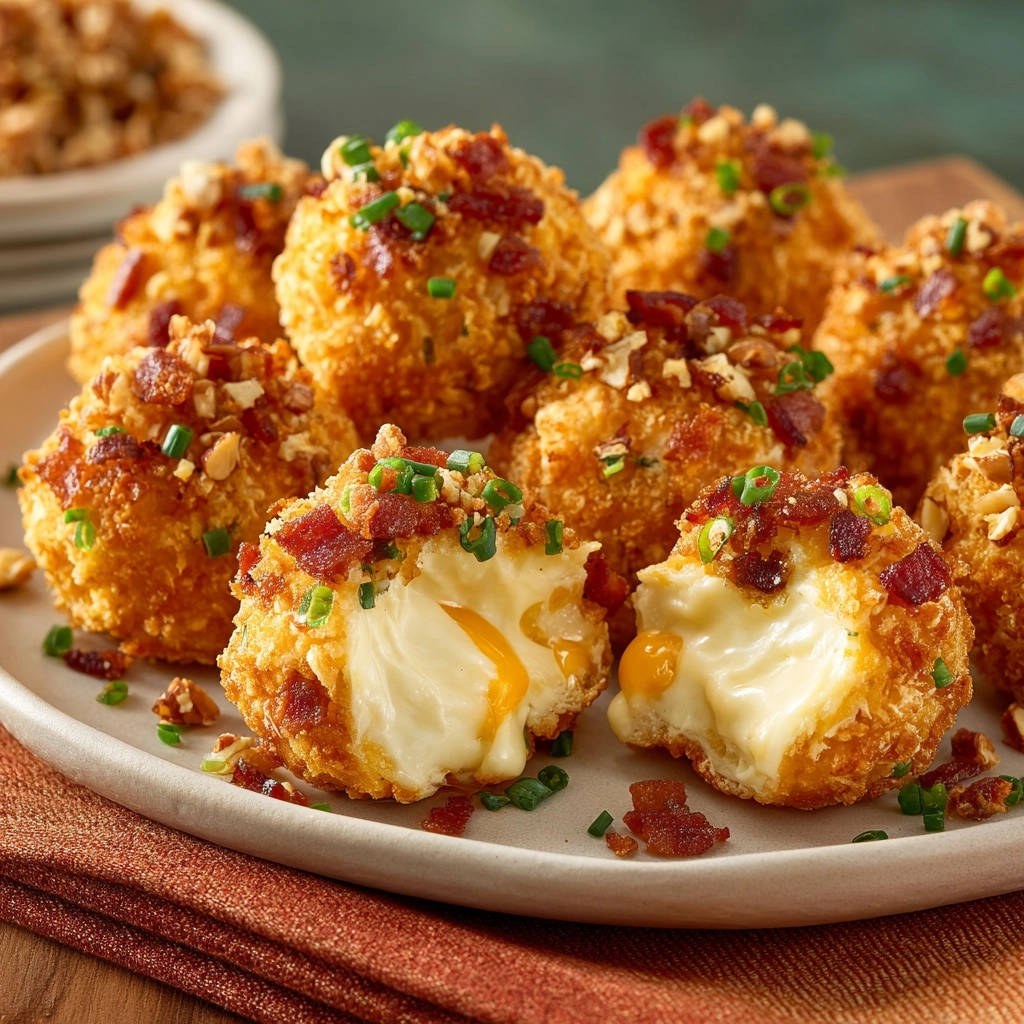
There’s nothing quite like the anticipation of biting into a perfectly golden, crunchy exterior, only to discover a warm, molten cheesy center. For years, I struggled with my homemade Crispy Cheesy Bites, battling leaky cheese or a lack of crispness, until I unlocked the simple secret to foolproof gooey perfection.
This recipe isn’t just about frying cheese; it’s about a guaranteed experience of irresistible, non-leaking cheesy goodness that will make you the star of any gathering. Prepare to savor the ultimate, satisfyingly gooey appetizer every single time.
Why Our Crispy Cheesy Bites Guarantee a Gooey Center
Many recipes for deep-fried cheese bites fall short, often resulting in messy, leaked cheese or a less-than-crispy coating. Our approach eliminates these common frustrations, focusing on precise techniques that deliver consistent, delicious results.
The core secret lies in one critical, yet often overlooked, step: thoroughly freezing the cheese before breading and frying. This simple preparation creates a protective barrier, ensuring the cheese stays perfectly contained until it’s beautifully gooey on the inside.
Coupled with our double-breading method and precise temperature control, this recipe stands out for its reliability and the superior texture it achieves. You’ll get that irresistible melt without any of the usual fuss.
Crafting Your Crispy Cheesy Bites: Essential Ingredients
Each ingredient plays a crucial role in building the perfect Crispy Cheesy Bites, from the melt-worthy core to the flavorful finishing touches.
The Cheese: Selecting Your Melt-Worthy Core
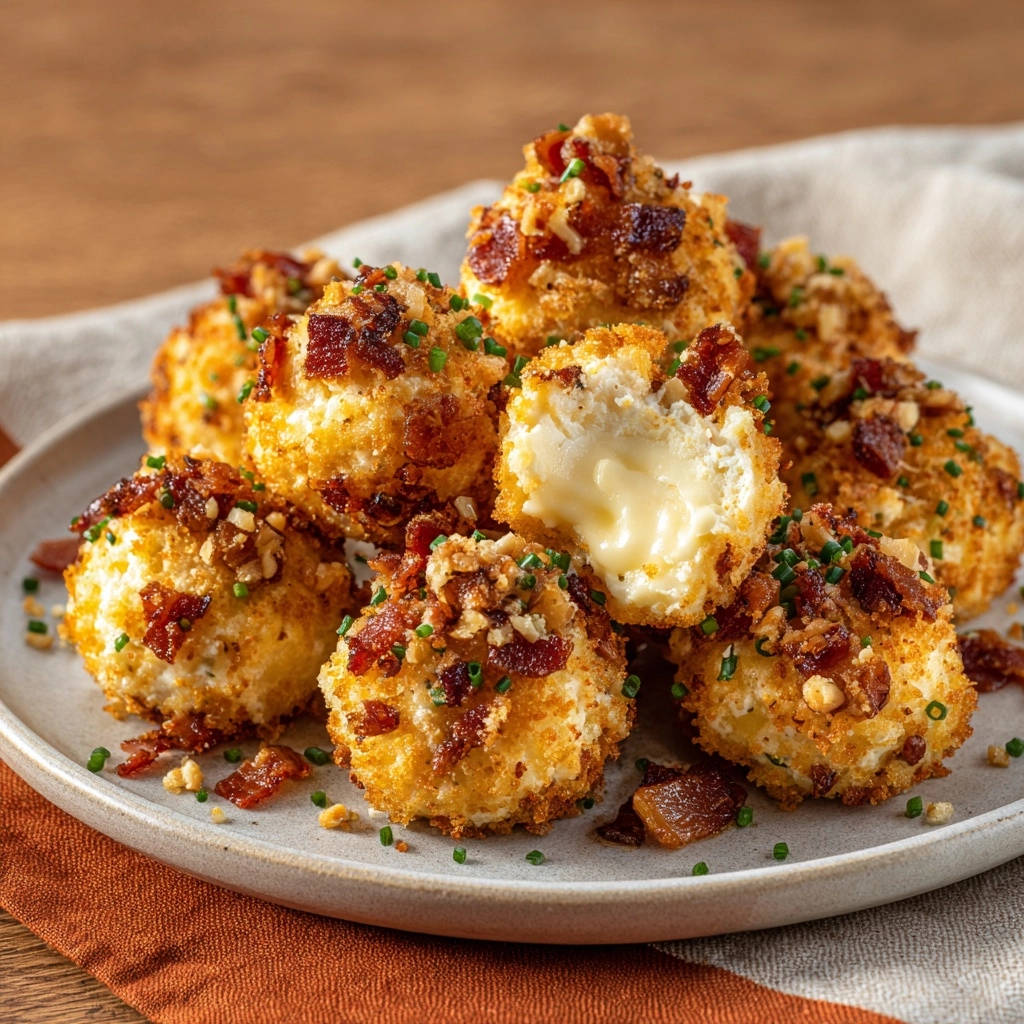
The foundation of these bites is a good quality melting cheese. A 1-pound block of white melting cheese, such as mozzarella or a mozzarella-cheddar blend, is ideal for its smooth melt and mild flavor.
Cutting the cheese into 1-inch cubes and then rolling them into smooth balls ensures even cooking and an optimal cheese-to-coating ratio for each bite.
The Perfect Coating: Flour, Egg, and Panko Power
This three-stage coating process is key to a truly crispy exterior. All-purpose flour provides the initial dry surface for the egg to adhere to.
Beaten eggs act as the binding agent, ensuring the breadcrumbs stick securely. Panko breadcrumbs are a game-changer here, offering a lighter, airier, and significantly crisper texture compared to standard breadcrumbs.
Flavor Boosters: Bacon, Nuts, and Fresh Chives
These additions elevate our Crispy Cheesy Bites beyond a simple fried cheese. Crumbled cooked bacon adds a savory, smoky dimension that is universally loved.
Chopped pecans or walnuts introduce a delightful crunch and nutty flavor, balancing the richness of the cheese. Fresh chives provide a bright, oniony freshness that cuts through the richness and adds a pop of color.
Feel free to experiment with other finely chopped herbs like parsley or a pinch of garlic powder mixed into the Panko for a customized twist.
Your Frying Oil: The Medium for Golden Perfection
Vegetable oil, with its high smoke point and neutral flavor, is perfect for deep frying these bites. It ensures a clean, crisp finish without imparting any unwanted tastes.
You’ll need approximately 4 cups of oil to achieve sufficient depth for proper frying in most heavy-bottomed pots or deep fryers.
Tools for Frying Success: Gear Up for Crispy Cheesy Bites
Having the right tools makes all the difference in achieving consistently perfect Crispy Cheesy Bites. Precision and safety are paramount.
Deep Fryer or Heavy-Bottomed Pot?
Both a deep fryer and a heavy-bottomed pot (like a Dutch oven) can deliver excellent results. A deep fryer offers consistent temperature control and a built-in basket, making it convenient.
However, a sturdy, heavy-bottomed pot with high sides works equally well, provided you have a reliable thermometer and exercise caution with hot oil.
The Indispensable Kitchen Thermometer
This is arguably the most critical tool for frying. An accurate kitchen thermometer (digital instant-read or candy thermometer) allows you to monitor and maintain the precise oil temperature of 350°F (175°C).
Correct temperature control prevents your Crispy Cheesy Bites from becoming either greasy and soggy (oil too cool) or burnt on the outside with an unmelted interior (oil too hot).
Breading Station Essentials
To streamline the breading process, you’ll need three shallow dishes or bowls. These should be wide enough to easily dredge and roll the cheese balls.
Parchment paper is essential for lining plates to prevent the cheese balls from sticking during freezing and while they await frying. A slotted spoon is crucial for safely removing the hot, crispy bites from the oil.
Your Step-by-Step Guide to Irresistible Crispy Cheesy Bites
Prepping the Star: Freezing the Cheese
Begin by cutting your block of white melting cheese into roughly 1-inch cubes. Then, gently roll each cube between your palms to form a smooth, uniform ball.
Place these cheese balls on a plate lined with parchment paper and freeze them for at least 1 hour, or until they are completely solid. This freezing step is absolutely CRITICAL, as it prevents the cheese from leaking out during frying and guarantees a perfectly gooey center.
Mastering the Breading Station: Double-Coating for Crispy Perfection
Set up your breading station with three shallow dishes. Fill the first with all-purpose flour, the second with beaten eggs, and the third with Panko breadcrumbs.
Working with one frozen cheese ball at a time, first dredge it thoroughly in the flour, shaking off any excess. Next, dip it completely into the beaten egg, ensuring it’s fully coated.
Finally, roll it generously in the Panko breadcrumbs, pressing gently to ensure a thick, even layer adheres. For an extra secure and truly crispy coating, repeat the egg dip and Panko roll one more time for each cheese ball. Place the double-breaded cheese balls back on the parchment-lined plate.
The Art of Frying: Temperature Control is Key
In a large, heavy-bottomed pot or deep fryer, heat 4 cups of vegetable oil over medium-high heat until it reaches 350°F (175°C). Use a kitchen thermometer to accurately monitor and maintain this temperature throughout the frying process.
Proper oil temperature is vital for achieving a golden, crispy exterior without burning. Do not overcrowd the pot; fry only a few Crispy Cheesy Bites at a time to keep the oil temperature stable.
Achieving Golden Perfection: Frying and Draining
Carefully add a few breaded cheese balls to the hot oil. Fry them for 2 to 3 minutes, turning occasionally with a slotted spoon, until they achieve a beautiful golden brown color and are wonderfully crispy.
Once golden, remove the Crispy Cheesy Bites from the oil using a slotted spoon. Immediately transfer them to a plate lined with paper towels to drain any excess oil, ensuring they stay light and non-greasy.
Finishing Touches: Flavoring While Warm
While the fried cheese balls are still warm and fresh out of the oil, generously sprinkle them with your crumbled cooked bacon, chopped pecans or walnuts, and finely chopped fresh chives.
Adding the toppings while warm helps them adhere beautifully and infuses the Crispy Cheesy Bites with incredible flavor. Serve immediately to enjoy that perfectly molten, gooey center!
Chef’s Secrets: Elevating Your Crispy Cheesy Bites
Beyond the steps, these expert tips will ensure your Crispy Cheesy Bites are nothing short of spectacular.
The Non-Negotiable Freeze: Why It Matters
A fully frozen cheese core is the cornerstone of this recipe’s success. It provides the necessary time for the breading to cook, crisp, and solidify into a protective shell before the cheese inside begins to melt and become fluid.
This crucial delay prevents the cheese from bursting through the coating prematurely, ensuring a beautiful, contained, gooey center every single time.
Double Breading: The Golden Rule for Crunch
While a single coat can work, double-breading is highly recommended for a superior outcome. The extra layer of Panko breadcrumbs creates a thicker, more robust crust, enhancing both crispiness and protection.
This added security significantly reduces the risk of any cheese leakage during the high heat of frying, giving you a consistently perfect Crispy Cheesy Bite.
Temperature Precision: Avoid Soggy or Exploded Bites
Maintaining the oil at a steady 350°F (175°C) is paramount. If the oil is too cool, the coating will absorb excess oil, leading to greasy, soggy bites.
Conversely, if the oil is too hot, the exterior will brown too quickly, potentially burning, before the cheese inside has a chance to melt properly, or it could cause the cheese to explode out of its coating.
Don’t Overcrowd the Pot!
Resist the urge to fry too many Crispy Cheesy Bites at once. Overcrowding the pot instantly drops the oil temperature, leading to inconsistent cooking and greasy results.
Frying in small batches ensures the oil temperature remains stable, allowing each bite to cook evenly and achieve maximum crispiness.
Fresh Herbs & Savory Toppings: Go Beyond Basic
The specified bacon, nuts, and chives are fantastic, but don’t stop there. Freshly grated Parmesan cheese, a sprinkle of smoked paprika, or even a touch of finely minced garlic can add exciting new dimensions.
For a spicy kick, a light dusting of cayenne pepper or chili flakes immediately after frying can be transformative. Always add toppings while the bites are still warm for best adhesion.
Troubleshooting Your Crispy Cheesy Bites: Common Pitfalls & Solutions
Even with a foolproof recipe, questions can arise. Here are solutions to common challenges you might encounter.
Why Did My Cheese Leak Out?
The most common culprit is insufficient freezing. Ensure your cheese cubes are completely solid, frozen for at least one hour, before breading. Another factor could be oil temperature that’s too low, giving the cheese too much time to melt before the coating sets.
My Bites Aren’t Crispy Enough!
Check your oil temperature; it must be 350°F (175°C) for optimal crispiness. Also, confirm that you double-breaded each cheese ball and pressed the Panko firmly to create a robust, crunchy shell.
Too Brown, Not Cooked Inside? (or cheese didn’t melt)
If the exterior is browning too rapidly, your oil is likely too hot. Reduce the heat and use a thermometer to bring the temperature back down to 350°F (175°C). The cheese needs those 2-3 minutes to melt slowly while the outside crisps.
The Coating Isn’t Sticking
Ensure the cheese cubes are dry before you begin the first flour dredge. A good, even coating of flour is crucial for the egg to adhere properly, and firm pressing of the Panko will make sure it sticks well.
Serving Suggestions, Storage, and Make-Ahead Magic
Maximize your enjoyment of these delicious Crispy Cheesy Bites with these practical tips.
Best Dips and Pairings for Your Crispy Cheesy Bites
While incredible on their own, Crispy Cheesy Bites truly shine with complementary dips. A classic warm marinara sauce is always a hit, or try a cool, creamy ranch or a zesty honey mustard.
If you love the contrast between crispy edges and gooey centers, try these loaded sheet pan fries for another satisfying crunch.
They are the ultimate party appetizer, perfect for game nights, holiday gatherings, or any occasion where you want to impress with minimal effort.
If you want that same crunchy coating with a spicy kick, try these Cheddar Jalapeño Poppers.
Can You Make These Ahead? Yes!
Absolutely! This recipe is fantastic for make-ahead preparation. You can bread all the cheese balls and freeze them solid on a parchment-lined tray.
Once completely frozen, transfer them to an airtight freezer bag or container. They will keep well in the freezer for up to 2-3 weeks. When ready to serve, fry them directly from frozen, adding an extra minute or two to the cooking time.
Storing Leftover Crispy Cheesy Bites (If There Are Any!)
If you happen to have any leftovers, store them in an airtight container in the refrigerator. They will remain fresh and delicious for up to 2-3 days.
Reheating for Optimal Enjoyment
To recapture their best texture, reheat Crispy Cheesy Bites in an oven or air fryer. Set your appliance to 350°F (175°C) and reheat for 5-8 minutes, or until they are heated through and the exterior is crispy once more.
Microwaving is not recommended, as it tends to make the coating soggy and diminishes the overall experience.
Frequently Asked Questions About Crispy Cheesy Bites
What kind of cheese is best for these bites?
A good quality low-moisture melting cheese is best. Mozzarella, string cheese, or a pre-shredded mozzarella-cheddar blend are excellent choices because they melt smoothly without releasing excessive oil, which can make the bites greasy.
Can I bake these instead of frying?
While deep frying yields the ultimate crispy exterior, you can bake them for a slightly lighter version. Preheat your oven to 400°F (200°C), place the breaded cheese balls on a lightly oiled baking sheet, and bake for 10-15 minutes.
Remember to flip them halfway through baking until they are golden brown. They will be less crispy than fried but still wonderfully delicious with a gooey center.
Are there gluten-free options for the coating?
Yes, absolutely! To make these Crispy Cheesy Bites gluten-free, simply substitute the all-purpose flour with your favorite gluten-free all-purpose flour blend. Then, use gluten-free Panko breadcrumbs in place of regular Panko.
How long do I need to freeze the cheese?
For optimal results and to completely prevent any cheese leakage, freeze the cheese cubes for a minimum of 1 hour, or until they are completely solid to the touch. Freezing for a few hours longer is also perfectly fine and won’t harm the cheese.
Can I use different seasonings or herbs in the coating?
Yes, personalization is encouraged! Feel free to mix your favorite dried herbs, such as oregano, basil, or a pinch of garlic powder, directly into the Panko breadcrumbs before breading. This adds an extra layer of aromatic flavor to your Crispy Cheesy Bites.
Ready to Delight? Share Your Crispy Cheesy Bites Creation!
Now that you’re armed with all the expert tips and precise steps, you’re ready to create truly sensational Crispy Cheesy Bites right in your own kitchen. Say goodbye to the frustration of leaky cheese and hello to a guaranteed molten, gooey perfection!
What to Serve with Crispy Cheesy Bites
These golden, gooey bites pair well with something creamy or extra cheesy to round out the meal.
- A cool, tangy Loaded Creamy Potato Salad balances the heat and crunch of the bites with its smooth texture.
- For more cheese pull, try the Cheesy Hash Brown Casserole with its crispy edges and soft center.
We’re confident these Crispy Cheesy Bites will become a cherished recipe in your home. We’d love to see your culinary masterpieces; please share your creations in the comments below or tag us on social media. Happy frying!

Cheesy Bites
Course: AppetizerCuisine: AmericanDifficulty: medium25
bites1
hour15
minutes70
kcal75
minutesMaster the art of perfectly crispy, gooey cheesy bites with this foolproof recipe. The secret to a molten center without any leakage is revealed, promising irresistible results every time. Finished with bacon, nuts, and chives, these are truly savory delights.
Ingredients
1 pound block white melting cheese (like mozzarella or a mozzarella cheddar blend), cut into 1 inch cubes
1/2 cup all purpose flour
2 large eggs, beaten
2 cups Panko breadcrumbs
4 cups vegetable oil, for frying
1/2 cup cooked bacon, crumbled
1/4 cup chopped pecans or walnuts
2 tablespoons fresh chives, finely chopped
Directions
- Cut the block of cheese into roughly 1 inch cubes. Roll each cube between your palms to form a smooth ball. Place the cheese balls on a plate lined with parchment paper and freeze for at least 1 hour, or until solid. This is the key step to prevent leakage and guarantee a gooey center!
- Set up your breading station. Place flour in a shallow dish, beaten eggs in a second shallow dish, and Panko breadcrumbs in a third shallow dish.
- Working with one frozen cheese ball at a time, first dredge it in the flour, shaking off any excess. Then dip it into the beaten egg, ensuring it’s fully coated. Finally, roll it generously in the Panko breadcrumbs, pressing gently to make sure the crumbs adhere well. For an extra secure and crispy coating, repeat the egg dip and Panko roll one more time for each cheese ball. Place the double breaded cheese balls back on the parchment lined plate.
- In a large, heavy-bottomed pot or deep fryer, heat the vegetable oil over medium high heat to 350°F (175°C). Use a kitchen thermometer to ensure the correct temperature.
- Carefully add a few cheese balls to the hot oil, making sure not to overcrowd the pot. Fry for 2 to 3 minutes, turning occasionally, until they are golden brown and crispy.
- Using a slotted spoon, remove the crispy cheese balls from the oil and place them on a plate lined with paper towels to drain any excess oil.
- While still warm, sprinkle the fried cheese balls with crumbled bacon, chopped nuts, and fresh chives. Serve immediately and enjoy that perfectly gooey center!
Notes
- Freezing the cheese balls solid before breading is crucial for preventing leakage and achieving a perfectly gooey center.