Perfect Peach Cobbler: Your Guide to a Never-Soggy Crust
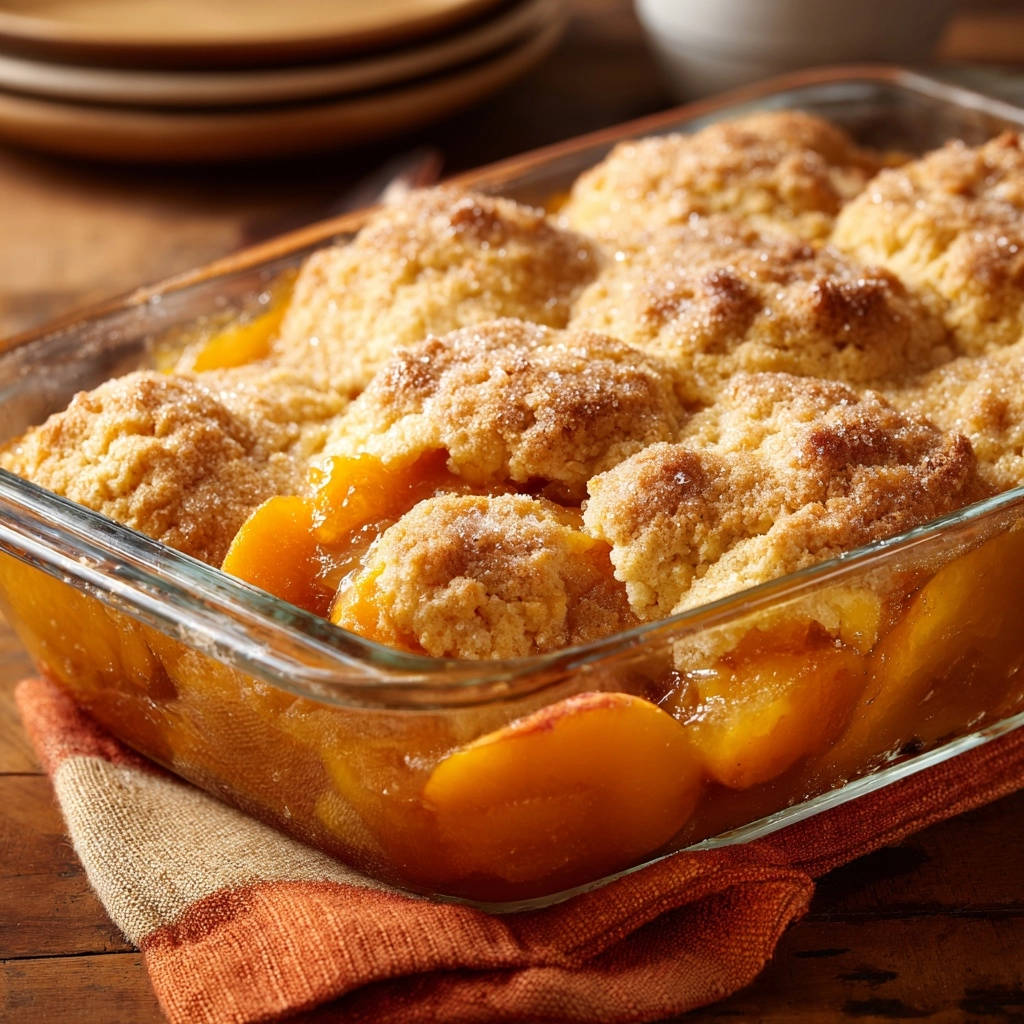
There’s nothing quite like a warm peach cobbler, but cutting into one only to find a sad, soggy biscuit topping used to be my biggest baking frustration. After countless attempts, I finally cracked the code to making the most incredible, never-soggy Perfect Peach Cobbler every single time.
This recipe ensures a perfectly golden, tender biscuit crust that holds its shape beautifully while soaking up just the right amount of that luscious peach juice. You’ll be amazed at how simple it is to achieve such a truly delightful dessert.
Why This Perfect Peach Cobbler Recipe Wins Every Time
This isn’t just another cobbler recipe; it’s designed to deliver perfection consistently. Here’s why this particular approach stands out:
If you’re eager to try this same approach with stone fruit, the same method works for this golden cherry cobbler.
Guaranteed Non-Soggy Crust: Say goodbye to disappointing, wet toppings. Our clever technique ensures the biscuit layer remains wonderfully tender yet firm, beautifully golden brown.
Perfectly Thickened Filling: The fruit filling bubbles with just the right consistency, never watery, thanks to a key ingredient that expertly manages the peach juices.
Effortlessly Tender Biscuits: The secret lies in a specific method for incorporating butter and mixing the dough, resulting in biscuits that are light, airy, and truly melt-in-your-mouth tender.
Rich, Balanced Flavor: We strike a harmonious balance between sweet peaches and aromatic spices, creating a comforting dessert that’s not overly saccharine.
Simple and Approachable: Despite its impressive results, this Perfect Peach Cobbler recipe is straightforward, making it accessible for bakers of all skill levels.
The Building Blocks of Bliss: Gathering Your Ingredients
Every exceptional dish begins with quality ingredients. For your Perfect Peach Cobbler, each component plays a vital role in achieving that sought-after flavor and texture.
For the Sweet, Juicy Peach Layer
The heart of your cobbler lies in the fruit filling.
Sliced Peaches: Six cups are ideal. Fresh, ripe peaches offer unparalleled flavor, but well-drained canned peaches are a fantastic year-round alternative. Ensure canned peaches are thoroughly drained to prevent excess moisture.
Granulated Sugar: Half a cup is a good starting point, but taste your peaches first. Adjust the amount based on their natural sweetness to achieve your preferred balance.
Cornstarch: This is your secret weapon against a soggy crust, and a true game-changer. A quarter cup of cornstarch is crucial for thickening the peach juices, transforming them into a luscious, syrupy consistency.
Vanilla Extract: One teaspoon of pure vanilla extract enhances the peaches’ natural sweetness and adds a warm, inviting aroma to the filling.
Ground Cinnamon: A half teaspoon, while optional, beautifully complements the peaches. It adds a subtle warmth and depth of flavor that elevates the entire dish.
Crafting the Tender, Fluffy Biscuit Topping
The biscuit topping is what truly makes a cobbler unique.
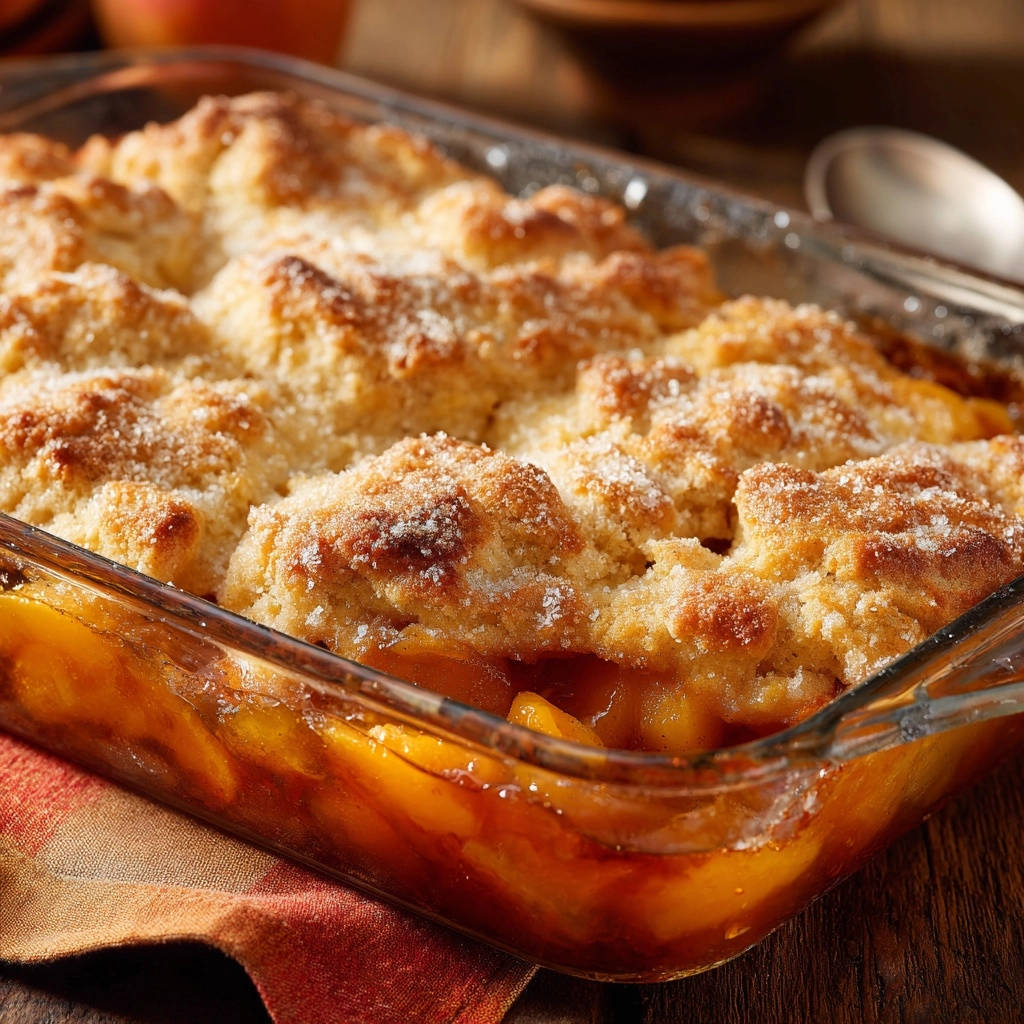
All-Purpose Flour: One cup forms the structural base of your tender biscuits. Measure it accurately by spooning it into your measuring cup and leveling it off.
Granulated Sugar: A quarter cup adds a touch of sweetness to the biscuit dough, perfectly complementing the fruit filling without overpowering it.
Baking Powder: One and a half teaspoons of baking powder are essential for lift, ensuring your biscuits are fluffy and light, not dense.
Salt: A quarter teaspoon of salt balances the sweetness and enhances all the flavors in the biscuit topping.
Unsalted Butter (Very Cold): A quarter cup, cut into small pieces, is paramount. Using very cold butter creates pockets of steam during baking, leading to an incredibly tender, flaky, and non-soggy biscuit texture.
Milk: Half a cup of milk brings the biscuit dough together. Use whole milk for the richest flavor and best texture.
Extra Granulated Sugar for Sprinkling: One tablespoon, optional, gives the biscuit tops a beautiful golden sheen and a delightful hint of sparkle.
Your Essential Kitchen Arsenal for Perfect Peach Cobbler
While this Perfect Peach Cobbler is simple to make, having the right tools on hand will make the process even smoother and more enjoyable.
9×13 Inch Baking Dish: This standard size is ideal for ensuring even baking and allowing for ample portions of cobbler.
Large Mixing Bowls (2): You’ll need one for the peach filling and another for the biscuit dough, keeping your prep organized.
Whisk: Essential for thoroughly combining your dry biscuit ingredients.
Pastry Blender or Your Fingertips: Crucial for cutting the cold butter into the flour mixture, which is key to a tender biscuit. If you don’t have a pastry blender, your fingertips work wonderfully!
Spatula or Wooden Spoon: For gently stirring the peach filling and carefully mixing the biscuit dough.
From Bowl to Bake: The Step-by-Step Perfect Peach Cobbler Journey
Making this Perfect Peach Cobbler is a delightful process. Follow these steps carefully to achieve that much-desired golden crust and bubbly, sweet filling.
Preparing the Luscious Peach Filling
The first step focuses on creating the delicious fruit base that will nestle under your tender biscuits.
- Preheat Oven:
Begin by preheating your oven to 375°F (190°C).
This ensures the oven is at the correct temperature when your cobbler goes in, helping the biscuits set quickly.
- Combine Peach Ingredients:
In a large mixing bowl, gently combine the 6 cups of sliced peaches with the 1/2 cup granulated sugar, 1/4 cup cornstarch, 1 teaspoon vanilla extract, and the optional 1/2 teaspoon ground cinnamon.
Stir everything until the peaches are evenly coated.
The cornstarch is incredibly important here; it will absorb excess moisture from the peaches as they bake, preventing the dreaded soggy biscuit topping.
- Pour into Baking Dish:
Carefully pour the coated peach mixture into your prepared 9×13 inch baking dish, spreading it evenly across the bottom.
The Secret to a Tender Biscuit Dough
Now for the star of the show: the biscuit topping. This technique is designed for ultimate tenderness and a non-soggy result.
- Whisk Dry Ingredients:
In a separate medium bowl, whisk together the 1 cup all-purpose flour, 1/4 cup granulated sugar, 1 1/2 teaspoons baking powder, and 1/4 teaspoon salt.
Whisking ensures these ingredients are thoroughly combined and evenly distributed.
- Cut in Cold Butter:
Add the very cold, small pieces of 1/4 cup unsalted butter to the dry mixture.
Using a pastry blender or your fingertips, work the butter into the flour until the mixture resembles coarse crumbs, with some pea-sized pieces of butter still visible.
This step is crucial: the cold butter creates steam pockets during baking, which results in a flaky, tender biscuit that resists sogginess.
- Add Milk Gradually:
Gradually pour in the 1/2 cup milk, stirring just until the dough comes together. Be careful not to overmix the dough.
Overmixing develops gluten, leading to a tough, dense biscuit that is more prone to absorbing moisture and becoming soggy. Mix just enough until no dry flour remains.
Assembling and Achieving Golden Perfection
The final steps bring everything together for a stunning finish.
- Drop Biscuit Dough:
Using a spoon or small cookie scoop, drop spoonfuls of the biscuit dough evenly over the peach mixture in the baking dish.
Don’t worry about perfect placement; the dough will spread slightly as it bakes.
If desired, sprinkle the tops of the biscuits with the extra tablespoon of granulated sugar for a beautiful golden crust and a hint of extra sweetness.
- Bake to Perfection:
Bake your cobbler for 35 to 45 minutes, or until the peach filling is visibly bubbly and thickened, and the biscuit topping is golden brown and cooked through.
The high initial oven temperature helps the biscuits set quickly, forming a protective barrier that prevents them from soaking up too much liquid from the fruit.
- Cool Before Serving:
Once baked, remove the cobbler from the oven and let it cool for at least 15-20 minutes before serving.
This vital cooling period allows the fruit filling to thicken further and the biscuits to fully set, ensuring perfect texture in every scoop.
Serve warm and enjoy your Perfect Peach Cobbler masterpiece!
Master Your Cobbler: Expert Tips for Flawless Results
Elevate your Perfect Peach Cobbler experience with these tried-and-true tips, ensuring consistently flawless results.
If you enjoy the warm fruit filling in this cobbler, you’ll love the tender crumb of this almond coffee cake for your next bake.
Choosing Your Peaches: Fresh, Frozen, or Canned?
The type of peaches you use can influence your cobbler’s final taste and texture.
Fresh Peaches: Offer the best flavor and texture, especially when in season. Choose ripe, slightly soft peaches. You may need to blanch and peel them for the best experience.
Frozen Peaches: A great off-season option. Thaw them completely and drain any excess liquid thoroughly before using to prevent a watery filling.
Canned Peaches: Convenient and available year-round. Always choose peaches packed in water or light syrup, and drain them exceptionally well. Rinse them if they are in heavy syrup.
The Art of the Golden, Non-Soggy Crust
Achieving that coveted crisp-tender topping is simpler than you think.
Keep Butter Cold: This cannot be stressed enough. Cold butter melts slower in the oven, creating steam that lifts the biscuit and contributes to flakiness, preventing it from collapsing into a soggy mess.
Don’t Overmix: Mix the biscuit dough just until combined. Overmixing develops gluten, which leads to tough biscuits that are more likely to absorb moisture and become soggy.
Hot Oven, Quick Set: Baking at 375°F (190°C) is key. The initial high heat helps the biscuit dough set quickly on the surface, forming a barrier against the fruit’s moisture before it can penetrate.
Cornstarch is Your Friend: The cornstarch in the peach filling is essential. It thickens the juices, preventing them from making direct contact with and saturating the biscuit dough from below.
Adjusting Sweetness and Spice
Tailor your Perfect Peach Cobbler to your palate.
Taste Your Peaches: Naturally sweet peaches will require less added sugar. If your peaches are tart, you might want to increase the sugar in the filling by a tablespoon or two.
Spice It Up (or Down): Cinnamon is classic, but a pinch of nutmeg or cardamom can add a unique twist. Feel free to adjust the amount of spice or omit it entirely based on your preference.
Troubleshooting Your Perfect Peach Cobbler: Common Fixes
Even expert bakers encounter challenges. Here are solutions to common cobbler dilemmas, ensuring your next attempt at Perfect Peach Cobbler is a success.
Help! My Topping is Soggy
This is the most common cobbler woe, but easily fixable.
Solution: Ensure your canned or frozen peaches are thoroughly drained. Double-check that you added the correct amount of cornstarch to the fruit filling; it’s vital for thickening the juices. Also, confirm your butter was very cold and you didn’t overmix the biscuit dough.
Finally, always allow the cobbler to cool for at least 15-20 minutes after baking. This crucial step allows residual heat to further thicken the filling and firm up the biscuits.
Peaches Not Thickening Enough?
If your peach filling is too runny, a few factors could be at play.
Solution: This usually means not enough cornstarch or that your peaches were exceptionally juicy (common with fresh, very ripe fruit). For next time, consider adding an extra tablespoon of cornstarch if your peaches are particularly watery.
Also, ensure the cobbler bakes until the filling is visibly bubbling throughout, not just around the edges, as this indicates the cornstarch has fully activated.
Tough Biscuit Topping Blues
A tough biscuit is often a result of too much handling.
Solution: The culprit is almost always overmixing the dough. Once the milk is added, stir only until the dry ingredients are just incorporated and no streaks of flour remain.
Another factor could be not using cold enough butter, which can lead to a less tender crumb. Always use butter straight from the fridge and work quickly when cutting it into the flour.
Your Perfect Peach Cobbler Questions Answered (FAQs)
Can I Prepare This Ahead of Time?
Yes, you can prep certain components! You can prepare the peach filling mixture up to a day in advance and store it covered in the refrigerator. The biscuit dough, however, is best made just before baking for optimal texture, as the cold butter is key.
Best Ways to Store Leftovers?
Store any leftover Perfect Peach Cobbler covered tightly with plastic wrap or in an airtight container in the refrigerator for up to 3-4 days. For reheating, a quick warm-up in the microwave or oven (350°F/175°C for 10-15 minutes) will bring it back to life.
Dietary Adaptations: Gluten-Free & Dairy-Free Options
Making this cobbler friendly for various diets is certainly possible!
Gluten-Free: You can substitute the all-purpose flour with a 1:1 gluten-free baking blend that contains xanthan gum. The texture might be slightly different but still delicious.
Dairy-Free: Use a plant-based milk (like almond or oat milk) and a high-quality dairy-free butter alternative in the biscuit topping. Ensure your butter substitute is very cold for best results.
What to Serve with Your Warm Cobbler
A warm slice of Perfect Peach Cobbler is heavenly on its own, but pairing it with a scoop of something cold takes it to the next level. Classic accompaniments include a generous scoop of vanilla bean ice cream or a dollop of freshly whipped cream.
What to Serve with Peach Cobbler
If you have extra peaches or just want another fruit-forward treat, these pancake recipes pair nicely with the cobbler for a brunch spread.
- Start the morning with Fluffy Blueberry Pancakes – the tart berries balance the sweet, jammy peach filling.
- For a heartier option that shares the same tender, fluffy texture, try Fluffy Oatmeal Pancakes with a drizzle of maple syrup.
For something a bit different, consider a drizzle of crème anglaise or even a side of homemade decadent pumpkin pie truffles for an autumnal dessert spread, or perhaps some perfect apple crumble bars if you’re exploring other fruity bakes.
Make-Ahead & Storage Tips for Your Perfect Peach Cobbler
To streamline your baking, you can slice the peaches and combine them with the sugar, cornstarch, vanilla, and cinnamon ahead of time. Store this mixture in an airtight container in the refrigerator for up to 24 hours.
The biscuit dough is best made right before assembly and baking. For cooked cobbler, cool it completely before covering tightly and refrigerating. It will keep well for 3-4 days.
You can also freeze baked cobbler. Wrap individual portions or the whole dish tightly in plastic wrap, then in foil. Freeze for up to 3 months. Thaw in the refrigerator overnight and reheat gently in the oven.
Ready to Enjoy? Share Your Perfect Peach Cobbler Masterpiece!
Now that you have all the secrets to a truly outstanding, never-soggy Perfect Peach Cobbler, it’s time to get baking! Experience the joy of a golden, tender biscuit crust perfectly complementing a warm, luscious peach filling.
This recipe isn’t just about dessert; it’s about creating cherished memories and delighting everyone at your table. Share your culinary success with us – we can’t wait to see your masterpiece!
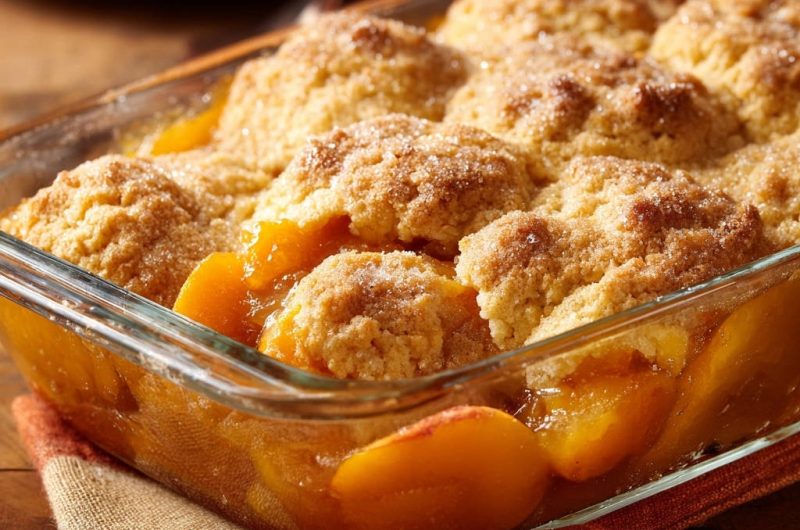
Peach Cobbler
Course: DessertCuisine: AmericanDifficulty: medium8
servings15
minutes35
minutes240
kcal60
minutesTired of soggy peach cobbler? This recipe reveals a simple trick for a perfectly golden, tender biscuit topping that never gets mushy, soaking up just the right amount of sweet peach juice. Enjoy a delightful, non-soggy peach cobbler every time!
Ingredients
6 cups sliced peaches (fresh or canned, drained)
1/2 cup granulated sugar (or more, to taste, depending on peach sweetness)
1/4 cup cornstarch
1 teaspoon vanilla extract
1/2 teaspoon ground cinnamon (optional)
1 cup all-purpose flour
1/4 cup granulated sugar
1 1/2 teaspoons baking powder
1/4 teaspoon salt
1/4 cup unsalted butter, very cold and cut into small pieces
1/2 cup milk
1 tablespoon granulated sugar for sprinkling (optional)
Directions
- Preheat your oven to 375°F.
- In a large bowl, combine the sliced peaches, 1/2 cup granulated sugar, cornstarch, vanilla extract, and cinnamon (if using). Stir gently until the peaches are evenly coated. The cornstarch is key here to ensure the peach juices thicken properly and don’t make your biscuit topping soggy. Pour the peach mixture into a 9×13 inch baking dish.
- In a separate medium bowl, whisk together the flour, 1/4 cup granulated sugar, baking powder, and salt.
- Add the very cold butter pieces to the flour mixture. Using a pastry blender or your fingertips, cut the butter into the flour until the mixture resembles coarse crumbs with some pea-sized pieces of butter remaining. This step is crucial for tender, non-soggy biscuits.
- Gradually add the milk to the flour mixture, stirring just until the dough comes together. Be careful not to overmix; overmixing develops gluten and can lead to tough, dense biscuits that are more prone to sogginess.
- Drop spoonfuls of the biscuit dough evenly over the peach mixture in the baking dish. If desired, sprinkle the tops of the biscuits with the extra tablespoon of granulated sugar for a beautiful golden crust.
- Bake for 35 to 45 minutes, or until the peach filling is bubbly and thickened, and the biscuit topping is golden brown and cooked through. The high initial heat helps the biscuits set quickly, preventing them from absorbing too much liquid and becoming soggy.
- Let the cobbler cool for at least 15-20 minutes before serving. This allows the fruit filling to thicken further and the biscuits to fully set. Enjoy!
Notes
- Let cool for at least 15-20 minutes before serving to allow fruit filling to thicken and biscuits to fully set.