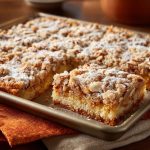
Mastering the Sheet Pan Almond Coffee Cake
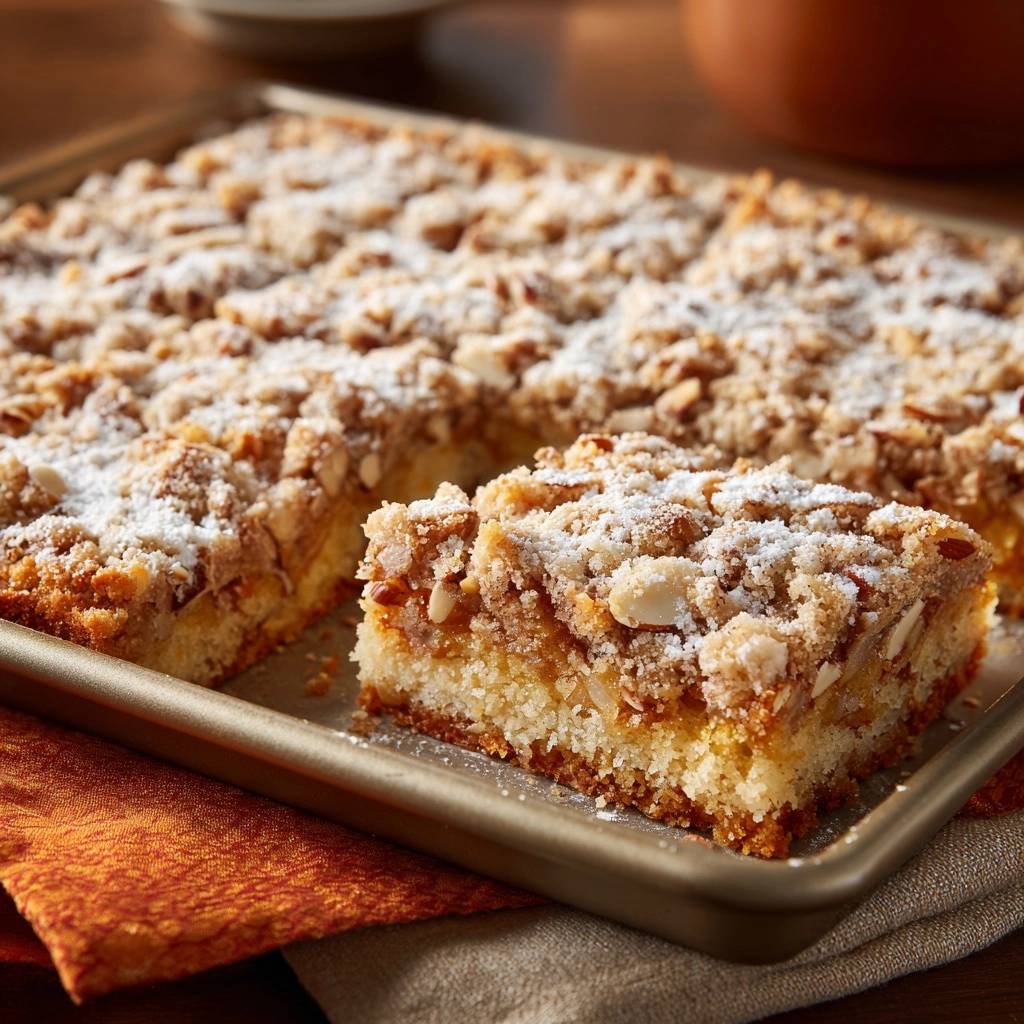
Imagine biting into a slice of coffee cake where the topping actually stays on top. You get that immediate, shattering crunch of toasted sliced almonds followed by a cloud-like crumb that isn’t weighed down by moisture. Most coffee cakes suffer from a dense, gummy layer where the sugar and butter have seeped into the batter, but this sheet pan version changes the game entirely.
The secret lies in the superior surface area of the sheet pan. By spreading the batter thin, you create a higher ratio of crispy topping to soft cake, ensuring every single bite has that coveted textural contrast. We’re moving away from the heavy, deep-dish bundt pans that often trap steam and lead to a “soggy bottom,” opting instead for a wide, shallow bake that stays light and airy.
I’ve found that the real trick to professional results is a quick par-bake of the base. This creates a structural “skin” on the batter that supports the heavy almond crumble. Without this step, the weight of the nuts and sugar drags the raw dough down, creating that dreaded wet middle. This method guarantees a clean, distinct line between the golden cake and the crunchy topping every time.
If the crunchy topping staying put appeals to you, the same attention to structure makes this glazed blueberry lemon bundt cake a reliable choice.
The Science of the Par-Bake Technique
Baking is essentially a race between structure and heat. When you pile a heavy, moisture-rich crumble onto raw batter, the sugar begins to melt before the cake proteins have a chance to set. This results in the topping sinking into the center, creating a dense, unbaked texture that no amount of extra oven time can fix.
By using a 7-minute “initial blast” at 375°F, you jumpstart the leavening process. The baking powder reacts quickly, and the eggs begin to coagulate, forming a firm membrane on the surface of the cake. This protein-set layer acts as a floor for your almond topping, preventing the brown sugar and butter from migrating into the delicate crumb during the final stage of baking.
Furthermore, this technique allows the bottom of the cake to begin crisping against the metal pan. Because the sheet pan is thin, heat transfers rapidly, ensuring the base is fully cooked and sturdy. You’ll notice the difference the moment you slice into it; the knife glides through a crisp top and a fluffy interior without any resistance from undercooked dough.
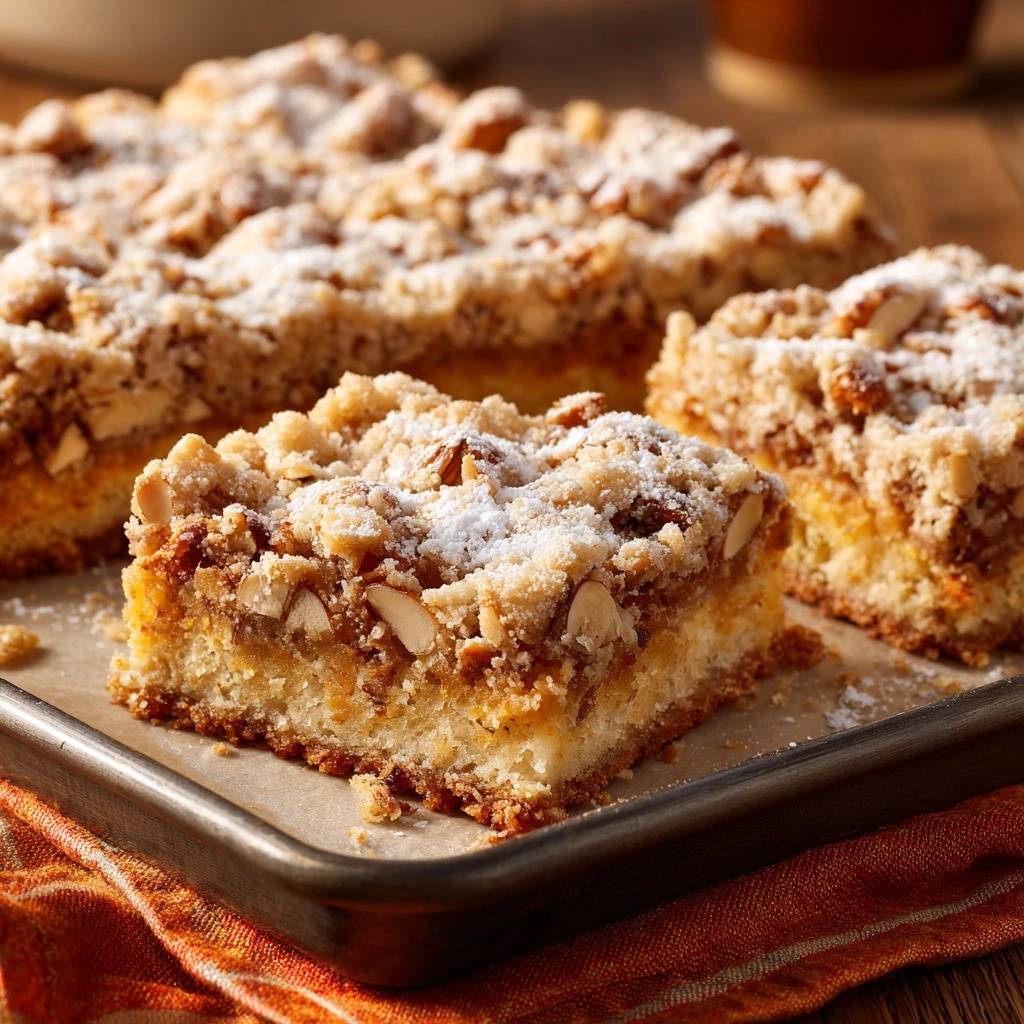
Essential Components for Almond Coffee Cake Success
Success starts with the right flour. While many bakers reach for cake flour for a tender bite, all-purpose flour is actually the hero here. It provides the necessary gluten structure to support the weight of a full cup of sliced almonds. Without that extra strength, the thin sheet cake would crumble and fall apart when you try to lift a square out of the pan.
The liquid choice is equally important. Whole milk is non-negotiable because the fat content contributes to a moist, tender crumb that lasts for days. If you use a lower-fat milk, the cake can lean toward being bread-like rather than cake-like. Additionally, the combination of vanilla and almond extracts is what creates that “bakery-style” aroma. The almond extract provides a high, sweet note that perfectly complements the toasted nuts on top.
Don’t skimp on the salt in the crumble. It might seem counterintuitive in a sweet breakfast cake, but salt cuts through the richness of the butter and the deep molasses notes of the brown sugar. It makes the almond flavor pop and prevents the topping from tasting one-dimensionally sweet.
Selecting the Right Sheet Pan
For this recipe, you need a 10×15 inch jelly roll pan with a rim. If you try to squeeze this batter into a standard 9×13 baking dish, the cake will be too thick, and the par-baking times will be completely off. A 9×13 pan would likely result in that soggy center we are trying to avoid because the heat can’t penetrate the middle fast enough.
The material of your pan also plays a role. Light-colored aluminum pans are ideal because they distribute heat evenly. Dark-colored pans absorb more heat and can cause the bottom of your cake to brown too quickly or even burn before the center is set. If you only have a dark pan, consider lowering the oven temperature by 25 degrees.
Temperature Matters: Softened vs. Cold Butter
You’ll notice this recipe calls for butter in two different states. For the cake base, the butter must be softened to room temperature. This allows it to cream with the sugar, trapping tiny air bubbles that expand in the oven to create a light, aerated texture. If the butter is too cold, it won’t emulsify with the eggs, and your cake will be heavy.
Conversely, the crumble topping requires cold, cubed butter. You want those solid bits of fat to remain intact as you mix them with the flour and sugar. In the oven, these cold pockets of butter melt and create steam, which results in a flaky, crisp topping rather than a greasy, melted mess. Keep the butter in the fridge until the very second you are ready to make the crumble.
Step-by-Step: Preparing the Aerated Cake Base
Start by creaming your softened butter and granulated sugar. You aren’t just mixing them; you are looking for a physical transformation. After about three minutes of beating, the mixture should look pale, almost white, and noticeably fluffy. This is the foundation of your cake’s lift, so don’t rush this part.
When you add the eggs, do it one at a time. This ensures the fat and water-based ingredients bond correctly. If the batter looks like it’s curdling, don’t panic; it will smooth out once you add the dry ingredients. Stir in your extracts at this stage so the flavor is evenly distributed throughout the fat in the batter.
Once you begin adding the flour and milk, switch to a low speed or a hand spatula. Overmixing at this stage is the most common mistake in cake baking. As soon as the flour hits the wet ingredients, gluten begins to form. If you overwork it, the cake will become tough and rubbery. Stop mixing the moment you see no more streaks of dry flour.
Use an offset spatula to spread the batter into the corners of your greased pan. The batter will be thick, so take your time to get it as level as possible. An even surface ensures that every part of the cake bakes at the same rate during that crucial 7-minute par-bake.
Executing the Perfect Almond Crumble Topping
While the cake base is in the oven for its initial set, move quickly on the topping. Combine your flour, brown sugar, cinnamon, and salt in a bowl. Use a pastry cutter or even two forks to work the cold butter into the dry mix. You are looking for “coarse crumbs”—some bits should be the size of peas, while others are smaller like sand.
The final step for the topping is adding the sliced almonds. Always stir these in by hand at the very end. If you use a food processor or over-mix with a pastry cutter, you’ll break the delicate almond slices into dust. You want those large, beautiful flakes to sit on top of the cake for maximum visual appeal and a distinct nutty crunch.
The cinnamon provides a warm background note, but the brown sugar is the real workhorse here. Because it contains molasses, it creates a chewy, caramelized texture that contrasts beautifully with the brittle almonds. This balance of textures is what makes a sheet pan coffee cake so addictive.
The Two-Stage Baking Process Explained
When the timer goes off after 7 minutes, pull the pan out of the oven. The batter should look slightly puffed and matte on top, but it shouldn’t have any color yet. It will still be wobbly in the center, which is perfectly fine. The goal is simply to create a surface firm enough to hold the topping.
Work quickly to sprinkle the almond crumble evenly over the surface. You want to minimize the time the oven door is open to keep the temperature steady. Once the topping is on, slide the pan back in for the final 18 to 22 minutes. Because the cake is thin, it can go from perfect to overbaked in a matter of sixty seconds.
To test for doneness, use a toothpick in the very center of the pan. It should come out clean or with just a few moist crumbs attached. If you see wet batter, give it another two minutes. The edges of the cake should be a deep golden brown and should just be starting to pull away from the sides of the pan.
Troubleshooting Common Sheet Pan Baking Issues
If your cake turns out dry, the most likely culprit is overbaking. Sheet cakes have a massive amount of surface area relative to their volume, which means they lose moisture much faster than a standard round cake. Start checking for doneness at the 18-minute mark of the second bake to be safe.
If you find that your almonds are browning too quickly before the cake is set, your oven rack might be too high. Move the rack to the center position for the next bake. You can also loosely tent the pan with foil for the last five minutes if the nuts look like they are reaching a dark mahogany color too soon.
Sometimes people complain that the topping falls off when they slice the cake. To prevent this, you can very gently press the crumble into the par-baked batter with the back of a spoon before the second bake. This “anchors” the topping into the semi-set dough without causing it to sink all the way to the bottom.
Flavor Variations and Ingredient Swaps
While almond is the star here, you can easily pivot the flavor profile. Try replacing the almond extract with fresh lemon zest in the batter for a bright, citrusy morning treat. You could also swap the cinnamon in the topping for ground cardamom, which pairs beautifully with the nuttiness of the almonds and adds a sophisticated, floral aroma.
If you enjoy swapping flavors here, try that same citrus twist with this glazed lemon blueberry loaf.
For those needing a gluten-free option, a high-quality 1-to-1 gluten-free flour blend works surprisingly well with this par-baking method. Since gluten-free batters often struggle with structure, the 7-minute initial bake is even more beneficial, as it helps the alternative flours set before they are burdened by the heavy topping.
If you want an even richer topping, you can replace half of the sliced almonds with chopped pecans or walnuts. However, keep in mind that almonds provide the most distinct “snap” when toasted. If you change the nuts, ensure they are raw and unsalted so you can control the final flavor and toast them perfectly in the oven.
Storage, Freezing, and Make-Ahead Strategies
To keep the almond topping as crisp as possible, store the cake at room temperature in a container that isn’t completely airtight for the first 24 hours. A tight seal can trap residual moisture, which softens the crumble. After the first day, move it to an airtight container to keep the cake base from drying out.
This cake freezes exceptionally well, making it a great make-ahead option for brunch. Slice the cooled cake into squares and wrap each one tightly in plastic wrap, then place them in a freezer bag. They will stay fresh for up to three months. When you’re ready for a treat, just let a square thaw on the counter for 30 minutes.
If you want to regain that “just-baked” crunch after storage, pop a slice into a toaster oven at 300°F for about five minutes. This recrisps the butter in the topping and warms the crumb without drying it out. Avoid the microwave if possible, as it will make the topping soft and chewy rather than crisp.
Expert Tips for a Professional Finish
The hardest part of this recipe is waiting. You must allow the cake to cool in the pan for at least 20 minutes before you even think about slicing it. This cooling period allows the crumb structure to stabilize. If you cut it while it’s piping hot, the steam will escape too quickly, and the cake will dry out instantly.
For that beautiful “snow-covered” look, use a fine-mesh sieve to dust the powdered sugar. Don’t just use a spoon, or you’ll end up with clumps. A light, even dusting highlights the texture of the toasted almonds and adds just the right amount of extra sweetness. I like to do this right before serving so the sugar doesn’t dissolve into the cake.
When it comes to slicing, use a sharp serrated knife. Use a gentle sawing motion to cut through the almond layer first, then press down through the soft cake. This prevents you from squashing the airy base as you navigate the crunchy topping, giving you those perfect, clean-edged squares you see in high-end bakeries.
Optimal Serving Temperatures
While many people love warm cake, this Sheet Pan Almond Coffee Cake is actually best at room temperature. As the cake cools, the fats in the butter and the oils from the almonds settle, which deepens the flavor. The almond extract becomes more pronounced, and the topping reaches its maximum level of crunch.
If you do prefer it warm, aim for “barely warm” rather than hot. This ensures the cake remains moist and the topping stays intact. Serving it too hot can make the delicate sheet cake feel a bit fragile, especially since it doesn’t have the thickness of a traditional loaf cake to hold it together.
Pairing Suggestions for Morning Service
Because this cake has a delicate almond profile, you want a beverage that won’t drown out the flavor. A light-roast coffee with citrusy or floral notes is a fantastic match. The acidity in the coffee cuts through the buttery richness of the crumble without overwhelming the nuttiness.
If you’re a tea drinker, try a hot cup of Earl Grey or a light herbal chamomile. The bergamot in the Earl Grey complements the almond extract beautifully. For a cold option, a simple glass of cold milk is a classic choice that lets the cinnamon and toasted almond flavors take center stage.
More Sweet Brunch Options
If you’re putting together a brunch spread around this almond coffee cake, these two baked treats fit right in with similar warm spice and fruit flavors.
- For a classic crumb-topped alternative, try Cinnamon Streusel Coffee Cake – the streusel topping echoes the nutty crunch of the almond version.
- Add a fruity contrast with
Get the full recipe in your inbox in seconds – perfect for shopping and cooking.
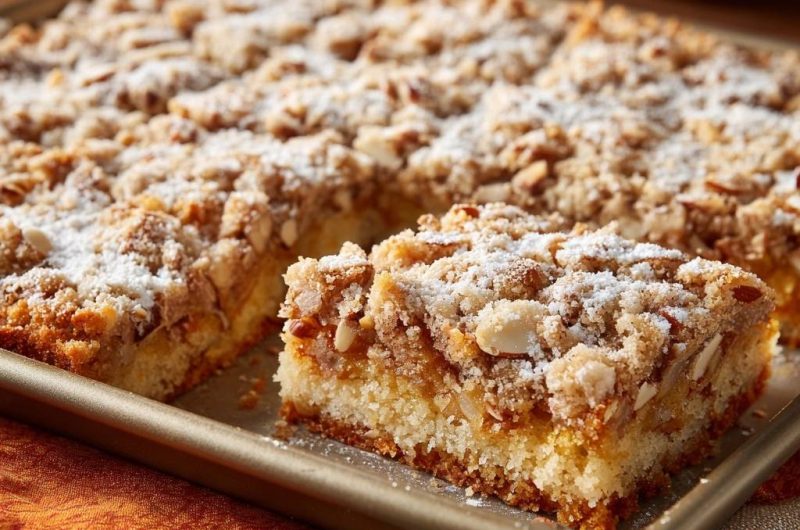
Almond Coffee Cake
Course: DessertCuisine: AmericanDifficulty: easy12
servings15
minutes30
minutes340
kcal45
MinutesThis almond coffee cake uses a specific high-heat par-baking method to ensure the base stays light while the heavy almond and cinnamon topping remains perfectly crisp. Ideal for feeding a crowd, this recipe eliminates the gummy layer often found in traditional coffee cakes.
Ingredients
Cake Base:
2 cups all-purpose flour
1 cup granulated sugar
1 tablespoon baking powder
1/2 teaspoon salt
1/2 cup unsalted butter, softened
2 large eggs
3/4 cup whole milk
1 teaspoon almond extract
1/2 teaspoon vanilla extract
Almond Crumble Topping:
1/2 cup all-purpose flour
1 cup light brown sugar, packed
1/2 cup cold unsalted butter, cubed
1 cup sliced almonds
1 teaspoon ground cinnamon
1/4 teaspoon salt
Finishing:
1/4 cup powdered sugar for dusting
Directions
- Preheat your oven to 375°F (190°C). Generously grease a 10×15 inch rimmed baking sheet (jelly roll pan) with butter or non-stick spray.
- In a large bowl, cream together the softened butter and granulated sugar until pale and fluffy (about 3 minutes). Beat in the eggs one at a time, then stir in the almond and vanilla extracts.
- In a separate bowl, whisk together the 2 cups of flour, baking powder, and salt.
- Gradually add the dry ingredients to the butter mixture, alternating with the milk, starting and ending with the flour. Mix until just combined; do not overmix.
- Spread the batter evenly into the prepared sheet pan using an offset spatula.
- To prevent a soggy bottom, place the plain batter in the oven and bake for exactly 7 minutes. This “sets” the top membrane of the cake so the heavy crumble won’t sink into the raw dough.
- While the base par-bakes, prepare the topping: In a medium bowl or food processor, combine the 1/2 cup flour, brown sugar, cinnamon, and salt. Cut in the cold cubed butter using a pastry cutter or pulse until the mixture resembles coarse crumbs. Stir in the sliced almonds by hand.
- Remove the pan from the oven. The batter should be slightly puffed but not browned. Quickly and evenly sprinkle the almond crumble over the semi-set surface.
- Return the pan to the oven and bake for another 18-22 minutes, or until the edges are golden brown and a toothpick inserted into the center comes out clean.
- Allow the cake to cool in the pan for at least 20 minutes. This allows the crumb structure to stabilize and ensures a clean cut. Dust generously with powdered sugar before slicing into squares.
Notes
- The 7-minute par-bake is essential to seal the surface of the cake and prevent the topping from sinking into the batter. Ensure the butter for the topping is cold to achieve the best crumble texture.