Pumpkin Hand Pies: Your Leak-Proof Guide to Golden Treats
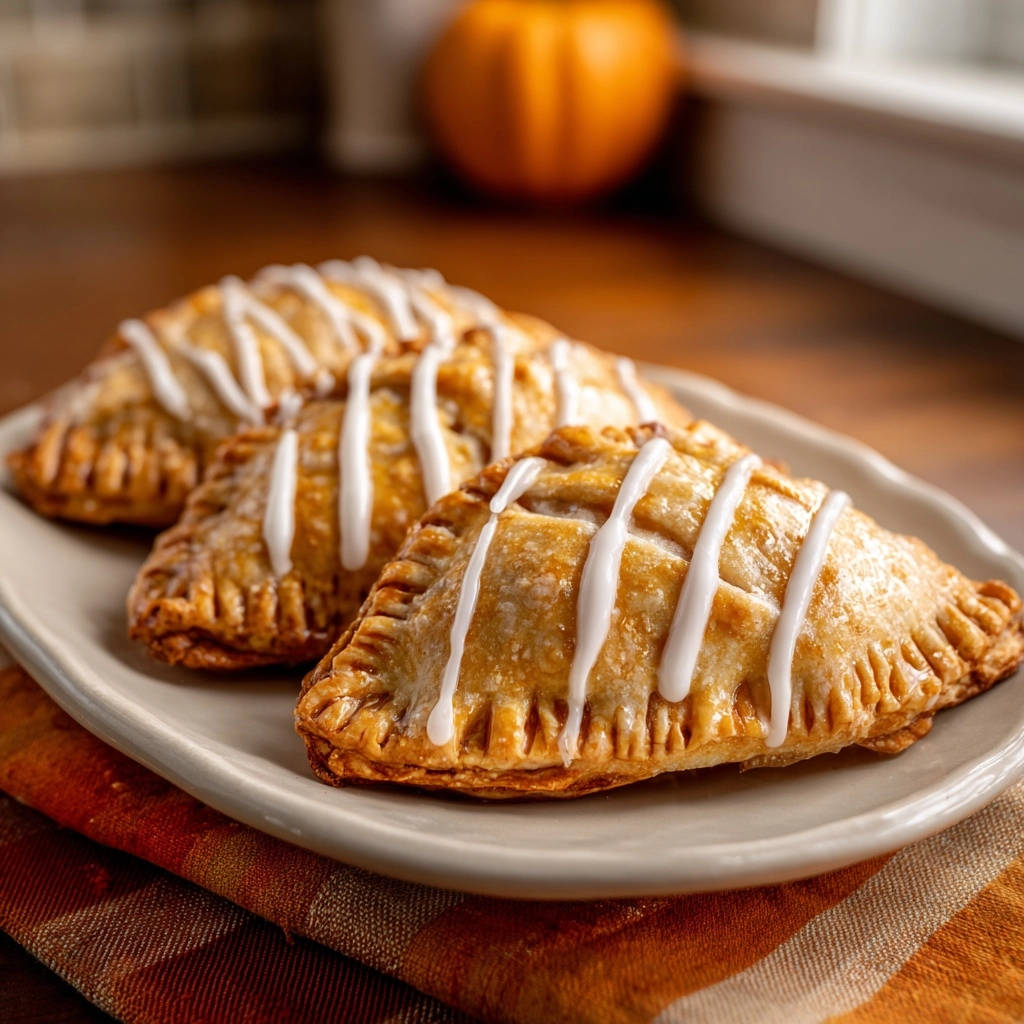
There’s nothing more frustrating than carefully crafting beautiful hand pies, only to watch their delicious filling ooze out during baking. I’ve faced that sticky disappointment countless times myself. But I’ve perfected a method for truly leak-proof Pumpkin Hand Pies that deliver golden, perfectly sealed treats every single time, ensuring your autumnal baking triumphs.
Why These Pumpkin Hand Pies Will Become Your Fall Favorite
The Secret to Perfectly Sealed, Mess-Free Pies
This recipe directly tackles the biggest hand pie challenge: leaking filling. We use specific techniques, like thoroughly thickening the pumpkin mixture, to ensure every pie emerges from the oven beautifully intact.
The meticulous sealing process, combined with an effective egg wash adhesive, creates a robust pastry pocket. You’ll enjoy a clean, delicious bite without any sticky surprises.
Quick & Easy Comfort, Without the Fuss
Utilizing pre-made pie crusts dramatically simplifies the process, making these Pumpkin Hand Pies accessible to bakers of all skill levels. This means less time fussing and more time enjoying.
The steps are straightforward and designed for efficiency, so you can whip up a batch of these comforting treats even on a busy weekday. It’s homemade goodness made easy.
A Burst of Autumnal Flavor in Every Bite
Each hand pie offers a concentrated taste of fall, with a perfectly spiced pumpkin filling nestled in a flaky, golden crust. The subtle sweetness of the glaze adds a delightful finishing touch.
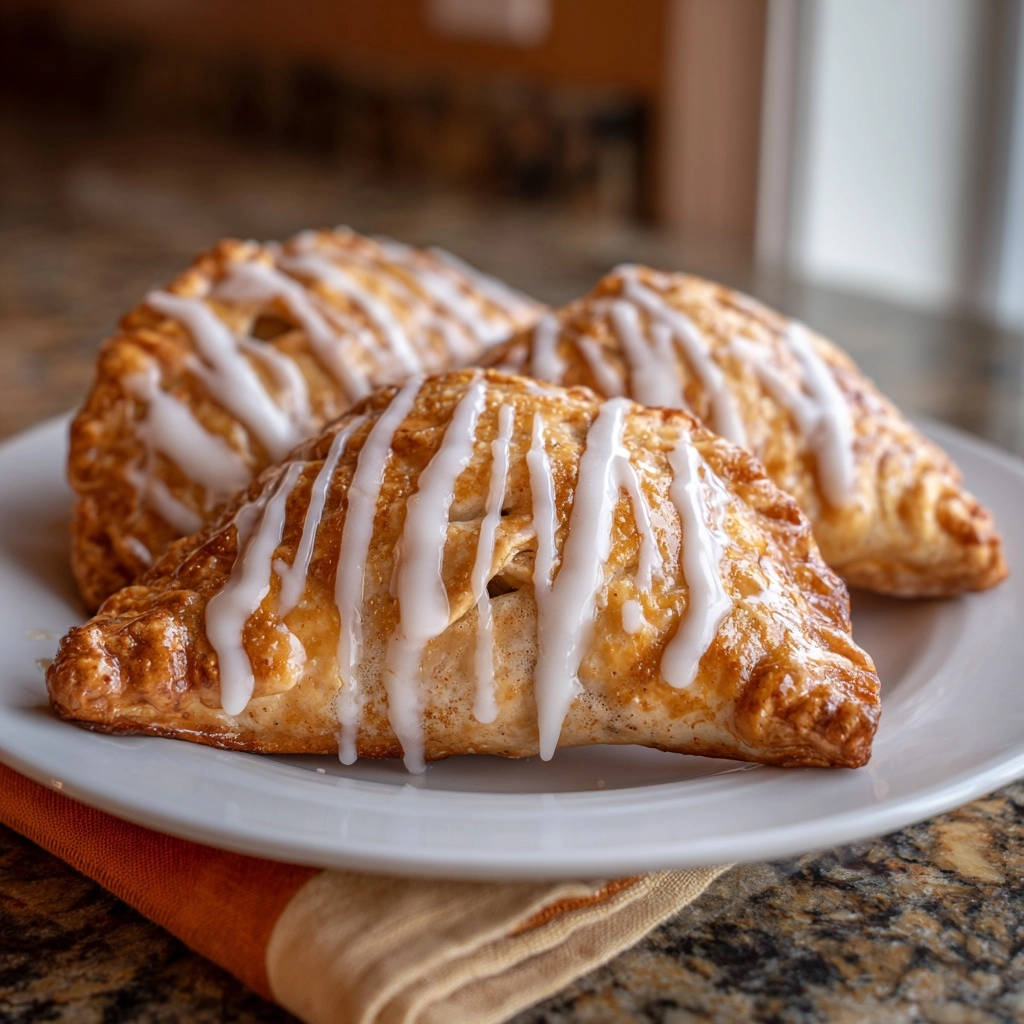
These individual pumpkin hand pies are ideal for gatherings, lunchboxes, or a cozy evening treat. They capture the essence of the season in a convenient, portable form.
If you enjoy working with pumpkin fillings, you’ll love the crisp crust of these creamy pumpkin pie bars.
Gather Your Ingredients: Crafting the Perfect Pumpkin Hand Pies
For the Irresistible Pumpkin Filling
Use 1 cup of pumpkin puree, ensuring it’s 100% pure pumpkin, not pre-spiced pie filling. Puree provides the blank canvas for our custom flavor and correct consistency.
A quarter cup of brown sugar adds a rich, molasses-like sweetness that complements the pumpkin beautifully. This also helps with the thickening process.
One teaspoon of pumpkin pie spice delivers that classic autumnal aroma and flavor. This blend typically includes cinnamon, nutmeg, ginger, and cloves, making the filling truly special.
The Flaky Crust Foundation
Two pre-made pie crusts are the backbone of these quick Pumpkin Hand Pies. Opt for a high-quality, all-butter variety if possible for the best flavor and flakiness.
While this recipe champions convenience, you can certainly use your favorite homemade pie crust recipe if you prefer. Just ensure it’s well-chilled and easy to work with.
Creating the Signature Glaze
One cup of powdered sugar forms the base of our simple, sweet glaze. Its fine texture ensures a smooth, lump-free drizzle.
Two tablespoons of milk (or water) are added to achieve the perfect pourable consistency. Start with less and add more if needed, aiming for a thick but flowing glaze.
Essential Pantry Staples: The Egg Wash
One beaten egg serves a dual purpose in this recipe. It acts as a powerful adhesive to seal the pie edges, preventing leaks.
Additionally, brushing the tops of the pies with egg wash creates that beautiful, glossy golden-brown finish we all desire. It’s the secret to professional-looking Pumpkin Hand Pies.
Essential Tools for Your Pumpkin Hand Pie Adventure
Kitchen Gadgets for Dough & Filling
A small saucepan is crucial for thickening the pumpkin filling to prevent leaks.
Mixing bowls of various sizes are needed for preparing the filling and the glaze.
A whisk ensures your glaze is perfectly smooth and lump-free.
Measuring cups and spoons guarantee accurate ingredient quantities for consistent results.
A 4-inch round or square cutter helps create uniform and professional-looking hand pies.
Baking Essentials for a Flawless Finish
A baking sheet provides the surface for baking your hand pies evenly.
Parchment paper prevents sticking and makes cleanup a breeze, ensuring your pies lift off easily.
A wire rack is essential for cooling the baked hand pies, allowing air circulation to prevent sogginess.
A pastry brush is perfect for applying the egg wash evenly, giving your pies a golden sheen.
A fork is used to securely crimp the edges, a vital step for preventing filling from escaping.
Step-by-Step Perfection: Baking Your Leak-Proof Pumpkin Hand Pies
Crafting the Heart of the Pie: Thickening Your Filling
In a small saucepan, combine your pumpkin puree, brown sugar, and pumpkin pie spice. Stir these ingredients until they are thoroughly mixed.
Cook this mixture over medium heat, stirring frequently, for approximately 5-7 minutes. This is a critical step where the mixture will thicken significantly as most of the moisture evaporates.
A well-thickened filling prevents a watery consistency that can lead to leaks and soggy crusts, ensuring our Pumpkin Hand Pies hold their delicious integrity. Let the filling cool completely before moving on; warm filling can make your pastry difficult to handle.
Prepping Your Workspace & Dough
Preheat your oven to 375 degrees F (190 degrees C). While it heats, line a baking sheet with parchment paper to prepare for baking.
Lightly flour a clean surface, then carefully roll out one of your pre-made pie crusts. Use a 4-inch round or square cutter to cut out as many shapes as possible.
Repeat this process with the second pie crust. You should aim for about 10-12 pastry shapes in total, ensuring you have enough for both the bottom and top of your hand pies.
Filling with Finesse: The “No-Overfill” Rule
Place a small spoonful, roughly 1.5 to 2 tablespoons, of the completely cooled pumpkin filling onto the center of half of your pastry shapes. Be sure to leave a generous half-inch border all around the edge.
Do not overfill! This is a common cause of leaks and compromised seals, as excess filling will push against the edges. Less is truly more here for perfect Pumpkin Hand Pies.
The Golden Seal: Egg Wash & Crimp Technique
Lightly brush the edges of each filled pastry shape with the beaten egg wash. This acts as a powerful edible glue, preparing the pastry for a secure seal.
Carefully top each filled pastry with an empty pastry shape. Gently press down around the edges, working from the center outwards, to remove any trapped air and bond the two layers.
Next, use a fork to firmly crimp all the way around the entire edge of each hand pie. Take your time here to ensure a tight, secure seal with absolutely no gaps, which is paramount for preventing any filling from escaping during baking.
Ready for the Oven: Vents & Golden Tops
Carefully transfer the sealed Pumpkin Hand Pies to your prepared baking sheet. Arrange them with a little space between each one for even baking.
Using a small knife, cut 2-3 small slits on the top of each hand pie. These vents are crucial; they allow steam to escape during baking, preventing the pies from bursting open.
Finally, brush the tops of all the hand pies with the remaining egg wash. This will give them a beautiful, appetizing golden-brown finish as they bake.
Baking to Golden Perfection
Bake your Pumpkin Hand Pies for 15-18 minutes, or until the crusts are visibly golden brown and appear flaky. Keep an eye on them towards the end of the baking time.
Once baked, carefully remove the hand pies from the oven and transfer them to a wire rack. Allow them to cool completely before glazing, as warm pies will melt the glaze.
The Sweet Drizzle: Whipping Up the Glaze
While the pies cool, prepare the glaze. In a small bowl, whisk together the powdered sugar and milk until the mixture is completely smooth and has a pourable consistency.
If the glaze is too thick, add a tiny bit more milk; if too thin, add a touch more powdered sugar. Drizzle this delightful glaze generously over the completely cooled Pumpkin Hand Pies just before serving.
Chef’s Secrets: Elevate Your Pumpkin Hand Pies Beyond Basic
Mastering the Filling Consistency
The key to leak-proof pies is a truly thick filling. After cooking, the pumpkin mixture should be almost paste-like, clinging to the spoon without running. If it’s still watery, cook it a few more minutes, stirring constantly.
A quick “spoon test” involves drawing a line through the filling on the back of your spoon; if it holds its shape and doesn’t run back together, you’re good to go.
Dough Handling & Temperature Tips
Always work with cold pie crusts; cold dough is less sticky and easier to handle, preventing tearing. If your kitchen is warm, chill your dough between steps.
Avoid overworking the dough when cutting and sealing, as this can develop the gluten too much, leading to a tough rather than flaky crust.
Achieving the Perfect Crimp (and Why it Matters)
Beyond the fork, consider a pastry wheel or decorative crimper for a more consistent and attractive edge. The goal is to create a strong, continuous seal.
A tight crimp is your primary defense against leaks, effectively welding the top and bottom crusts together. Spend extra time here for perfect results.
Customizing Your Hand Pies: Flavors & Shapes
Enhance the pumpkin filling with a pinch of ground ginger, nutmeg, or a tiny dash of black pepper for a more complex spice profile. You could also swirl in a spoonful of cream cheese for a richer flavor.
Experiment with different cookie cutter shapes like leaves, pumpkins, or even small squares for a unique presentation. Remember to adjust filling quantity for very small shapes.
Freezing for Future Feasts
For unbaked hand pies: Freeze them solid on a parchment-lined baking sheet, then transfer to an airtight freezer bag for up to 2 months. Bake from frozen, adding a few extra minutes to the baking time.
For baked hand pies: Allow them to cool completely, then freeze individually on a baking sheet before transferring to a freezer-safe container. Reheat in a warm oven until heated through.
Troubleshooting Your Hand Pies: Common Questions & Quick Fixes
Why Did My Filling Leak?
The most common culprits are an under-thickened filling, overfilling the pastry, or an insufficient seal around the edges. Ensure your filling is cooked until very thick, almost like jam.
Double-check that you’re leaving a generous border and not exceeding 2 tablespoons of filling per pie. Also, be meticulous with your egg wash and fork crimping to create a strong, uninterrupted seal.
My Crust Isn’t Golden Enough!
Ensure you apply an even layer of egg wash across the entire top surface of each hand pie before baking. This contributes significantly to that desirable golden color.
Your oven temperature might also be slightly off; verify it with an oven thermometer if you suspect it’s running cool. For a deeper golden hue, you can bake for an extra 1-2 minutes, watching carefully.
The Hand Pies Are Soggy
Sogginess often points to too much moisture. This could be from an under-thickened filling, overfilling, or steam not properly escaping during baking.
Make sure to cut those steam slits! They are vital for venting moisture. Also, allow the pies to cool on a wire rack for proper air circulation, which prevents condensation and maintains a crisp crust.
Enjoying Your Creation: Serving & Storage Suggestions
Best Ways to Serve Pumpkin Hand Pies
These Pumpkin Hand Pies are delightful served warm or at room temperature. The warmth allows the spices in the filling to truly shine.
For an extra treat, serve them with a dollop of fresh whipped cream, a scoop of vanilla bean ice cream, or a dusting of cinnamon sugar. They also pair wonderfully with a hot cup of coffee or cider.
Keeping Them Fresh: Storage Tips
Store baked Pumpkin Hand Pies at room temperature in an airtight container for up to 2-3 days. This helps maintain their fresh taste and flaky texture.
For longer storage, refrigerate them in an airtight container for up to 5 days. Reheat gently in the microwave or a warm oven for the best experience.
Can You Make Them Ahead?
Absolutely! The pumpkin filling can be made up to 2-3 days in advance and stored in the refrigerator. This saves significant time on baking day.
You can also assemble the Pumpkin Hand Pies completely, then freeze them unbaked as described in the “Freezing for Future Feasts” section. This makes for a convenient, ready-to-bake dessert any time.
Your Pumpkin Hand Pies Questions Answered
Can I Use Fresh Pumpkin?
Yes, you can certainly use homemade fresh pumpkin puree. However, ensure it is thoroughly cooked and then drained of any excess moisture to prevent a watery filling.
Pressing the puree through a fine-mesh sieve or blotting with paper towels helps achieve the ideal thick consistency required for these leak-proof pies.
What If I Don’t Have Pumpkin Pie Spice?
No problem! You can easily make your own blend. For 1 teaspoon of pumpkin pie spice, combine 1/2 teaspoon ground cinnamon, 1/4 teaspoon ground ginger, 1/8 teaspoon ground nutmeg, and a tiny pinch of ground cloves.
This homemade mix will deliver the authentic autumnal flavors needed for your delicious Pumpkin Hand Pies.
Are These Freezer-Friendly?
Yes, these Pumpkin Hand Pies are very freezer-friendly! You can freeze them either unbaked or baked, following the instructions provided in the “Freezing for Future Feasts” section above.
Freezing allows you to enjoy these comforting treats whenever a craving strikes, making them perfect for meal prep or unexpected guests. For another delightful pumpkin treat, consider making these decadent pumpkin pie truffles.
Can I Make These Gluten-Free?
Yes, you can! Simply use a high-quality gluten-free pre-made pie crust. Many brands offer excellent options that behave similarly to traditional crusts.
The filling itself is naturally gluten-free, so no adjustments are needed there. Just ensure all other ingredients are certified gluten-free if strict dietary needs apply.
Ready to Impress? Share Your Golden Pumpkin Hand Pie Masterpiece!
You now have all the tools and expertise to create truly spectacular, leak-proof Pumpkin Hand Pies that will impress everyone. Say goodbye to sticky messes and hello to perfectly golden, flavor-packed autumn treats.
Don’t wait another moment; gather your ingredients and get baking! I can’t wait to see your golden masterpieces, so be sure to share your creations and tag us. Happy baking, and enjoy every delightful bite of your hand pie success!
Pumpkin Hand Pies
Course: PastryCuisine: AmericanDifficulty: medium10
hand pies1
hour18
minutes140
kcal78
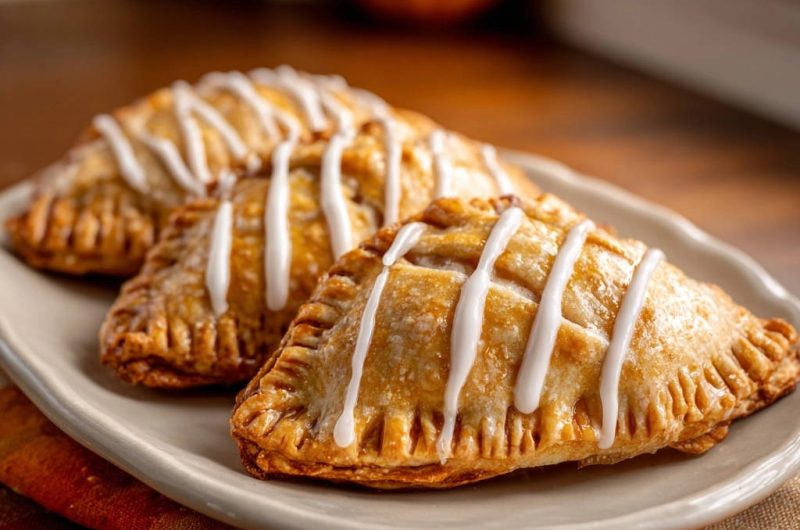
minutesSay goodbye to messy, spilled fillings! This recipe perfects the art of making Pumpkin Hand Pies, ensuring a tight seal and golden, flaky crusts every time. Follow the crucial steps to prevent leaks and enjoy delicious, perfectly baked hand pies.
Ingredients
2 pre-made pie crusts (or homemade)
1 cup pumpkin puree (not pie pie filling)
1/4 cup brown sugar
1 teaspoon pumpkin pie spice
1 egg, beaten (for egg wash)
1 cup powdered sugar
2 tablespoons milk (or water)
Directions
- Prepare the filling: In a small saucepan, combine pumpkin puree, brown sugar, and pumpkin pie spice. Cook over medium heat, stirring frequently, for 5-7 minutes until the mixture thickens significantly and most of the moisture has evaporated. This is a critical step to prevent a watery filling that leads to leaks! Let the filling cool completely.
- Preheat oven to 375 degrees F (190 degrees C). Line a baking sheet with parchment paper.
- Roll out one pie crust on a lightly floured surface. Use a 4-inch round or square cutter to cut out shapes. Repeat with the second crust. You should get about 10-12 pastry shapes total.
- Place a small spoonful (about 1.5 to 2 tablespoons) of the cooled pumpkin filling onto the center of half of your pastry shapes, leaving a generous half-inch border all around. Do not overfill! Overfilling is a common cause of leaks.
- Brush the edges of the filled pastry shapes with the beaten egg wash. This creates a strong adhesive for sealing.
- Top each filled pastry with an empty pastry shape. Press down firmly around the edges to remove any air, then use a fork to crimp all the way around, ensuring a tight, secure seal. Take your time here to make sure no gaps remain.
- Transfer the sealed hand pies to the prepared baking sheet. Cut 2-3 small slits on the top of each hand pie to allow steam to escape during baking. This prevents the pies from bursting. Brush the tops with the remaining egg wash for a beautiful golden finish.
- Bake for 15-18 minutes, or until the crust is golden brown and flaky. Let cool on a wire rack.
- While pies cool, make the glaze: In a small bowl, whisk together powdered sugar and milk until smooth and pourable. Drizzle over cooled hand pies.
Notes
- Cooking and completely cooling the pumpkin filling is crucial for preventing leaks.