Mastering Glazed Strawberry Sweet Rolls Without the Soggy Bottom
Imagine pulling a tray of warm rolls from the oven, the scent of caramelized sugar and sun-ripened berries filling your kitchen. You pull one apart, expecting a soft, pillowy crumb, but instead, you find a gummy, wet mess at the base where the fruit juices pooled. It’s the ultimate heartbreak for any home baker, but it doesn’t have to be your reality.
The secret to a perfect fruit-filled pastry lies in managing moisture before it ever hits the heat. These Glazed Strawberry Sweet Rolls utilize a specific layering technique designed to keep the dough light and airy while the strawberries transform into a thick, jammy filling. We’re moving beyond basic baking to master the art of the moisture barrier.
To ensure success, you must treat your fresh fruit with a bit of science. By coating your diced strawberries in a light dusting of cornstarch, you create a natural thickening agent that catches juices the moment they’re released. This simple step, combined with a protective fat barrier, ensures your rolls stay fluffy from the top swirl down to the very bottom.
The Science of Moisture Control in Fruit Pastries
When you bake with fresh strawberries, you’re essentially putting tiny water balloons into your oven. As the temperature rises, the heat breaks down the cell walls of the fruit, causing them to dump their internal moisture onto your raw dough. If that liquid isn’t managed, it soaks into the flour, preventing the gluten from setting and creating a “gum line” that tastes raw and heavy.
Therefore, we use a two-pronged defense strategy to keep the dough pristine. Firstly, we introduce a hydrophobic barrier using softened butter, which physically prevents liquid from entering the dough’s pores. Secondly, we use cornstarch to manage the viscosity of the fruit’s release. This ensures the final result is a cohesive pastry rather than a soggy bread pudding.
Why Cornstarch is Non-Negotiable for Fresh Berries
Cornstarch acts as a powerful stabilizer in this recipe because of a process called starch gelatinization. Once the strawberry juices reach approximately 144°F in the oven, the cornstarch molecules begin to swell and absorb the surrounding liquid. This transforms what would have been a watery runoff into a thick, glossy jam that clings to the dough layers.
Without this addition, the high water content of fresh berries would overwhelm the sugar and preserves. By tossing the berries in cornstarch first, you ensure that every bit of flavor is trapped within a thickened sauce. This results in a clean bite where the fruit stays put instead of sliding out of the roll.
The Fat Barrier: Using Butter as a Sealant
Think of the softened butter in this recipe as a raincoat for your dough. By spreading a thin, even layer of fat across the entire surface of the rectangle, you are sealing the “pores” of the enriched yeast dough. Because oil and water don’t mix, the moisture from the strawberries and preserves sits on top of the butter rather than soaking in.
In addition to protection, this butter layer adds incredible richness and helps the cinnamon-sugar mixture adhere. As the rolls bake, the butter melts into the dough from the inside out, creating that classic, melt-in-your-mouth texture. It is the most important step for maintaining structural integrity during the long bake time.
Essential Components for Glazed Strawberry Sweet Rolls
Quality ingredients are the foundation of any enriched dough, especially when you’re working with delicate fruit. You’ll want to use a brioche-style dough or a high-quality refrigerated sweet dough that has enough protein to support the weight of the filling. A dough with a higher fat content will stay tender longer, even after it cools.
For the glaze, heavy cream is significantly better than milk or water. The higher fat content in the cream creates a velvety, opaque finish that sits beautifully on top of the roll without disappearing into the crust. When paired with pure vanilla extract, it provides a floral sweetness that cuts through the tartness of the berries.
Selecting the Best Strawberries for Baking
While frozen berries are convenient, fresh strawberries are the gold standard for these rolls because they hold their shape better during the dicing process. Look for berries that are deep red all the way to the hull, as these have the highest sugar-to-acid ratio. If your berries are too tart, they can make the filling taste sharp rather than sweet.
Finely dicing the fruit is a specific requirement for structural integrity. Large chunks of fruit create “air pockets” in the roll, which can cause the pastry to collapse or unroll as it bakes. Small, uniform pieces ensure that every single bite has an even distribution of fruit and dough.
The Role of High-Quality Strawberry Preserves
Fresh strawberries provide texture and brightness, but preserves provide the concentrated “punch” of flavor. Preserves act as the glue that holds the fresh fruit in place while adding a deep, cooked-down sweetness that fresh berries can’t achieve in just 25 minutes of baking. It’s the secret to that professional, bakery-style finish.
When shopping, look for a jar where strawberries are listed as the first ingredient. Avoid brands that rely heavily on high fructose corn syrup, as these tend to be thinner and more prone to leaking. A thick, fruit-first preserve will stay exactly where you spread it, contributing to those beautiful, distinct swirls.
Step-by-Step: Preparing the Enriched Dough Base
Whether you’ve made your dough from scratch or are using a premium store-bought version, temperature is your best friend. If the dough is too warm, it will be sticky and difficult to roll; if it’s too cold, it will spring back and refuse to hold its shape. Aim for a cool room temperature that feels supple to the touch.
Roll the dough out into a 12×18 inch rectangle on a lightly floured surface. This “golden ratio” ensures you have enough length to get several tight rotations, which creates more layers for the filling to nestle into. Use a rolling pin to push from the center outward to maintain an even thickness across the entire sheet.
The Layering Technique for Maximum Flavor Retention
The assembly of these rolls is where the “Anti-Soggy Bottom” magic happens. You aren’t just throwing ingredients onto dough; you are building a fortified structure. Start by spreading your softened butter all the way to the edges, ensuring no spot of dough is left “unprotected” from the upcoming moisture.
Once the butter is down, you’ll create your secondary defense line. This involves layering your dry ingredients before your wet ones. This strategic order ensures that any juice that manages to bypass the cornstarch is immediately absorbed by the sugar and cinnamon before it can reach the dough itself.
Applying the Butter and Cinnamon-Sugar Shield
After the butter is spread, sprinkle your cinnamon-sugar mixture evenly over the top. This layer serves a dual purpose. Firstly, the sugar acts as a desiccant, drawing out just enough moisture to create a syrup. Secondly, as the rolls bake, this mixture caramelizes against the butter, creating a golden, flavorful crust on the interior of the swirls.
Make sure you leave a one-inch border at the top edge of the dough rectangle. This strip of “clean” dough will act as your seal when you finish rolling. If butter or sugar gets on this edge, the roll may unravel in the oven, causing the filling to leak out onto the bottom of the pan.
The “Toss and Scatter” Method for Fresh Fruit
Before adding the fresh fruit, toss your diced strawberries in the tablespoon of cornstarch until they look slightly dusty. This ensures the starch is in direct contact with the fruit’s surface. Spread your preserves thinly over the sugar layer first, then scatter the cornstarch-coated berries on top as the final addition.
By scattering the fresh fruit last, you ensure they are suspended within the preserves. This prevents the raw fruit from sitting directly on the dough for an extended period. It also makes the rolling process easier, as the preserves act as a “tack” to keep the diced berries from rolling away as you turn the dough.
For a perfect pairing, try our Strawberry Loaf Cake: No-Sink Berries, Perfect Every Slice.
Precision Cutting and the Proofing Phase
Rolling the dough tightly is essential for a professional look. Start from the long edge and use your fingers to tuck the dough over the filling, creating a snug cylinder. A tight roll prevents the centers from popping up during the bake, a common issue known as “coning.”
When it comes to cutting, put the chef’s knife away unless it is razor-sharp. A dull blade will compress the dough layers and squeeze the filling out the sides. Instead, use a piece of unflavored dental floss. Slide it under the log, cross it over the top, and pull quickly to “snip” through the dough without any downward pressure.
Achieving the Perfect Second Rise
Once the rolls are in the pan, they need a second rise to regain the air lost during rolling and cutting. Cover them with a clean kitchen towel and place them in a warm, draft-free spot. You are looking for them to “double in size,” which usually means the rolls should be touching each other and the sides of the pan.
Be careful not to over-proof. If the rolls rise too much, the gluten structure becomes weak and will collapse once the heat of the oven hits it. If you poke the dough gently with a finger and the indentation fills back in slowly, they are ready to bake. If it snaps back instantly, give them another ten minutes.
Baking to a Deep Golden Brown
Preheat your oven to 350°F, which is the sweet spot for enriched doughs. This temperature is high enough to activate the yeast for a final “oven spring” but low enough that the high sugar content in the filling won’t burn before the center of the roll is cooked through.
Bake for 22 to 25 minutes. You are looking for a deep, golden brown on the edges and a firm feel to the center swirls. If you have a probe thermometer, the internal temperature should read 190°F. If the tops are browning too quickly, you can loosely tent the pan with foil for the last five minutes of baking.
Crafting the Heavy Cream Vanilla Glaze
While the rolls bake, whisk together your powdered sugar, heavy cream, and vanilla. The goal is a “ribbon stage” consistency. When you lift the whisk, the glaze should fall in a thick, steady stream and hold its shape on the surface for a second before disappearing. If it’s too thin, add more sugar; if too thick, add a teaspoon of cream.
Adding the vanilla extract at the very end is a pro tip that preserves its delicate aromatics. Because vanilla is alcohol-based, its flavor can dissipate if it sits too long in an open bowl. Whisking it in just before glazing ensures that the scent hits your guests the moment you serve the rolls.
The 10-Minute Cooling Rule
Patience is the final ingredient in this recipe. If you pour the glaze over the rolls the second they come out of the oven, the heat will melt the sugar completely, and it will disappear into the bottom of the pan. This leads to a sticky mess rather than a beautiful, white-drizzled topping.
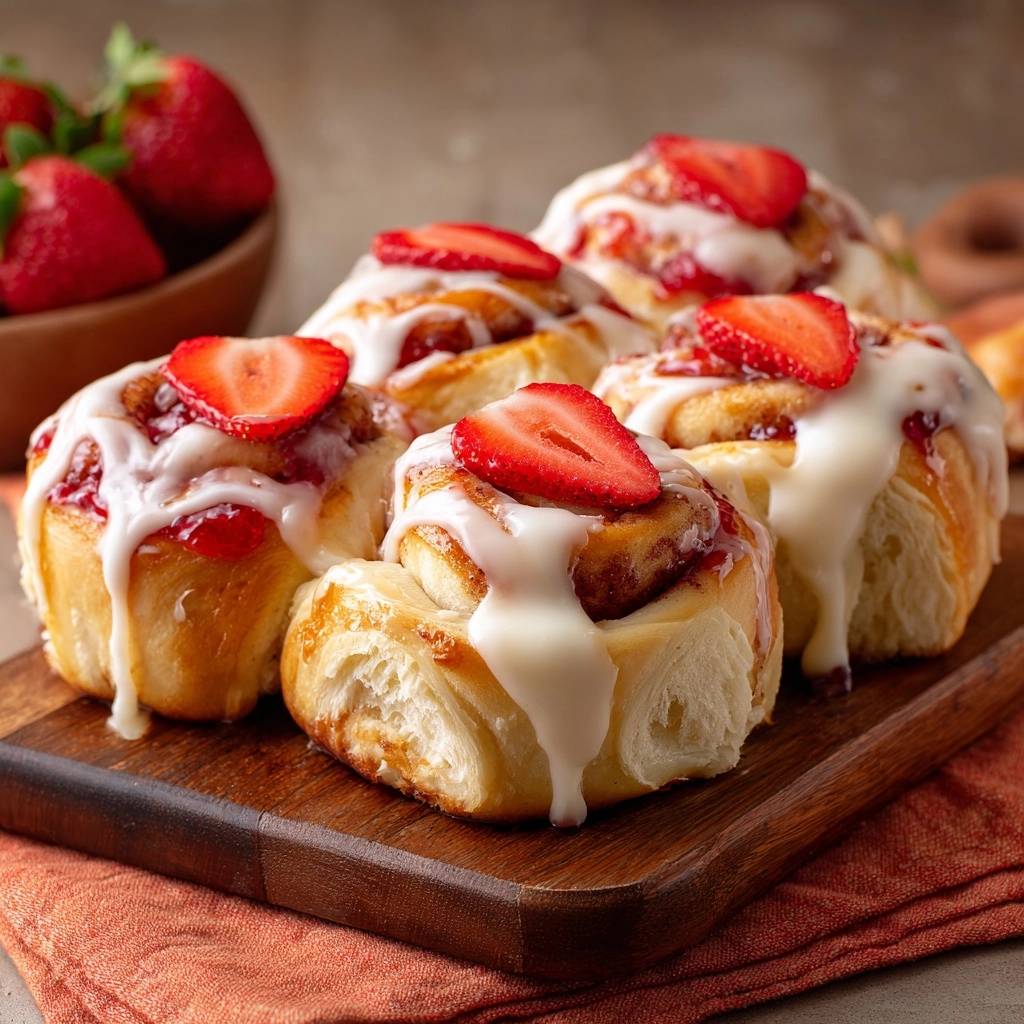
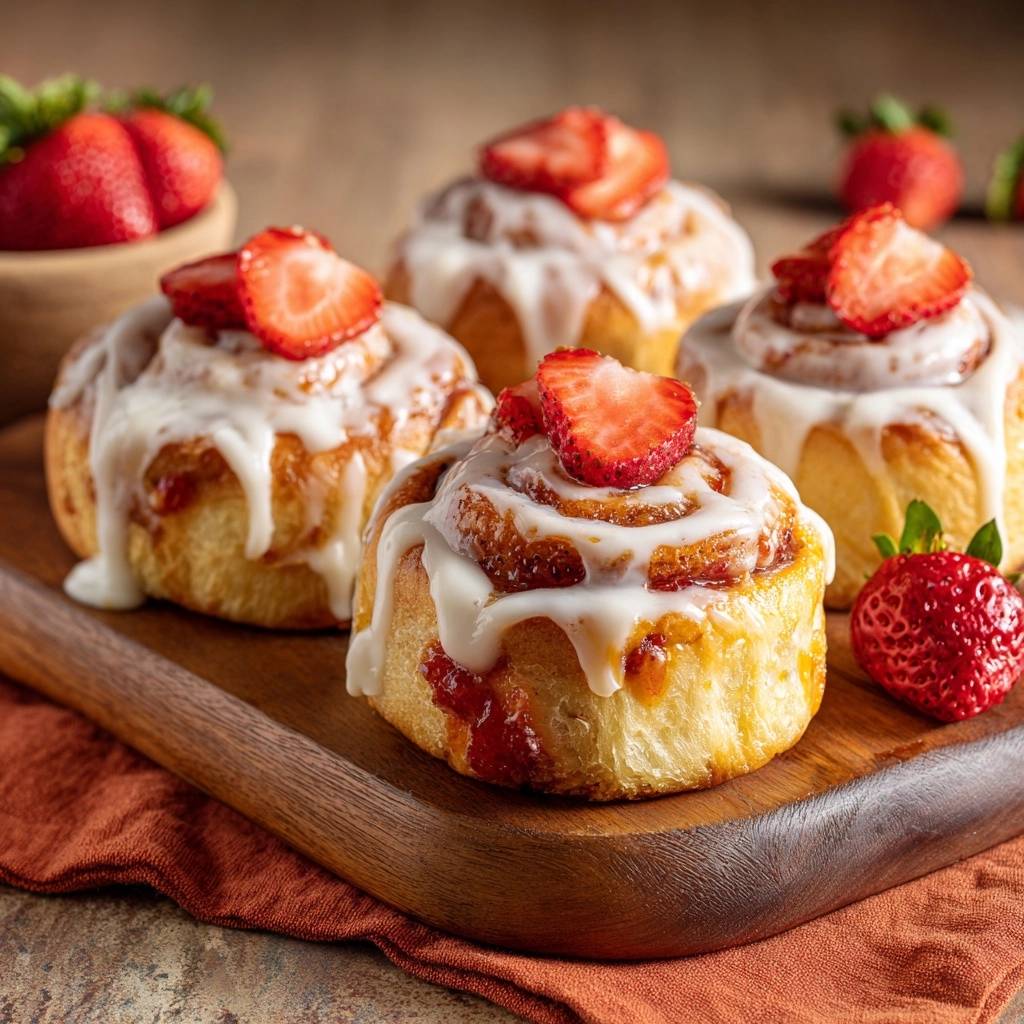
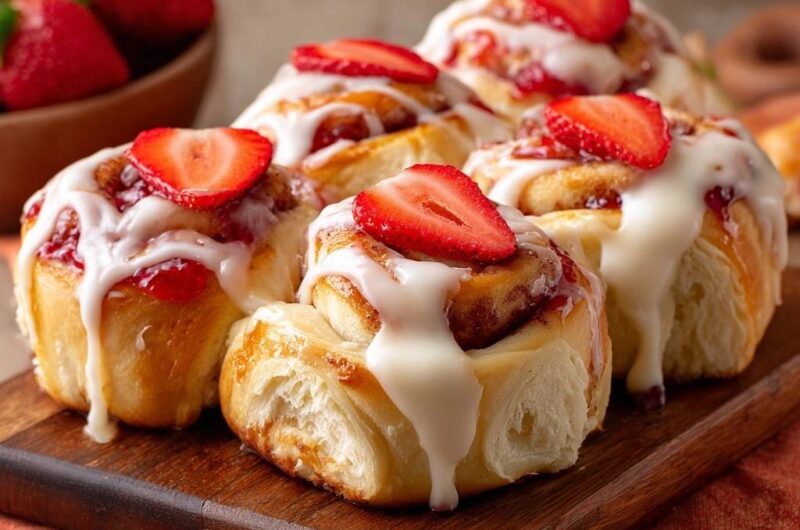
Wait exactly 10 minutes. This allows the internal steam to settle and the surface temperature to drop just enough. When you drizzle the glaze now, it will stay thick and opaque on top while slightly melting down the sides to create those iconic “cascades.” Top with fresh strawberry slices immediately so they stick to the setting glaze.
Troubleshooting Common Sweet Roll Failures
If your rolls are pulling apart or unraveling, it usually means the roll wasn’t tight enough or the dough was too heavily floured, preventing it from sticking to itself. Next time, use a pastry brush to remove excess flour before rolling. If the centers are raw but the tops are dark, your pan might be too crowded; ensure you are using a full 9×13 inch space.
Leaking filling is often caused by over-filling or not sealing the edge. Stick to the measurements provided, as tempting as it is to add extra berries. Finally, if your cinnamon tastes bitter, check the age of your spice. Cinnamon loses its sweet oils over time and can become astringent, so always use a fresh bottle for baking-heavy recipes.
Make-Ahead Strategies and Storage Solutions
You can easily prepare these the night before for a stress-free morning. After cutting the rolls and placing them in the pan, cover them tightly with plastic wrap and immediately put them in the refrigerator. The cold temperature slows the yeast down. In the morning, let them sit on the counter for 45 minutes to take the chill off before baking as directed.
For leftovers, store the rolls in an airtight container at room temperature for up to two days. To regain that “just-baked” fluffiness, microwave a single roll for 10 to 15 seconds. This softens the butter in the dough and thins the glaze just enough to make it gooey again. Avoid freezing these rolls if possible, as the fresh strawberries can become mushy upon thawing.
Pairing Suggestions for a Morning Spread
These rolls are undeniably sweet, so they pair best with items that offer a bit of contrast. A sharp, plain Greek yogurt or a side of soft-scrambled eggs provides a savory balance to the jammy filling. The acidity in the yogurt specifically helps cleanse the palate between bites of the rich, buttery pastry.
For beverages, a cold-brew coffee served black or a tart herbal hibiscus tea works beautifully. The deep, roasted notes of coffee complement the caramelized sugar, while the floral tartness of hibiscus echoes the natural acidity of the strawberries. These pairings turn a simple sweet roll into a complete, sophisticated breakfast experience.
How do I store leftover strawberry rolls?
Store your rolls in an airtight container at room temperature for up to 2 days. If you need to keep them longer, they will stay fresh in the refrigerator for up to 4 days, though the dough may firm up slightly. Always reheat them for a few seconds in the microwave to restore the soft texture. I do not recommend freezing these because the fresh strawberry pieces release too much moisture when thawing, which can make the rolls soggy.
Why did my strawberry filling leak out of the rolls?
Filling usually leaks for two reasons: the roll wasn’t tight enough or the end wasn’t sealed. When you roll the dough, make sure you are keeping it snug from the very first turn. Also, ensure you leave that one-inch border of plain dough at the top. If preserves or butter get on that edge, the dough won’t stick to itself, and the roll will expand and dump its filling during the bake.
Can I use frozen strawberries instead of fresh?
You can use frozen strawberries, but you must thaw and drain them thoroughly first. Frozen berries release significantly more liquid than fresh ones. After thawing, pat them dry with a paper towel and toss them in an extra half-tablespoon of cornstarch to account for the added moisture. Note that the texture will be softer and more jam-like than if you used fresh fruit.
What if I don’t have strawberry preserves?
If you are out of preserves, you can use raspberry or blackberry jam as a substitute. However, if you want to stick to strawberry flavor, you can macerate an extra half-cup of diced strawberries with a tablespoon of sugar and a teaspoon of lemon juice, then mash them slightly with a fork. This won’t be as thick as preserves, so you may need to add a pinch more cornstarch to the mix to prevent leaking.
Why are my rolls dry and tough?
Dry rolls are usually the result of adding too much flour during the rolling process or over-baking. Only use enough flour to keep the dough from sticking to the counter. Additionally, check your rolls at the 20-minute mark. Enriched doughs can go from perfect to overdone very quickly. As soon as the edges are golden and the center feels set to a light touch, take them out.
Strawberry Sweet Rolls
Course: Breakfast and DessertCuisine: AmericanDifficulty: medium12
rolls25
minutes25
minutes340
kcal50
MinutesThese fluffy strawberry sweet rolls feature a specialized layering technique to prevent mushy dough. By using a butter sealant and cornstarch-coated fresh fruit, these rolls stay light and airy while maintaining a jammy strawberry center.
Ingredients
1 lb enriched yeast dough (brioche-style or high-quality refrigerated sweet dough)
1/2 cup high-quality strawberry preserves
1 cup fresh strawberries, finely diced
1 tablespoon cornstarch (essential for moisture control)
1/4 cup granulated sugar
1 teaspoon ground cinnamon
3 tablespoons unsalted butter, softened
1.5 cups powdered sugar
3 tablespoons heavy cream
1/2 teaspoon vanilla extract
Fresh strawberry slices for garnish
Directions
- Preheat your oven to 350°F (175°C) and grease a 9×13 inch baking pan or a large cast-iron skillet.
- Roll out your dough on a lightly floured surface into a 12×18 inch rectangle.
- To solve the soggy bottom issue, spread the softened butter in an even layer over the dough. This fat layer acts as a sealant.
- In a small bowl, toss the diced fresh strawberries with the cornstarch until coated. This prevents the raw fruit from “bleeding” water into the dough.
- Mix the granulated sugar and cinnamon together. Sprinkle this mixture evenly over the buttered dough. The sugar will absorb any remaining moisture during the bake.
- Spread the strawberry preserves thinly over the sugar layer, leaving a 1-inch border at the top. Scatter the cornstarch-coated diced strawberries over the preserves.
- Roll the dough tightly starting from the long edge. Use unflavored dental floss or a very sharp serrated knife to cut into 12 even rounds.
- Place the rolls in the prepared pan. Cover and let rise in a warm spot for 30 minutes until doubled in size (if using fresh yeast dough).
- Bake for 22 to 25 minutes until the edges are a deep golden brown and the centers are set.
- While baking, whisk the powdered sugar, heavy cream, and vanilla until you reach a thick, pourable consistency.
- Let the rolls cool for 10 minutes. Drizzle the glaze generously over the warm rolls so it cascades down the sides as seen in the image. Top each roll with a fresh strawberry slice just before serving.
Notes
- The butter layer acts as a moisture barrier while the cornstarch prevents fresh strawberries from bleeding water into the dough during the baking process.