Creamy Pumpkin Pie Bars: Crisp Crust, No More Soggy Bottoms!
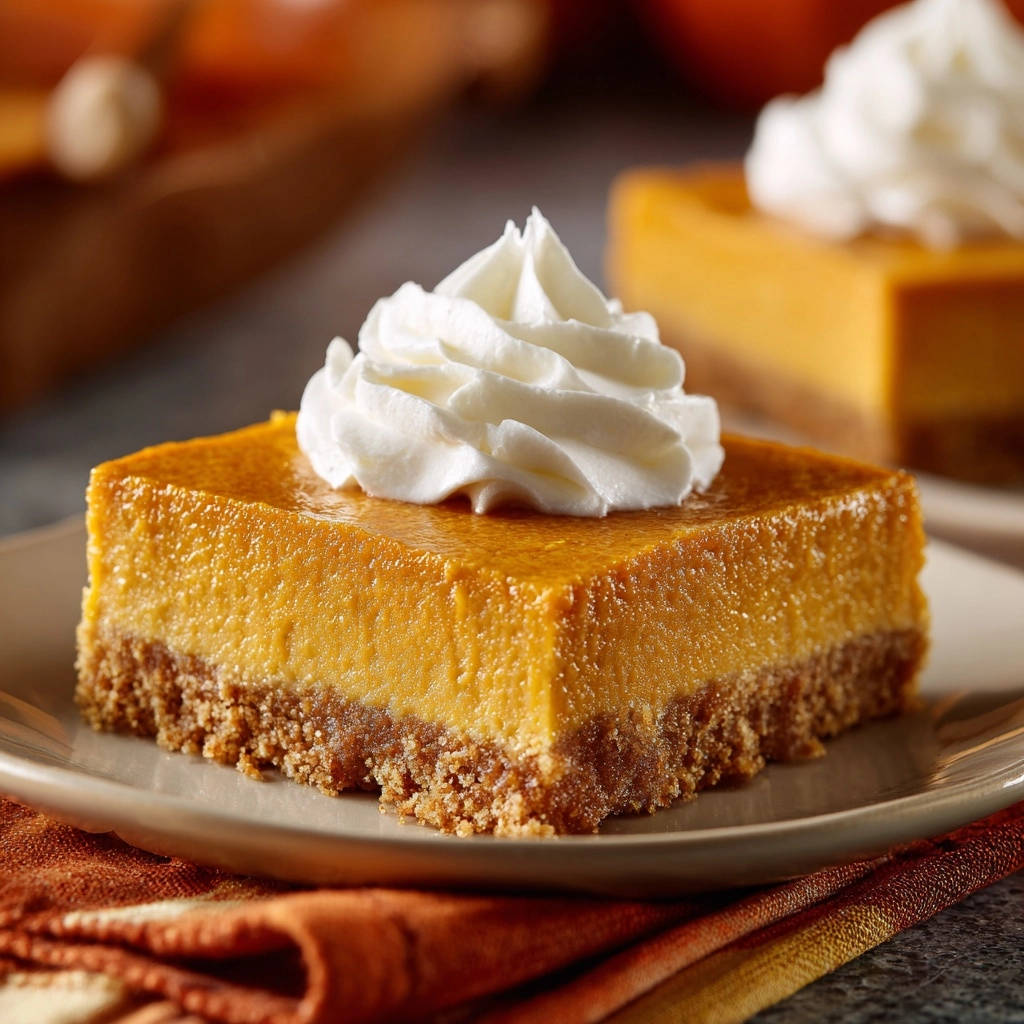
There’s nothing quite like the comforting aroma of pumpkin baking, but I vividly recall the disappointment of a perfectly spiced filling paired with a dreaded soggy crust. After countless attempts, I discovered a simple, foolproof technique that guarantees a wonderfully crisp base for these Creamy Pumpkin Pie Bars, transforming a common baking woe into consistent success.
This recipe isn’t just about delicious fall flavor; it’s about reliable texture, making it the ultimate seasonal dessert for family gatherings, holiday baking, or simply a cozy evening treat. Get ready for a perfectly set, silky pumpkin filling cradled in a delightfully crunchy graham cracker crust.
The Secret to Success: Never-Soggy Crust Pumpkin Pie Bars
The nemesis of many a home baker, a soggy crust can undermine even the most delicious pumpkin filling. This often happens because the moisture from the filling seeps into an unbaked or underbaked crust during baking.
Our secret to preventing this common pitfall is incredibly simple yet highly effective: pre-baking the graham cracker crust. This crucial step creates a protective barrier, essentially sealing the crust to prevent it from absorbing moisture from the creamy pumpkin filling.
It ensures every bite of your Creamy Pumpkin Pie Bars offers that satisfying crunch, elevating the entire dessert experience. You’ll wonder why you ever baked them any other way!
Gather Your Harvest: Ingredients for Perfect Creamy Pumpkin Pie Bars
Quality ingredients are the foundation of any outstanding dessert. Here’s what you’ll need, with a few notes to ensure the best possible outcome for your homemade pumpkin bars.
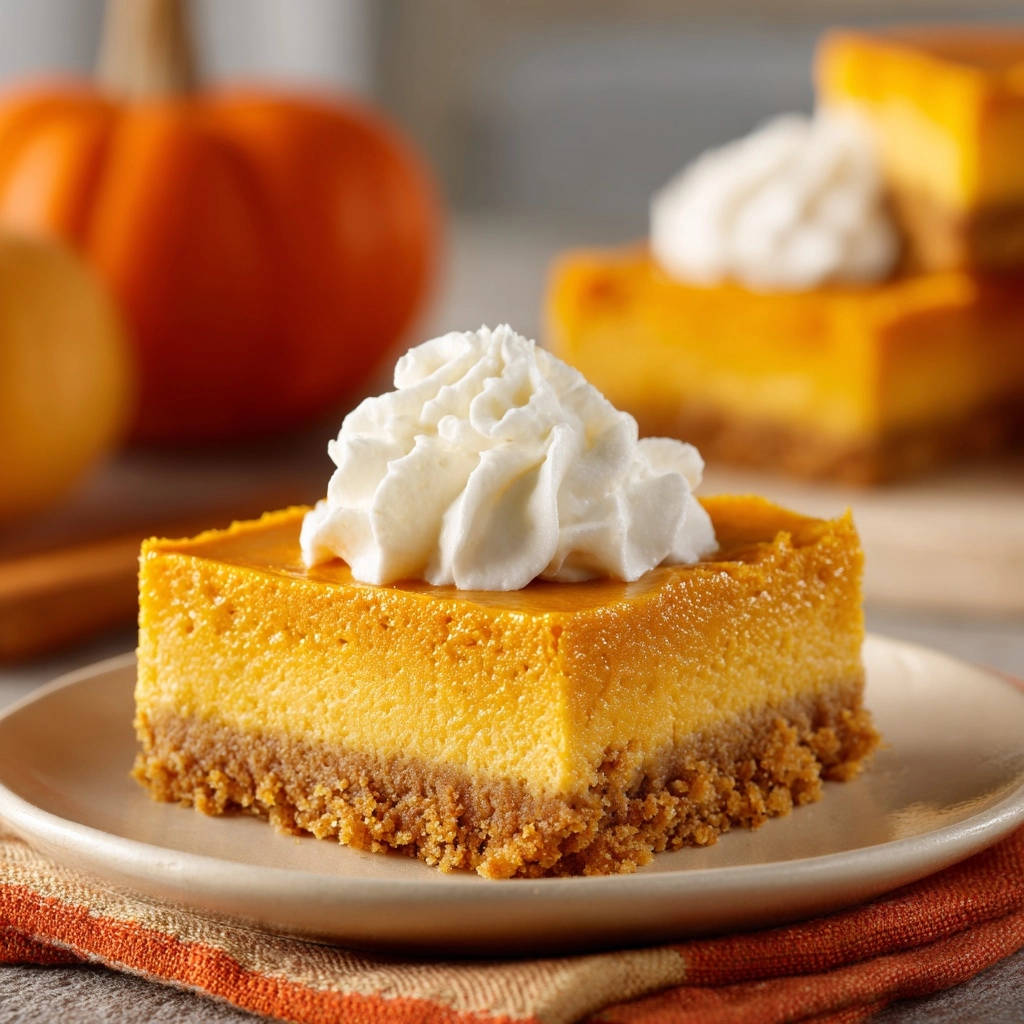
For the Irresistible Graham Cracker Crust
This simple combination creates a sturdy, flavorful base that provides a delightful contrast to the smooth filling.
Graham Cracker Crumbs: Approximately 10 full graham cracker sheets yield the perfect amount. Crushing your own can provide a fresher flavor and coarser texture than store-bought crumbs, if preferred.
Granulated Sugar: Just a touch adds sweetness and helps the crust caramelize slightly during baking.
Unsalted Butter, Melted: The binder that holds our crust together. Unsalted butter allows you to control the overall saltiness of the dish.
The Silky, Spiced Pumpkin Filling
This harmonious blend of ingredients results in a rich, perfectly spiced pumpkin layer.
Pumpkin Puree: Ensure you grab 100% pure pumpkin puree, not pumpkin pie filling. The latter contains added sugar and spices that will alter the intended flavor profile of these holiday pumpkin bars.
Evaporated Milk: This key ingredient contributes to the filling’s incredibly creamy, velvety texture without adding excess moisture. It’s concentrated milk with a slightly caramelized flavor.
Large Eggs: Eggs are essential for binding the filling and providing structure as it bakes and sets. They ensure a custard-like consistency.
Granulated Sugar & Light Brown Sugar: The combination of sugars offers a balanced sweetness with notes of caramel from the brown sugar, complementing the pumpkin beautifully.
Ground Cinnamon, Ginger, Cloves: This classic trio provides that unmistakable warm, aromatic pumpkin spice flavor. Using ground spices ensures even distribution throughout the filling.
Salt: A small amount of salt enhances all the other flavors, making the spices and pumpkin taste even brighter and more prominent.
For a perfect pairing, try our Mastering the Deep Dish Golden Apple Pie.
Elegant Topping Options
A simple topping can elevate these Creamy Pumpkin Pie Bars from delicious to decadent.
Whipped Cream: A classic, airy finish that perfectly complements the rich pumpkin flavor. Whether homemade or store-bought, it adds a delightful lightness.
Essential Tools for Your Creamy Pumpkin Pie Bar Baking Adventure
Having the right tools on hand makes the baking process smooth and enjoyable, ensuring your Creamy Pumpkin Pie Bars turn out perfectly every time.
Baking Pan Perfection
An 8×8 inch baking pan is ideal for achieving the perfect thickness for these bars. Lightly greasing it or, even better, lining it with parchment paper is essential.
Leaving a parchment paper overhang on two sides creates convenient “handles” that allow for easy, mess-free removal of the entire slab of bars once cooled and set.
Mixing Bowls and Whisk
You’ll need two medium to large mixing bowls: one for preparing the graham cracker crust and another for whisking together the silky pumpkin filling ingredients. A sturdy whisk ensures all components are thoroughly combined and smooth without overworking the mixture.
Cooling Rack and Cutting Essentials
A wire rack is crucial for allowing the bars to cool evenly after baking, promoting proper setting and preventing condensation that could soften the crust. For serving, a sharp knife or bench scraper will help you achieve clean, appealing squares, ensuring each bar looks as good as it tastes.
Crafting Your Creamy Pumpkin Pie Bars: A Step-by-Step Guide
Follow these detailed steps to create flawless Creamy Pumpkin Pie Bars with that signature crisp crust.
- Prepare Your Pan and Preheat Oven:
Begin by preheating your oven to a precise 350°F (175°C). This ensures the oven is at the correct temperature for even baking from the moment your bars go in. Prepare an 8×8 inch baking pan by lightly greasing it, or for the easiest removal, line it with parchment paper, allowing an overhang on two sides.
- Assemble the Crisp Graham Cracker Crust:
In a medium bowl, combine the graham cracker crumbs, 1/4 cup granulated sugar, and the melted unsalted butter. Mix these ingredients thoroughly until the crumbs are evenly moistened and resemble wet sand. This even coating ensures a uniform and sturdy crust.
- The Golden Rule: Pre-Bake the Crust:
This is the absolute most critical step for preventing a soggy bottom on your Creamy Pumpkin Pie Bars. Press the crumb mixture firmly and evenly into the bottom of the prepared baking pan. Bake this crust in your preheated oven for 8 to 10 minutes, or until you notice it’s lightly golden around the edges and fragrant. This pre-baking step creates a barrier, preventing moisture from the filling from seeping in. Remove it from the oven and set aside, but keep the oven on.
- Whisk Together the Velvety Pumpkin Filling:
While your crust is pre-baking, prepare the filling. In a large bowl, whisk together the pumpkin puree, evaporated milk, large eggs, 3/4 cup granulated sugar, light brown sugar, cinnamon, ginger, cloves, and salt. Continue whisking until the mixture is completely smooth and uniformly combined, ensuring no lumps remain for a truly silky texture.
- Layering for Success: Fill the Pre-Baked Crust:
Carefully pour the prepared pumpkin filling over the warm, pre-baked graham cracker crust in the pan. Pour slowly and steadily to avoid disturbing the crisp crust below. A warm crust will absorb less liquid from the filling, further preventing sogginess.
- Bake to Pumpkin Perfection:
Return the pan to the preheated oven and bake for 45 to 55 minutes. The bars are done when the edges appear set, and the center still has a slight jiggle. A knife inserted near the center should come out clean. Avoid overbaking, as this can lead to cracks in the filling.
- Cooling and Setting for Ideal Texture:
Once baked, remove the pan from the oven and transfer it to a wire rack. Let the bars cool completely at room temperature. This gradual cooling is essential for the filling to fully set and achieve its creamy texture. Once cooled, cover the pan and refrigerate for at least 2 hours, or ideally overnight.
- Slice, Serve, and Savor:
When you’re ready to serve, use the parchment paper overhang to gently lift the entire slab of Creamy Pumpkin Pie Bars out of the pan onto a cutting board. Cut into neat squares using a sharp, clean knife. Top each square with a generous dollop of whipped cream just before serving for an elegant and delicious presentation.
Elevate Your Baking: Expert Tips for Creamy Pumpkin Pie Bars
Transform your baking from good to extraordinary with these insider tips for your homemade pumpkin bars.
Achieving the Crispiest Crust
The secret to a truly crisp, never-soggy crust lies in proper pressing and the crucial pre-baking step. Ensure you press the graham cracker mixture very firmly and evenly into the pan; this compaction is vital for stability.
Pre-baking dries out the crumbs and creates a toasted barrier that moisture from the filling cannot penetrate. Look for that light golden hue and fragrant aroma as your cue that it’s ready.
Flavor Boosters and Spice Secrets
For an extra layer of warmth, consider adding a tiny pinch of freshly grated nutmeg to your filling alongside the other spices. A splash of pure vanilla extract also enhances the overall sweetness and complexity.
Don’t be afraid to adjust the spice blend to your preference, perhaps a tiny dash of black pepper for an unexpected kick that enhances the other spices, or a touch more cinnamon for a warmer profile.
The Art of Doneness and Patient Cooling
Accurately determining doneness is key to a perfectly set, creamy filling without cracks. Watch for edges that are firm, while the very center retains a slight, subtle jiggle when gently nudged.
Resist the urge to cut into the bars early! Complete cooling on a wire rack followed by thorough chilling in the refrigerator (preferably overnight) is non-negotiable for the bars to fully set, making them easier to slice cleanly and ensuring an optimal, firm texture.
Perfecting Presentation
For pristine squares, run a sharp knife under hot water and wipe it clean between each cut. This creates clean edges for a professional look. Beyond whipped cream, consider garnishing your Creamy Pumpkin Pie Bars with a light dusting of cinnamon, a sprinkle of toasted pecans, or a delicate caramel drizzle for extra flair.
Troubleshooting Common Creamy Pumpkin Pie Bar Quandaries
Even expert bakers encounter hiccups. Here’s how to tackle common issues when making your fall pumpkin bars.
Why Is My Crust Soggy?
A soggy crust is almost always due to skipping or rushing the crucial pre-baking step. Without this barrier, the moisture from the pumpkin filling will inevitably soften your graham cracker base.
The solution is simple: always thoroughly press and pre-bake the crust until it’s visibly golden and fragrant before adding the filling. This ensures a crisp foundation every time.
Why Did My Filling Crack?
Cracking in the pumpkin filling typically indicates that the bars were overbaked, causing the custard to cook too much and shrink. An oven temperature that’s too high can also be a culprit.
Ensure your oven temperature is accurate and bake only until the center is just set with a slight jiggle. Rapid cooling can also contribute; allow the bars to cool gradually on a wire rack before chilling.
My Bars Won’t Set Properly.
If your Creamy Pumpkin Pie Bars remain too soft or unset, it usually points to either underbaking or insufficient chilling time. The filling needs enough heat to coagulate and enough cold to firm up completely.
Emphasize baking until a knife inserted near the center comes out clean and allowing for the full chilling time (preferably overnight) in the refrigerator. Patience here truly pays off for optimal firmness and sliceability.
Creative Twists: Make These Creamy Pumpkin Pie Bars Your Own
These Creamy Pumpkin Pie Bars are a delicious canvas for personalization. Feel free to adapt them to suit your taste or dietary needs.
For a perfect pairing, try our Mastering the Golden Cherry Cobbler: The Anti-Soggy Method.
Gluten-Free Graham Cracker Crust
Easily make this recipe gluten-free by opting for certified gluten-free graham cracker crumbs. You could also explore alternative crust bases like a simple almond flour crust or crushed gluten-free ginger snap cookies for a spicier base.
Dairy-Free Options
For a dairy-free version, substitute the evaporated milk with an equal amount of full-fat canned coconut milk. The coconut milk will lend a rich, creamy texture and a subtle tropical note that pairs surprisingly well with pumpkin. If using sweetened coconut milk, consider slightly reducing the added sugars.
Spice It Up (or Down!)
The beauty of homemade treats is customization. Enhance your spice blend by adding a touch of ground cardamom for an exotic twist, or increase the cinnamon for an even warmer profile. If you prefer a milder flavor, simply stick to cinnamon and ginger.
Topping Transformations
While whipped cream is classic, don’t stop there! Drizzle your bars with warm caramel sauce, sprinkle with toasted pecans or walnuts, or give them a simple dusting of powdered sugar. A maple cream cheese frosting would also be a luxurious addition, transforming these into truly decadent pumpkin pie bars.
Pair These Pancakes With Your Pumpkin Bars
If you want to round out a brunch spread or add a soft, sweet contrast to those crisp pumpkin pie bars, these pancake recipes share the same cozy, comforting spirit.
- The Fluffy Blueberry Pancakes bring a pop of tart fruit that cuts through the creamy pumpkin filling nicely.
- For a heartier, nutty option that matches the warm spice notes, the Fluffy Oatmeal Pancakes offer a chewier texture and subtle grain flavor.
Plan Ahead & Preserve: Storage and Serving Suggestions
Prepare these delightful Creamy Pumpkin Pie Bars ahead of time and store them correctly to enjoy their perfect texture and flavor over several days.
Can I Make Creamy Pumpkin Pie Bars in Advance?
Absolutely, these bars are an excellent make-ahead dessert! In fact, their flavor and texture deepen and improve with proper chilling, making them perfect for busy holidays or entertaining. Prepare them up to 2-3 days in advance for the best flavor and firmness.
Optimal Storage for Freshness
Store any leftover bars tightly covered with plastic wrap or in an airtight container in the refrigerator. They will maintain their freshness and delicious taste for up to 5 days. For longer storage, bars can be frozen for up to 3 months when individually wrapped and then stored in an airtight container to prevent freezer burn.
Serving Inspirations
Beyond a simple dollop of whipped cream, consider elegant garnishes for your fall treats. A delicate sprinkle of ground nutmeg, a light drizzle of pure maple syrup, or a few candied ginger pieces can add an extra touch of sophistication. You might even serve them alongside our Decadent Pumpkin Pie Truffles for an ultimate pumpkin dessert spread.
Your Creamy Pumpkin Pie Bar Questions Answered
Here are answers to some common questions about making these irresistible pumpkin pie bars.
Can I use pumpkin pie filling instead of pumpkin puree?
I strongly advise against using pumpkin pie filling. Pumpkin puree is preferred for this recipe because it gives you complete control over the sweetness and spice levels. Pumpkin pie filling is already sweetened and spiced, which would throw off the carefully balanced flavors in these bars, making them potentially too sweet or over-spiced.
How do I know if my Creamy Pumpkin Pie Bars are set?
The key indicators are a firm edge and a slight jiggle in the very center when gently nudged. The most reliable test is to insert a knife near the center; it should come out clean. Avoid baking until the center is completely firm, as this will lead to a dry, cracked filling.
Can I make these in a different sized pan?
Yes, you can, but you may need to adjust baking time and potentially ingredient quantities. If using a larger pan, like a 9×13 inch, the bars will be thinner and may bake faster, so start checking for doneness around 30-35 minutes. A smaller pan will result in thicker bars, requiring more baking time. Adjust accordingly to ensure proper setting.
Do Creamy Pumpkin Pie Bars need to be refrigerated?
Yes, absolutely. Due to the presence of dairy (evaporated milk) and eggs in the filling, refrigeration is essential. This not only ensures the bars fully set to their optimal texture but also maintains food safety. Always store these seasonal dessert bars in the refrigerator.
Can I freeze Creamy Pumpkin Pie Bars?
Yes, you can! Once fully cooled and set, cut the bars into individual squares. Wrap each square tightly in plastic wrap, then again in aluminum foil. Place them in a freezer-safe bag or airtight container. They can be frozen for up to 3 months. Thaw them overnight in the refrigerator before serving, potentially with a fresh dollop of whipped cream.
Ready to Impress? Share Your Creamy Pumpkin Pie Bars Masterpiece!
I can’t wait for you to experience the magic of these Creamy Pumpkin Pie Bars with their perfect, crisp crust and velvety filling. This recipe will undoubtedly become a treasured part of your fall and holiday traditions.
Don’t forget to tag us on social media when you share your delicious creations, and let us know your favorite topping combination! For more delightful bar recipes and expert baking tips, explore our collection, including these incredible Chocolate Crumb Cheesecake Bars.
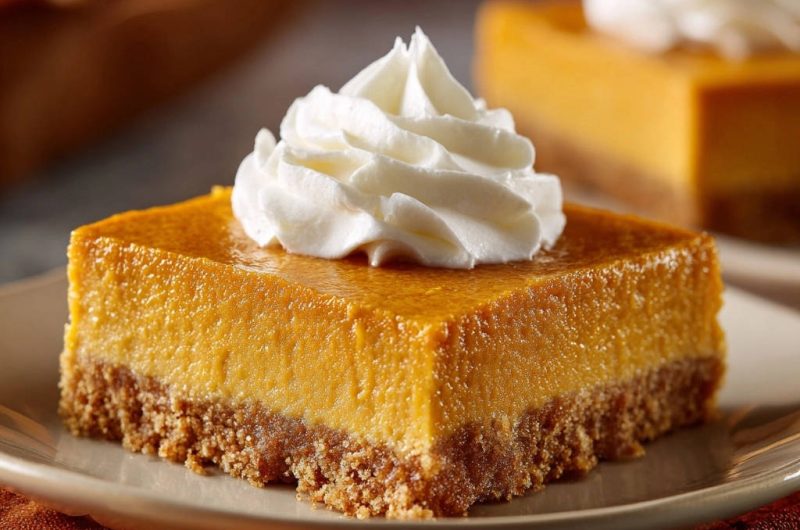
Pumpkin Pie Bars
Course: DessertCuisine: AmericanDifficulty: easy16
bars15
minutes1
hour90
kcal300
minutesSay goodbye to mushy crusts with these delicious Creamy Pumpkin Pie Bars! This recipe features a simple trick for a perfectly crisp graham cracker base, topped with a smooth, spiced pumpkin filling. An irresistible fall treat, served best with whipped cream.
Ingredients
For the Crust:
1 and 1/2 cups graham cracker crumbs (about 10 full graham cracker sheets)
1/4 cup granulated sugar
6 tablespoons unsalted butter, melted
For the Filling:
1 (15 ounce) can pumpkin puree
1 (12 ounce) can evaporated milk
2 large eggs
3/4 cup granulated sugar
1/4 cup packed light brown sugar
1 teaspoon ground cinnamon
1/2 teaspoon ground ginger
1/4 teaspoon ground cloves
1/2 teaspoon salt
For Topping:
Whipped cream, for serving
Directions
- Preheat your oven to 350 degrees F (175 degrees C). Lightly grease an 8×8 inch baking pan or line with parchment paper, leaving an overhang on two sides for easy removal.
- In a medium bowl, combine the graham cracker crumbs, 1/4 cup granulated sugar, and melted butter. Mix until well combined and the crumbs are evenly moistened.
- Press the crumb mixture firmly and evenly into the bottom of the prepared baking pan. This is the key step for a non-soggy crust: Bake the crust in the preheated oven for 8 to 10 minutes, or until lightly golden and fragrant. Remove from oven and set aside. Keep the oven on.
- While the crust is baking, prepare the filling. In a large bowl, whisk together the pumpkin puree, evaporated milk, eggs, 3/4 cup granulated sugar, brown sugar, cinnamon, ginger, cloves, and salt until smooth and well combined.
- Pour the pumpkin filling carefully over the pre-baked graham cracker crust in the pan.
- Bake for 45 to 55 minutes, or until the center is just set. A knife inserted near the center should come out clean. The edges will appear set, and the center may have a slight jiggle.
- Remove the pan from the oven and let cool completely on a wire rack.
- Once cooled, cover the pan and refrigerate for at least 2 hours, or preferably overnight, to allow the bars to fully set.
- When ready to serve, use the parchment paper overhang to lift the bars out of the pan. Cut into squares and top each square with a dollop of whipped cream.
Notes
- Pre-baking the graham cracker crust is crucial for preventing a soggy bottom.