Classic Butter Cookies: Melt-in-Your-Mouth Perfection!

There’s nothing quite like a homemade cookie that effortlessly melts in your mouth, yet achieving that delicate, tender texture with classic butter cookies can sometimes feel elusive. I remember countless batches turning out crumbly or surprisingly dense, until I perfected a few simple, crucial techniques.
This recipe for Classic Butter Cookies isn’t just about ingredients; it’s about the magic behind truly melt-in-your-mouth perfection, ensuring every single bite is buttery, light, and never hard. Get ready to bake a batch that will disappear almost as fast as you make them.
Unlocking the Secret to Truly Tender Butter Cookies
What makes these classic butter cookies stand out is their ethereal texture, a result of precise technique rather than complex ingredients. Many butter cookie recipes promise tenderness but often deliver a dense, crumbly bite.
Our secret lies in a few critical steps: the proper creaming of butter and sugar, careful handling of the flour to prevent gluten development, and precise baking. These elements work in harmony to create a cookie that’s delicate, rich, and truly melts.
We’re focusing on incorporating just the right amount of air and avoiding overworking the dough. This ensures your cookies remain light and buttery, consistently perfect every time you bake them.
Essential Ingredients for Your Buttery Masterpiece
Unsalted Butter: The Foundation of Flavor
Unsalted butter is paramount for these delicate cookies. It allows you to control the exact salt content in your recipe, ensuring a balanced flavor.
Ensure your butter is softened to room temperature – not melted, but pliable. This consistency is critical for creaming effectively and incorporating air.
Granulated Sugar: Achieving Sweetness and Tenderness
Granulated sugar provides the perfect level of sweetness, but it also plays a vital role in texture. When creamed with butter, its crystals create tiny air pockets, contributing to the cookie’s tenderness.
Having extra for rolling is optional but adds a lovely sparkle and a subtle crispness to the exterior.
All-Purpose Flour: Structure Without Toughness
All-purpose flour gives these cookies their necessary structure. The key is to add it gradually and mix just until combined.
Overmixing develops gluten, leading to a tough, chewy cookie, which is the opposite of the melt-in-your-mouth texture we’re aiming for.
Vanilla Extract & Salt: The Flavor Enhancers
Vanilla extract deepens the rich buttery flavor, adding a warm, aromatic note. Use a good quality pure vanilla for the best results.
Salt is not just for seasoning; it balances the sweetness and enhances all the other flavors in the cookie, preventing them from tasting flat.
Tools for Baking Butter Cookies with Ease
Essential Baking Gear
Electric Mixer (Stand or Handheld): Crucial for properly creaming butter and sugar, ensuring the light, airy texture.
Large Mixing Bowl: Provides ample space for creaming and mixing ingredients without mess.
Rubber Spatula: Essential for scraping down the sides of the bowl, ensuring all ingredients are evenly incorporated.
Baking Sheets: Sturdy sheets provide even heat distribution for consistent baking.
Parchment Paper: Prevents sticking and makes cleanup a breeze, ensuring your cookies lift off perfectly.
Wire Rack: Allows air circulation for even cooling, preventing the bottoms from becoming soggy.
Crafting Your Classic Butter Cookies: Step-by-Step Guide
-
Prepare Your Oven and Baking Sheets:
Preheat your oven to 350°F (175°C). Line two baking sheets with parchment paper.
This ensures the oven is at the correct temperature before your cookies go in, promoting even baking and preventing spreading.
-
Cream Butter and Sugar:
In a large bowl, using an electric mixer, cream together the softened butter and 1/2 cup granulated sugar.
Beat on medium-high speed for 3-5 minutes, until the mixture is light, fluffy, and noticeably paler in color. This step is the “secret” to tenderness, as it incorporates crucial air into the butter, creating a delicate crumb.
Stop periodically to scrape down the sides of the bowl with a rubber spatula, ensuring everything is thoroughly combined.
-
Incorporate Wet Ingredients:
Beat in the vanilla extract and salt. Mix on low speed just until they are fully combined with the butter mixture.
Avoid overmixing at this stage, as the goal is simply integration.
-
Gradually Add Flour:
With the mixer on low speed, gradually add the all-purpose flour to the butter mixture, about 1/2 cup at a time. Mix just until combined after each addition.
The moment you see no dry streaks of flour remaining, stop mixing. Overworking the dough develops gluten, which will make your cookies tough instead of tender.
-
Shape the Cookies:
Gather the dough into a ball. Divide it into small, uniform pieces, each about 1 inch in diameter. Roll each piece between your palms to form a smooth ball.
For an extra touch, lightly roll each ball in additional granulated sugar at this point. This adds a lovely sparkle and slight crispness to the exterior.
-
Place and Flatten:
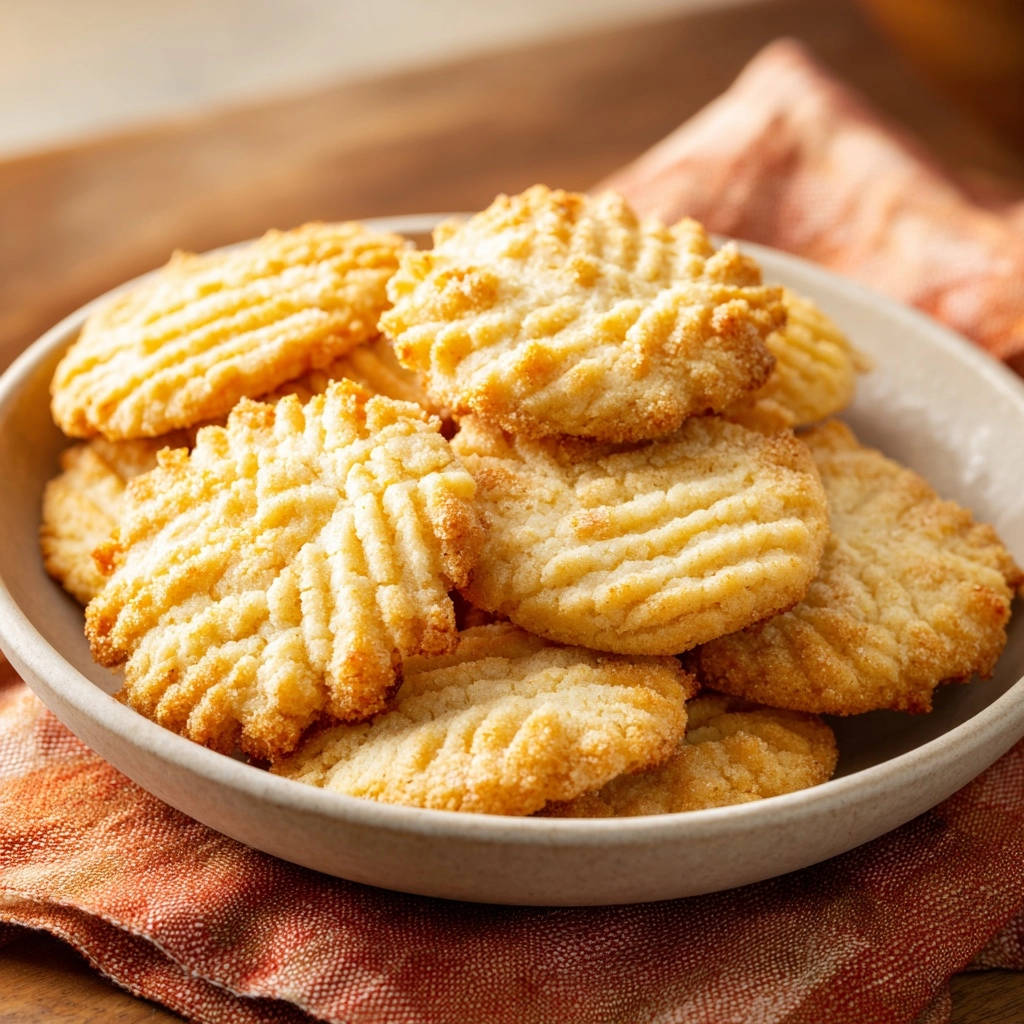
Place the cookie balls onto the prepared baking sheets, leaving about 1 inch of space between each. Use the tines of a fork to gently flatten each cookie ball, creating a classic crosshatch or ridged pattern.
This flattening helps with even baking and gives the cookies their traditional appearance.
-
Bake to Perfection:
Bake for 10-12 minutes, or until the edges are lightly golden. The centers of the cookies should still appear pale and set, not browned.
Baking until just set, without allowing them to turn deeply golden, is key to maintaining their tender texture. Overbaking will result in dry, crumbly cookies.
-
Cool and Enjoy:
Allow the baked cookies to cool on the baking sheets for 5 minutes. They are delicate when hot, and this resting period helps them firm up.
After 5 minutes, carefully transfer them to a wire rack to cool completely. Enjoy the melt-in-your-mouth goodness!
Pro Tips for Unforgettable Butter Cookies
Mastering the Creaming Technique for Airiness
Always start with truly softened butter. If it’s too cold, it won’t cream properly, and if it’s melted, it won’t incorporate air.
Cream butter and sugar for the full 3-5 minutes, even if it looks combined earlier. This extended creaming is where the magic happens, creating millions of tiny air pockets.
The Art of Not Overmixing Your Dough
Once flour is added, mix only until no dry streaks remain. Seriously, stop the mixer the instant it’s combined.
Overmixing activates gluten, turning your delicate homemade butter biscuits tough instead of tender.
Chilling Dough: A Crucial Step for Perfect Shape
If your kitchen is warm or your dough feels too soft after mixing, a quick 15-20 minute chill in the refrigerator can make it easier to handle.
Chilling also helps prevent excess spreading during baking, maintaining those beautiful shapes.
Achieving the Perfect Bake (No Overbrowning!)
Keep a close eye on your cookies during the last few minutes of baking. Butter cookies are meant to be pale with just a hint of golden on the edges.
Pull them from the oven as soon as the edges are lightly set and golden, even if the center seems slightly soft. They will continue to set as they cool.
Uniformity for Even Baking
Strive for similarly sized cookie balls. Using a small cookie scoop can help ensure consistent portions.
Uniformity ensures all your cookies bake evenly at the same rate, preventing some from being overbaked while others are underbaked.
Creative Twists for Your Classic Butter Cookies
Citrus Zest Infusion
Add 1-2 teaspoons of finely grated lemon, orange, or lime zest to the butter and sugar mixture. The citrus oils infuse the cookies with a bright, refreshing flavor that complements the richness of the butter beautifully.
Chocolate Dipped Delights
Once the cookies are completely cooled, melt your favorite chocolate (dark, milk, or white). Dip half of each cookie into the melted chocolate, then sprinkle with sea salt or sprinkles before the chocolate sets for an extra indulgent treat. They’re like miniature works of art, much like creating decadent dessert truffles!
Nutty or Spiced Variations
For a nutty crunch, fold in 1/2 cup of finely chopped toasted pecans or almonds with the flour. For warmth, add 1/2 teaspoon of ground cinnamon or a pinch of nutmeg to the dry ingredients for a spiced butter cookie.
Sprinkled Fun
Before baking, press colorful sprinkles onto the top of each cookie. This is especially fun for holidays or parties and adds a delightful pop of color and texture.
Perfect Pairings and Serving Ideas
These Classic Butter Cookies are incredibly versatile. Enjoy them simply with a cup of hot coffee or tea for a delightful afternoon treat.
They make an elegant addition to any dessert platter, especially alongside fresh berries or a scoop of vanilla ice cream. Crumble them over yogurt or parfaits for an added buttery crunch.
Package them beautifully in decorative tins or bags for a thoughtful homemade gift during the holidays or for a hostess present. Everyone appreciates a fresh batch of these tender delights.
Storage & Make-Ahead: Keeping Your Cookies Fresh
Storing Baked Classic Butter Cookies
Once completely cooled, store your baked butter cookies in an airtight container at room temperature for up to 5-7 days. To maintain their freshness, you can place a slice of bread in the container; it helps absorb excess moisture and keeps them soft.
Freezing Cookie Dough for Future Cravings
You can prepare the dough in advance and freeze it. Shape the dough into balls, place them on a parchment-lined baking sheet, and freeze until solid (about 1-2 hours).
Transfer the frozen cookie balls to a freezer-safe bag or container for up to 2-3 months. When ready to bake, place them on a baking sheet and bake from frozen, adding a couple of minutes to the baking time.
Can You Freeze Baked Cookies?
Yes, baked butter cookies freeze beautifully! Once completely cooled, arrange them in a single layer in an airtight freezer-safe container, separating layers with parchment paper.
They will keep well for up to 3 months. Thaw them at room temperature before serving for optimal texture and flavor.
Troubleshooting Common Butter Cookie Challenges
My Cookies Spread Too Much!
This often happens if your butter was too soft or melted, or if your dough was too warm. Ensure butter is softened, not melted, and consider chilling the shaped dough for 15-20 minutes before baking.
An oven that isn’t fully preheated can also contribute to spreading, so always allow ample time for preheating.
Why Are My Butter Cookies Tough or Dry?
Tough cookies are almost always a result of overmixing the flour, which develops too much gluten. Ensure you stop mixing as soon as the flour is just combined and no dry streaks remain.
Dry cookies often indicate overbaking. Butter cookies are meant to be pale; pull them from the oven when the edges are just set and lightly golden, even if the centers still look soft.
Cookies Are Too Pale or Overly Browned.
If your cookies are too pale, they might need an extra minute or two in the oven. If they’re overly browned, your oven might be running hot, or you’ve baked them too long.
Consider investing in an oven thermometer to verify your oven’s true temperature, and trust the visual cues (lightly golden edges) over strict adherence to time.
Dough is Too Crumbly or Sticky.
Crumbly dough usually means your butter wasn’t soft enough, or you haven’t mixed it quite enough to bring everything together. Sticky dough could mean your butter was too soft, or you might need a tiny bit more flour.
Adjust by adding a splash of milk (1 teaspoon at a time) if too crumbly, or a tablespoon of flour if too sticky, mixing minimally.
Your Top Questions About Classic Butter Cookies Answered
Can I use salted butter instead of unsalted?
While unsalted butter is recommended for precise salt control, you can use salted butter if it’s all you have. Just omit the 1/4 teaspoon of salt from the recipe to avoid overly salty cookies.
Is chilling the dough necessary for butter cookies?
Chilling the dough is not strictly necessary if your kitchen is cool and your dough is firm. However, it’s highly recommended for warm kitchens or if your dough feels too soft, as it helps prevent spreading and results in crisper edges and a more defined shape.
How long do homemade butter cookies stay fresh?
When stored in an airtight container at room temperature, Classic Butter Cookies typically stay fresh for 5 to 7 days. Their flavor and texture are best within the first few days.
Can I make these cookies gluten-free?
Yes, you can substitute the all-purpose flour with a 1:1 gluten-free baking flour blend that contains xanthan gum. The texture might vary slightly, but they should still be wonderfully tender.
What if I don’t have an electric mixer?
While an electric mixer is ideal for achieving the airy texture, you can still make these cookies with a sturdy whisk and a lot of arm power. Cream the butter and sugar vigorously until very light and fluffy. The rest of the mixing can be done with a wooden spoon or spatula.
Bake, Share, and Savor Your Homemade Butter Cookies!
There’s a special kind of joy that comes from baking a batch of these truly delightful Classic Butter Cookies. Their rich, tender goodness is a testament to simple ingredients and careful technique, creating a treat that’s always a crowd-pleaser.
Whether you’re baking for a special occasion, a quiet evening at home, or packaging them up for a thoughtful gift, these cookies are sure to bring smiles. I encourage you to whip up a batch, perhaps alongside some other delicious baked goods like our classic banana bread, and share your baking journey with us!
Enjoy the process, savor the aroma, and delight in every melt-in-your-mouth bite.
Butter Cookies
Course: DessertCuisine: AmericanDifficulty: easy24
cookies20
minutes12
minutes40
kcal32
minutesDiscover the simple secret to perfectly delicate, melt-in-your-mouth classic butter cookies. This foolproof recipe ensures tender, buttery treats every single time, avoiding hardness or crumbliness.
Ingredients
1 cup (2 sticks) unsalted butter, softened
1/2 cup granulated sugar, plus extra for rolling
2 cups all-purpose flour
1 teaspoon vanilla extract
1/4 teaspoon salt
Directions
- Preheat your oven to 350°F (175°C). Line baking sheets with parchment paper.
- The Secret to Melt-in-Your-Mouth Texture: In a large bowl, using an electric mixer, cream together the softened butter and 1/2 cup granulated sugar until the mixture is light and fluffy. This isn’t just mixing; it’s incorporating air, which is crucial for that tender crumb. Beat for 3-5 minutes, scraping down the sides of the bowl as needed.
- Beat in the vanilla extract and salt until just combined.
- Gradually add the all-purpose flour to the butter mixture, mixing on low speed just until combined. Be careful not to overmix, as overworking the dough can develop gluten and make your cookies tough. Stop mixing as soon as no dry streaks of flour remain.
- Gather the dough into a ball, then divide it into small, uniform pieces, about 1 inch in diameter. Roll each piece into a ball. If desired, lightly roll each ball in extra granulated sugar.
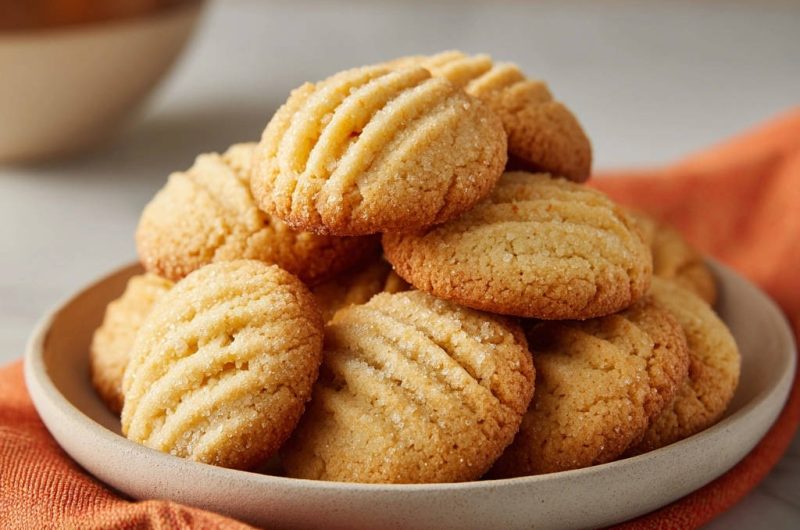
- Place the cookie balls on the prepared baking sheets, leaving about 1 inch between them. Use the tines of a fork to gently flatten each cookie ball, creating a crosshatch or ridged pattern, as seen in the photo.
- Bake for 10-12 minutes, or until the edges are lightly golden. The cookies should still be pale in the center. Baking them until just set, without overbrowning, helps maintain their tender texture.
- Let the cookies cool on the baking sheets for 5 minutes before transferring them to a wire rack to cool completely. Enjoy that perfectly delicate, melt-in-your-mouth goodness!
Notes
- Properly creaming butter and sugar, and avoiding overmixing the flour, are key for the melt-in-your-mouth texture. Do not overbake.