Skillet Glazed Chicken & Green Beans: Master the Sticky Glaze
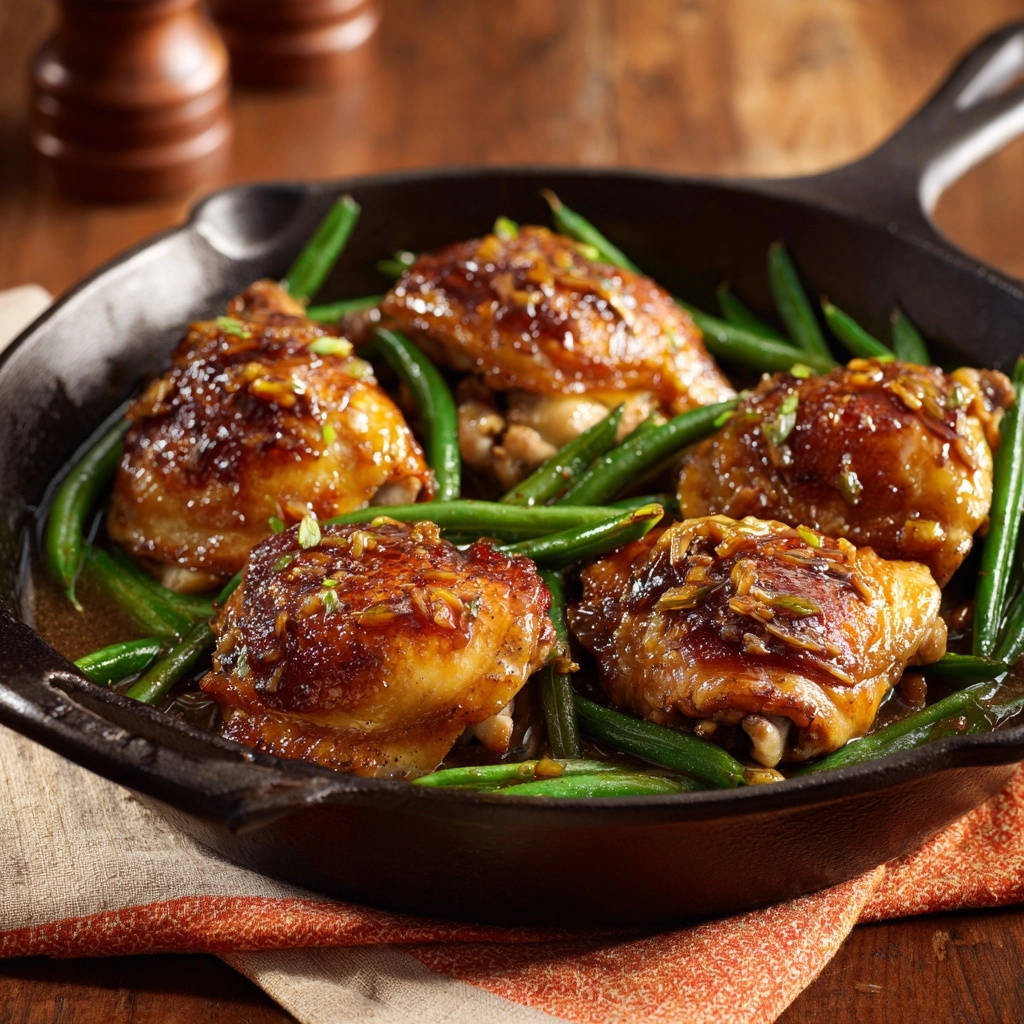
I remember countless times in my early cooking days, striving for that perfect, glossy sauce on my chicken, only to end up with a thin, watery puddle at the bottom of the pan. It was incredibly frustrating! But I discovered the secret, and now I can confidently say this Skillet Glazed Chicken & Green Beans recipe consistently delivers a beautifully thick, perfectly sticky glaze that clings to every savory piece, making it a reliable weeknight dinner for busy home cooks.
Why This Skillet Glazed Chicken & Green Beans Recipe Will Be Your New Favorite
The “No More Watery Sauce” Promise
Say goodbye to disappointing, thin sauces that pool on your plate. This recipe introduces you to the magic of a cornstarch slurry, guaranteeing a rich, syrupy glaze every single time.
You’ll enjoy chicken and green beans perfectly coated in a sauce that truly elevates the entire dish, transforming a simple meal into something extraordinary.
Effortless Elegance: A One-Pan Dinner
Imagine a delicious, impressive meal with minimal cleanup. This Skillet Glazed Chicken & Green Beans recipe allows you to cook everything in one pan, from searing the chicken to glazing the vegetables.
It’s the ideal solution for busy evenings, offering both convenience and a restaurant-quality result without the fuss.
Flavor That Clings: Perfectly Balanced Sweet & Savory
The glaze here isn’t just thick; it’s bursting with a harmonious blend of savory soy, sweet honey, tangy vinegar, and bright aromatics. This perfectly sticky glaze ensures every bite of chicken and every tender-crisp green bean is infused with incredible flavor.
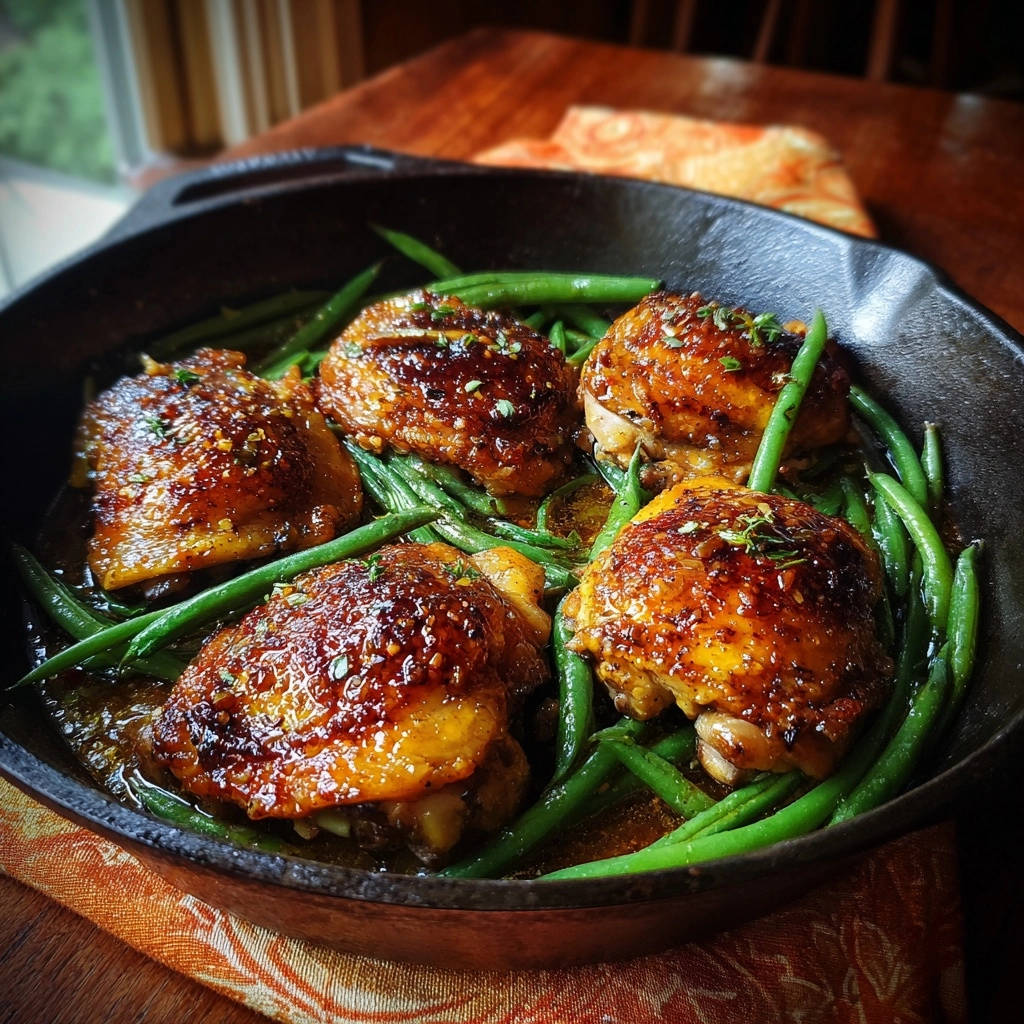
It creates a satisfying savory-sweet chicken experience that you’ll crave again and again.
Essential Tools for Skillet Glazed Chicken Success
The Mighty Cast Iron Skillet
A large cast iron skillet is your best friend for this recipe. Its superior heat retention is crucial for achieving that deep, golden sear on the chicken skin.
The even heat distribution also helps in building the flavorful fond at the bottom of the pan, which becomes the delicious base for your glaze.
Supporting Kitchen Utensils
Sturdy Tongs: Essential for safely handling hot chicken and flipping it precisely, ensuring even browning.
Whisk: Critical for thoroughly combining the cornstarch slurry and smoothly incorporating it into the simmering sauce, preventing lumps.
Cutting Board & Sharp Knife: For prepping the chicken and mincing garlic and ginger efficiently.
Measuring Cups & Spoons: Accuracy is key for a balanced glaze, so have these on hand for precise ingredient measurements.
Unlocking the Flavor: Key Ingredients for Your Glazed Chicken
The Star Protein: Bone-In, Skin-On Chicken Thighs
Bone-in, skin-on chicken thighs are chosen for a reason: they offer unmatched flavor and juiciness. The bone adds depth, and the skin renders into a wonderfully crispy texture.
These cuts also stand up beautifully to high heat searing, locking in moisture and creating a rich taste.
Fresh & Vibrant: Green Beans
Opt for fresh, crisp green beans for the best results. Their vibrant color and satisfying tender-crisp texture provide a perfect contrast to the rich chicken and savory-sweet chicken glaze.
The Heart of the Glaze: Sauce, Sweeteners & Aromatics
A foundation of low-sodium soy sauce delivers deep umami, while honey or maple syrup provides essential sweetness and helps achieve that irresistible glaze. Rice vinegar introduces a bright, tangy balance, cutting through the richness beautifully.
Freshly minced garlic and grated ginger infuse the sauce with aromatic warmth, creating a complex and inviting flavor profile.
The Secret Weapon: Cornstarch Slurry
This simple mixture of cornstarch and cold water is the game-changer for your perfectly sticky glaze. It’s what transforms a liquid sauce into a luxurious, glossy coating that adheres beautifully to every component of your Skillet Glazed Chicken & Green Beans.
The cornstarch slurry prevents a watery sauce, ensuring a restaurant-quality finish that impresses every time.
Crafting Your Skillet Glazed Chicken & Green Beans: Step-by-Step Journey to Perfection
- Prep Chicken:
Patting your chicken thighs very dry with paper towels is a crucial first step. Excess moisture prevents the skin from crisping up effectively during searing.
Season lightly with salt and pepper to enhance the chicken’s natural flavors, laying the groundwork for a delicious result.
- Sear Chicken to Golden Perfection:
Heat olive oil in your large cast iron skillet over medium-high heat until it shimmers. Place the chicken thighs, skin side down, in the hot skillet without overcrowding the pan.
Cook for 6-8 minutes until the skin is deeply golden brown and incredibly crispy. Flip the chicken and cook for another 5-7 minutes, until browned, then remove it from the skillet and set aside.
- Blanch Green Beans:
Add the trimmed fresh green beans to the same skillet, adding a touch more oil if needed. Sauté them for 3-5 minutes, stirring occasionally.
You’re looking for bright green beans that are slightly tender-crisp, ensuring they still have a nice bite. Remove the cooked green beans and set them aside with the chicken.
- Build the Glaze Base:
Reduce the heat to medium. Add the soy sauce, honey, rice vinegar, minced garlic, grated ginger, and chicken broth to the skillet. Bring this mixture to a gentle simmer.
As it heats, scrape up any browned bits (fond) from the bottom of the pan; these caramelized pieces add incredible depth of flavor to your glaze. In a small bowl, whisk together the cornstarch and 2 tablespoons of cold water until completely smooth, creating your essential slurry.
- Activate the Secret Thickener:
Gradually whisk the cornstarch slurry into the simmering sauce in the skillet. This slow addition helps prevent lumps and ensures an even thickening.
Continue to simmer and whisk gently for 1-2 minutes, watching as the sauce transforms. It will thicken to a glossy, syrupy glaze that beautifully coats the back of a spoon, indicating it’s ready.
- Bring It All Together: Glaze & Finish:
Return the perfectly seared chicken thighs and tender-crisp green beans to the skillet. Gently toss everything to coat it evenly in the thick, sticky glaze.
Allow it to cook for another 2-3 minutes, letting the chicken heat through and fully absorb more of that incredible, savory-sweet chicken glaze.
- Serve with Style:
For an extra flourish, garnish your Skillet Glazed Chicken & Green Beans with fresh chives or sliced green onions if desired. Serve immediately and enjoy!
Beyond the Recipe: Tips for Skillet Glazed Chicken & Green Beans Perfection
Achieving that Irresistible Crispy Chicken Skin
Always start with chicken thighs that are thoroughly patted dry; moisture is the enemy of crispiness. Use medium-high heat during searing to render the fat slowly and effectively, creating a golden, crunchy skin.
Avoid overcrowding your skillet, as this lowers the pan’s temperature and steams the chicken instead of searing it. Cook the chicken in batches if necessary for the best results.
Mastering Your Glaze: Consistency is Key
If your glaze seems too thin after a couple of minutes of simmering, you can make a small additional cornstarch slurry (1 teaspoon cornstarch with 1 tablespoon cold water) and whisk it in gradually until your desired thickness is reached.
Should the glaze become too thick, a splash of chicken broth or water will help thin it down to the perfect consistency. Look for a sauce that lightly coats a spoon, not one that’s overly gloopy.
Flavor Customization: Spices and Sweetness
Feel free to adjust the sweetness of your Skillet Glazed Chicken & Green Beans by adding a little more honey or maple syrup to taste. For a subtle kick, a pinch of red pepper flakes can be stirred into the glaze.
Consider a touch of sesame oil added at the very end for an extra layer of nutty aroma, or experiment with a sprinkle of toasted sesame seeds for garnish.
Troubleshooting Common Glaze & Skillet Glazed Chicken Issues
“My Glaze Isn’t Thickening!”
First, ensure your cornstarch slurry was thoroughly whisked before adding it, as undissolved cornstarch won’t activate properly. Give the sauce a bit more time to simmer and whisk; it often takes a full 1-2 minutes for the starch to activate and thicken.
If it’s still too thin, create a small, fresh slurry with 1/2 teaspoon cornstarch and 1 tablespoon cold water, then whisk it into the simmering sauce gradually until it reaches the desired consistency.
“My Chicken Skin Isn’t Crispy!”
The most common culprits are insufficient drying of the chicken skin before searing, or a pan that isn’t hot enough. Always pat the chicken thoroughly dry with paper towels.
Ensure your skillet is preheated over medium-high heat until the oil shimmers before adding the chicken, and avoid overcrowding the pan, which can drop the temperature and prevent proper searing.
“My Green Beans are Overcooked/Undercooked!”
For perfectly tender-crisp green beans, keep a close eye on them during cooking; 3-5 minutes is a guideline, but actual time varies by bean thickness and stove heat. They should still have a slight snap to them.
If you prefer them softer, cook for an extra minute or two. If they are undercooked, you can gently simmer them in the glaze for a moment longer before serving.
Serving Suggestions & Perfect Pairings
Classic Sides to Complete Your Meal
This savory-sweet chicken dish pairs beautifully with simple, absorbent sides. Fluffy white or brown rice is excellent for soaking up every drop of that delicious glaze.
Consider quinoa for a nutrient-rich alternative, or even some creamy mashed potatoes. For another easy green vegetable side, you might enjoy these crispy baked asparagus.
Garnishes for a Finishing Touch
A sprinkle of fresh, finely chopped chives or thinly sliced green onions not only adds a pop of vibrant color but also introduces a fresh, mild oniony flavor that complements the glaze.
These simple garnishes elevate the presentation and add an extra layer of freshness to your Skillet Glazed Chicken & Green Beans.
Storing & Reheating Skillet Glazed Chicken & Green Beans
Make-Ahead Strategies
While this dish is best fresh, you can prep components in advance. Mince your garlic and ginger, measure out your glaze ingredients, and trim your green beans.
This streamlines the cooking process, making dinner even quicker on a busy weeknight.
Best Practices for Delicious Leftovers
Store any leftover Skillet Glazed Chicken & Green Beans in an airtight container in the refrigerator for up to 3-4 days. For reheating, gently warm the chicken and green beans in a skillet over medium-low heat, adding a splash of chicken broth or water if the glaze has become too thick.
Alternatively, microwave until heated through, though the skin will lose some crispness. For more skillet inspiration, try this skillet rosemary chicken and potatoes for another delicious one-pan meal.
Frequently Asked Questions About This Glazed Chicken Recipe
Can I Use Boneless, Skinless Chicken?
Yes, you can substitute boneless, skinless chicken thighs or breasts, though cooking times will be shorter. For breasts, be careful not to overcook them to maintain juiciness, as they don’t have the protective skin and bone.
You won’t get the same crispy skin, but the flavor of the glaze will still be fantastic. Alternatively, check out our sticky herb glazed chicken for another boneless option.
Are There Gluten-Free or Low-Sodium Substitutions?
Absolutely! For a gluten-free version, simply use tamari in place of regular soy sauce. Many brands offer low-sodium tamari or low-sodium soy sauce options, which are perfect for controlling your salt intake without sacrificing flavor.
What Other Vegetables Can I Add?
This recipe is quite versatile for vegetables. Quick-cooking options like broccoli florets, asparagus spears, bell pepper strips, or snap peas would all work wonderfully.
Add them to the skillet at the same stage as the green beans, adjusting cooking time as needed to achieve a tender-crisp texture.
Can I Prepare the Sauce in Advance?
You can whisk together all the glaze ingredients (soy sauce, honey, vinegar, garlic, ginger, broth) in advance and store them in the refrigerator for up to 2-3 days. However, do not add the cornstarch slurry until you are ready to thicken the sauce on the stovetop.
The cornstarch slurry needs to be mixed right before use to ensure a smooth, lump-free glaze.
Your Culinary Triumph Awaits: Share Your Skillet Glazed Chicken!
You now possess the expert knowledge to create truly exceptional Skillet Glazed Chicken & Green Beans. That perfectly sticky glaze, crispy chicken skin, and vibrant tender-crisp green beans are within your reach.
This isn’t just a recipe; it’s a technique for culinary success. We encourage you to try this amazing one-pan meal, revel in the satisfying flavors, and discover your new favorite weeknight dinner.
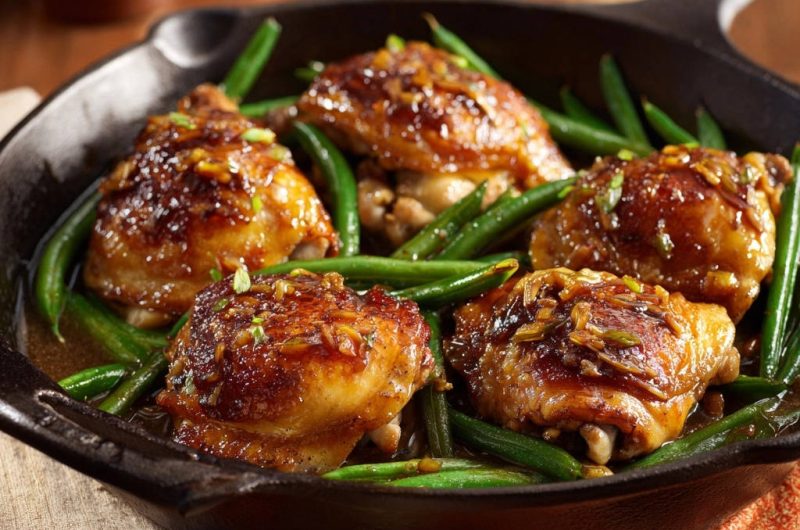
Skillet Glazed Chicken
Course: Main CourseCuisine: AsianDifficulty: easy4
servings20
minutes30
minutes450
kcal50
minutesEver found yourself trying to get that gorgeous, glossy sauce on your chicken, only for it to turn out thin and runny instead? This recipe ensures your skillet sauce is always perfectly thick, sticky, and clings exactly how you want it.
Ingredients
4 bone-in, skin-on chicken thighs
1 tablespoon olive oil (or other high-heat oil)
1 pound fresh green beans, trimmed
1/2 cup low sodium soy sauce (or tamari for gluten-free)
1/4 cup honey or maple syrup
2 tablespoons rice vinegar (or apple cider vinegar)
2 cloves garlic, minced
1 teaspoon grated fresh ginger (or 1/2 teaspoon ground ginger)
1/2 cup chicken broth (or water)
1 tablespoon cornstarch
2 tablespoons cold water (for cornstarch slurry)
Optional: Fresh chives or green onions for garnish
Directions
- Prep Chicken: Pat chicken thighs very dry with paper towels. Season lightly with salt and pepper.
- Sear Chicken: Heat olive oil in a large cast iron skillet over medium-high heat. Place chicken thighs, skin side down, in the hot skillet. Cook for 6-8 minutes until skin is deeply golden and crispy. Flip and cook for another 5-7 minutes, until browned. Remove chicken from skillet and set aside.
- Cook Green Beans: Add green beans to the same skillet (add a touch more oil if needed). Cook for 3-5 minutes, stirring occasionally, until bright green and slightly tender-crisp. Remove green beans and set aside with the chicken.
- Make the Sauce (The Fix for Watery Sauce!): Reduce heat to medium. Add soy sauce, honey, rice vinegar, minced garlic, grated ginger, and chicken broth to the skillet. Bring to a simmer, scraping up any browned bits from the bottom of the pan. In a small bowl, whisk together cornstarch and 2 tablespoons cold water until smooth to create a slurry.
- Thicken the Glaze: Gradually whisk the cornstarch slurry into the simmering sauce in the skillet. Continue to simmer and whisk gently for 1-2 minutes, until the sauce thickens to a glossy, syrupy glaze that coats the back of a spoon. This is the key to preventing a watery sauce!
- Glaze & Finish: Return the seared chicken thighs and cooked green beans to the skillet. Toss gently to coat everything evenly in the thick, sticky glaze. Cook for another 2-3 minutes, allowing the chicken to heat through and absorb more of that delicious glaze. The chicken is done when it reaches 165°F (74°C) in the thickest part.
- Serve: Garnish with fresh chives or green onions if desired. Serve immediately.
Notes
- Use cornstarch slurry for a perfectly thick, glossy sauce, preventing a watery result.