S’mores Hand Pies: No-Mess Gooey Perfection
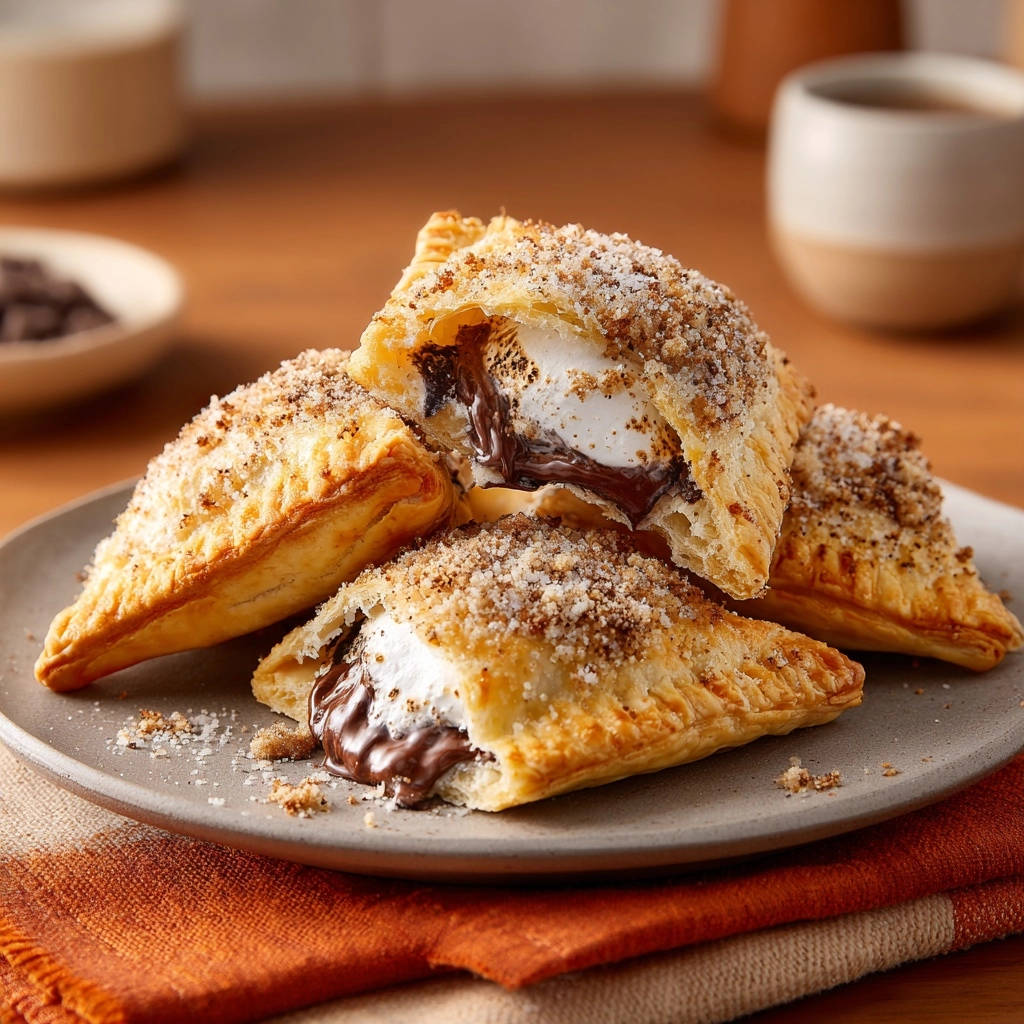
I used to dread making those adorable S’mores Hand Pies, often ending up with a sticky, exploded filling all over my baking sheet. But I finally cracked the code to keeping all that deliciousness perfectly tucked inside, transforming a messy endeavor into a foolproof recipe for these irresistible S’mores Hand Pies.
This recipe isn’t just about recreating a campfire classic; it’s about achieving perfectly sealed, golden-brown treats every single time, without the fuss or cleanup. Get ready to impress with these perfectly portioned, gooey delights.
Why Our S’mores Hand Pies Are Your New Favorite No-Mess Treat
These aren’t just any hand pies; they’re designed for stress-free baking and maximum enjoyment.
The Secret to No-Leak Filling
The frustration of leaked filling is real, especially with molten chocolate and marshmallow. Our method focuses on a meticulous sealing technique, using both egg wash and a firm fork crimp, to create an impenetrable barrier.
This ensures every bit of that gooey s’mores center stays exactly where it belongs: inside your flaky pastry, not on your baking sheet.
Quicker Than Campfire, Easier Than Cake
Forget the campfire logistics or hours spent baking elaborate desserts. Utilizing convenient store-bought puff pastry dramatically cuts down on prep time, making these S’mores Hand Pies a surprisingly simple yet impressive treat.
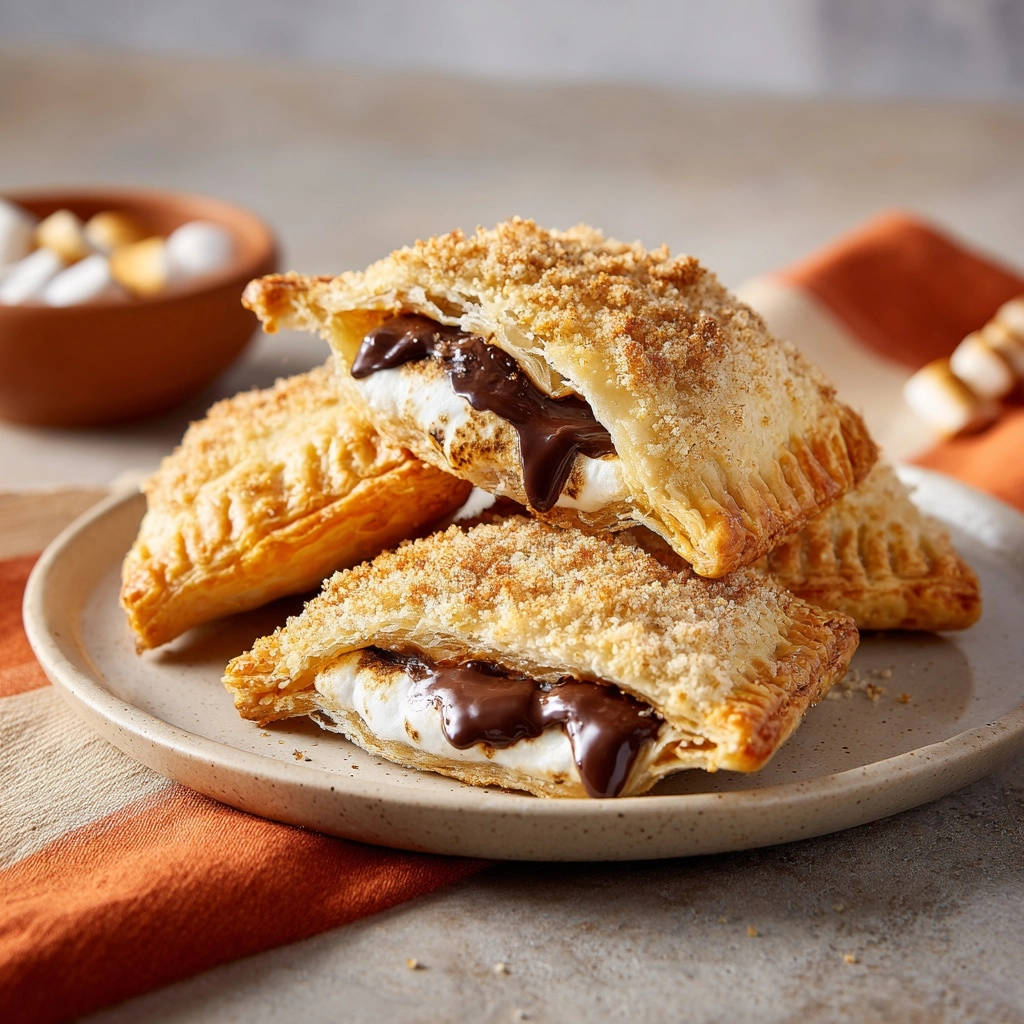
You can whip up a batch of these handheld delights in minutes, perfect for spontaneous cravings or last-minute gatherings.
A Treat for Every Occasion
Their individual size and portability make these S’mores Hand Pies incredibly versatile. They are ideal for children’s parties, convenient lunchbox treats, or an elegant addition to any dessert spread.
Whether you’re hosting or simply enjoying a quiet evening, these treats are always a crowd-pleaser.
If you love the gooey chocolate filling in these hand pies, you will enjoy the rich layers of this chocolate vanilla dream pie.
The Simple Ingredients for S’mores Hand Pies Magic
Achieving deliciousness doesn’t require a long list of obscure items. Our recipe relies on quality basics to create maximum impact.
The Foundation: Store-Bought Puff Pastry
Puff pastry is your secret weapon for incredible flakiness with minimal effort. Its numerous layers create that iconic airy, crisp texture once baked.
Ensure your pastry is fully thawed but still cold enough to work with easily, as a warm dough can become sticky and difficult to handle.
Sweet & Gooey Core: Chocolate and Marshmallows
Semi-sweet chocolate chips or finely chopped chocolate provide a rich, molten center that perfectly complements the toasted marshmallow. Chopping a chocolate bar often yields a better melt.
Large marshmallows, cut in half, or mini marshmallows are essential for that classic gooey pull. Proper placement and avoiding overfilling are key to preventing leaks.
The Flavor Finish: Graham Cracker Crumb Topping
A simple blend of graham cracker crumbs and granulated sugar provides the signature crunch and flavor of a true s’more. This mixture toasts beautifully on top of the pastry.
It adds an extra layer of texture and an undeniable aroma that elevates these hand pies to s’mores perfection.
The “Glue”: Essential Egg Wash
The beaten egg wash serves two vital functions. Firstly, it acts as a powerful adhesive, sealing the pastry edges to contain your filling.
Secondly, brushing it over the tops ensures a gorgeous, golden-brown, and slightly shiny crust, enhancing both the appearance and texture of your baked pies.
Essential Tools for Hand Pie Success
A few basic kitchen tools will make preparing these S’mores Hand Pies a breeze.
Baking Sheet & Parchment Paper: For even baking and easy cleanup.
Pizza Cutter or Sharp Knife: To precisely cut your puff pastry into squares.
Small Bowls: For mixing the topping and holding the egg wash.
Pastry Brush: Essential for applying an even layer of egg wash for sealing and browning.
Fork: The crucial tool for creating a decorative, secure crimped edge.
Crafting Perfectly Sealed S’mores Hand Pies: A Step-by-Step Guide
Follow these steps carefully for beautifully sealed, utterly delicious S’mores Hand Pies every time.
- Prepare Your Workspace and Oven:
Preheat your oven to a precise 400°F (200°C) to ensure a quick bake and flaky pastry.
Line a baking sheet with parchment paper; this prevents sticking and makes cleanup incredibly easy.
- Unroll and Cut the Pastry:
On a lightly floured surface, gently unroll the thawed puff pastry sheet.
Using a knife or pizza cutter, carefully cut the sheet into 6 equal squares. Precision here helps with uniform baking and folding.
- Mix the Topping:
In a small bowl, combine the graham cracker crumbs and granulated sugar.
Set this mixture aside; it will be sprinkled on top just before baking to give that classic s’mores flavor and crunch.
- Fill Each Pastry Square:
Place about 1 tablespoon of chocolate chips slightly off-center on one half of each pastry square.
Top the chocolate with one half of a large marshmallow (or two mini marshmallows).
Remember to avoid overfilling, as this is crucial for a successful, leak-free seal.
- Brush with Egg Wash (The Sealant):
Brush a thin, even layer of the beaten egg wash around the edges of each pastry square, particularly on the half that does not have the filling.
This egg wash acts as your adhesive, creating a strong bond that ensures the pie stays closed during baking.
- Fold and Gently Press:
Carefully fold the empty half of the pastry square over the filling, creating a neat triangle shape.
Gently press down the edges to bring the pastry together and create an initial, light seal around the filling.
- Crimp for the Ultimate Seal (Crucial Step!):
Using the tines of a fork, firmly crimp all three edges of the pastry triangle.
Press down thoroughly to create a strong, decorative seal. This is the critical step to prevent any gooey filling from escaping during baking, locking in all that delightful s’mores goodness.
- Prepare for Baking:
Carefully transfer the sealed S’mores Hand Pies to your prepared baking sheet, leaving a little space between each.
Brush the tops of each hand pie with a thin layer of the remaining egg wash for a beautiful golden finish and enhanced flakiness.
- Add the Signature Topping:
Evenly sprinkle the reserved graham cracker crumb and sugar mixture over the tops of the hand pies, adding classic s’mores flavor and a delightful textural contrast.
- Bake to Golden Perfection:
Bake for 12 to 15 minutes, or until the pastry is beautifully puffed, golden brown, and the filling is visibly melted and bubbly.
Keep an eye on them, as oven temperatures can vary.
- Cool Before Serving:
Let the hand pies cool slightly on the baking sheet before serving. The filling will be extremely hot and can cause burns if consumed immediately.
Allowing them to cool slightly also helps the filling set a bit, making them easier to handle.
For a perfect pairing, try our Chocolate Caramel Crunch Rice Krispie Treats.
Chef’s Secrets: Elevate Your S’mores Hand Pies Game
Beyond the basic steps, these expert tips will help you achieve truly outstanding S’mores Hand Pies.
Mastering the Perfect Seal: The Crimp is Key
The fork crimp isn’t just for looks; it’s your primary defense against leaks. After folding and pressing, ensure you press down firmly with the fork tines, creating distinct indentations that truly fuse the pastry layers.
Don’t be shy with this step-a weak crimp is the most common reason for a messy baking sheet.
Avoiding the Overfill Trap
It’s tempting to add extra chocolate and marshmallow, but overfilling is a direct path to leaks. The small amount specified is perfectly balanced for flavor and ensures enough pastry remains to create a secure seal.
A little less filling is always better than too much when it comes to preventing gooey escapes.
Chilling for Flaky Perfection
If your kitchen is warm or you want extra flaky pastry, consider chilling the cut pastry squares for 10-15 minutes before filling, or the assembled S’mores Hand Pies for 15-20 minutes before baking.
This re-chills the butter in the puff pastry, leading to a more pronounced puff and a beautifully crisp texture.
Visual Cues for Golden Greatness
While bake times are a guide, trust your eyes. Look for a deep golden-brown color across the entire surface of the pastry, not just the edges.
You should also see the filling bubbling slightly from any small gaps, indicating the chocolate and marshmallows are perfectly melted and gooey inside.
Troubleshooting: Solving Sticky Hand Pie Situations
Even with the best intentions, baking can throw a curveball. Here’s how to tackle common issues.
Why Your Filling Might Be Leaking
Leaks usually stem from three things: overfilling, an insufficient egg wash seal, or a weak crimp. Double-check your filling quantity and ensure your egg wash covers all edges before crimping.
Press down firmly with your fork to create deep, secure indentations that truly seal the pastry together.
When Dough Gets Too Sticky or Soft
Puff pastry can become sticky if it warms up too much. If your dough is difficult to handle, simply pop it back into the refrigerator for 10-15 minutes to firm up.
You can also lightly dust your work surface and rolling pin with a little extra flour, but use sparingly to avoid toughening the pastry.
Achieving Even Browning
If your hand pies are browning unevenly, your oven might have hot spots. Rotate your baking sheet halfway through the baking time for a more uniform golden color.
Ensure you apply an even layer of egg wash across the tops, as this helps promote consistent browning.
Serving & Storing Your Delicious S’mores Hand Pies
Knowing how to best enjoy and preserve your hand pies ensures maximum delight.
What to Serve Next
If you are making these handheld pies, you might want another dessert that uses marshmallow and chocolate in a new way.
- For a breakfast that uses the same campfire flavors, try the S’mores French Toast Stack with its crisp edges and melted chocolate center.
- For a sweet morning pastry that shares a similar cinnamon-sugar vibe, the Sugared Cinnamon Morning Buns have a crunchy base and soft, spiced interior.
Best Enjoyed Warm
S’mores Hand Pies are truly at their best when served warm, allowing the chocolate and marshmallow filling to remain wonderfully gooey. A light dusting of powdered sugar or a scoop of vanilla ice cream can be a delightful addition.
Just remember the filling will be very hot right out of the oven, so allow them to cool for a few minutes before diving in.
Smart Storage for Freshness
Store any leftover S’mores Hand Pies in an airtight container at room temperature for up to 2-3 days. While they are best fresh, they still make a delightful treat the next day.
To retain their crispness, avoid refrigerating them, as this can make the pastry soft.
Can You Make Them Ahead?
You can assemble the S’mores Hand Pies completely and freeze them unbaked. Arrange them on a parchment-lined baking sheet and freeze until solid, then transfer to a freezer-safe bag for up to 1 month.
Bake from frozen, adding a few extra minutes to the baking time, until golden brown and bubbly.
S’mores Hand Pies FAQs: Your Questions Answered
Here are some common questions about making these irresistible S’mores Hand Pies.
Can I use homemade pastry for S’mores Hand Pies?
Absolutely! If you enjoy making pastry from scratch, homemade puff pastry will yield an even richer, flakier result. Just ensure it’s well-chilled and handled gently.
However, the convenience of store-bought pastry is what makes this recipe so quick and accessible.
Are there gluten-free options for these hand pies?
Yes, you can readily find gluten-free puff pastry in many grocery stores. Additionally, ensure you use gluten-free graham cracker crumbs for the topping.
These simple substitutions will allow everyone to enjoy these delightful S’mores Hand Pies.
What other fillings can I try besides chocolate and marshmallow?
While the classic s’mores combination is divine, feel free to experiment! Try fruit preserves, thinly sliced apples with cinnamon, or a combination of cream cheese and fruit. For inspiration on fruit-based pastries, you might enjoy making some delightful raspberry crumb bars or our perfect apple crumble bars.
Just remember to keep the filling amount modest to prevent leaks, no matter what delicious flavors you choose.
How do I reheat leftover S’mores Hand Pies?
To restore their crispness and gooey center, reheat leftover hand pies in a toaster oven or conventional oven at 300°F (150°C) for 5-7 minutes.
Microwaving is not recommended, as it will make the pastry soft and lose its flaky texture.
Your Turn: Bake, Share, and Enjoy the S’mores Hand Pies Joy!
Now that you’re armed with all the secrets to perfect, no-mess S’mores Hand Pies, it’s time to get baking!
Gather your ingredients, follow our expert guide, and prepare to delight friends and family with these irresistible treats. We can’t wait to see your golden, gooey creations!
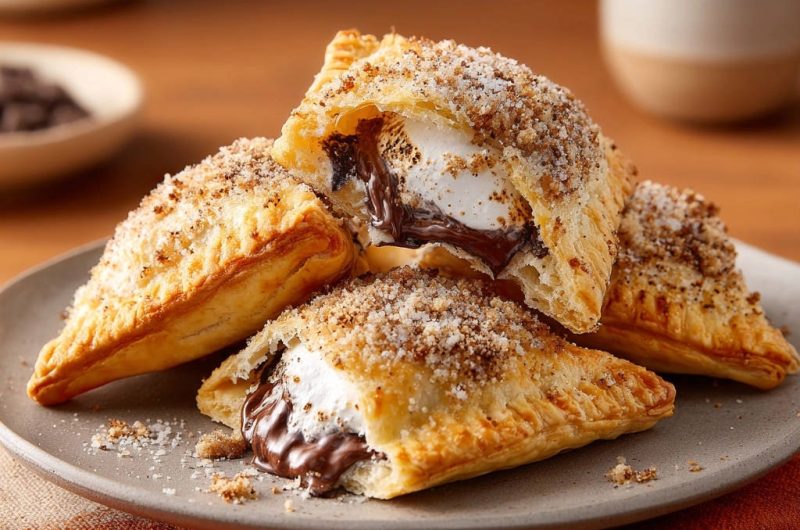
S’mores Hand Pies
Course: PastryCuisine: AmericanDifficulty: easy6
hand pies15
minutes15
minutes240
kcal30
minutesTired of messy S’mores? These easy S’mores Hand Pies tuck all the delicious chocolate and marshmallow goodness into a perfectly sealed puff pastry triangle. Learn the secret to prevent gooey explosions and enjoy neat, golden, and bubbly treats every time.
Ingredients
1 sheet store-bought puff pastry, thawed
1/2 cup semi-sweet chocolate chips or chopped chocolate
6 large marshmallows, cut in half horizontally (or 12 mini marshmallows)
1 tablespoon graham cracker crumbs
1 tablespoon granulated sugar
1 large egg, beaten (for egg wash)
Directions
- Preheat your oven to 400 degrees Fahrenheit (200 degrees Celsius). Line a baking sheet with parchment paper.
- Unroll the thawed puff pastry sheet on a lightly floured surface. Using a knife or pizza cutter, gently cut the sheet into 6 equal squares.
- In a small bowl, combine the graham cracker crumbs and granulated sugar for the topping. Set aside.
- For each pastry square, place a small amount of chocolate chips (about 1 tablespoon) slightly off-center on one half of the square. Top the chocolate with one half of a large marshmallow (or two mini marshmallows). Avoid overfilling.
- Brush a thin layer of the beaten egg wash around the edges of the pastry square, particularly on the half that does not have the filling. This egg wash acts as your glue.
- Carefully fold the empty half of the pastry square over the filling, creating a triangle shape. Gently press down the edges to seal.
- Using the tines of a fork, firmly crimp all three edges of the pastry triangle. Press down thoroughly to create a strong seal that will help prevent any filling from escaping during baking. This is the crucial step to lock in all that gooey goodness.
- Transfer the sealed hand pies to the prepared baking sheet. Brush the tops of each hand pie with a thin layer of the remaining egg wash.
- Sprinkle the graham cracker crumb and sugar mixture evenly over the tops of the hand pies.
- Bake for 12 to 15 minutes, or until the pastry is puffed, golden brown, and the filling is melted and bubbly.
- Let the hand pies cool slightly on the baking sheet before serving. The filling will be very hot.
Notes
- Crucial step: firmly crimp edges with a fork to prevent filling from escaping. Let cool slightly before serving as filling is very hot.