Spooky Fun Cupcakes: Fluffy, Festive & Fail-Proof!
I remember countless times struggling with cupcakes that turned out dense or disappointingly dry, a common frustration for home bakers. But I’ve cracked the code to making these delightful Spooky Fun Cupcakes consistently light and fluffy, every single batch. This recipe transforms ordinary baking into a magical experience, ensuring perfectly tender treats for any occasion.
Why These Spooky Fun Cupcakes Are a Must-Bake This Season
Effortlessly Light & Fluffy: Our “Never Dense” Promise
Say goodbye to heavy, brick-like cupcakes. Our carefully crafted batter, with a focus on proper creaming and gentle mixing, guarantees an airy, tender crumb that melts in your mouth. This isn’t just about taste; it’s about achieving that coveted bakery-quality texture right in your own kitchen.
Unleash Your Inner Witch (or Wizard!): Creative Decorating Fun
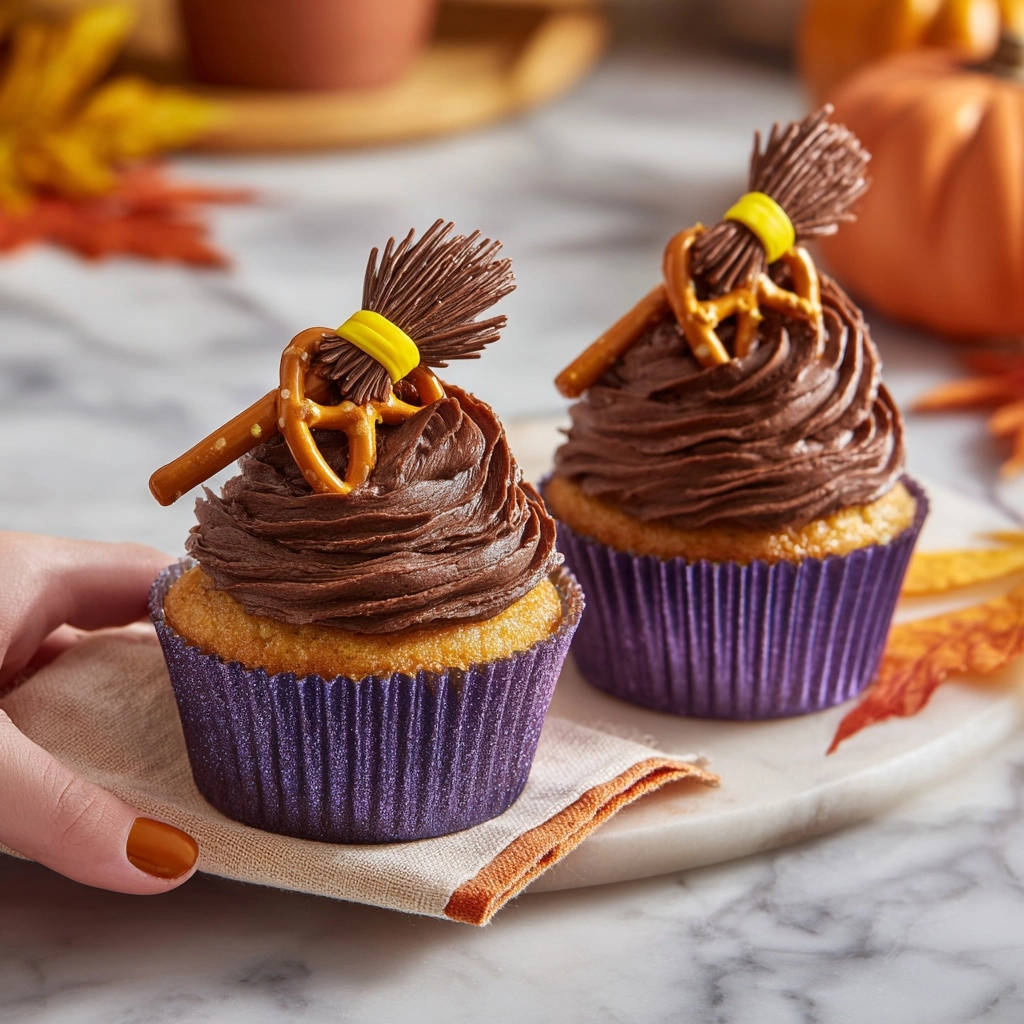
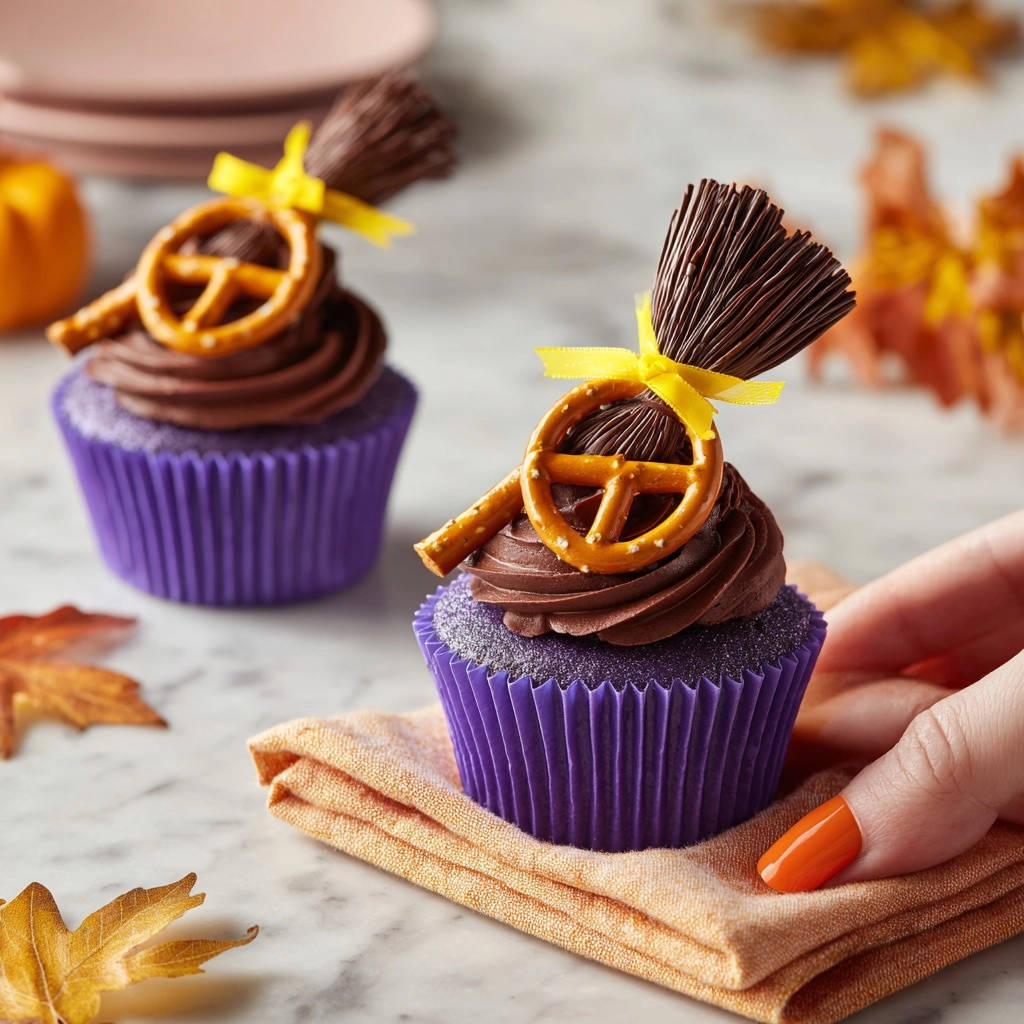
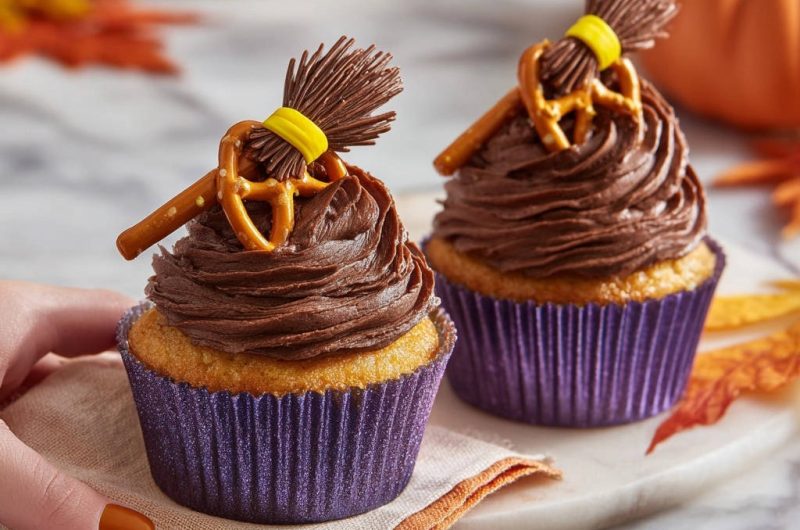
What sets these apart are the whimsical, edible broomstick decorations. They’re surprisingly simple to create, adding an enchanting touch that makes these Spooky Fun Cupcakes a showstopper. It’s an easy way to elevate your treats from delicious to truly magical.
Simple Steps, Spectacular Results: Perfect for All Skill Levels
Whether you’re a seasoned baker or just starting, this recipe breaks down each stage into clear, actionable steps. The impressive final presentation belies the straightforward process, making it an ideal choice for anyone looking to bake something special without stress.
Gather Your Spellbinding Supplies: What You’ll Need
For the Heavenly Spooky Cupcake Base
These ingredients are the foundation of your fluffy cupcakes. Ensure your dairy and eggs are at room temperature for optimal emulsion and a smooth batter.
- 1 1/2 cups all-purpose flour
- 1 1/2 teaspoons baking powder
- 1/4 teaspoon salt
- 1/2 cup (1 stick) unsalted butter, softened
- 1 cup granulated sugar
- 2 large eggs, at room temperature
- 1 teaspoon vanilla extract
- 1/2 cup milk, at room temperature
Rich & Creamy Chocolate Frosting Essentials
The perfect balance of butter, cocoa, and sugar creates a velvety smooth frosting. Sifting the powdered sugar is key for a lump-free consistency.
- 1/2 cup (1 stick) unsalted butter, softened
- 1/2 cup unsweetened cocoa powder
- 3 cups powdered sugar, sifted
- 1/4 cup milk or heavy cream
- 1 teaspoon vanilla extract
- Pinch of salt
Crafting Magical Broomstick Decorations
These simple items come together to create eye-catching edible brooms, adding a unique festive flair to your cupcakes.
- 12 small pretzel sticks
- 1/2 cup chocolate melting wafers or chocolate chips
- 1/4 cup yellow melting wafers or yellow candy melts
Your Witch’s Kitchen Arsenal: Essential Baking Tools
Standard 12-Cup Muffin Tin: The cornerstone for perfect cupcake batches.
Paper Liners: For easy serving and cleanup, plus a neat presentation.
Electric Mixer (Stand or Handheld): Crucial for properly creaming butter and sugar to achieve that airy texture.
Mixing Bowls: Several sizes for dry and wet ingredients.
Whisk & Spatulas: For combining ingredients gently and scraping down bowls.
Wire Rack: Essential for cooling cupcakes completely before frosting.
Piping Bags (or Ziploc Bag with Snipped Corner): For precise chocolate broom shapes.
Parchment Paper: For easy removal of chocolate decorations and a clean workspace.
Whip Up Some Magic: Step-by-Step Spooky Fun Cupcakes Guide
Prepping for Perfection: Oven & Liners
Preheat your oven to 350°F (175°C) to ensure it’s at the correct temperature when the batter is ready. Line a 12-cup muffin tin with paper liners, preparing your base for the cupcakes to prevent sticking and aid in cleanup.
Dry Ingredients Ready
In a medium bowl, whisk together the flour, baking powder, and salt until well combined. This ensures even distribution of leavening agents for a consistent rise and prevents pockets of unmixed ingredients in your final cake.
Mastering the Batter: The Secret to Fluffiness
In a large bowl, using an electric mixer, cream the softened butter and granulated sugar together for 2 to 3 minutes, until the mixture is visibly light and fluffy. This step is absolutely crucial as it incorporates a significant amount of air, which is the foundation for wonderfully tender and airy cupcakes.
Egg & Vanilla Integration
Beat in the eggs one at a time, mixing well after each addition to fully incorporate them into the butter mixture. Stir in the vanilla extract, ensuring it’s evenly distributed for a rich, aromatic flavor throughout the batter.
Gentle Mixing: The Anti-Density Rule
With the mixer on low speed, gradually add the dry ingredients to the wet ingredients in three additions, alternating with the milk. Always begin and end with the dry ingredients. Mix only until just combined after each addition. Be extremely careful not to overmix the batter; overmixing develops gluten, which is the primary culprit behind tough and dense cupcakes. Stop as soon as no dry streaks of flour remain, even if it looks slightly lumpy.
Filling the Cups
Divide the batter evenly among the prepared muffin cups, filling each about two-thirds full. This allows ample room for them to rise without overflowing, ensuring beautifully domed cupcakes.
Baking Your Batches: Timing & Doneness
Bake for 18 to 22 minutes, or until a wooden skewer inserted into the center of a cupcake comes out clean. Keep a close eye on them, as oven temperatures can vary and overbaking can lead to dry cupcakes.
Cooling Completely
Let the cupcakes cool in the muffin tin for a few minutes to firm up slightly before transferring them to a wire rack to cool completely. It’s essential that cupcakes are fully cool before frosting; warm cupcakes will instantly melt your beautiful frosting into a sticky mess.
Crafting the Velvety Chocolate Frosting
While cupcakes cool, prepare the chocolate frosting. In a large bowl, cream the softened butter until smooth. Gradually beat in the cocoa powder, then the sifted powdered sugar, alternating with the milk or heavy cream, until smooth and creamy. Stir in the vanilla extract and a pinch of salt to enhance the flavors. Adjust consistency as needed: if the frosting is too thick, add a little more milk; if too thin, add more powdered sugar.
Frosting the Cupcakes
Once cupcakes are completely cool, frost generously with the velvety chocolate frosting. A piping bag can give a more professional and swirled look, but a knife or offset spatula works beautifully for a rustic charm. For another delightful treat, consider trying these decadent pumpkin pie truffles which also benefit from a smooth, rich coating.
Bringing Your Brooms to Life: Spooky Decor Details (Chocolate Broom Heads)
Melt the chocolate melting wafers according to package directions. Spoon the melted chocolate into a small piping bag or a ziptop bag with the corner snipped. On parchment paper, pipe small broom shapes (a small rectangle for the handle, then zigzags for the bristles). Let these set completely; they will firm up quickly, especially if your room is cool.
Assembling the Broomsticks
Melt the yellow melting wafers according to package directions. Dip one end of a pretzel stick into the yellow melted candy. Immediately attach one of the cooled chocolate broom heads to the pretzel stick where the yellow candy is still soft, creating the “broom” effect. The yellow candy acts as edible glue, securing the chocolate piece.
Final Flourish: Decorating Your Spooky Fun Cupcakes
Carefully insert a decorated pretzel broom into the top of each frosted cupcake. Arrange them artfully for a truly spooky display that will delight all your guests!
Unlock the Enchantment: Chef’s Secrets for Perfect Spooky Fun Cupcakes
The Golden Rule of Creaming: Don’t Rush It! The 2-3 minutes of creaming butter and sugar until light and fluffy is not just a suggestion; it’s the foundation for incorporating air. This aeration is key to preventing dense cupcakes, so give it the full time it needs to achieve that pale, fluffy texture.
The Delicate Dance of Mixing: Avoid Overworking. Once flour is added, mix only until just combined. Overmixing activates gluten, leading to a tough, chewy texture. It’s better to have a few streaks of flour remaining than an overmixed batter; any streaks will disappear during baking.
Room Temperature Ingredients: A Small Detail, Big Impact. Ensure your butter, eggs, and milk are at room temperature. This allows them to emulsify properly, creating a smooth, cohesive batter that bakes evenly and results in a better, more consistent texture. Cold ingredients can cause the batter to curdle.
Cooling Completely: Patience is a Virtue (and Prevents Melting!). It bears repeating: wait until your cupcakes are absolutely, completely cool before frosting. Even slight warmth will cause your beautiful frosting to melt and slide off, ruining your presentation. This is just as important as the perfect cooling for a delicate dessert like peach cupcakes.
Sifting Powdered Sugar: No Lumps Allowed! For the silkiest, smoothest chocolate frosting, always sift your powdered sugar. This removes any lumps that can make your frosting grainy or difficult to spread, ensuring a professional-quality finish.
Practice Your Piping: For Picture-Perfect Brooms. If you’re new to piping, do a quick test on a spare piece of parchment paper before making all your chocolate broom heads. It helps to get a feel for the consistency and how the chocolate flows, giving you confidence for the actual decorations.
Banishing Baking Blunders: Troubleshooting Your Spooky Fun Cupcakes
Cupcakes Came Out Dense or Dry?
This is usually due to overmixing the batter after the flour was added. Remember, mix only until no dry streaks remain, as excess mixing develops gluten. It could also be from using cold ingredients, which don’t emulsify properly, leading to a less cohesive batter.
Another common culprit is overbaking. Keep a close eye on your oven and test for doneness with a wooden skewer; remove them promptly once it comes out clean, as even a minute too long can dry them out.
Frosting Too Runny or Stiff?
If your frosting is too runny, gradually add more sifted powdered sugar, a tablespoon at a time, mixing well after each addition, until it reaches the desired consistency. For frosting that’s too stiff, add a tiny bit more milk or cream, half a teaspoon at a time, until it’s perfectly spreadable and smooth.
Decorations Not Setting or Breaking?
Ensure your chocolate broom heads are fully set and firm before handling or attaching to pretzels. If your kitchen is warm, you can pop them into the fridge for 5-10 minutes to speed up setting. Be gentle when attaching the broom heads to the pretzel sticks to prevent breakage, as they can be delicate.
Enjoying Your Hauntingly Delicious Creations
Best Ways to Serve Your Spooky Fun Cupcakes
These Spooky Fun Cupcakes are an absolute hit for Halloween parties, school events, or simply as a fun family baking project. Arrange them on a festive platter to showcase their adorable broomstick decorations. Pair them with a spooky punch, hot cider, or a ghostly milkshake for the ultimate autumnal treat spread.
Keeping Them Fresh: Storage Tips
Store frosted cupcakes in an airtight container at room temperature for up to 2-3 days, ensuring they stay moist and delicious. If your home is particularly warm, or for slightly longer storage (up to 5 days), you can store them in the refrigerator, but allow them to come to room temperature for about 30 minutes before serving for the best texture and flavor.
Plan Ahead for Spooky Success: Make-Ahead Options
The cupcakes can be baked a day in advance and stored unfrosted in an airtight container at room temperature. The chocolate broomstick decorations are quite stable and can be made up to a week in advance, stored carefully in an airtight container at room temperature. Frosting is best made fresh or a day before, stored in the fridge, then whipped briefly before use to restore its creamy texture.
Your Spooky Fun Cupcakes Questions Answered!
Can I make these gluten-free?
Yes, you can substitute the all-purpose flour with a 1:1 gluten-free baking flour blend. Ensure your chosen blend contains xanthan gum, or add 1/2 teaspoon per cup of flour if it doesn’t. The texture might be slightly different but will still yield delicious cupcakes.
Can I use a different frosting flavor?
Absolutely! While chocolate is a classic spooky choice, you could use a vibrant vanilla buttercream, a tangy cream cheese frosting, or even a brightly colored orange or green frosting to enhance the Halloween theme. Just ensure it’s a stable frosting that can hold the pretzel broom decorations.
Are there other decoration ideas?
Get creative! Besides the broomsticks, you could add candy eyes for monster cupcakes, gummy worms peeking out of the frosting, mini chocolate chips for “spider eggs,” or simply sprinkle with festive Halloween sprinkles. A dusting of cocoa powder or green sugar can also add a subtle spooky effect without extra effort.
How far in advance can I make the broom decorations?
The chocolate broom heads and assembled pretzel brooms can be made up to a week in advance. Store them carefully in a single layer in an airtight container at room temperature, away from direct sunlight or heat, until ready to use. This makes decorating day much less stressful!
Share Your Spooky Fun Cupcakes Masterpiece!
Now that you’re armed with the secrets to perfectly light, fluffy, and festive Spooky Fun Cupcakes, it’s time to unleash your inner baker! We’d love to see your hauntingly delicious creations. Snap a picture and share it with us on social media using #SpookyFunCupcakes. What’s your favorite part about baking for Halloween? Let us know in the comments below!
If you enjoyed this recipe, don’t forget to check out our other chocolate-themed treats and desserts for more inspiration for your next ghoulish gathering or any sweet occasion!
Cupcakes
Course: DessertCuisine: AmericanDifficulty: medium12
cupcakes40
minutes20
minutes150
kcal60
minutesDiscover the secret to perfectly light and fluffy cupcakes every time. These delightful chocolate cupcakes are topped with creamy frosting and adorable pretzel broom decorations, making them the ultimate spooky treat for any occasion.
Ingredients
For the Cupcakes:
1 1/2 cups all-purpose flour
1 1/2 teaspoons baking powder
1/4 teaspoon salt
1/2 cup (1 stick) unsalted butter, softened
1 cup granulated sugar
2 large eggs, at room temperature
1 teaspoon vanilla extract
1/2 cup milk, at room temperature
For the Chocolate Frosting:
1/2 cup (1 stick) unsalted butter, softened
1/2 cup unsweetened cocoa powder
3 cups powdered sugar, sifted
1/4 cup milk or heavy cream
1 teaspoon vanilla extract
Pinch of salt
For the Decorations:
12 small pretzel sticks
1/2 cup chocolate melting wafers or chocolate chips
1/4 cup yellow melting wafers or yellow candy melts
Directions
- Preheat your oven to 350F (175C). Line a 12-cup muffin tin with paper liners.
- In a medium bowl, whisk together the flour, baking powder, and salt. Set aside.
- In a large bowl, using an electric mixer, cream the softened butter and granulated sugar together for 2 to 3 minutes, until the mixture is visibly light and fluffy. This step is crucial as it incorporates air, which is essential for a tender crumb in your cupcakes.
- Beat in the eggs one at a time, mixing well after each addition. Stir in the vanilla extract.
- With the mixer on low speed, gradually add the dry ingredients to the wet ingredients in three additions, alternating with the milk. Begin and end with the dry ingredients. Mix only until just combined after each addition. Be careful not to overmix the batter; overmixing develops gluten, which can lead to tough and dense cupcakes. Stop as soon as no dry streaks of flour remain.
- Divide the batter evenly among the prepared muffin cups, filling each about two-thirds full.
- Bake for 18 to 22 minutes, or until a wooden skewer inserted into the center of a cupcake comes out clean.
- Let the cupcakes cool in the muffin tin for a few minutes before transferring them to a wire rack to cool completely. Cupcakes must be fully cool before frosting.
- While cupcakes cool, prepare the chocolate frosting. In a large bowl, cream the softened butter until smooth. Gradually beat in the cocoa powder, then the sifted powdered sugar, alternating with the milk or heavy cream, until smooth and creamy. Stir in the vanilla extract and a pinch of salt. If the frosting is too thick, add a little more milk; if too thin, add more powdered sugar.
- Once cupcakes are completely cool, frost generously with the chocolate frosting.
- To create the broom decorations: Melt the chocolate melting wafers according to package directions. Spoon the melted chocolate into a small piping bag or a ziptop bag with the corner snipped. On parchment paper, pipe small broom shapes (a small rectangle for the handle, then zigzags for the bristles). Let set.
- Melt the yellow melting wafers according to package directions. Dip a pretzel stick into the yellow melted candy, then attach one of the cooled chocolate broom heads to the pretzel stick where the yellow candy is still soft, creating the “broom” effect.
- Carefully insert a decorated pretzel broom into the top of each frosted cupcake.
Notes
- The crucial creaming step ensures light and fluffy cupcakes. Do not overmix the batter.