Christmas Shortbread Fingers: Melt-in-Your-Mouth Holiday Bliss
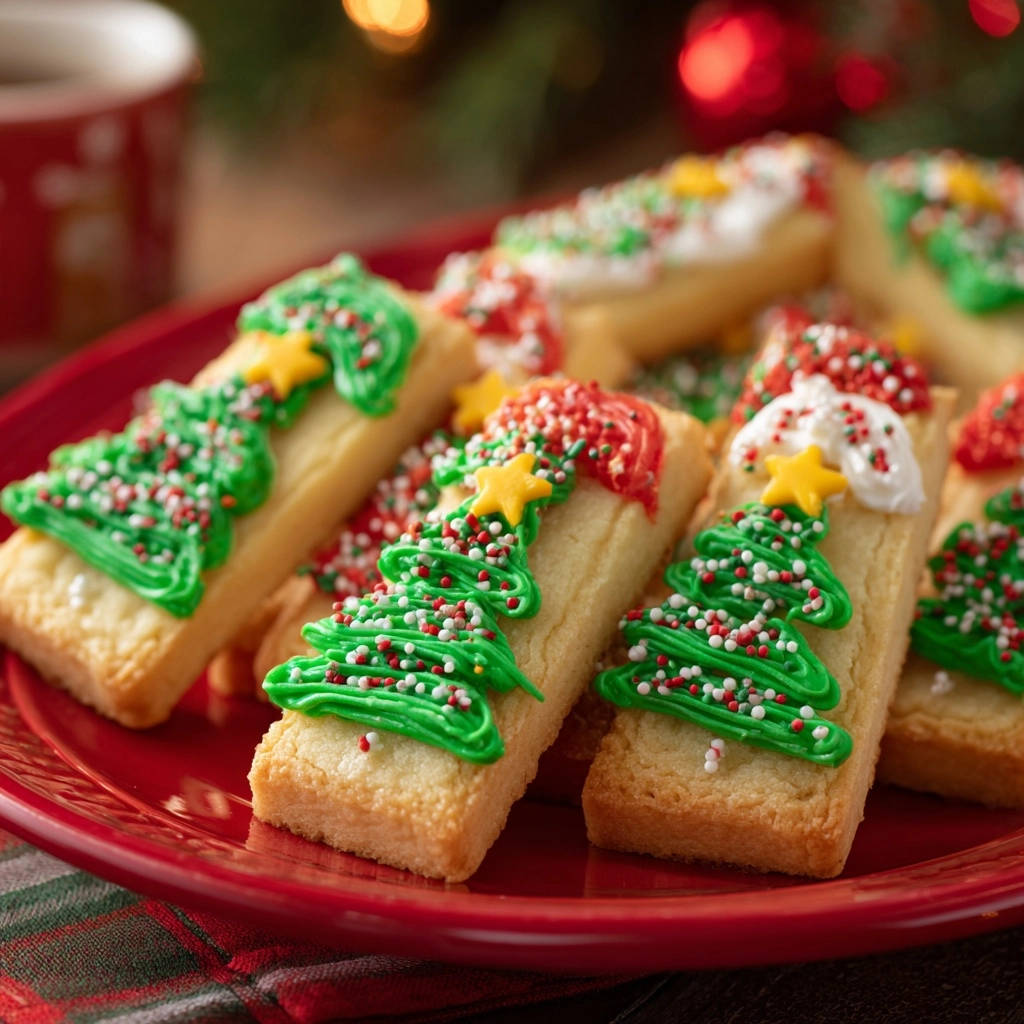
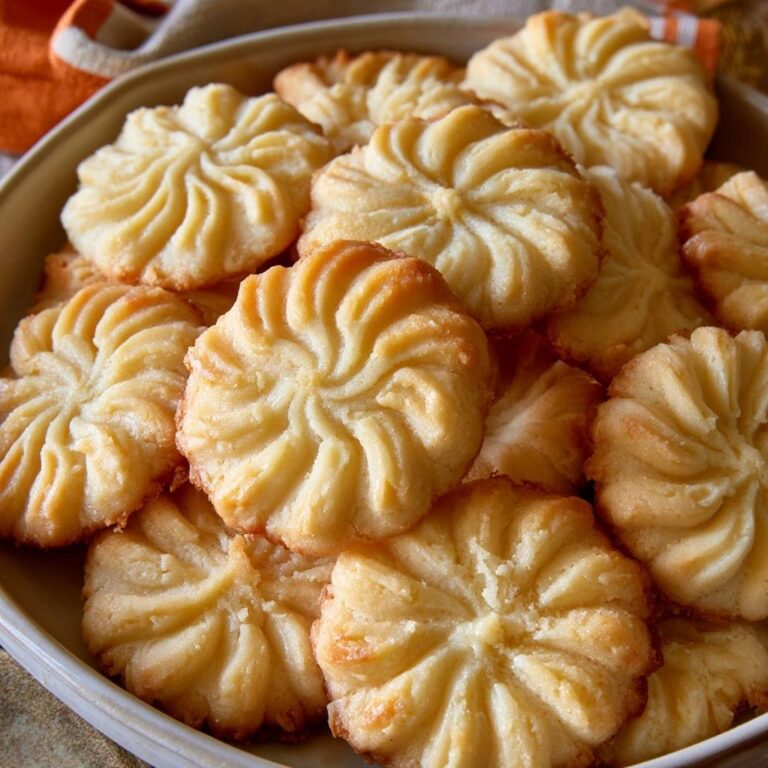
There’s nothing quite like homemade shortbread to evoke the spirit of the holidays, yet achieving that elusive melt-in-your-mouth tender texture can often feel like a challenge. I’ve certainly faced my share of crumbly or tough batches over the years, but after much experimentation, I finally cracked the code to truly perfect Christmas Shortbread Fingers. This recipe consistently delivers that buttery, classic texture, making holiday baking genuinely stress-free and wonderfully rewarding.
Why These Christmas Shortbread Fingers Will Be Your Holiday Go-To
This isn’t just another shortbread recipe; it’s designed for consistent success and unparalleled flavor. From its incredible texture to its ease of preparation, these Christmas Shortbread Fingers are poised to become a staple in your festive baking repertoire.
The Melt-in-Your-Mouth Texture Secret
The secret to this shortbread’s remarkable tenderness lies in precise ingredient ratios and careful technique. We emphasize proper creaming of butter and sugar to incorporate essential air, combined with a strict “no overmixing” rule for the flour. This prevents gluten development, ensuring your shortbread remains delightfully crumbly and never tough.
Effortless Holiday Baking: A Breeze for Busy Seasons
Holiday baking shouldn’t add stress, and this recipe for classic shortbread fingers ensures it won’t. Its straightforward steps and reliable outcome make it perfect for busy schedules, allowing you to whip up impressive treats with minimal fuss.
You can achieve consistently perfect results every single time, freeing you up to enjoy the festive season rather than stressing over your bakes.
A Recipe That Always Delivers Rave Reviews
Prepare for compliments! The rich, buttery flavor and delicate texture of these shortbread cookies are universally loved. They’re perfect for gifting, cookie exchanges, or simply enjoying with a warm cup of tea by the fire.
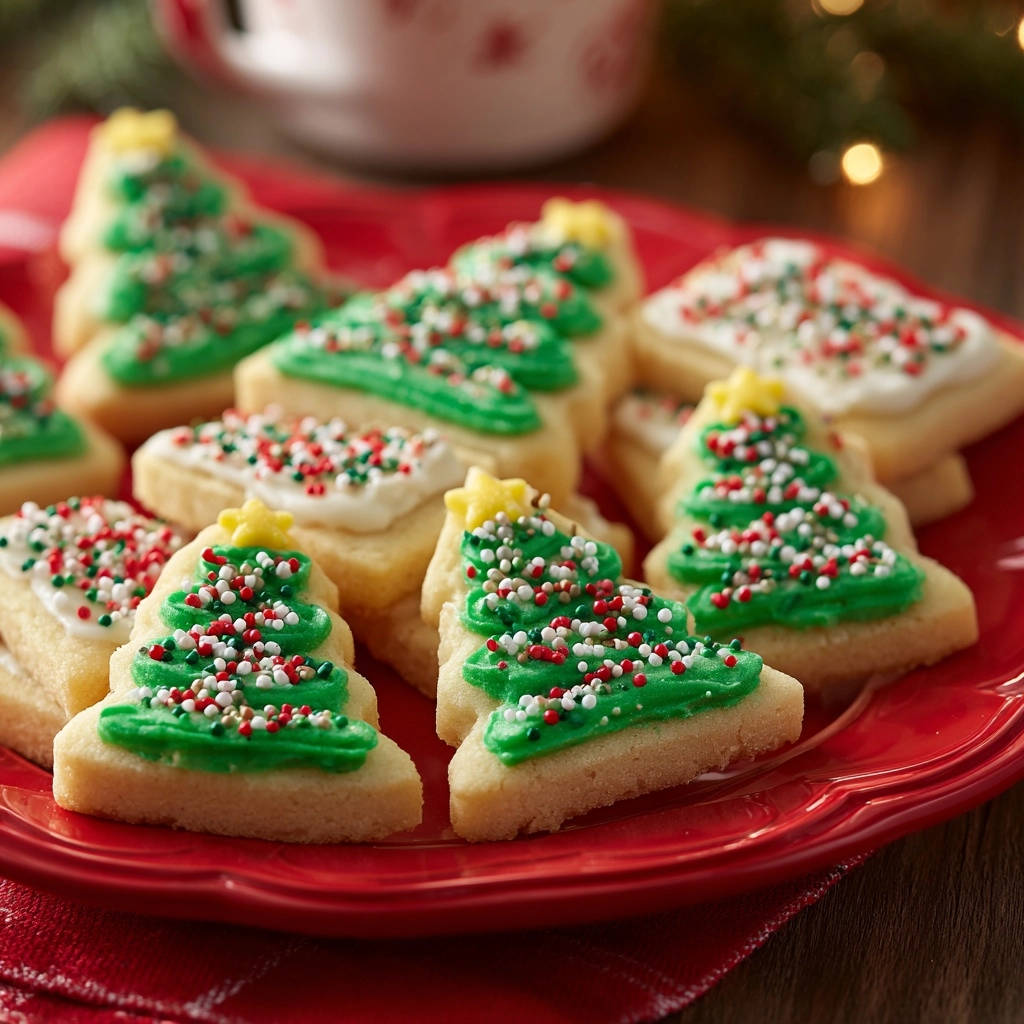
This recipe guarantees a delightful experience for anyone who tastes them, solidifying your reputation as a masterful holiday baker.
The Simple Ingredients for Irresistibly Tender Shortbread
Creating extraordinary shortbread starts with understanding the role of each high-quality ingredient. Each component plays a vital part in achieving that signature melt-in-your-mouth quality.
The Heart of the Butter: Quality Matters
Unsalted butter is the cornerstone of this recipe, providing the rich, authentic flavor and tender texture characteristic of classic shortbread. Using unsalted butter allows you to control the salt content precisely.
Ensuring the butter is properly softened is crucial; it creams more effectively with the sugar, incorporating air that is vital for light shortbread.
Sweetness & Structure: Sugar and Flour Essentials
Granulated sugar provides the perfect balance of sweetness and contributes to the delicate crispness of the shortbread. All-purpose flour is ideal for this recipe, offering just enough structure without making the cookies tough.
The ratio of flour to butter is key for achieving the correct dough consistency and final tender crumb.
The Flavor Enhancers: Salt & Vanilla
A touch of salt is essential; it balances the sweetness of the sugar and truly enhances the buttery flavor of the shortbread. Vanilla extract adds a warm, inviting aroma and a depth of flavor that complements the richness of the butter.
Festive Toppings: Icing & Decorations
Powdered sugar forms the base of our simple, pourable icing, while milk or water adjusts its consistency for perfect piping. Green and red food coloring bring festive cheer, transforming simple shortbread into beautiful Christmas Shortbread Fingers.
Assorted Christmas sprinkles and yellow star candies provide the final enchanting sparkle, making each cookie a mini work of art.
Essential Tools for Shortbread Baking Success
Having the right equipment at hand streamlines the baking process and contributes to perfect results. These tools are common kitchen staples, making this recipe accessible to everyone.
Basic Baking Essentials
Electric Mixer: Crucial for creaming butter and sugar until light and fluffy, incorporating the necessary air.
Large and Medium Bowls: Needed for mixing wet and dry ingredients separately before combining.
Baking Sheet & Parchment Paper: Ensures even baking and prevents sticking, making cleanup a breeze.
Measuring Tools: Accurate cups and spoons are vital for consistent shortbread texture.
Fork: Used to prick the dough, preventing air bubbles and creating the traditional shortbread look.
Decorating Made Easy
Piping Bags & Small Round Tips: Allow for precise application of icing for detailed festive designs. A simple zip-top bag with a snipped corner works equally well for easy decorating.
Small Bowls: Handy for dividing and tinting the icing with different food colorings.
Crafting Your Christmas Shortbread Fingers: A Step-by-Step Guide
Follow these detailed steps carefully to achieve tender, buttery shortbread that will impress everyone.
- Prepare Your Workspace:
Preheat your oven to 325 degrees Fahrenheit (160°C). Line a baking sheet with parchment paper to ensure easy removal and clean-up.
- Cream the Butter and Sugar:
In a large bowl, using an electric mixer, combine the softened unsalted butter and granulated sugar. Beat them together until the mixture is light, fluffy, and pale in color, typically taking 3-5 minutes.
Remember to scrape down the sides of the bowl as needed to ensure even creaming. This crucial step incorporates air, which is vital for achieving that desired tender texture.
- Incorporate Vanilla:
Add the vanilla extract to the creamed butter and sugar mixture. Beat until it is just well combined, ensuring the flavor is evenly distributed.
- Whisk Dry Ingredients:
In a separate, medium-sized bowl, whisk together the all-purpose flour and salt. This pre-mixing ensures these dry components are evenly distributed throughout the dough.
- Combine Wet and Dry:
Gradually add the flour mixture to the butter mixture. Mix on low speed, just until the ingredients are combined and a thick dough forms. It’s critical not to overmix at this stage.
Overworking the dough develops gluten, which will make your shortbread tough instead of wonderfully tender and crumbly.
- Shape the Dough:
Gently press the dough evenly into an ungreased 9×13 inch baking pan, or for finger shapes as shown, press it into a rectangular shape about 1/2 inch thick directly onto your parchment-lined baking sheet.
- Prick the Surface:
Use a fork to prick the surface of the dough all over. This prevents air bubbles from forming during baking and helps create the classic shortbread appearance.
- Bake to Perfection:
Bake for 20-25 minutes, or until the edges are lightly golden and the center is set but still pale. The key to truly tender shortbread is to avoid overbaking; it should remain light in color.
- Cut While Warm:
Remove the shortbread from the oven and immediately, while it’s still warm, cut it into individual fingers or your desired shapes using a sharp knife.
Allow the cut shortbread to cool completely on the baking sheet before moving on to decorating.
Unlocking the Secret to Perfectly Decorated Shortbread Fingers
Once your beautifully baked shortbread is cool, the real holiday magic begins with the festive icing and decorations.
Icing Consistency is Key
Achieving the right icing consistency is crucial for smooth piping and even coverage. You want it pourable enough to flow, but thick enough to hold its shape when piped. Adjust with tiny amounts of liquid or powdered sugar until it drips slowly from a spoon.
Festive Colors and Designs
Dividing your icing and tinting it with vibrant green and red food coloring allows for endless creative possibilities. Don’t forget to leave some white for classic “snow” effects, providing a lovely contrast on your Christmas Shortbread Fingers.
Adding the Sparkle: Immediate Decoration
Timing is everything when it comes to sprinkles and candies. Decorate immediately after piping the icing, while it’s still wet. This ensures that all your festive adornments adhere beautifully before the icing sets.
- Prepare the Icing:
In a medium bowl, whisk together the powdered sugar and 3-4 tablespoons of milk or water until the mixture is smooth and pourable, yet still thick enough to pipe. Adjust liquid sparingly until desired consistency is reached.
- Color Your Icing:
Divide the prepared icing into separate bowls. Tint each bowl with green and red food coloring as desired for a festive palette. You may also choose to leave some white for “snow” effects.
- Decorate with Precision:
Once the shortbread cookies are completely cool, transfer the tinted icings to piping bags fitted with small round tips, or simply use zip-top bags with a corner snipped off.
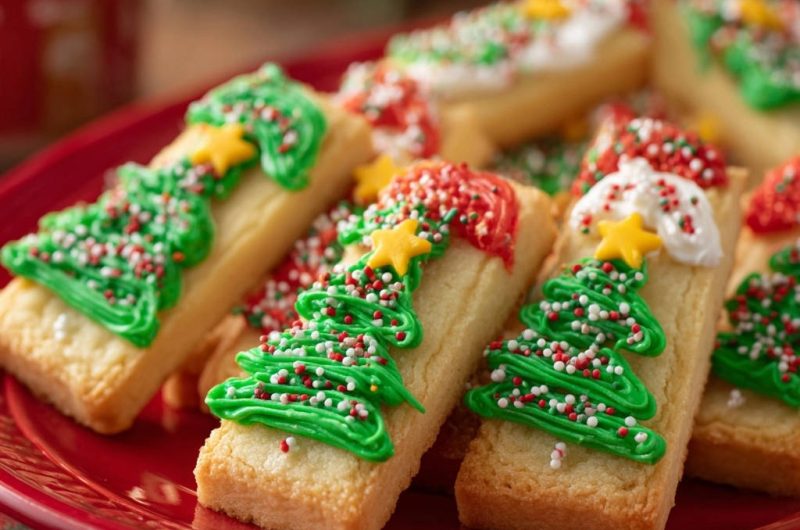
Pipe Christmas tree shapes onto the cookies with green icing, and add red or white icing for snow, ornaments, or other festive designs as you wish.
- The Final Sparkle:
Immediately after piping, decorate your cookies with assorted Christmas sprinkles and yellow star candies. Act quickly before the icing begins to set.
- Allow Icing to Set:
Allow the icing to fully set and harden on the cookies before storing them. This prevents smudging and ensures your beautiful designs remain intact.
Expert Tips for Melt-in-Your-Mouth Christmas Shortbread
Beyond the recipe steps, these insights will elevate your shortbread from good to truly exceptional, ensuring a consistently tender and buttery result every time.
The Art of Creaming Butter Properly
Softened butter is non-negotiable for tender shortbread. Creaming it with sugar for the full 3-5 minutes isn’t just about combining ingredients; it’s about incorporating air. This aeration creates a lighter, more delicate crumb that truly melts in your mouth.
Mastering the Mix: No Tough Cookies Here!
When adding the flour, mix on the lowest speed possible and stop as soon as it’s just combined. Overmixing develops gluten in the flour, which leads to a tough, chewy shortbread rather than a tender, crumbly one. Less is more here!
The Golden Rule of Baking: Don’t Overbake!
Overbaking is the enemy of tender shortbread. Your Christmas Shortbread Fingers should emerge from the oven with only lightly golden edges and a center that is set but still quite pale. Removing them at this stage ensures they retain their delicate texture.
Prick for Perfection
Pricking the dough all over with a fork before baking serves a dual purpose. It allows steam to escape, preventing large air bubbles from forming, and it also contributes to the classic, rustic appearance of traditional shortbread.
Cooling Completely for Best Results
Patience is key! Allowing the shortbread to cool completely on the baking sheet before decorating or storing is crucial. This helps the cookies firm up properly, preventing crumbling when handled and ensuring your icing sets beautifully without smudging.
Troubleshooting Common Shortbread Hiccups
Even seasoned bakers encounter challenges. Here are solutions to common shortbread issues, ensuring your Christmas Shortbread Fingers turn out perfectly.
Why is my shortbread crumbly?
If your shortbread is too crumbly, it might be due to too much flour, not enough butter, or insufficient pressing of the dough into the pan. Ensure your measurements are precise and firmly press the dough to help it bind together.
Why is my shortbread tough?
The primary culprit for tough shortbread is overmixing the dough, especially after adding the flour. Overworking the dough develops gluten, leading to a chewy rather than tender texture. Mix just until combined, and no more.
My shortbread spread too much!
Excessive spreading can occur if your butter was too soft, almost melted, before creaming. Ensure your butter is simply softened, not greasy. An oven that’s too cool can also contribute to spreading; confirm your oven temperature with an oven thermometer.
Icing not setting or too thin/thick?
If your icing is too thin, gradually whisk in more powdered sugar until the desired consistency is reached. If it’s too thick, add a tiny amount (1/4 teaspoon at a time) of milk or water until it’s perfectly pourable but still pipeable. Patience is key when adjusting consistency.
Preserving Your Holiday Bliss: Storage & Make-Ahead Tips
Proper storage ensures your beautiful and delicious Christmas Shortbread Fingers remain fresh and delightful for as long as possible. Planning ahead can also make holiday baking even easier.
Storing Baked Shortbread Fingers
Once the icing has fully set, store your decorated Christmas Shortbread Fingers in an airtight container at room temperature. Layer them between sheets of parchment paper to prevent sticking and smudging. They will stay fresh and delicious for up to 1 week.
Freezing for Later Enjoyment
Baked, undecorated shortbread freezes exceptionally well. Wrap cooled shortbread tightly in plastic wrap, then aluminum foil, and store in a freezer-safe bag for up to 3 months. Thaw at room temperature before decorating.
You can also freeze the decorated cookies, though there’s a slight risk of colors bleeding. Freeze on a tray until solid, then transfer to an airtight container layered with parchment paper. Thaw in the refrigerator.
Make-Ahead Dough Convenience
The shortbread dough can be made ahead of time. Wrap it tightly in plastic wrap and refrigerate for up to 3 days, or freeze for up to 1 month. If refrigerated, let it come to room temperature for easier pressing. If frozen, thaw in the refrigerator overnight before use.
Your Top Christmas Shortbread Finger Questions Answered
Here are answers to common questions, designed to help you confidently bake these delightful holiday treats.
Can I make these Christmas Shortbread Fingers gluten-free?
Yes, you can substitute the all-purpose flour with a 1:1 gluten-free baking flour blend that contains xanthan gum. The texture may be slightly different, but the flavor will remain delicious. It’s a great way to enjoy other festive sweet treats with dietary considerations.
How long do Christmas Shortbread Fingers stay fresh?
When stored in an airtight container at room temperature, these shortbread fingers will stay fresh and tender for about 5-7 days. Beyond that, they might start to lose some of their optimal texture, though they’ll still be tasty.
Can I freeze the dough or baked cookies?
Absolutely! The unbaked dough can be wrapped tightly and refrigerated for up to 3 days or frozen for up to 1 month. Baked, undecorated shortbread also freezes well for up to 3 months. For decorated cookies, freeze them solid on a tray first to prevent smudging, then transfer to an airtight container.
What’s the best way to cut them evenly?
For uniform Christmas Shortbread Fingers, you can lightly score the dough before baking, creating guides for where to cut. Alternatively, use a ruler and a sharp knife immediately after removing them from the oven while they are still warm to ensure clean, precise cuts.
Can I use salted butter instead of unsalted?
While unsalted butter is preferred for precise salt control, you can use salted butter. If you do, omit the 1/4 teaspoon of added salt from the recipe. Be aware that the salt content in salted butter can vary between brands.
Share the Joy: Your Christmas Shortbread Fingers Await!
Baking these Christmas Shortbread Fingers is more than just following a recipe; it’s about creating cherished holiday memories and sharing delicious moments. This recipe, with its guaranteed melt-in-your-mouth texture and effortless preparation, will quickly become a beloved part of your festive traditions.
So gather your ingredients, turn on some holiday tunes, and prepare to fill your home with the inviting aroma of buttery goodness. Once you try these, you’ll see why they’re the ultimate holiday shortbread, perfect for gifting, sharing, or simply savoring yourself. If you’re looking for other delightful desserts to share during the holidays, you might also love our decadent pumpkin pie truffles or a zesty lemon bundt cake to complete your festive spread.
Shortbread Fingers
Course: DessertCuisine: BritishDifficulty: easy24
fingers25
minutes25
minutes60
kcal50
minutesThis foolproof recipe for Christmas Shortbread Fingers consistently delivers melt-in-your-mouth tender and perfectly buttery shortbread, making holiday baking a breeze. Learn the secrets to avoiding crumbly or tough results for a classic texture every single time.
Ingredients
1 cup (2 sticks) unsalted butter, softened
1/2 cup granulated sugar
2 cups all-purpose flour
1/4 teaspoon salt
1 teaspoon vanilla extract
For the Icing:
2 cups powdered sugar
3-4 tablespoons milk or water
Green food coloring
Red food coloring
Yellow star candies
Assorted Christmas sprinkles
Directions
- Preheat your oven to 325 degrees Fahrenheit. Line a baking sheet with parchment paper.
- In a large bowl, using an electric mixer, cream together the softened butter and granulated sugar until light and fluffy. This should take about 3-5 minutes, scraping down the sides of the bowl as needed. The air incorporated here is important for achieving that tender texture.
- Beat in the vanilla extract until well combined.
- In a separate bowl, whisk together the all-purpose flour and salt.
- Gradually add the flour mixture to the butter mixture, mixing on low speed just until combined. Do not overmix! Overworking the dough will develop the gluten and make your shortbread tough instead of wonderfully tender. The dough will be thick.
- Gently press the dough evenly into an ungreased 9×13 inch baking pan, or roll it out on a lightly floured surface to about 1/2 inch thickness. For the finger shapes seen in the image, press the dough into a rectangular shape about 1/2 inch thick on your parchment lined baking sheet.
- Prick the surface of the dough all over with a fork.
- Bake for 20-25 minutes, or until the edges are lightly golden and the center is set but still pale. The key to truly tender shortbread is not to overbake it; it should remain light in color.
- Remove from the oven and immediately, while warm, cut into individual fingers or desired shapes. Let them cool completely on the baking sheet before decorating.
- To make the icing, in a medium bowl, whisk together the powdered sugar and milk or water until smooth and pourable, but still thick enough to pipe.
- Divide the icing into separate bowls and tint with green and red food coloring. You can also leave some white.
- Once the cookies are completely cool, transfer the icings to piping bags with small round tips (or use a zip-top bag with a corner snipped off). Pipe Christmas tree shapes with green icing onto the cookies. Add red or white icing for snow or other festive designs.
- Immediately decorate with sprinkles and yellow star candies before the icing sets.
- Allow the icing to fully set before storing the cookies in an airtight container at room temperature.
Notes
- Do not overmix the dough to keep shortbread tender. Avoid overbaking; shortbread should remain pale. Ensure cookies are completely cool before decorating.