Halloween Pretzel Ghosts: The No-Seize White Chocolate Secret
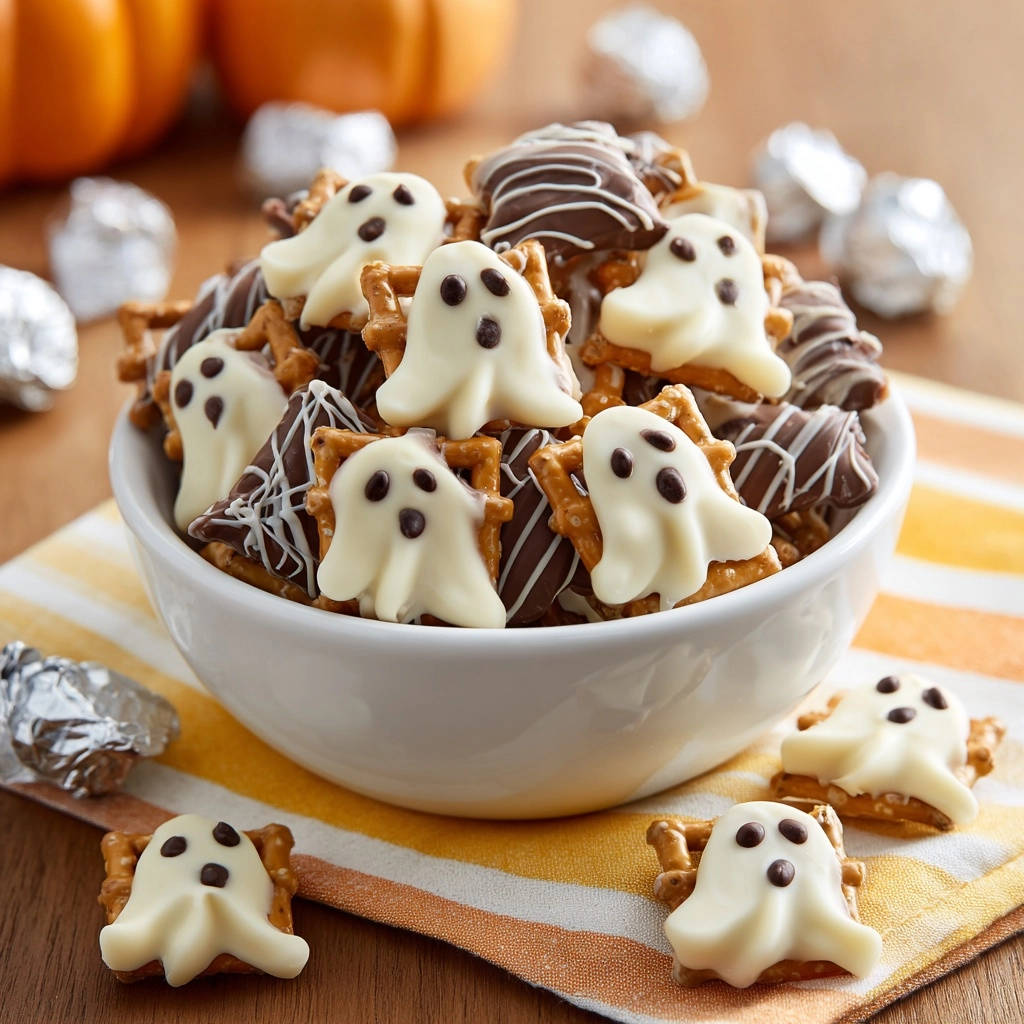
Every year, I hear the same stories: excited bakers, armed with pretzels and chocolate, only to be met with a frustrating, clumpy mess. It’s truly a common culinary nightmare, and I’ve certainly experienced it myself! But after years of perfecting holiday treats, I’ve developed a foolproof method for making truly exceptional Halloween Pretzel Ghosts that ensures your white chocolate melts perfectly smooth, every single time.
This recipe isn’t just about crafting adorable, picture-perfect spooky snacks; it’s about banishing the dreaded seized chocolate forever. Get ready to create a batch of these delightful ghost treats with confidence, impressing everyone with their flawless finish and irresistible crunch.
Why These Halloween Pretzel Ghosts Will Be Your Family’s Favorite Treat
These adorable Halloween Pretzel Ghosts are incredibly simple to make, making them an ideal project for busy families or a last-minute addition to any spooky gathering. The quick turnaround time means you can whip up a batch in under an hour, perfect for unexpected guests or a fun afternoon activity with the kids.
What truly sets this recipe apart is the ingenious trick for achieving perfectly smooth, no-seize white chocolate. This solves the most common frustration home bakers face, guaranteeing a beautiful, glossy coating without any lumps or grit.
Beyond their ease and flawless execution, these ghostly pretzels are undeniably cute. Their charming faces and crispy texture make them a universal crowd-pleaser, appealing to all ages as a festive and fun Halloween snack.
Gathering Your Ghostly Essentials: The Ingredients List
The Crunchy Canvas: Square Pretzels
Square pretzels are the ideal choice for this recipe because their flat, broad surface easily accommodates the ghost shape, providing the perfect “body” for your spooky creations.
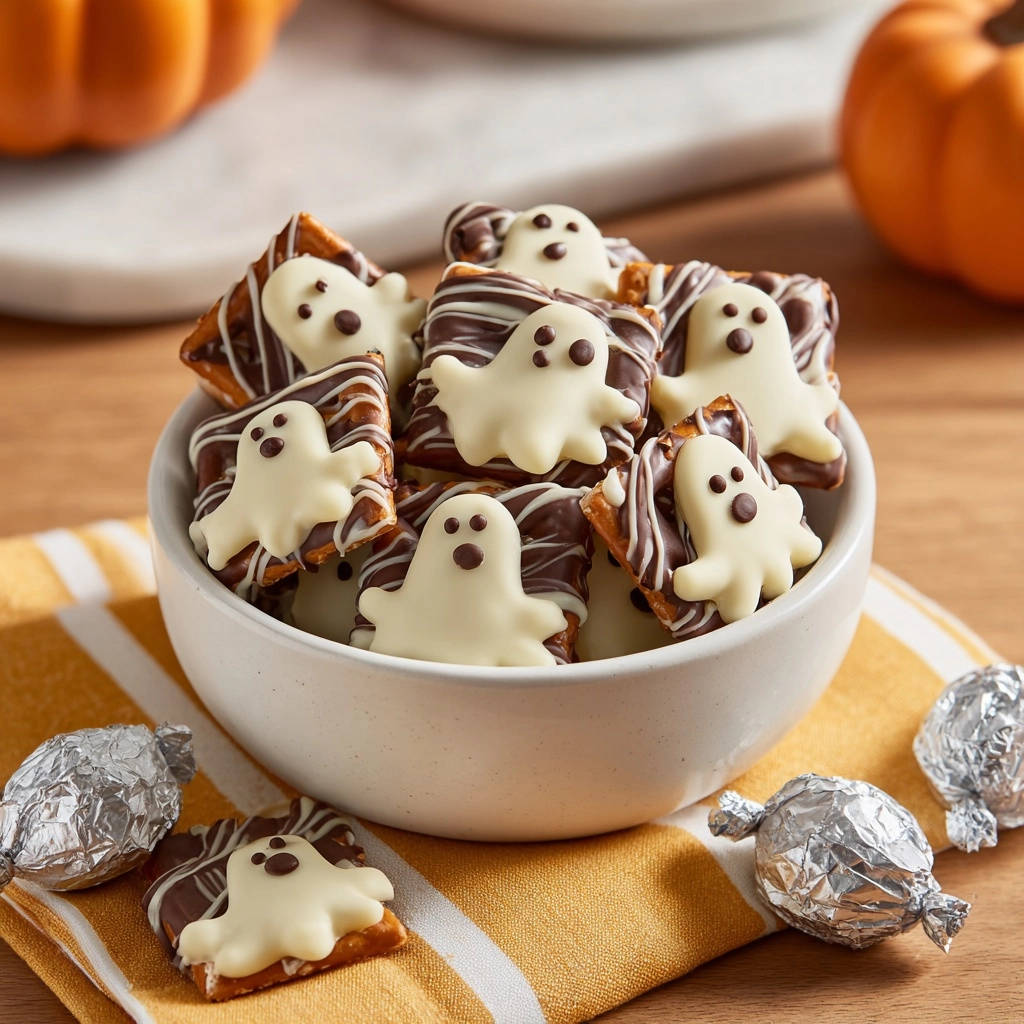
While square pretzels are best for the ghost aesthetic, you could use pretzel rods for “mummies” or even mini pretzel twists for a different look. However, the distinct ghost shape will be less prominent with alternative forms.
Crafting the Perfect Melt: White Chocolate & Candy Melts
You have a choice between white candy melts, designed for easy melting, or good quality white chocolate chips. Candy melts offer a consistent, smooth finish, while quality white chocolate chips provide a richer, more authentic chocolate flavor.
Choosing high-quality ingredients here significantly impacts both the taste and the melt consistency. Better quality chocolate melts more predictably and offers a superior flavor profile for your Halloween Pretzel Ghosts.
This same principle of ingredient quality applies directly to achieving that silky smooth texture in white chocolate pretzel almond bark.
The Magic Touch: Vegetable Oil or Shortening Explained
Vegetable oil or shortening plays a crucial role in preventing your white chocolate from seizing, which is when it turns thick and clumpy. This addition ensures a fluid, pourable consistency perfect for dipping.
The fat content in the oil or shortening helps stabilize the chocolate by thinning it slightly and acting as an emulsifier. This prevents the cocoa solids from clumping together when exposed to small amounts of moisture or heat, which is the common cause of seizing.
Bringing Faces to Life: Mini Chocolate Chips
Mini chocolate chips are perfectly sized for creating expressive ghost faces, serving as both the eyes and the mouth. Their small size allows for precise placement and delightful details.
For alternative edible decorations, you might consider using edible food markers to draw faces, tiny candy eyes, or even small sprinkles to give your ghosts unique personalities.
Optional Flair: Dark Chocolate for Extra Spookiness
Dark chocolate chips offer fantastic versatility for adding an extra layer of visual appeal and flavor. They can be used for dipping half a pretzel or drizzled for a marbled effect.
The rich, slightly bitter notes of dark chocolate provide a delightful contrast to the sweet white chocolate, enhancing the overall taste experience of your Halloween Pretzel Ghosts.
Tools of the Trade: Equipping Your Kitchen for Ghostly Fun
Baking Sheets & Parchment Paper: Essential for a non-stick surface and easy setting, ensuring your Halloween Pretzel Ghosts don’t stick and making cleanup a breeze.
Microwave-Safe Bowls: Ideal for controlled and gradual melting of the chocolates. Using multiple bowls allows you to melt white and dark chocolate separately without cross-contamination or flavor transfer.
Dry Spatula or Spoon: Crucial for stirring chocolate without introducing moisture. Even a tiny drop of water can cause chocolate to seize instantly, making a dry utensil non-negotiable.
Small Tongs or Fork: These tools facilitate easy and clean dipping of pretzels into the melted chocolate. They allow excess chocolate to drip off cleanly, preventing pooling around your finished ghosts.
Your Step-by-Step Path to Flawless Halloween Pretzel Ghosts
- Prepare Your Workspace:
Line a baking sheet with parchment paper or wax paper. This crucial first step ensures your Halloween Pretzel Ghosts won’t stick, providing a smooth surface for setting and making for super easy cleanup after decorating.
- Master the No-Seize White Chocolate Melt:
In a microwave-safe bowl, combine your white candy melts or white chocolate chips with the vegetable oil or shortening. Microwave at 50% power in 30-second intervals, stirring vigorously with a completely dry spatula after each interval. This gradual, low-power approach, combined with the added fat, is the secret to a perfectly smooth, stable, and pourable chocolate that won’t seize.
- Dip Your Ghostly Shapes:
Carefully dip each square pretzel into the melted white chocolate, ensuring it’s fully coated. Gently lift it out, letting any excess chocolate drip back into the bowl for a cleaner finish, then place it onto your prepared baking sheet.
- Bring Ghosts to Life with Faces:
While the white chocolate is still wet (this is key!), carefully place two mini chocolate chips for eyes and one for a mouth on each pretzel. The wet chocolate will secure them firmly in place as it sets, creating adorable ghost faces that won’t slide off.
- Continue Dipping & Maintain Consistency:
Repeat the dipping and decorating process with your remaining pretzels. If your white chocolate starts to thicken during this process, microwave it for an additional 10-15 seconds at 50% power and stir until smooth again to maintain its ideal dipping consistency.
- Optional Dark Chocolate Melt:
If you’re adding an extra touch, melt the dark chocolate chips in a separate microwave-safe bowl using the same 50% power, 30-second interval method, stirring between each until smooth. This ensures the dark chocolate is equally well-tempered and easy to work with.
- Add Dark Chocolate Details:
Dip half of a few remaining pretzels into the melted dark chocolate, or drizzle it over some white chocolate-dipped pretzels with a fork for a marbled, spooky effect. This step adds both visual appeal and a rich flavor contrast, making some of your Halloween Pretzel Ghosts extra special.
- Set and Firm Up Your Treats:
Allow all your Halloween Pretzel Ghosts and any additional dipped pretzels to set completely. You can let them firm up at room temperature, or for quicker results, chill them in the refrigerator for about 15 to 20 minutes until solid and easy to handle.
- Serve and Enjoy:
Once firm, peel your perfectly smooth, non-seized spooky treats from the parchment paper. They are now ready to be served and enjoyed, bringing a delightful crunch and festive spirit to your Halloween celebration!
Chef’s Corner: Expert Tips for Pretzel Ghost Perfection
Don’t Rush the Melt: Patience is key when melting chocolate. The 50% power and short intervals prevent overheating, which is a common cause of seizing and clumping, ensuring a smooth, consistent melt.
Moisture is the Enemy: Ensure all your bowls, spatulas, and spoons are completely dry before they touch the chocolate. Even a tiny drop of water can cause chocolate to seize instantly, ruining your perfect melt.
Work Efficiently: Have all your ingredients and tools ready and organized before you start melting the chocolate. Working quickly while the chocolate is at its ideal consistency makes dipping and decorating much smoother and prevents the chocolate from setting prematurely.
Get Creative with Ghost Faces: Use a toothpick to gently adjust the mini chocolate chips or create slightly different expressions for your ghosts. You can also use other small candies or edible pens for varied and whimsical designs, giving each ghost a unique personality.
Organize for Success: Lay out your pretzels on the baking sheet before dipping them. This streamlines the process and ensures you can quickly place the chocolate chips for faces before the white chocolate coating has a chance to set.
Optimal Storage for Freshness: Once fully set, store your Halloween Pretzel Ghosts in an airtight container at room temperature for up to a week. This helps maintain their crisp crunch and prevents the chocolate from blooming, keeping them looking and tasting their best.
Solving Spooky Snags: Common Pretzel Ghost Troubleshooting
“My White Chocolate Seized!” – The Quick Fix
If your chocolate has turned clumpy, the most likely culprits are water exposure or overheating. Our recipe proactively addresses this by using vegetable oil or shortening during melting, which acts as an emulsifier to stabilize the chocolate. If it still seizes, double-check that your utensils are absolutely dry and that you are melting at 50% power in short, controlled bursts.
Chocolate Too Thick? Here’s What to Do
If your melted chocolate becomes too thick for easy dipping, it usually means it has cooled slightly or was under-thinned. Microwave it for just 5-10 seconds at 50% power and stir well to re-liquify. If still too thick, you can add another 1/4 teaspoon of vegetable oil or shortening, one increment at a time, until the desired pourable consistency is reached.
Eyes Sliding Off? Timing is Everything!
The key to securely attaching the mini chocolate chip eyes and mouth is to place them while the white chocolate coating is still wet. If they’re sliding, your chocolate may have started to set too quickly. Work in smaller batches or re-warm your chocolate slightly if it has cooled too much, ensuring optimal adhesion.
Pretzels Breaking? Gentle Handling & Tools
Pretzels can be quite fragile, especially when wet with chocolate. To minimize breakage, use a small, two-pronged fork or a pair of tongs with very gentle pressure for dipping and lifting. Don’t overload your tool, and always be delicate when placing the coated pretzels onto the parchment paper.
Beyond the Dip: Serving, Storage, and Make-Ahead Magic
Creative Ways to Serve Your Ghostly Gang
Arrange your Halloween Pretzel Ghosts artistically on a spooky-themed platter, perhaps nestled among some decadent pumpkin pie truffles, to create an eye-catching centerpiece for your party spread.
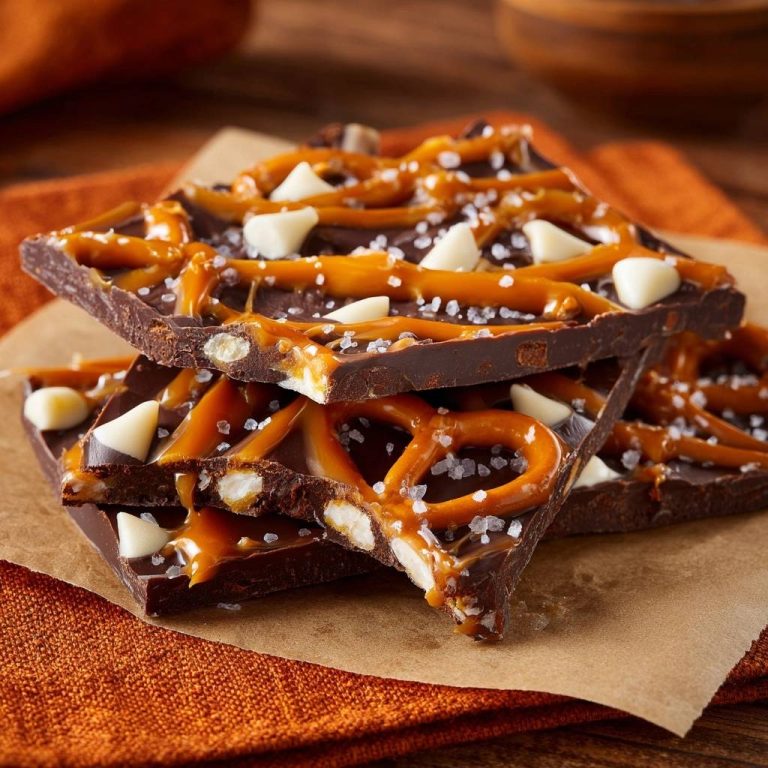
If you love the salty-sweet crunch in these pretzel ghosts, try this salty pretzel pecan chocolate bark for another quick treat.
For festive party favors or individual trick-or-treat handouts, bag them individually in small cellophane bags tied with orange or black ribbon. They make a charming and delicious takeaway.
These adorable ghosts can also be used as fun, edible decorations for other Halloween desserts. Perch them on top of cupcakes, cakes, or even a spooky punch bowl rim for added visual flair.
Keeping Your Treats Fresh: Storage Solutions
Once fully set and firm, store your Halloween Pretzel Ghosts in an airtight container at room temperature for up to one week. This preserves their crisp texture and prevents the chocolate from absorbing ambient moisture.
For longer storage or if you live in a warmer climate, you can keep them in the refrigerator. However, for optimal flavor and texture, allow them to come to room temperature briefly before serving.
Planning Ahead: Make-Ahead for Stress-Free Spookiness
These Halloween Pretzel Ghosts are an ideal make-ahead treat, perfect for preparing several days in advance. This frees up valuable time closer to your event, allowing you to focus on other party preparations.
Their stable chocolate coating ensures they remain fresh, crunchy, and delicious for days. Simply store them as directed, and they’ll be ready for any spontaneous ghoulish gathering.
Your Burning Questions Answered: Halloween Pretzel Ghosts FAQ
Can I use different types of pretzels for this recipe?
While square pretzels lend themselves perfectly to the ghost shape, you can absolutely experiment! Pretzel rods can be dipped to create “mummy” shapes, or pretzel twists can be half-dipped for a different look. Just note that the classic ghost effect will be less prominent with other shapes.
Are there dairy-free or vegan options available?
Yes, absolutely! Many brands now offer excellent dairy-free white chocolate chips or candy melts that work wonderfully as a direct substitute. Simply use these in place of the regular white chocolate in the recipe, and always check ingredient labels to ensure they meet your specific dietary needs.
How do I color the white chocolate without it seizing?
To color white chocolate without causing it to seize, you must use oil-based food coloring. Water-based gel or liquid food colorings will introduce moisture and cause the chocolate to clump instantly. Add the oil-based color sparingly, stirring until your desired ghostly hue is achieved.
What if I don’t have a microwave to melt the chocolate?
No problem at all! You can easily melt the chocolate using a double boiler method. Place your microwave-safe bowl (with the chocolate and oil/shortening) over a saucepan of simmering water, ensuring the bottom of the bowl does not touch the water. Stir constantly until smooth and melted, then proceed with the recipe.
Unleash Your Inner Monster: Spooky Pretzel Variations
Mummy Pretzels: Dip pretzels in white chocolate, then use a fork or piping bag to drizzle thin lines of white chocolate back and forth across them like bandages. Add candy eyes peeking out from the “bandages” to finish the look.
Pumpkin Patch Pretzels: Use orange candy melts for the base instead of white. Once set, use a green edible food marker or a small amount of green melted chocolate to draw a stem and leaves at the top of each pretzel for a cute pumpkin effect.
Monster Pretzels: Dip pretzels in various vibrant colored candy melts like green, purple, or orange for a truly monstrous display. Once slightly set, add different sized candy eyes or colorful sprinkles to create quirky, one-eyed monsters or multi-eyed creatures.
Sparkly Bats: Dip pretzels in dark chocolate, then immediately sprinkle with edible black or silver glitter while the chocolate is still wet. These can make fantastic companions to your chewy pumpkin chocolate chip blondies for a complete Halloween spread.
Ready to Delight? Share Your Spooky Success!
There you have it – the ultimate guide to creating utterly adorable and perfectly flawless Halloween Pretzel Ghosts, complete with the secret to smooth, no-seize white chocolate. These delightful treats are not just incredibly easy to make; they’re a guaranteed hit with kids and adults alike, bringing a touch of homemade magic to any Halloween celebration.
What to Serve with Your Halloween Pretzel Ghosts
These sweet-salty pretzel ghosts work well alongside a hearty meal or as part of a dessert spread. Here are two recipes that balance the chocolate and white chocolate flavors.
- Pair the pretzel ghosts with Creamy Beef Meatball Shells for a filling dinner contrast – the rich tomato sauce and tender meatballs offset the sugary white chocolate coating.
- For a double-dessert option, slice into Frosted Chocolate Walnut Cake alongside the ghosts; the nutty crunch and dark cocoa frosting create a satisfying texture mix with the crunchy pretzels.
We’d love to see your hauntingly good creations! Snap a photo of your Halloween Pretzel Ghosts and share them on social media, tagging us. Don’t forget to leave a comment below and let us know how your spooky baking adventure turned out. Happy Halloween, and happy ghost-making!
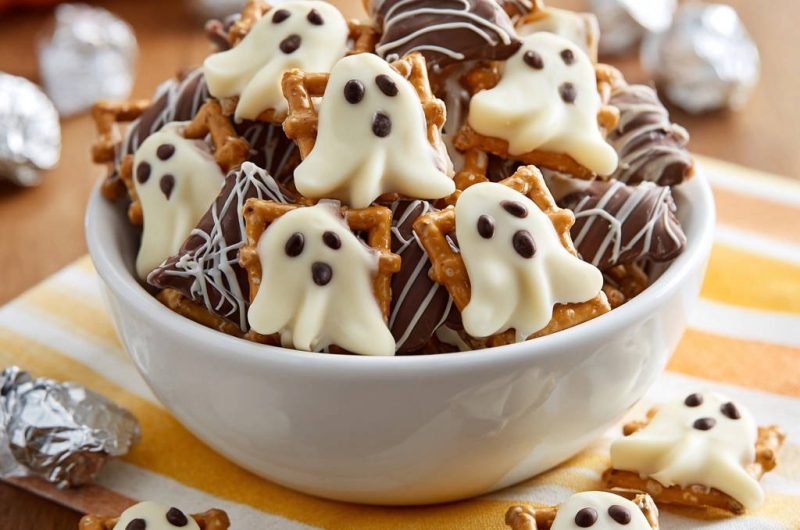
Pretzel Ghosts
Course: SnacksCuisine: AmericanDifficulty: easy4
(approx. 50-70 ghosts)15
minutes240
kcal35
minutesCreate adorable Halloween Pretzel Ghosts with ease. This recipe reveals the simple trick to achieve perfectly smooth, non-seizing white chocolate for picture-perfect spooky treats every time.
Ingredients
1 bag (about 12 ounces) square pretzels
12 ounces white candy melts or good quality white chocolate chips
1 tablespoon vegetable oil or shortening
1/4 cup mini chocolate chips
4 ounces dark chocolate chips (optional, for dipping and drizzling)
Directions
- Prepare a baking sheet by lining it with parchment paper or wax paper.
- For the perfect smooth white chocolate that won’t seize: Place white candy melts or white chocolate chips in a microwave safe bowl. Add the vegetable oil or shortening. Microwave on 50% power for 30 second intervals, stirring well after each interval with a dry spatula. Continue this process until the chocolate is completely smooth and melted. The added oil or shortening helps stabilize the chocolate and prevents it from seizing, giving you a beautiful pourable consistency for your ghosts.
- Dip each square pretzel into the melted white chocolate, ensuring it is fully coated. Gently lift it out, letting any excess drip off, and place the coated pretzel back onto the prepared baking sheet.
- While the white chocolate is still wet, carefully add two mini chocolate chips for eyes and one for a mouth to create the ghost face.
- Repeat with remaining pretzels and white chocolate. If your white chocolate starts to thicken as you work, microwave again for 10 to 15 seconds at 50% power and stir until smooth again.
- (Optional) For the dark chocolate drizzled pretzels: Melt dark chocolate chips in a separate microwave safe bowl using the same 50% power, 30 second interval method, stirring between each, until smooth.
- Dip half of a few remaining pretzels into the dark chocolate, or drizzle the dark chocolate over some white chocolate dipped pretzels with a fork for a marbled effect.
- Let the pretzel ghosts and any additional dipped pretzels set completely at room temperature, or chill in the refrigerator for about 15 to 20 minutes until firm.
- Serve and enjoy your perfectly smooth, non-seized spooky treats!
Notes
- The addition of vegetable oil or shortening is key to prevent white chocolate from seizing, ensuring a smooth coating.