Cheesy Chicken Mac Bake: Never Dry, Always Creamy
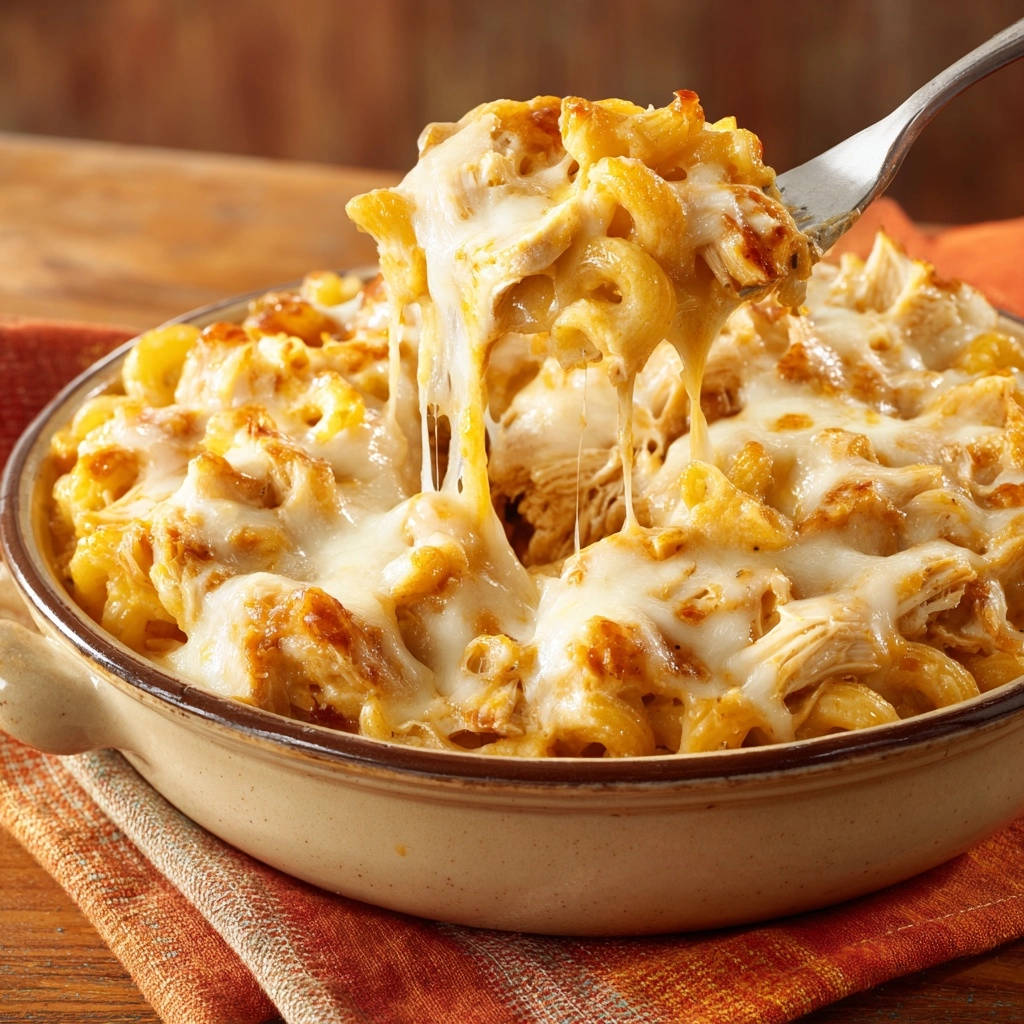
There’s nothing more disappointing than craving a warm, comforting Cheesy Chicken Mac Bake, only to bite into dry chicken that ruins the whole dish. I’ve been there, and I’ve cracked the code to keeping that chicken perfectly juicy and tender, even after baking.
This recipe provides the ultimate solution, ensuring incredible creamy, cheesy goodness with not a single dry bite, making it the perfect family meal or cozy night in.
Why This Cheesy Chicken Mac Bake Will Be Your New Go-To
This Cheesy Chicken Mac Bake stands out because it guarantees luscious, moist chicken every time, solving the common issue of dry casserole. My unique method infuses the chicken with flavor and moisture before baking, ensuring tender bites throughout.
Pairings for Your Cheesy Chicken Mac Bake
This Cheesy Chicken Mac Bake is a hearty, creamy main dish. The sides you choose should either match its cheesy richness or offer a nice contrast in texture.
- For another layer of cheesy, comforting texture, the Cheesy Shredded Potato Casserole has a crispy golden top and a soft center that fits right in with this meal.
- If you want something with a crisp crust to scoop up the creamy sauce, the Cheesy Sausage Breakfast Puffs bring a savory, fluffy bite to the table.
The result is a casserole brimming with incredible creamy, cheesy goodness, the ultimate comfort food for any occasion. It’s a dish that truly delivers on its promise of rich flavor and satisfying texture.
Gather Your Arsenal: Essential Tools for the Perfect Bake
Having the right tools makes all the difference in achieving kitchen success. For this Cheesy Chicken Mac Bake, you’ll need a few common items.
9×13 Inch Baking Dish: This standard size is perfect for accommodating the generous portions of this comforting bake.
Large Pot: Essential for boiling your pasta to that crucial al dente consistency, ensuring it holds up well in the sauce.
Large Saucepan or Dutch Oven: Ideal for preparing the rich, velvety cheese sauce, offering plenty of space for whisking and mixing.
Whisk: A crucial tool for creating a smooth, lump-free roux and ensuring your cheese sauce is perfectly blended.
The Flavor Foundation: Key Ingredients for Your Mac Bake
Each ingredient in this Cheesy Chicken Mac Bake plays a vital role in building its layered flavors and irresistible texture. Quality ingredients truly shine through in simple, hearty dishes like this.
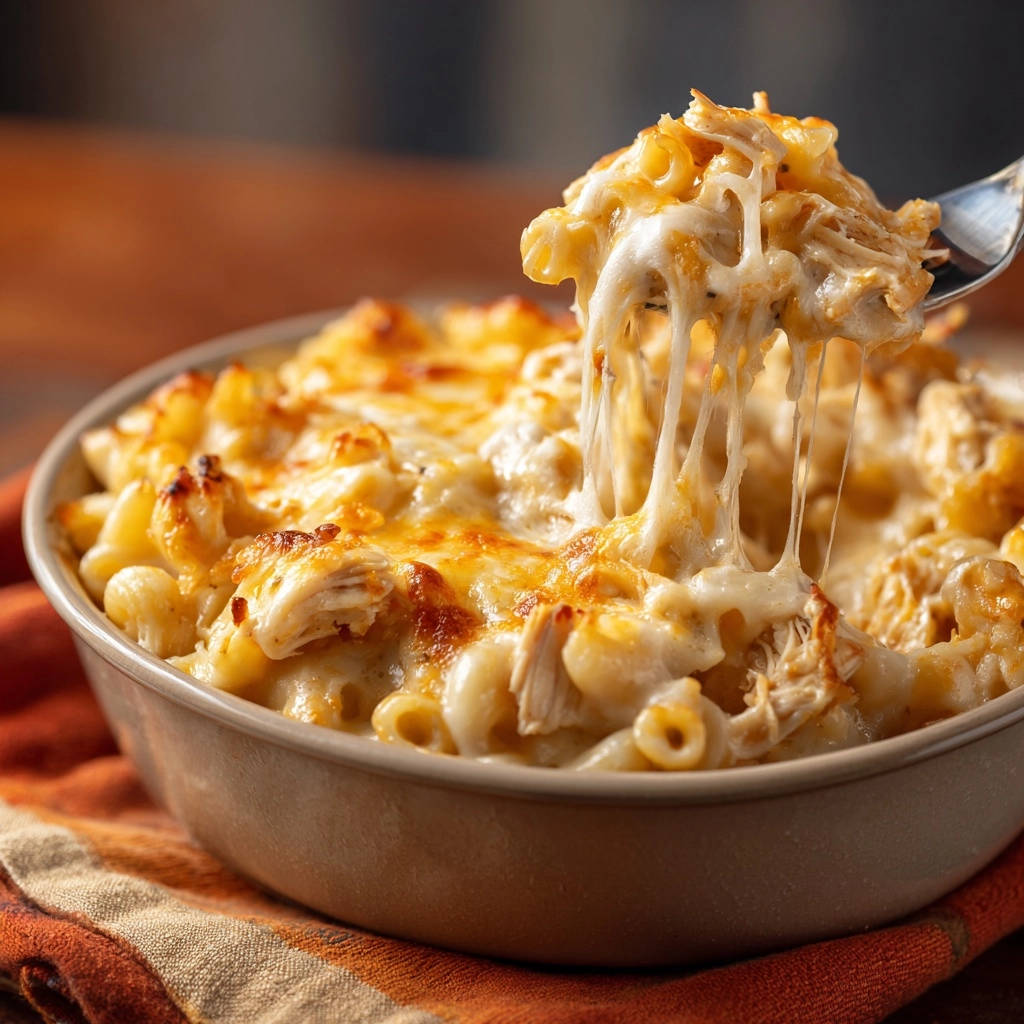
Choosing Your Pasta Powerhouse
Elbow Macaroni or Cavatappi: These shapes are ideal because their curves and hollows expertly capture and hold the rich cheese sauce in every bite.
Cooking your pasta until al dente is crucial; it prevents it from becoming mushy during baking and ensures a pleasant texture. Generously salting your pasta water is also key, as it seasons the pasta from the inside out, building a flavorful foundation.
Crafting the Velvety Cheese Sauce
Unsalted Butter and All-Purpose Flour: These form the classic roux, the backbone of our béchamel-based cheese sauce. The roux provides the necessary thickening, preventing a watery consistency.
Milk (Whole or 2%): Whole milk yields the richest, creamiest sauce, though 2% works well for a slightly lighter version without sacrificing much texture. Gradual addition is key for smoothness.
Sharp Cheddar Cheese and Mozzarella Cheese: Sharp cheddar provides a robust, tangy flavor, while mozzarella offers that irresistible melt and stretch, creating a balanced and appealing cheese blend.
Salt, Black Pepper, and Garlic Powder: These seasonings elevate the sauce, adding depth and a subtle aromatic warmth. They balance the richness of the cheese and complement the chicken beautifully.
Ensuring Tender, Juicy Chicken
Cooked Chicken (Shredded): Using pre-cooked rotisserie chicken is a fantastic time-saver and guarantees moist, flavorful chicken for your Cheesy Chicken Mac Bake. Alternatively, gently poached chicken breast works wonderfully too, ensuring tender results.
The most important step for preventing dryness is adding the shredded chicken directly into the warm cheese sauce. This allows the chicken to absorb moisture and flavor before the baking process, keeping it wonderfully juicy.
Your Step-by-Step Guide to Cheesy Chicken Mac Bake Excellence
-
Oven Prep and Dish Dressing:
Preheat your oven to 375 degrees F (190 degrees C) and lightly grease a 9×13 inch baking dish.
A little grease prevents sticking and ensures easy serving later, making cleanup a breeze.
-
Pasta Perfection Achieved:
Bring a large pot of generously salted water to a rolling boil.
Add the pasta and cook according to package directions until al dente (slightly firm).
Draining well is crucial to prevent a watery sauce that compromises creaminess.
-
Build the Roux Base:
In a large saucepan or Dutch oven, melt the butter over medium heat.
Once melted, sprinkle in the flour and whisk constantly for 1-2 minutes to create a smooth, light roux. This ensures a lump-free, thick sauce.
-
Whisk in the Milk Gradually:
Slowly whisk in the milk, a little at a time, until completely smooth.
Continue whisking as the sauce simmers and thickens (about 5-7 minutes), aiming for a consistency that coats the back of a spoon. Patience is key for a silky sauce!
-
Melt in the Cheesy Goodness:
Remove the saucepan from the heat.
Stir in the salt, black pepper, and garlic powder.
Add 1 1/2 cups of the cheddar cheese and 1/2 cup of the mozzarella cheese, stirring until completely melted and smooth. The residual heat will melt the cheese perfectly.
-
Infusing Chicken with Moisture:
Add the cooked, shredded chicken to the warm cheese sauce, ensuring it is well coated.
This critical step infuses moisture and flavor into the chicken before baking, preventing any dry bites in the finished dish.
-
Combine Pasta and Sauce:
Add the drained pasta to the saucepan with the chicken and cheese sauce.
Gently stir until all the pasta is evenly coated and mixed with the chicken. Be careful not to mash the pasta.
-
Assemble and Top:
Pour the pasta and chicken mixture into the prepared baking dish.
Evenly sprinkle the remaining 1/2 cup cheddar cheese and 1/2 cup mozzarella cheese over the top for that irresistible golden, bubbly crust.
-
The Covered Bake Advantage:
Cover the baking dish tightly with aluminum foil.
Bake for 15 minutes. This initial covered bake helps trap moisture, ensuring the chicken and pasta heat through without drying out.
-
Uncover for Golden Perfection:
Remove the foil and continue to bake for another 10-15 minutes.
Bake until the cheese on top is melted, bubbly, and lightly golden brown, indicating a perfect, appetizing crust.
-
Rest for Creaminess:
Let the dish rest for 5-10 minutes before serving.
This crucial resting period allows the sauce to set slightly, maintaining its wonderfully creamy texture and preventing it from being too runny when served.
Chef’s Secrets & Pro Tips for Your Best Cheesy Chicken Mac Bake
Elevate your Cheesy Chicken Mac Bake from great to extraordinary with these expert insights.
If you enjoy this method for keeping chicken creamy, you will love the same silky result in this creamy chicken broccoli pasta bake.
Achieving the Silkiest Cheese Sauce
Gradual Milk Addition: Pouring milk into the roux slowly, while whisking vigorously, is the secret to a smooth, lump-free sauce. It allows the flour to fully incorporate without clumping.
Continuous Whisking: Keep whisking constantly as the sauce simmers to prevent sticking and ensure even thickening, yielding a truly silky texture.
Avoid Overcooking the Roux: A light, blonde roux is all you need for this sauce. Overcooking can make it too dark and alter the flavor of your béchamel base.
Customizing Your Cheese Blend
Experiment with Varieties: While cheddar and mozzarella are classic, consider adding a touch of Gruyere for nuttiness, Monterey Jack for extra melt, or even a smoked gouda for a deeper flavor profile.
Shred Your Own: Pre-shredded cheeses often contain anti-caking agents that can make your sauce less smooth. Shredding your own cheese from a block melts more beautifully and creates a creamier consistency.
Beyond Just Chicken: Protein Variations
This versatile Cheesy Chicken Mac Bake is easily adapted to other proteins. Leftover cooked turkey works wonderfully as a substitute for chicken, especially after holidays.
You can also use cooked, diced ham or even a plant-based chicken alternative for a different twist. Just ensure any added protein is already cooked and shredded or diced for even distribution.
Adding a Veggie Boost
Incorporating vegetables adds nutrition, color, and flavor to your mac bake. Stir in 1-2 cups of frozen peas or corn during the last few minutes of the pasta cooking time, then drain together.
Blanched broccoli florets or finely diced bell peppers can also be folded into the sauce with the chicken and pasta. For more inspiration on comforting baked dishes, consider our Classic Baked Mac and Cheese with Ham.
Troubleshooting Common Cheesy Chicken Mac Bake Questions
Even experienced cooks encounter occasional hiccups. Here’s how to navigate common issues for a perfect Cheesy Chicken Mac Bake.
Why is My Cheese Sauce Lumpy?
Lumpy sauce usually happens if the milk is added too quickly to the roux or if the whisking isn’t continuous. Ensure you pour the milk in a slow, steady stream while whisking vigorously.
If lumps still appear, you can try pressing the sauce through a fine-mesh sieve or using an immersion blender to smooth it out before adding the cheese.
My Cheesy Chicken Mac Bake is Too Dry!
Dryness is often caused by chicken not being fully coated in sauce, or by overbaking. Always ensure your shredded chicken is thoroughly mixed into the sauce before baking.
The initial covered bake is crucial for trapping moisture; also, check for doneness at the lower end of the baking time to avoid overcooking.
The Sauce is Too Runny or Too Thick!
If your sauce is too runny, return it to low heat and gently simmer, whisking constantly, until it thickens to the desired consistency. For a sauce that’s too thick, gradually whisk in a splash of warm milk until it loosens up.
Remember, the sauce will thicken further as it bakes and cools, so err slightly on the side of it being a little looser initially.
The Top Cheese Didn’t Brown Enough.
If your top layer of cheese isn’t as golden and bubbly as you’d like after the uncovered bake, briefly broil the dish for 1-2 minutes.
Keep a close eye on it, as cheese can go from perfectly golden to burnt very quickly under the broiler. Ensure the cheese is evenly distributed for uniform browning.
Beyond the Meal: Serving, Storing, and Enjoying Leftovers
Once you’ve mastered your Cheesy Chicken Mac Bake, here’s how to best enjoy every last bit.
Delicious Side Dish Pairings
To complement the richness of this Cheesy Chicken Mac Bake, consider serving it with something fresh and crisp. A simple green salad with a light vinaigrette is always a great choice.
For a perfect pairing, try our Tropical Chicken and Pineapple Bread Pudding: The Anti-Soggy Method.
Crusty garlic bread is perfect for soaking up any extra sauce, or you could opt for steamed green beans or our Crispy Baked Asparagus for a touch of vibrant green.
Proper Storage for Maximum Freshness
Allow any leftover Cheesy Chicken Mac Bake to cool completely before transferring it to an airtight container. It will keep well in the refrigerator for up to 3-4 days.
For longer storage, portion the bake into freezer-safe containers and freeze for up to 2-3 months. Thaw in the refrigerator overnight before reheating.
Best Practices for Reheating
To reheat individual portions from the fridge, a microwave works quickly, often requiring a splash of milk to restore creaminess. For larger amounts, or from frozen, cover the dish with foil and reheat in a 300-325°F (150-160°C) oven until warmed through.
The goal is to gently warm the dish without drying out the chicken or making the sauce oily. Avoid high heat for too long.
Can I Assemble This Dish Ahead of Time?
Yes, you can assemble the Cheesy Chicken Mac Bake up to 24 hours in advance. Prepare the dish through step 8 (assembling in the baking dish), cover tightly with plastic wrap, and refrigerate.
When ready to bake, remove from the fridge 30 minutes before baking to come closer to room temperature, then proceed with steps 9-11, adding an extra 5-10 minutes to the initial covered bake time if needed.
Your Top Cheesy Chicken Mac Bake FAQs Answered
Got more questions? Here are answers to some of the most common inquiries about making a fantastic Cheesy Chicken Mac Bake.
Can I Use Different Types of Pasta?
Absolutely! While elbow macaroni and cavatappi are classic, other small-to-medium pasta shapes that hold sauce well are excellent alternatives. Consider penne, rotini, or even medium shells for your Cheesy Chicken Mac Bake.
Just ensure you cook them to al dente according to their package directions, as cooking times can vary between shapes.
Is There a Gluten-Free Option for This Recipe?
Yes, this Cheesy Chicken Mac Bake can easily be made gluten-free. Simply substitute the all-purpose flour with a 1:1 gluten-free all-purpose flour blend (ensure it contains xanthan gum for best results).
Additionally, use your favorite gluten-free elbow macaroni or other gluten-free pasta, adjusting cooking times as per package instructions.
How Can I Make This Cheesy Chicken Mac Bake Spicier?
For those who love a bit of heat, there are several ways to spice up your Cheesy Chicken Mac Bake. A pinch of cayenne pepper added to the cheese sauce with other seasonings provides a subtle kick.
You can also stir in a dash of your favorite hot sauce or incorporate finely diced jalapeños (fresh or pickled) into the sauce before baking for more pronounced heat.
Can I Add More Vegetables to This Dish?
Certainly! This Cheesy Chicken Mac Bake is very adaptable to adding more vegetables. Peas, carrots, and spinach are popular choices.
Stir in frozen peas or corn during the last minute of pasta cooking, or wilt fresh spinach into the hot cheese sauce just before adding the pasta. Cooked, diced carrots or steamed broccoli florets also work wonderfully.
What if I Don’t Have Sharp Cheddar Cheese?
If sharp cheddar isn’t available, you can use other cheeses that offer good flavor and melt. Colby Jack or a mild cheddar will work, providing a milder cheese flavor profile.
For a sharper taste, consider a blend of Monterey Jack and a little Parmesan. The key is to use cheeses that melt smoothly for that desirable creamy texture.
Ready to Impress? Share Your Cheesy Chicken Mac Bake Masterpiece!
Now that you’re equipped with all the secrets to a perfectly moist and creamy Cheesy Chicken Mac Bake, it’s time to create your own masterpiece. This dish is more than just a meal; it’s a hug in a baking dish, guaranteed to bring comfort and smiles.
Don’t hesitate to dive in and experience the joy of a truly spectacular homemade casserole. Share your results and let us know how your family enjoyed this irresistible baked chicken pasta dish!
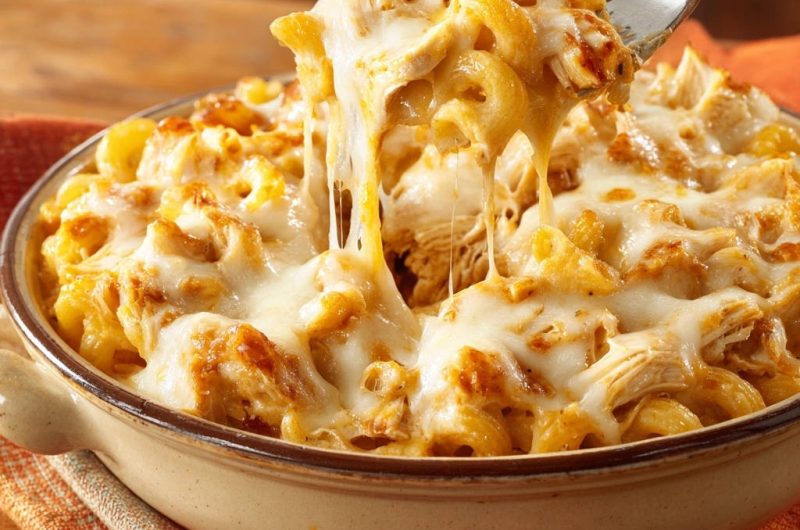
Chicken Mac Bake
Course: Main CourseCuisine: AmericanDifficulty: easy6
servings20
minutes30
minutes550
kcal60
minutesSay goodbye to dry chicken! This Cheesy Chicken Mac Bake recipe ensures perfectly juicy chicken in a creamy, cheesy sauce. It’s the ultimate comforting family meal, guaranteed to be a hit.
Ingredients
1 pound elbow macaroni or cavatappi pasta
2 cups cooked chicken, shredded (from rotisserie chicken or gently poached chicken breast)
1/4 cup unsalted butter
1/4 cup all-purpose flour
3 cups milk, whole or 2%
1/2 teaspoon salt, plus more for pasta water
1/4 teaspoon black pepper
1/4 teaspoon garlic powder
2 cups shredded sharp cheddar cheese
1 cup shredded mozzarella cheese
Directions
- Preheat oven to 375 degrees F (190 degrees C). Lightly grease a 9×13 inch baking dish.
- Bring a large pot of generously salted water to a rolling boil. Add the pasta and cook according to package directions until al dente (slightly firm). Drain well and set aside.
- While the pasta cooks, prepare your cheese sauce. In a large saucepan or Dutch oven, melt the butter over medium heat. Once melted, sprinkle in the flour and whisk constantly for 1-2 minutes to create a smooth roux.
- Gradually whisk in the milk, a little at a time, until completely smooth. Continue to whisk as the sauce simmers and thickens, about 5-7 minutes. It should be thick enough to coat the back of a spoon.
- Remove the saucepan from the heat. Stir in the salt, black pepper, and garlic powder. Add 1 1/2 cups of the cheddar cheese and 1/2 cup of the mozzarella cheese to the sauce, stirring until completely melted and smooth.
- Add the cooked, shredded chicken to the cheese sauce, ensuring it is well coated. This step is key to infusing moisture and flavor into the chicken before baking, preventing it from drying out.
- Add the drained pasta to the saucepan with the chicken and cheese sauce. Gently stir until all the pasta is evenly coated and mixed with the chicken.
- Pour the pasta and chicken mixture into the prepared baking dish.
- Sprinkle the remaining 1/2 cup cheddar cheese and 1/2 cup mozzarella cheese evenly over the top of the dish.
- Cover the baking dish tightly with aluminum foil. Bake for 15 minutes. This initial covered bake helps trap moisture and ensures the chicken and pasta heat through without drying out.
- Remove the foil and continue to bake for another 10-15 minutes, or until the cheese on top is melted, bubbly, and lightly golden brown.
- Let the dish rest for 5-10 minutes before serving. This allows the sauce to set slightly and remain wonderfully creamy.
Notes
- Let rest for 5-10 minutes before serving for best sauce consistency.