Classic Apple Crisp: The Secret to Endless Crunch!
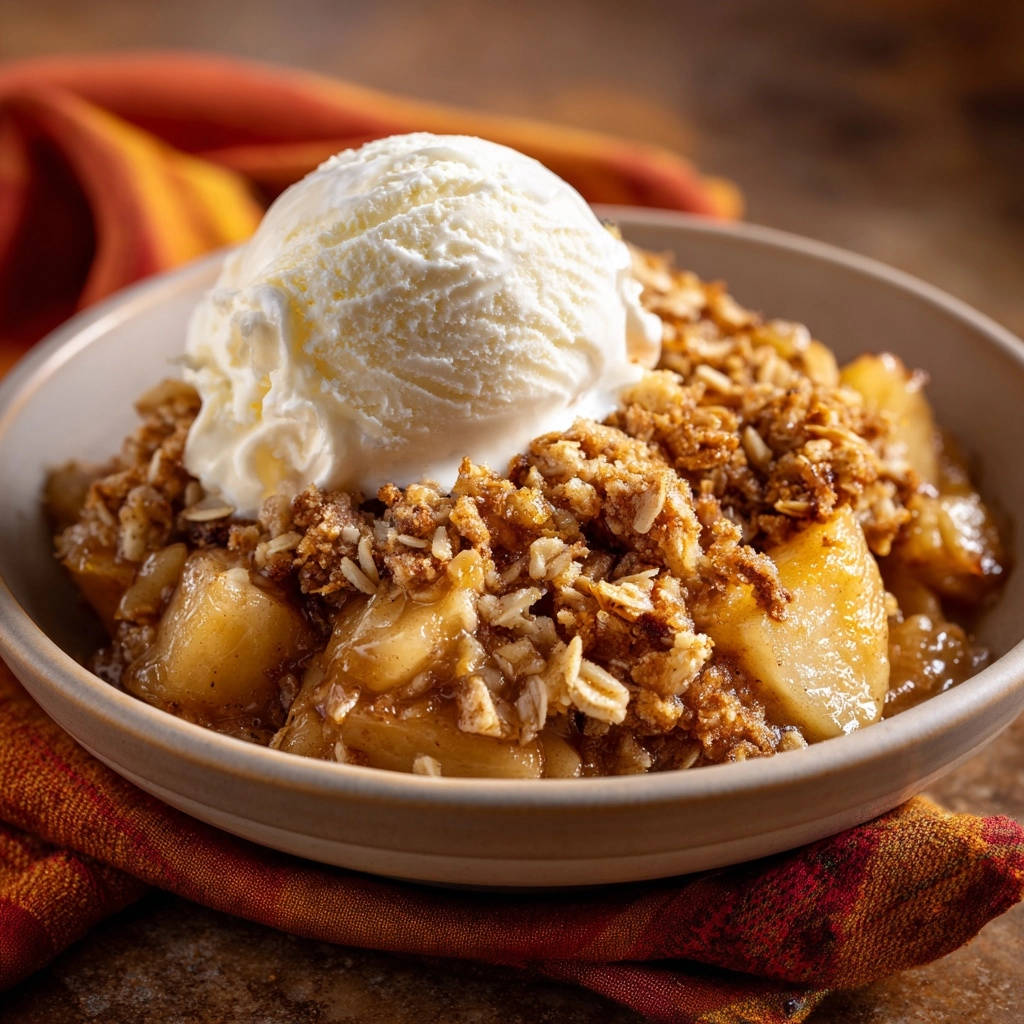
There’s nothing quite like the comforting aroma of a warm apple crisp, but I’ve heard the lament many times: that beautiful topping often turns disappointingly soft. As an avid baker, I know the frustration of a less-than-crispy crisp! This Classic Apple Crisp recipe holds the simple, game-changing trick to a gloriously golden, consistently crunchy topping that stays perfect from the first spoonful to the last.
Experience the Unmatched Delight of Our Classic Apple Crisp
This recipe isn’t just about apples and oats; it’s about crafting a perfect dessert experience. From the tender, spiced apples to the truly crispy topping, every element is designed for maximum enjoyment.
The Game-Changing Crunchy Topping Revealed
The secret to this recipe’s legendary crunch lies in how the butter is handled. Using very cold butter and incorporating it strategically creates pockets of air and prevents the topping from becoming soggy. You’ll achieve those satisfyingly large, crunchy clusters every time.
A Symphony of Flavors in Every Spoonful
Beyond the texture, this Classic Apple Crisp delivers a perfectly balanced flavor profile. Sweet and tart apples mingle with warm spices, creating a comforting depth that’s never overpowering. It’s a classic taste that evokes warmth and nostalgia.
Effortless Elegance for Any Occasion
Despite its impressive results, this apple crisp is surprisingly simple to prepare. It’s an ideal dessert for a cozy family dinner, a festive gathering, or a delightful treat for quiet weeknights. It brings a touch of homemade elegance without the fuss.
Assembling Your Ingredients for a Flawless Apple Crisp
The quality and preparation of your ingredients are the foundation of an outstanding Classic Apple Crisp. Selecting the right apples and ensuring your butter is perfectly chilled makes all the difference.
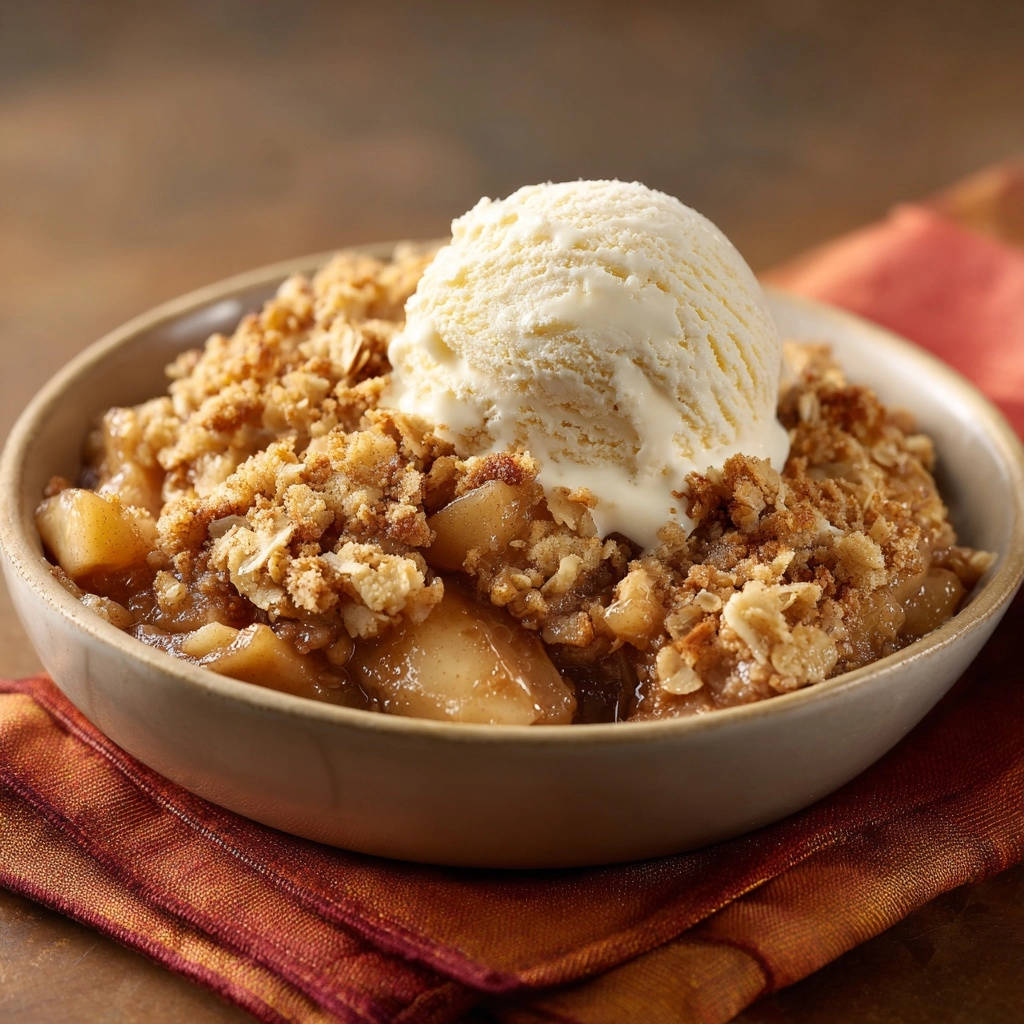
For the Sweet & Tangy Apple Foundation
- 6 medium apples (such as Honeycrisp or Granny Smith), peeled, cored, and sliced about 1/4 inch thick
- 1/4 cup granulated sugar
- 1/4 cup packed light brown sugar
- 1 teaspoon ground cinnamon
- 1/4 teaspoon ground nutmeg
- 1 tablespoon lemon juice
- 2 tablespoons all purpose flour
Opt for firm, slightly tart apples like Granny Smith for structure, or a mix with sweeter varieties like Honeycrisp for balanced flavor. The lemon juice brightens the apples and prevents browning, while a touch of flour thickens the juices into a luscious sauce.
Crafting the Iconic Oat Crumble Topping
- 1 cup old fashioned rolled oats
- 1/2 cup all purpose flour
- 1/2 cup packed light brown sugar
- 1/4 cup granulated sugar
- 1/2 teaspoon ground cinnamon
- 1/4 teaspoon salt
- 1/2 cup (1 stick) unsalted butter, very cold and cut into small pieces
- Vanilla ice cream, for serving
Old-fashioned rolled oats provide the chewiness and texture that defines a classic apple crisp. The key ingredient here is the butter: it must be very cold and cut into small pieces. This cold butter is crucial for creating those signature crunchy clusters in the topping.
Tools of the Trade: Equipping Your Kitchen for Crisp Success
Having the right kitchen tools makes preparing this Classic Apple Crisp a smooth and enjoyable process.
8×8 inch baking dish: A ceramic or glass dish is ideal for even baking and beautiful presentation.
Large mixing bowls: You’ll need one for the apple filling and a separate one for the topping ingredients.
If you love the crunchy oat topping here, you’ll want to try this deep dish cranberry apple crumble pie.
Whisk: Essential for thoroughly combining the dry ingredients for the topping.
Pastry blender or your fingertips: These are best for incorporating the cold butter into the topping mixture without overworking it.
Vegetable peeler and corer: For efficient apple preparation.
Mastering the Method: A Detailed Walkthrough
Follow these steps closely to ensure your Classic Apple Crisp turns out perfectly golden and delightfully crunchy every single time.
- Step 1: Preheat and Prepare Your Dish
Preheat your oven to 375 degrees Fahrenheit (190 degrees Celsius). This ensures the oven is at the correct temperature for even baking from the start. Lightly grease an 8×8 inch baking dish or a similar size, which prevents the apple filling from sticking.
- Step 2: Craft the Flavorful Apple Filling
In a large bowl, combine your sliced apples, both granulated and brown sugars, cinnamon, nutmeg, and lemon juice. Toss gently but thoroughly to ensure every apple slice is coated, allowing the flavors to meld beautifully during baking. Sprinkle the 2 tablespoons of all-purpose flour over the apple mixture and toss again until it’s evenly distributed. This flour is a game-changer, absorbing the apple’s juices and creating a thick, luscious sauce as it bakes.
Pour the prepared apple mixture into your greased baking dish, spreading it evenly. This foundational layer will become tender and fragrant as the crisp bakes.
- Step 3: Combine Dry Topping Ingredients
In a separate medium bowl, combine the rolled oats, 1/2 cup all-purpose flour, 1/2 cup brown sugar, 1/4 cup granulated sugar, 1/2 teaspoon cinnamon, and salt. Whisk these dry ingredients together very well. This ensures all the spices and sugars are evenly distributed before adding the butter.
- Step 4: The Cold Butter Secret for Crunchy Clusters
This step is critical for a truly crispy topping. Add the very cold, small pieces of butter to the dry topping mixture. Using your fingertips or a pastry blender, quickly work the butter into the dry ingredients. Continue until the mixture resembles coarse crumbs with some larger, pea-sized clumps.
It’s crucial not to overmix the butter; overmixing will warm the butter and develop too much gluten, resulting in a tough, less crisp topping. Keeping the butter as cold as possible creates those glorious crunchy clusters that won’t turn soggy during baking.
If you enjoy the crunchy topping here, you’ll love how sea salt balances the sweetness in these dark chocolate chunk cookies.
- Step 5: Assemble and Distribute the Topping Evenly
Evenly sprinkle the prepared topping mixture over the apple filling in the baking dish. Do not press down on the topping; leave it light and crumbly. This airy distribution allows the hot air to circulate, ensuring maximum crispness.
- Step 6: Bake Until Bubbly and Golden
Bake for 35 to 45 minutes. The Classic Apple Crisp is ready when the apple filling is visibly bubbly around the edges and through the topping, and the crisp topping is beautifully golden brown and crispy. Baking uncovered allows the moisture from the apples to escape, which is essential for the topping to dry out and crisp up perfectly. If the topping browns too quickly, you can loosely tent it with foil.
- Step 7: Cool Slightly and Serve Warm
Let the apple crisp cool slightly for at least 15-20 minutes before serving. This allows the filling to set and prevents it from being too runny. Serve warm with a generous scoop of vanilla ice cream for the ultimate hot-cold contrast, enjoying that perfect crunch in every bite.
Preparing Your Apples and Setting the Stage
The Golden Rule: Achieving That Perfect Crisp Topping
Baking to Golden Perfection: Signs of Doneness
Cooling and Serving Your Delectable Creation
Chef’s Secrets: Elevating Your Classic Apple Crisp
Unlock even more potential with these expert tips, transforming a great apple crisp into an unforgettable one.
Choosing the Best Apples for Your Crisp
For the best texture and flavor, choose a mix of apples. Granny Smith provides a nice tartness and holds its shape well, while Honeycrisp or Fuji add sweetness and a pleasant softness. Avoid overly soft or mealy apple varieties.
The Cold Butter Advantage: Crunch You Can Count On
Always use very cold butter, cut into small pieces. This creates steam pockets as it melts in the oven, leading to a flakier, crispier topping. If the butter gets too warm, pop it back into the freezer for a few minutes before mixing.
Why You Shouldn’t Press the Topping
Resist the urge to press the topping onto the apples. Leaving it light and airy allows for better air circulation during baking, promoting an even, golden brown, and truly crispy texture. Pressing it down can lead to a dense, pasty crust.
The Uncovered Baking Secret for Ultimate Crispness
Baking uncovered is fundamental. It allows excess moisture from the apples to evaporate, preventing a soggy bottom and ensuring the crisp topping dries out and becomes wonderfully crunchy. Only cover if the topping is browning too quickly.
Knowing When Your Crisp is Perfectly Baked
Look for visual cues beyond just the timer. The apple filling should be visibly bubbling around the edges and through the topping. Gently poke an apple slice with a knife or skewer through the topping; it should feel tender, not firm. The topping itself should be deep golden brown and firm to the touch.
Troubleshooting Your Apple Crisp: Common Questions Solved
Even seasoned bakers encounter hiccups. Here are solutions to common apple crisp challenges.
Pair These With Your Apple Crisp
Apple crisp is best with something soft and warm on the side. These pancake recipes use a similar batter technique and share that breakfast-dessert crossover appeal.
- Start the morning with a stack of Fluffy Blueberry Pancakes for a fruity contrast to the crisp’s cinnamon notes.
- Serve a side of Fluffy Oatmeal Pancakes alongside the crisp for a heartier texture that soaks up the apple juices.
My Topping Isn’t Crispy Enough!
Ensure your butter was very cold when incorporated and that you didn’t overmix the topping, which can warm the butter. Also, confirm you baked the crisp uncovered, allowing moisture to escape. An extra 5-10 minutes of baking time can often achieve the desired crunch.
Are My Apples Too Hard or Mushy?
If apples are too hard, they might have been sliced too thick or not baked long enough. If they’re mushy, you might have used an apple variety that breaks down too easily (like McIntosh) or overbaked them. Stick to the recommended slicing thickness and monitor baking time closely.
Flavor Balance: Too Sweet, Too Tart, or Bland?
Adjust sugar based on apple tartness and personal preference; if using very sweet apples, slightly reduce the sugar. If too bland, ensure spices are fresh and properly measured. A tiny pinch more cinnamon or nutmeg can enhance the aroma and taste.
Beyond the Oven: Serving, Storing, and Making Ahead
Maximize your enjoyment of this Classic Apple Crisp with these practical tips.
Delightful Serving Suggestions
While vanilla ice cream is a classic pairing, consider serving your crisp with a dollop of fresh whipped cream, a drizzle of warm caramel sauce, or even a sprinkle of toasted pecans for added texture. For another delightful dessert, you might also enjoy our decadent pumpkin pie truffles.
How to Store Leftover Apple Crisp
Store any leftover apple crisp covered in the refrigerator for up to 3-4 days. While the topping may soften slightly, a quick reheat in the oven can help revive some of its crispness.
Can You Prepare Apple Crisp in Advance?
You can prepare the apple filling and topping separately and store them in the refrigerator for up to 24 hours. Assemble and bake just before serving for the freshest, crispiest results. For longer storage, the assembled, unbaked crisp can be frozen for up to 3 months; bake from frozen, adding extra time.
Your Top Classic Apple Crisp Questions Answered
Here are quick answers to some frequently asked questions about this comforting dessert.
What are the ideal apples for crisp?
A mix of firm, tart apples like Granny Smith and sweeter, crisp varieties such as Honeycrisp or Fuji offers the best balance of flavor and texture, ensuring the apples don’t become mushy during baking.
Can I adapt this recipe for dietary needs? (Gluten-Free, Dairy-Free)
Yes, you can. For a gluten-free crisp, substitute gluten-free all-purpose flour blend in both the filling and topping, and ensure oats are certified gluten-free. For dairy-free, use a high-quality plant-based butter alternative in the topping. Results may vary slightly.
How do I know when my apple crisp is fully baked?
The crisp is done when the apple filling is bubbling generously, and the topping is a deep golden brown and feels firm and crispy to the touch. You should also be able to easily pierce an apple slice with a knife or fork.
Ready to Bake? Share Your Classic Apple Crisp Masterpiece!
Now that you’re armed with all the secrets, it’s time to create your own truly spectacular Classic Apple Crisp. We’re confident you’ll achieve that perfect crunch every single time. Give this recipe a try this weekend and let us know how it turns out in the comments below! For more delightful crumbly desserts, be sure to check out our raspberry crumb bars.
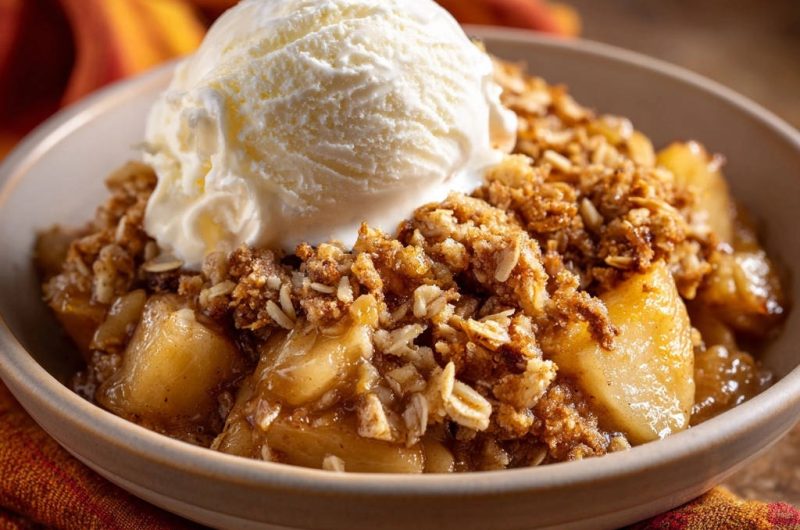
Apple Crisp
Course: DessertCuisine: AmericanDifficulty: medium6
servings25
minutes40
minutes350
kcal60
minutesDiscover the secret to a perfectly crunchy apple crisp topping that stays golden and crispy from the first bite to the last. This classic dessert features tender, spiced apples topped with a delightful oat and butter crumble. Serve warm with vanilla ice cream for the ultimate treat.
Ingredients
For the Filling:
6 medium apples (such as Honeycrisp or Granny Smith), peeled, cored, and sliced about 1/4 inch thick
1/4 cup granulated sugar
1/4 cup packed light brown sugar
1 teaspoon ground cinnamon
1/4 teaspoon ground nutmeg
1 tablespoon lemon juice
2 tablespoons all purpose flour
For the Topping:
1 cup old fashioned rolled oats
1/2 cup all purpose flour
1/2 cup packed light brown sugar
1/4 cup granulated sugar
1/2 teaspoon ground cinnamon
1/4 teaspoon salt
1/2 cup (1 stick) unsalted butter, very cold and cut into small pieces
Vanilla ice cream, for serving
Directions
- Preheat your oven to 375 degrees Fahrenheit (190 degrees Celsius). Lightly grease an 8×8 inch baking dish or similar size.
- In a large bowl, combine the sliced apples, granulated sugar, brown sugar, cinnamon, nutmeg, and lemon juice. Toss gently to coat the apples evenly. Sprinkle the 2 tablespoons of all purpose flour over the apple mixture and toss again until the flour is evenly distributed. This helps thicken the juices. Pour the apple mixture into your prepared baking dish.
- For the topping, in a separate medium bowl, combine the rolled oats, 1/2 cup all purpose flour, 1/2 cup brown sugar, 1/4 cup granulated sugar, 1/2 teaspoon cinnamon, and salt. Whisk these dry ingredients together.
- This is the key for a truly crispy topping: Add the very cold, small pieces of butter to the dry topping mixture. Using your fingertips or a pastry blender, quickly work the butter into the dry ingredients until the mixture resembles coarse crumbs with some larger, pea sized clumps. It’s crucial not to overmix and to keep the butter as cold as possible to create those glorious crunchy clusters that won’t turn soggy.
- Evenly sprinkle the prepared topping mixture over the apple filling in the baking dish. Do not press down on the topping; leave it light and crumbly.
- Bake for 35 to 45 minutes, or until the apple filling is bubbly and tender, and the crisp topping is beautifully golden brown and crispy. Baking uncovered allows the moisture to escape and the topping to dry out and crisp up perfectly.
- Let the apple crisp cool slightly before serving warm with a scoop of vanilla ice cream. Enjoy that perfect crunch!
Notes
- For the crispiest topping, ensure butter is very cold and do not overmix the topping ingredients.