The Ultimate Loaded Sheet Pan Fries: A Masterclass in Texture
Nothing ruins a game day spread faster than a pile of limp, greasy potatoes that collapse under the weight of their own toppings. Most home cooks struggle with loaded fries because the moisture from the cheese and toppings turns the potato base into a mushy mess within minutes. We’ve all been there, digging through a soggy pile of starch that tastes more like steamed mash than crispy gold.
The secret to the Ultimate Loaded Sheet Pan Fries lies in a specific “anti-soggy” philosophy that prioritizes structural integrity. By treating the potato as a rigid foundation rather than a soft bed, you create a snack that maintains its crunch from the first bite to the last. It’s about engineering the perfect ratio of surface area to savory toppings while fighting off the dreaded moisture trap.
I’ve found that the real trick isn’t just the heat of the oven, but the temperature of the pan itself before the food even touches it. Using a preheated heavy-duty metal sheet pan creates an immediate sear on the potato starch, locking in the interior fluffiness while building a fortified outer crust. This thermal shock is the only way to ensure your fries can actually hold up a mountain of cheddar and bacon.
The Physics of the Perfect Sheet Pan Crunch
Achieving a restaurant-quality crunch at home requires understanding how starch and moisture interact under high heat. When you bake a potato, the water inside wants to escape as steam, but if that steam gets trapped between the fry and a cold pan, it creates a soggy bottom. By using a screaming hot pan, you trigger an instant evaporation process that dries out the exterior of the fry immediately.
Frozen fries are actually a secret weapon for this specific application because they’ve been par-fried and blast-frozen. This process creates a microscopic “crust” of gelatinized starch that is ready to re-crisp far more efficiently than a raw potato slice. When these frozen sticks hit a 425°F surface, the starch granules expand and harden into a lattice that resists soaking up oils from the cheese later on.
Furthermore, the metal of the sheet pan acts as a heat conductor that maintains a consistent temperature even when the cold fries are added. This constant energy transfer is vital for moisture evaporation. If the pan temperature drops too low, the fries will sit in their own escaping water vapor, leading to that sad, bendy texture we are trying to avoid.
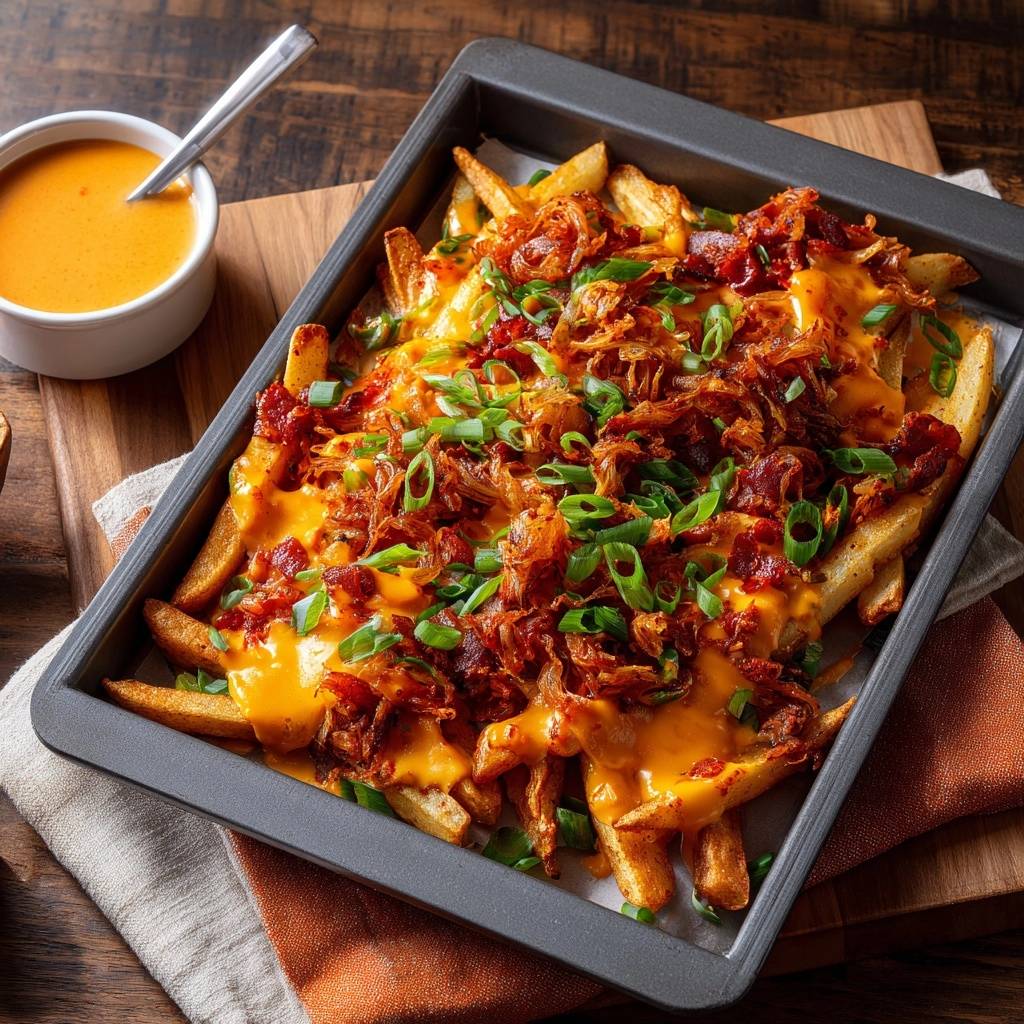
Essential Components for Ultimate Loaded Sheet Pan Fries
Quality ingredients are the difference between a greasy snack and a gourmet appetizer. For the cheese, I always recommend a sharp cheddar because it has a lower oil-to-protein ratio than mild varieties. This means it melts into a thick, glossy coating that clings to the fries rather than breaking down into a puddle of yellow oil that soaks into the potato fibers.
The “extra crispy” thin-cut variety of frozen fries is non-negotiable here. Thin fries offer a much higher surface-area-to-volume ratio, which means more crispy edges for the cheese to grab onto. If you use thick steak fries, the soft interior often outweighs the crispy exterior, leading to a structural collapse once you add the heavy toppings like chopped beef bacon and fried onions.
Freshness matters for the garnish, too. While the bacon and onions provide the salty, savory crunch, the fresh green onions add a necessary hit of acidity and brightness. This cuts through the richness of the cheddar and the spicy mayo, keeping your palate refreshed so you can keep reaching back for more.
Selecting the Right Potato Base
While waffle fries or crinkle cuts look fun, they often trap steam in their ridges, which can lead to soft spots. Thin-cut fries create a dense, interlocking “lattice” on the pan. This structure is much stronger and can support the weight of the toppings without bending, ensuring every bite has that satisfying snap.
The Cheese Factor: Shredded vs. Sauce
Avoid liquid cheese sauces if you want to keep things crispy. Sauces are water-based and will immediately migrate into the fry, making it soft. Freshly grated sharp cheddar is the gold standard because it provides a “high-viscosity” melt. It creates a gooey blanket that sits on top of the fries rather than sinking into them.
Preheating the Steel: The Secret to Rigidity
Most people make the mistake of putting frozen fries on a cold baking sheet and sliding it into the oven. This “cold start” method allows the fries to thaw slowly, which releases moisture onto the pan surface and creates a steaming effect. By the time the pan gets hot enough to crisp the bottom, the top is already overcooked.
Instead, place your heavy-duty sheet pan in the oven while it preheats to 425°F. When you hear that loud sizzle as the fries hit the metal, you know you’re doing it right. This immediate contact creates a steam barrier that pushes moisture upward and away from the pan, resulting in a bottom that is just as crunchy as the top.
This method mimics the effect of a commercial deep fryer without the need for gallons of oil. The intense, direct heat from the preheated steel sears the starch instantly. It’s a simple technical shift that completely changes the structural integrity of the finished dish, making it sturdy enough to eat with your hands.
Step-by-Step: Engineering the Ultimate Loaded Sheet Pan Fries
Start by preheating your oven and that essential sheet pan. Once it’s at 425°F, carefully pull the pan out and dump your fries on. You need to work fast here to keep the pan hot. Spread them out so no two fries are overlapping; overcrowding is the enemy of the crunch because it traps steam between the potatoes.
Bake them for about 20 to 22 minutes. You are looking for a deep, golden-brown color and a rigid texture. Halfway through, give them a good flip with a spatula. You’ll notice they start to look “dry” and stiff rather than oily and limp. This is the transformation we want—the starch is hardening into a protective shell.
Once they are golden, pull the pan out. You’ll see the fries are individual sticks of gold. Now comes the “consolidation” where we turn them into a meal. Use your spatula to push them into a tighter pile in the center of the pan. This creates a thermal mass that will keep the fries hot while the cheese melts on top.
If you are taking the time to crisp the toppings on loaded fries, the same method guarantees no sad, soft bites in these crispy shredded hash browns.
The Consolidation Phase: Building the Pile
By bunching the fries together before adding the cheese, you ensure the toppings stay on the potatoes rather than falling onto the bare pan and burning. This concentrated pile also helps the fries retain their internal heat. It creates a “nest” that holds the bacon bits and fried onions in place for the final melt.
The Two-Minute Melt: Timing the Toppings
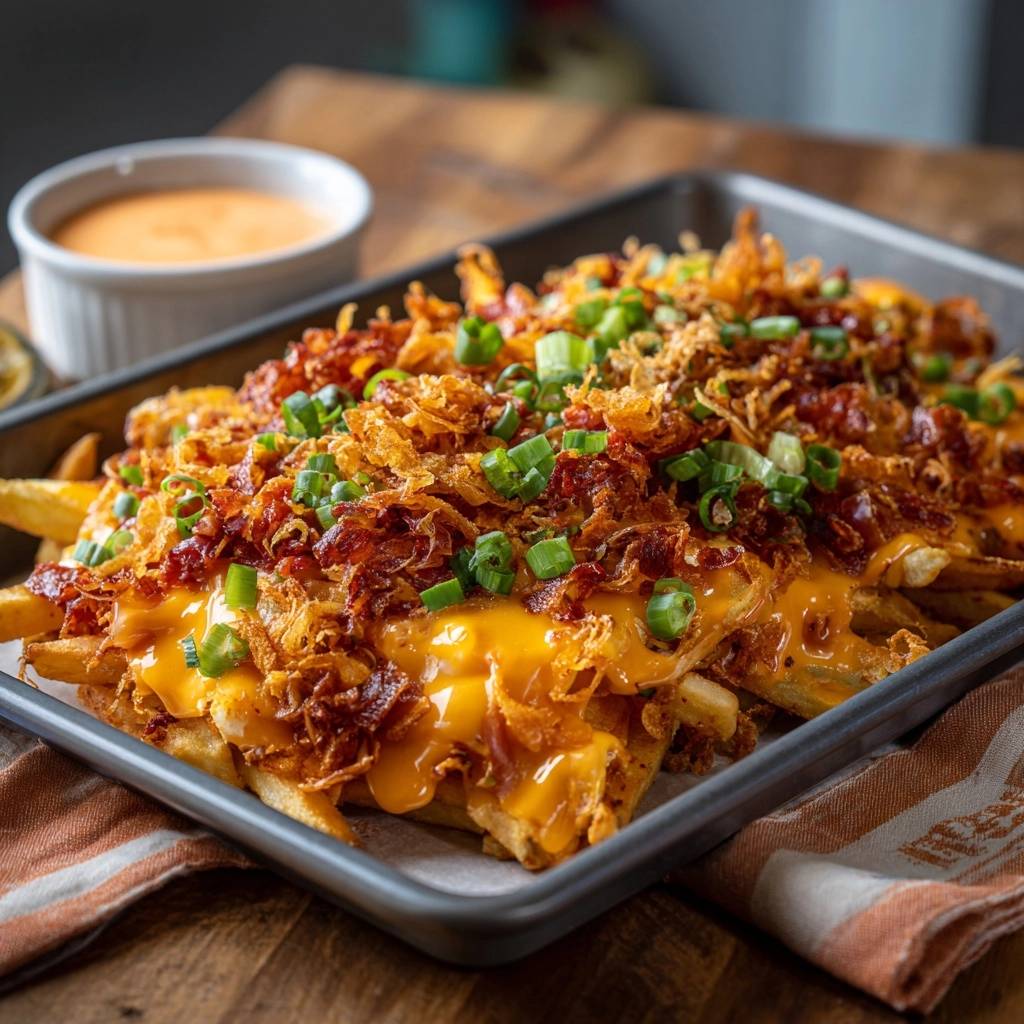
After topping with cheese, bacon, and fried onions, put the pan back in for only 2 to 3 minutes. Watch it closely through the oven window. You want the cheese to look glossy and just barely bubbly. If you leave it too long, the cheese will “break,” meaning the fats separate from the solids, leaving you with an oily mess.
Troubleshooting Common Texture Failures
If your fries are still coming out soft, the most likely culprit is oven calibration. Many home ovens run 25 degrees cooler than the dial says. Use an oven thermometer to ensure you’re actually hitting 425°F. Without that high heat, the moisture inside the potato won’t evaporate fast enough to create a crust.
Another common mistake is adding “wet” toppings like salsa, sour cream, or tomatoes directly onto the fries in the oven. These ingredients release water as they heat up, which will instantly destroy your hard-earned crunch. Always keep wet ingredients on the side as dips or add them cold at the very last second before serving.
Humidity in the kitchen can also play a role. If it’s a particularly humid day, you might need to leave the fries in for an extra two minutes during the initial bake. The goal is to see that rigid, “stiff” look before you even think about adding the cheese. If they still bend when you lift them with a spatula, they aren’t ready.
Flavor Profiles and Creative Variations
Once you master the base technique, you can experiment with different flavor profiles. For a Mediterranean twist, swap the cheddar for crumbled feta and add dried oregano and garlic powder to the fries before baking. After the melt, garnish with fresh parsley and a side of cool cucumber yogurt dip.
If you want something with a bit more kick, try a “Buffalo” style. Use a mix of Monterey Jack and blue cheese crumbles for the melt. Instead of bacon, use spicy roasted chickpeas for crunch. Serve it with a side of ranch and some celery salt sprinkled over the top for that classic wing-night vibe.
For a sophisticated “Truffle-Parm” version, toss the fries in a tiny bit of truffle oil after the initial bake but before the cheese. Use a blend of shredded parmesan and mozzarella. The parmesan provides a salty, nutty crust while the mozzarella gives you that iconic cheese pull that everyone loves for photos.
Optimal Serving Strategies for Maximum Crisp
You must serve these fries directly from the sheet pan. Transferring them to a cold ceramic bowl or a plastic platter creates a pocket of steam underneath the pile, which will soften the bottom layer in seconds. The metal pan continues to hold heat, keeping the fries warm and the cheese gooey while you eat.
Follow the “Dip, Don’t Drizzle” rule for your sauces. While drizzling spicy mayo over the top looks great, it starts the clock on sogginess immediately. By serving the sauce in a small ramekin on the side, you preserve the crunch of the potato skin. Every dip ensures you get the perfect amount of sauce without compromising the texture.
The best vessel for your dipping sauce is a wide, shallow bowl. This allows you to get a good “scoop” of the loaded toppings along with the fry. Since these fries are engineered to be rigid, they act like edible spoons for the spicy mayo and any stray bits of bacon or green onion that fall off.
Expert Tips for High-Volume Batches
If you’re hosting a large group for a game, don’t try to crowd two bags of fries onto one pan. Use two separate sheet pans and rotate them between the top and bottom racks halfway through the baking time. This ensures both pans get equal exposure to the heating elements and plenty of airflow for crisping.
You can prep the toppings (chopping the bacon and onions) hours in advance, but don’t shred the cheese until you’re ready to bake. Freshly shredded cheese has more moisture than the stuff that’s been sitting out, which actually helps it melt more smoothly without becoming grainy. Time the “melt” phase for right when guests arrive for the best experience.
Frequently Asked Questions
Can I use fresh potatoes instead of frozen for this recipe?
You can, but it requires much more work to get the same level of crunch. You would need to peel, cut, and soak the potatoes in cold water for an hour to remove excess starch. Then, you must pat them completely dry and toss them in a light coating of cornstarch and oil before following the preheated pan method.
How do I reheat leftovers without them getting mushy?
Never use a microwave for loaded fries! The best way to reheat them is in an air fryer at 375°F for about 3 to 5 minutes. If you don’t have an air fryer, a toaster oven or a standard oven at 400°F works well. Place them back on a metal pan until the cheese sizzles and the fries regain their rigidity.
What is the best substitute for spicy mayo?
If you want a different flavor profile, a thick Greek yogurt mixed with lime juice and cilantro is a fantastic cooling option. Alternatively, a high-quality barbecue sauce or a honey mustard dip works beautifully with the salty bacon and sharp cheddar. Just remember to keep the sauce on the side to maintain the crunch.
Why did my cheese turn oily and separate?
This usually happens for two reasons: either the oven was too hot during the final melt phase, or you used pre-shredded cheese from a bag. Pre-shredded cheese is coated in potato starch or cellulose to prevent clumping, which can interfere with a smooth melt. For the best results, grate a block of sharp cheddar yourself and only bake it until just melted.
Can I make this recipe dairy-free?
Yes, you can use a high-quality plant-based cheddar shred. However, be aware that many dairy-free cheeses have a higher oil content and a different melting point. You may need to use the broiler for the last 60 seconds to get the “melt” look, as plant-based proteins don’t always liquefy as easily as dairy.
Why are my fries still soft even though I preheated the pan?
Check if you are overcrowding the pan. If the fries are touching or overlapping, the steam escaping from one fry gets trapped by the one next to it. Use a larger pan or split the batch into two. Also, ensure you aren’t using a “cushioned” or insulated cookie sheet, as these don’t get hot enough to sear the potatoes.
Sheet Pan Fries
Course: AppetizerCuisine: AmericanDifficulty: easy4
servings10
minutes25
minutes650
kcal35
MinutesA game-day snack designed to solve the problem of mushy loaded fries. By using a double-blast heat method and specific layering techniques, these fries remain structural and crunchy even under heavy toppings.
Ingredients
1 bag (28 oz) frozen extra crispy thin-cut french fries
2 cups shredded sharp cheddar cheese
1/2 cup crispy fried onions (store-bought or homemade)
1/2 cup cooked bacon, chopped into small bits
1/4 cup fresh green onions, sliced
1/2 cup spicy mayo or chipotle fry sauce (for dipping)
Directions
- Preheat your oven to 425°F (220°C). Place an empty, heavy-duty metal sheet pan inside the oven while it preheats. This is the secret to the anti-soggy bottom; putting fries on a screaming hot pan sears the starch immediately.
- Carefully remove the hot pan and spread the fries in a single, even layer. Do not overcrowd the pan or they will steam instead of crisp.
- Bake for 20-22 minutes, flipping halfway through, until the fries are deep golden brown and rigid.
- Remove the pan and bunch the fries slightly closer together into a concentrated pile. Immediately sprinkle the shredded cheddar cheese over the hot fries.
- Top the cheese layer with the bacon bits and the crispy fried onions.
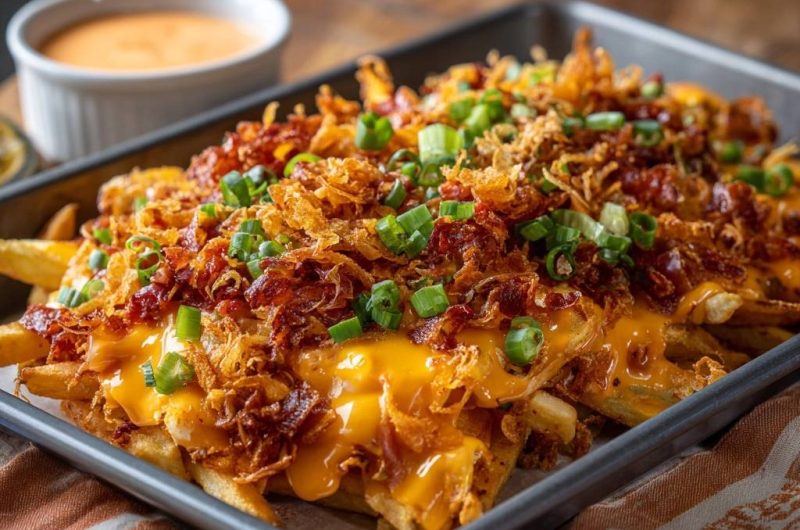
- Return the pan to the oven for exactly 2 to 3 minutes. You want the cheese just melted into a thick, glossy coating (as seen in the image) but not so long that the oils separate and soak into the potato.
- Remove from the oven and garnish generously with fresh green onions. Serve immediately directly from the pan with a side of dipping sauce to maintain maximum crispness.
Notes
- The secret to the anti-soggy bottom is placing the fries on a preheated metal sheet pan to sear the starch immediately. Do not overcrowd the pan to avoid steaming.