Mastering Chocolate Chip Banana Oat Bars: The No-Crumble Method
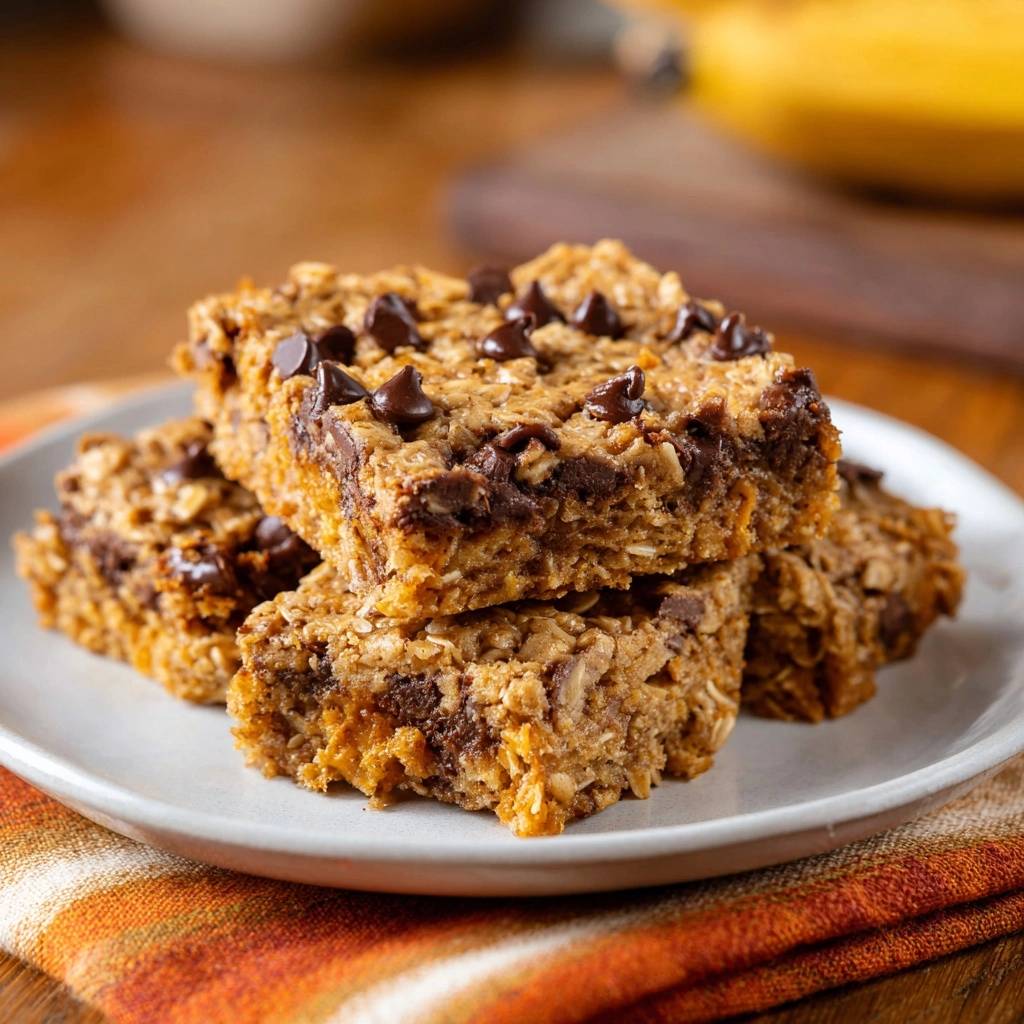
We’ve all been there. You pull a tray of beautiful-looking oat bars out of the oven, wait for them to cool, and the moment you take a bite, they disintegrate into a pile of dry crumbs on your lap. It’s frustrating when a healthy snack feels more like eating a bowl of loose granola than a sturdy, handheld bar.
The secret to fixing this isn’t adding more flour or sugar. Instead, it’s all about the “Rest and Hydrate” technique. By giving your ingredients a few minutes to get to know each other before they hit the heat, you create a bar that’s incredibly chewy, naturally sweet, and structurally sound enough to survive a lunchbox.
The same patience applies when making these chewy oatmeal chocolate chip cookies for the softest texture.
I’ve found that the real magic happens when the oats fully absorb the moisture from the bananas. If you rush the batter into the pan, the oats stay hard and separate. Give them ten minutes to rest, and they transform into a cohesive dough that bakes up perfectly every single time.
The Structural Science of Non-Crumbly Oat Bars
Most homemade bars fail because the oats act like tiny, dry sponges that never quite get wet enough. When you mix your oats with mashed bananas and egg, a fascinating bit of food chemistry begins. The starches in the rolled oats start to swell as they pull in the liquid from the fruit and the proteins from the egg.
This hydration period creates a natural, sticky matrix. Think of it like building a brick wall; the oats are your bricks, and the hydrated banana-egg mixture is the mortar. If the mortar is too dry, the wall falls down. By waiting ten minutes, you ensure that the “mortar” has actually bonded to the surface of every single oat flake.
Furthermore, the egg provides a protein-based lattice that sets firmly during baking. While the banana provides the bulk, the egg provides the “snap.” Skipping the rest period means the oats stay “sandy,” which is why bars often shatter when you try to slice them. Patience is truly the most important ingredient for a clean, professional-looking bite.
Essential Components for Chocolate Chip Banana Oat Bars
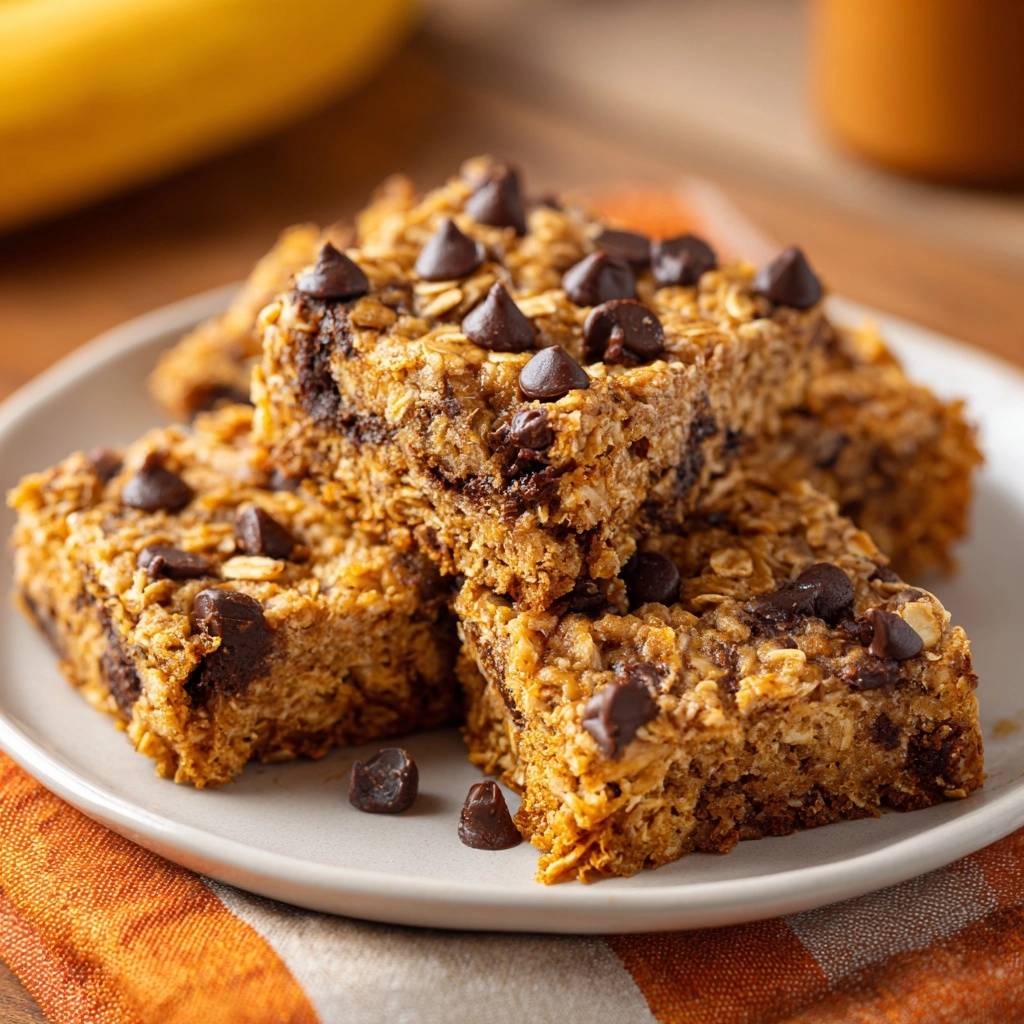
Quality ingredients lead to better texture. You must use old-fashioned rolled oats for this recipe. Quick oats are processed too thin and turn into mush, while steel-cut oats are far too hard and won’t soften enough in the oven to be pleasant to eat.
The bananas are your primary sweetener and moisture source. You want them to be “cheetah-spotted”—covered in brown freckles. These over-ripe bananas have a higher sugar content and a much softer cell structure, making them easier to mash into a smooth, liquid-like consistency that coats the oats evenly.
Don’t forget the salt and cinnamon. Even though these are sweet bars, a quarter-teaspoon of salt is vital. It cuts through the density of the nut butter and makes the chocolate flavor pop. Without it, the bars can taste a bit one-dimensional and flat.
Choosing the Right Nut Butter Binder
Creamy peanut butter is the classic choice here, offering a robust flavor that pairs perfectly with banana. However, almond butter provides a more neutral, nutty backdrop that lets the vanilla and cinnamon shine. Both work equally well as binders because of their high healthy fat content.
If you’re dealing with a nut allergy, sunflower seed butter is a fantastic alternative. Just be aware that sunflower butter can sometimes react with baking soda to create a harmless green tint, though since we aren’t using soda here, your bars should stay perfectly golden brown.
The Role of the Structural Egg
The egg is the “secret weapon” that separates a crumbly snack from a sturdy bar. As the egg proteins heat up, they coagulate, locking the oats into a solid form. It’s the difference between a snack you have to eat over a plate and one you can grab on your way out the door.
If you need a plant-based option, a flax egg (one tablespoon of ground flaxseed mixed with three tablespoons of water) can work. However, keep in mind that flax doesn’t have the same binding strength as a chicken egg. Your bars will be softer and might require extra cooling time to stay together.
Step-by-Step: Preparing the Perfect Oat Base
Start by mashing your bananas in a large bowl. You want to be thorough here; keep going until the mixture is a smooth liquid with no large chunks remaining. Large pieces of banana create “wet spots” in the finished bar, which can lead to structural weak points where the bar might snap.
Once the bananas are smooth, whisk in the egg, nut butter, honey, vanilla, and spices. Whisk vigorously until the mixture looks like a thick, glossy caramel. This emulsification ensures that the fat from the nut butter and the moisture from the honey are perfectly blended before you add the dry oats.
Fold in the oats using a sturdy spatula. Make sure you scrape the bottom of the bowl to get every bit of the wet mixture incorporated. At this stage, the batter will look quite loose and wet, but don’t worry—the oats are about to do some heavy lifting during the rest phase.
The Critical 10-Minute Hydration Phase
Now comes the most important part: walk away. Set a timer for ten full minutes and let the bowl sit on the counter. During this time, the oats are performing a “cold soak,” softening their outer husks and becoming tacky. This is what prevents that “dry oat” mouthfeel later on.
You will notice a visible change in the batter. It will transform from a bowl of “wet oats” into a thick, heavy, and tacky dough. If you stir it after ten minutes, you’ll feel a lot more resistance. This thickness is the visual cue that the starches have activated and are ready to bond in the heat of the oven.
After the rest, fold in your chocolate chips. Adding them now ensures they are suspended in the thick dough rather than sinking to the bottom of the pan. This keeps your chocolate distribution even from the first bite to the last.
Techniques for Pressing and Baking the Bars
When you transfer the dough to your lined 8×8 pan, don’t just spread it around. You need to use the “Firm Press” technique. I like to lay a small piece of parchment paper over the top and use the flat bottom of a measuring cup to pack the mixture down firmly into the corners.
Pressing the dough removes air pockets and forces the oats closer together, which is essential for a dense, chewy texture. If the dough is loose in the pan, the edges will dry out and become brittle before the center is even cooked. A firm pack ensures even heat distribution throughout the entire tray.
Bake at 350°F for 22 to 25 minutes. Look for the edges to turn a deep golden brown. The center should feel firm and spring back slightly when touched. If it feels soft or “jiggly,” give it another two minutes. Underbaked bars are the leading cause of a “mushy” texture that won’t hold its shape.
The Cooling Mandate: Setting the Structure
I know it’s tempting to slice into these while the chocolate is melty, but you must wait. The cooling process is actually the final stage of cooking. As the bars return to room temperature, the sugars in the honey and the starches in the oats “lock” into place.
If you cut them while they’re hot, the steam escaping will cause the bars to fall apart, creating the very “crumbly mess” we’ve worked so hard to avoid. Place the pan on a wire rack and let it sit until it’s completely cool to the touch. For the cleanest lines, you can even pop the pan in the fridge for 30 minutes.
Once cold, use the parchment paper overhang to lift the entire block out of the pan. This allows you to slice on a flat surface, giving you much better leverage and control over your knife. You’ll see that the bars are now sturdy enough to be stacked without sticking or breaking.
Flavor Variations and Ingredient Swaps
Once you master the base method, you can get creative. For a “Power Bar” version, swap out two tablespoons of oats for a mix of hemp seeds and chia seeds. These add a nice crunch and extra protein without ruining the structural integrity of the “no-crumb” bind.
If you want something more indulgent, try the “Dark Forest” variation. Use dark chocolate chunks instead of semi-sweet chips and fold in a handful of dried tart cherries. The acidity of the cherries cuts through the sweetness of the banana beautifully.
For those who love texture, toasted walnuts or pecans are a great addition. Just make sure to chop them finely. Large nut pieces can act like “wedges” that cause the bars to split, so keeping the pieces small ensures the oats can still bond around them effectively.
Make Ahead, Storage, and Freezing Guide
These bars are fantastic for meal prep because they actually taste better on day two once the flavors have fully melded. You can store them in an airtight container at room temperature for up to three days. If you live in a humid climate, I recommend keeping them in the fridge to maintain that chewy bite.
For long-term storage, these bars freeze beautifully. I suggest “flash freezing” them first. Place the individual bars on a baking sheet in the freezer for an hour until they are hard, then toss them into a freezer bag. This prevents them from sticking together in one giant clump.
When you’re ready to eat, you can let them thaw on the counter for 20 minutes or give them a quick 15-second zap in the microwave. If you microwave them, they will soften significantly, so let them sit for a minute afterward to regain their sturdiness before you pick them up.
Troubleshooting Common Texture Issues
If your bars turned out mushy, the most likely culprit is the banana size. “Large” can be subjective, so if your mash looks very watery, add an extra tablespoon of oats. Also, ensure you aren’t using a pan smaller than 8×8, as the extra thickness will prevent the center from setting properly.
If they are still crumbling despite the egg, you likely skipped the 10-minute rest or didn’t press them firmly enough into the pan. That physical compression is what forces the “mortar” into the “bricks.” Next time, really put some weight into it when you’re flattening the dough!
Lastly, if your chocolate chips look burnt or dull, your oven might be running hot. Chocolate can scorch easily, so check your oven with an internal thermometer. If the tops are browning too fast, you can loosely tent the pan with foil for the last five minutes of baking.
Why are my oats still tough?
Not all oats are created equal. Some “extra thick” brands of rolled oats have a much heartier husk and require more liquid to soften. If you find your bars are a bit too “toothy,” try extending the hydration rest period to 15 or 20 minutes to give those thicker flakes more time to drink up the moisture.
Can I make these without a refined sweetener?
You can certainly omit the honey or maple syrup, but keep in mind that these liquid sweeteners act as a secondary glue. If you remove them, I recommend adding an extra half of a mashed banana to compensate for the lost moisture and tackiness. The bars will be less sweet but still very delicious.
Expert Tips for Clean Slicing
To get those perfect, straight edges you see in bakeries, use a large Chef’s knife rather than a serrated bread knife. A serrated knife uses a sawing motion that can pull at the oats and cause tearing. A sharp Chef’s knife allows for a single, clean vertical press.
Wipe your knife with a damp cloth between every single cut. The residual chocolate and sticky banana on the blade can “drag” through the next bar, creating messy edges. A clean, slightly warm blade will glide through the bars like butter, leaving you with professional-looking snacks every time.
How should I store these bars to keep them from getting soggy?
Store the bars in an airtight container with a piece of parchment paper between the layers. At room temperature, they stay fresh for about 3 days. For longer storage, keep them in the refrigerator for up to a week. The cold environment actually helps maintain their firm, chewy structure.
Why did my bars fall apart when I cut them?
The most common reason for crumbling is cutting the bars while they are still warm. The starches and sugars need to cool completely to “set” the structure. Additionally, make sure you didn’t skip the 10-minute resting period before baking, as this is when the oats hydrate and create the necessary bond.
Can I substitute the egg to make these vegan?
Yes, you can use a “flax egg” by mixing 1 tablespoon of ground flaxseed meal with 3 tablespoons of water and letting it sit for 5 minutes. While the bars will still taste great, they will be slightly more fragile than the version made with a real egg. Be extra careful to let them cool completely before handling.
Can I use quick oats instead of old-fashioned rolled oats?
I don’t recommend using quick oats for this specific recipe. Quick oats are processed into smaller, thinner pieces that absorb moisture too rapidly, often resulting in a mushy, cake-like texture rather than a chewy bar. Rolled oats provide the essential “bite” and structural integrity needed for a handheld snack.
My bars are too soft in the middle, what happened?
This usually happens if the bananas were exceptionally large or if the bars were underbaked. Ensure you mash the bananas until smooth and measure out roughly 1.5 cups. If your oven runs cool, you may need to add 2-3 minutes to the bake time until the center feels firm to a light touch.
Can I use something other than peanut butter?
Absolutely! Almond butter, cashew butter, or even sunflower seed butter work perfectly. The key is to use a “creamy” variety rather than “crunchy” to ensure it mixes smoothly with the banana and egg to create a consistent binder for the oats.
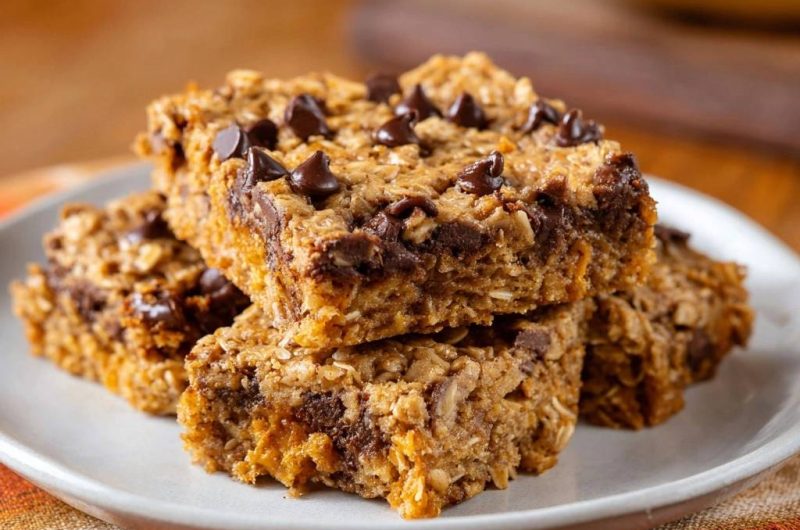
Banana Oat Bars
Course: SnackCuisine: AmericanDifficulty: easy12
bars10
minutes25
minutes240
kcal35
MinutesA sturdy and delicious oat bar recipe that uses mashed bananas, nut butter, and a specific resting technique to ensure a perfect, non-crumbly texture every time.
Ingredients
3 large ripe bananas, mashed smooth (approx. 1.5 cups)
2 cups old-fashioned rolled oats
1/2 cup creamy peanut butter or almond butter
1/4 cup honey or maple syrup
1 large egg (essential for the structural “no-crumb” bind shown in the image)
1 teaspoon vanilla extract
1/2 teaspoon cinnamon
1/4 teaspoon salt
1/2 cup semi-sweet chocolate chips, plus 2 tablespoons for topping
Directions
- Preheat your oven to 350°F (175°C) and line an 8×8 inch baking pan with parchment paper, leaving an overhang on the sides for easy removal.
- In a large mixing bowl, mash the bananas until completely smooth with no large chunks. Whisk in the egg, nut butter, honey, vanilla, cinnamon, and salt until the mixture is emulsified and creamy.
- Fold in the rolled oats until every flake is thoroughly coated. This is the critical step for the (No More Crumbly Mess!) promise. Let the mixture sit in the bowl for 10 full minutes. This allows the oats to hydrate and soften, ensuring they bond together during the bake.
- After the resting period, fold in the 1/2 cup of chocolate chips.
- Transfer the batter to the prepared pan. Use the back of a spatula or a piece of parchment paper to press the mixture down firmly and into the corners. Pressing firmly is essential for the dense, sturdy texture seen in the image.
- Sprinkle the remaining 2 tablespoons of chocolate chips evenly over the top, pressing them slightly into the surface so they stay put.
- Bake for 22 to 25 minutes. The bars are done when the edges are golden brown and the center feels firm and set to the touch.
- Allow the bars to cool completely in the pan on a wire rack. This is non-negotiable; the structure sets as it cools. Once cold, lift the parchment paper out and slice into 12 bars with a sharp knife for clean, non-crumbly edges.
Notes
- The 10-minute resting period is critical for oat hydration. Cooling completely in the pan is non-negotiable for the bars to set their structure.