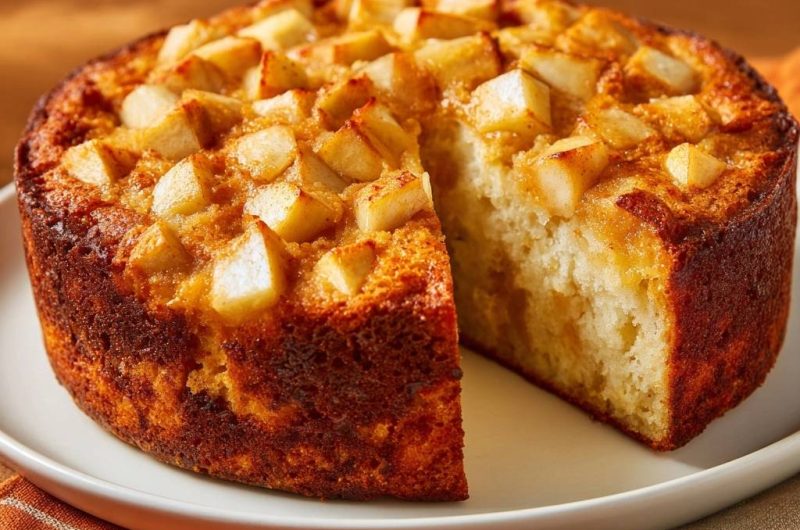
Caramel Apple Upside-Down Cake with Foolproof Release
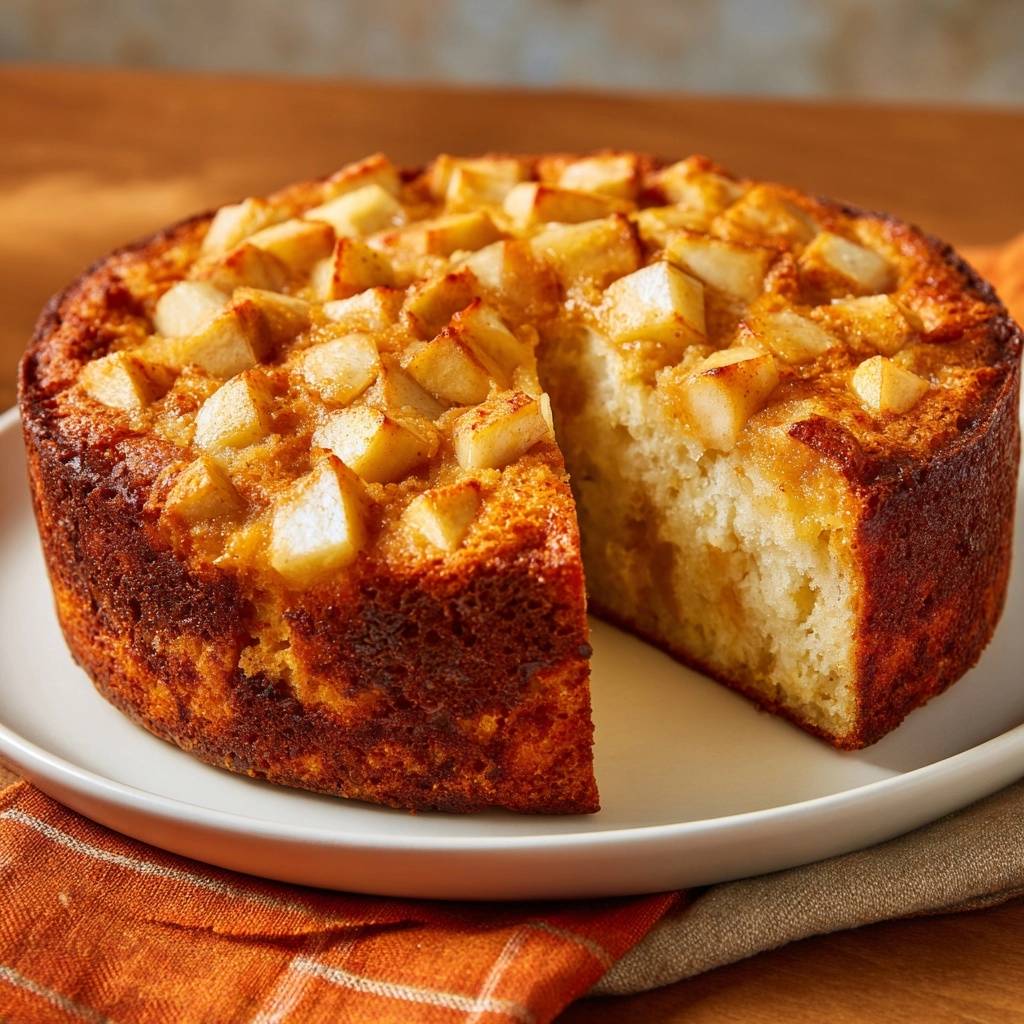
Stovetop Caramel Seals Apples Perfectly
Upside-down cakes dazzle with their glossy fruit tops, but they often stick and tear when you flip them. You’ve seen it happen, right? The caramel clings to the pan, ruining that perfect presentation. This recipe changes everything with a stovetop caramel base that seals the apples tight for a flawless release every time.
Therefore, you get restaurant-worthy results without the frustration. In addition, the warm fall flavors make it ideal for cozy gatherings. Plus, it’s straightforward once you know the trick.
The secret lies in cooking the butter and brown sugar right on the stovetop until it bubbles smooth. This creates a sealed glaze that locks everything in place. No more pan disasters, just pure success.
Selecting Apples for Caramel Apple Upside-Down Cake
Pick tart apples like Granny Smith for the best balance against the sweet caramel in your caramel apple upside-down cake. However, Honeycrisp works too if you want a touch more sweetness. Their firm texture holds up beautifully during baking.
Slice them 1/4-inch thick to prevent sogginess. Thinner pieces turn mushy, while thicker ones stay too crunchy. Therefore, you’ll get that tender yet defined bite every time.
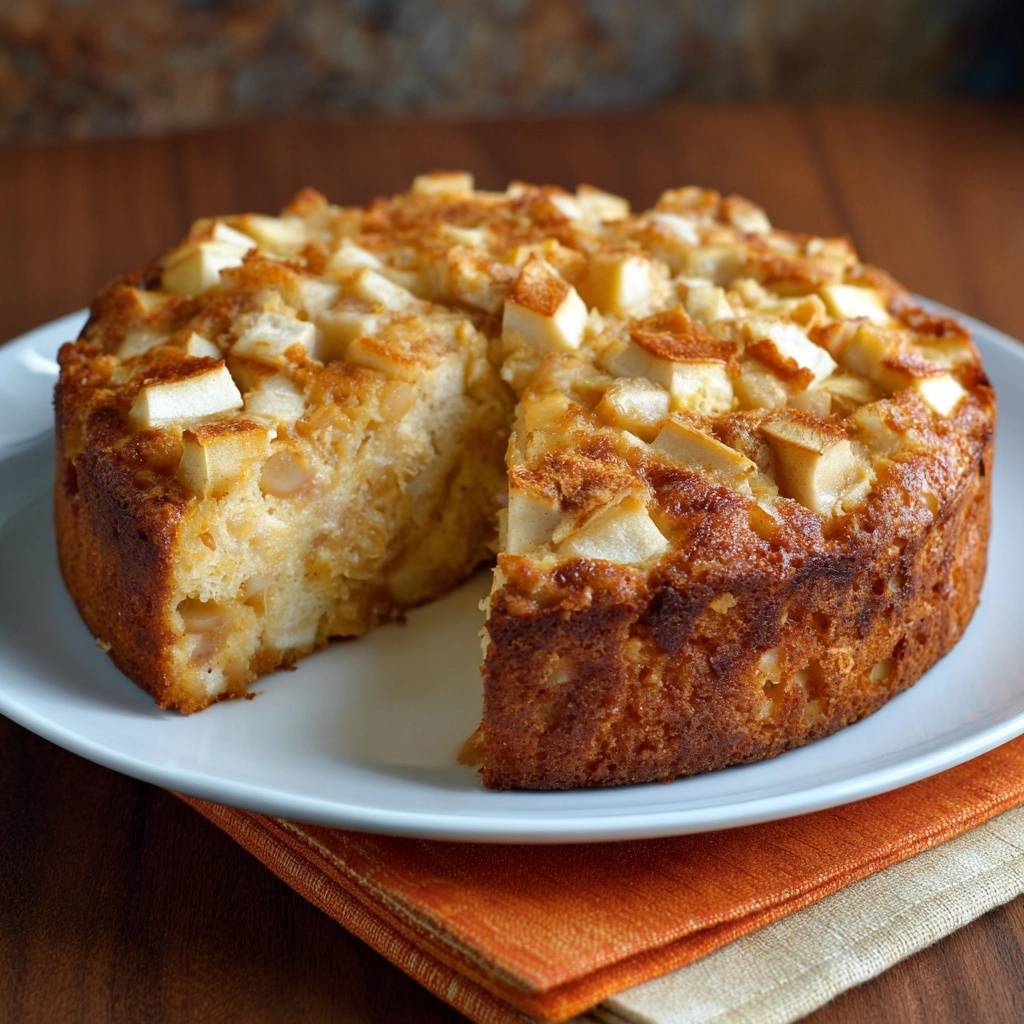
Peel and core four medium ones. They’ll fit perfectly in a single overlapping layer. Oh man, the aroma as they hit the warm caramel is irresistible.
Brown Sugar and Butter Ratio Explained
The 1 cup brown sugar to 1/2 cup unsalted butter ratio forms a glossy, non-stick glaze for your caramel apple upside-down cake. Brown sugar’s molasses adds depth and chew, while butter ensures smoothness. In addition, this combo melts evenly without seizing.
Oven methods often fail because dry sugar doesn’t dissolve fully. Here, stovetop stirring creates a sealed barrier. Therefore, the cake releases cleanly, no scraping needed.
Always use unsalted butter to control the saltiness. Stir constantly over medium heat. You’ll see it bubble into perfection in just minutes.
Cinnamon’s Role in Apple Topping
One teaspoon of ground cinnamon sprinkled over the apples boosts the warm spice without overpowering your caramel apple upside-down cake. It complements the caramel’s richness perfectly. Sprinkle it after arranging the slices on the warm base.
If you enjoy the warm spice in this cake, you’ll love the cinnamon sugar apple bundt cake as well.
This timing lets the cinnamon bloom in the residual heat. Therefore, the flavor infuses evenly as it bakes. It’s subtle yet essential for that classic fall taste.
Science of Caramel Apple Batter Chemistry
Butter Creaming for Light Texture
Cream 1/2 cup softened butter with 1 cup granulated sugar for two full minutes. This traps air bubbles that expand in the oven, giving your caramel apple upside-down cake its light, fluffy rise. Cold butter won’t aerate properly, so let it soften first.
Beat until pale and fluffy, like whipped frosting. In addition, this step prevents a dense crumb. You’ll feel the difference in every bite.
Avoid melted butter here. It leads to flat results. Pro tip: Room temp butter creams fastest.
Alternating Wet and Dry Ingredients
Whisk 1 1/2 cups flour, 1 1/2 teaspoons baking powder, and 1/2 teaspoon salt first. Then add to the wet mix alternately with milk, starting and ending with flour. This keeps gluten from overdeveloping in your caramel apple upside-down cake.
Baking powder provides the lift, while salt sharpens flavors. Therefore, the batter stays tender. Stir just until no streaks remain.
Overmixing toughens it. In addition, this method ensures even distribution without lumps.
Milk’s Impact on Moist Crumb
1/2 cup whole milk creates a moist, tender crumb that won’t sink into the apples. Its fat content hydrates the flour perfectly. Other liquids like water make it dry.
Add it gradually to avoid curdling. Therefore, the cake stays light. Don’t overmix after adding it.
Equipment Choices for Upside-Down Success
Why 9-Inch Round Cake Pan Works
A 9-inch metal round cake pan heats evenly on the stovetop for your caramel apple upside-down cake. Metal conducts heat fast, melting the caramel smoothly. Glass takes longer and risks cracking.
Non-stick isn’t essential thanks to the glaze. However, light-colored metal prevents overbrowning. It fits four apples just right.
Pro tip: Use one with straight sides for easy release.
Tools for Even Batter Spreading
An offset spatula gently spreads batter to the edges over the apples. It keeps air pockets minimal for even baking in your caramel apple upside-down cake. Spoon it in first, then smooth.
A wire rack cools the pan evenly after 10 minutes. This firms the caramel without sticking. Lift slowly when inverting.
Phase 1: Building Caramel Apple Base
Melting Butter and Sugar on Stovetop
Preheat your oven to 350°F. Place 1/2 cup butter and 1 cup brown sugar in the 9-inch pan over medium heat. Stir constantly for 3-4 minutes until it melts into a smooth, bubbling caramel.
Look for a glossy sheen and sweet aroma. Remove from heat immediately. This seals the base perfectly for your caramel apple upside-down cake.
Don’t walk away; it can burn fast. In addition, the bubbles mean it’s ready.
Arranging Slices Without Sinking
Peel, core, and slice four apples 1/4-inch thick. Arrange in a single overlapping layer over the warm caramel. Start from the outside and work in for a pretty spiral.
Sprinkle with 1 teaspoon cinnamon. Therefore, they stay put as you add batter. The warmth softens them just enough.
If you enjoy the warmth of cinnamon in this cake, you’ll love the cinnamon streusel coffee cake for its crunchy topping.
Phase 2: Whipping Up the Batter
Creaming Butter, Sugar, Eggs, Vanilla
Beat softened 1/2 cup butter and 1 cup sugar until light and fluffy, about 2 minutes. Add two eggs one at a time, beating well after each. Mix in 1 teaspoon vanilla for flavor depth.
The mixture thickens and pales. This builds structure for your caramel apple upside-down cake. Scrape the bowl often.
Pro tip: Eggs at room temp emulsify better.
Folding in Flour and Milk Alternately
Add dry ingredients gradually, alternating with 1/2 cup milk. Start and end with flour. Stir just until combined for your caramel apple upside-down cake.
No lumps, but don’t overdo it. Therefore, it stays tender. The batter should be thick but pourable.
Phase 3: Baking and Flawless Inversion
Spooning Batter Evenly Over Apples
Spoon batter gently over the apples, spreading to edges with an offset spatula. This prevents sinking in your caramel apple upside-down cake. Fill evenly for uniform baking.
Place in the center of the oven. In addition, tap the pan lightly to release air bubbles.
Timing the 40-45 Minute Bake
Bake at 350°F for 40-45 minutes. A toothpick in the center comes out clean, and the top turns golden. The edges pull away slightly.
Preheat fully for even rise. Therefore, no raw spots. Rotate halfway if your oven heats unevenly.
10-Minute Cool and Knife-Edge Release
Cool in the pan on a wire rack for exactly 10 minutes. The caramel firms up for easy release. Run a thin knife around the edges.
Invert onto a plate, lift pan slowly. The topping slides out perfectly. Cool fully before slicing your caramel apple upside-down cake.
If a bit sticks, pop it back on briefly. Warmth loosens it.
Avoiding Caramel Apple Pitfalls
Preventing Sticky Pan Disasters
The stovetop method beats sprinkling dry sugar, which never fully melts. Overcooking turns it bitter and hard. Stir constantly and watch the clock for your caramel apple upside-down cake.
If it tears on release, the caramel was too cool. Next time, ensure full bubbling. In addition, metal pans help most.
Pro tip: Grease edges lightly with butter beforehand.
Fixing Dense or Sunken Cake
Dense cake comes from overmixing, which toughens gluten. Stir minimally after flour. Cold milk shocks the batter too.
Check batter weight; it should mound slightly. Therefore, your caramel apple upside-down cake rises tall. Use room temp everything.
Apples Too Soft or Too Firm
1/4-inch slices and firm varieties like Granny Smith give ideal texture. Thinner slices mush; thicker stay crisp. Adjust next time for perfect tenderness in your caramel apple upside-down cake.
Tart apples balance caramel best. Therefore, no overly sweet result.
Flavor Twists on Upside-Down Cake
Pear or Peach Substitutions
Swap apples for pears or peaches in season. Use four medium pears, sliced same thickness. Reduce brown sugar to 3/4 cup if they’re sweet for balanced caramel upside-down cake.
Pears soften nicely, peaches add juiciness. Arrange tightly. In addition, they release just as well.
Nut Additions for Crunch
Sprinkle 1/2 cup chopped pecans or walnuts over the cinnamon. Toast them first in a dry pan for nutty depth on your caramel apple upside-down cake. They add welcome crunch.
Don’t overload; nuts sink if too many. Therefore, 1/2 cup max.
Spice Upgrades Beyond Cinnamon
Add 1/4 teaspoon nutmeg or cardamom with the cinnamon. These boost warmth without dominating your caramel apple upside-down cake. Start small to taste.
Freshly ground spices shine brightest. In addition, they pair with fall fruits perfectly.
What to Serve Alongside Your Caramel Apple Cake
Since this upside-down cake brings warm caramel and tender apples to the table, add another fruit or vegetable side that shares that same caramelized sweetness.
- The caramelized pineapple chunks use a similar skillet technique and deliver concentrated sweetness that matches the cake’s sticky topping.
- For a heartier companion, the candied sweet potatoes with firm texture and glossy glaze echo the caramel
Pairing Sides with Upside-Down Cake
Creamy Toppings and Sauces
Whipped cream cuts the richness of caramel apple upside-down cake. Vanilla ice cream melts into sweet pools. For extra, drizzle homemade salted caramel sauce.
Whip cream to soft peaks with a touch of sugar. Therefore, it contrasts the warm cake beautifully. Fresh and simple.
Beverage Matches for Fall Dessert
Hot coffee enhances the caramel notes in caramel apple upside-down cake. Hot cider brings out the apples too. Both warm you up perfectly.
Serve them steaming alongside slices. In addition, they make any fall day brighter.
Storage Guide for Caramel Apple Cake
Room Temp vs Fridge Holding
Cool completely, then cover tightly at room temp for up to 2 days. Humidity softens the topping, so keep it dry. Fridge works for 4 days but dries the cake slightly.
Warm slices gently before serving. Therefore, the caramel stays glossy.
Freezing Slices for Later
Wrap individual slices airtight, then freeze up to 2 months. Thaw overnight in fridge; the topping holds firm. Microwave briefly to revive moisture in your caramel apple upside-down cake.
Avoid freezing the whole cake. In addition, parchment between slices prevents sticking.
Troubleshooting Caramel Apple Questions
Why Does Caramel Harden Too Much?
Too much heat or time makes it seize. Cook only to bubbling, 3-4 minutes. If hard, warm the pan gently over low heat before inverting your caramel apple upside-down cake.
Can I Use Gluten-Free Flour?
Yes, swap 1:1 gluten-free flour blend. Add 1/4 teaspoon xanthan gum if not included. It holds structure well in caramel apple upside-down cake.
Batter Too Thick or Thin?
Thick? Add milk 1 tablespoon at a time. Thin? Sprinkle in flour. Aim for spoonable consistency for perfect caramel apple upside-down cake.
How to Scale for Larger Pan?
For 10-inch pan, increase all ingredients by 25%. Use 5 apples, bake 45-50 minutes. Keeps proportions right for caramel apple upside-down cake.
Apples Browning Before Baking?
Dip slices in lemon juice after cutting. Or arrange quickly on hot caramel. Keeps them fresh-looking in your caramel apple upside-down cake.
FAQ
How do I store leftovers of Caramel Apple Upside-Down Cake?
Store at room temperature in an airtight container for up to 2 days. For longer, refrigerate up to 4 days; the caramel stays intact but cover well to prevent drying. It freezes beautifully: wrap slices individually in plastic and foil, then into a freezer bag for up to 2 months. Thaw in the fridge overnight and warm in a 300°F oven for 10 minutes to restore texture; the topping won’t weep or separate.
Why did my upside-down cake stick to the pan?
The most common issue is skipping the stovetop caramel step or not cooking it fully to a bubbling glaze. Dry sugar sprinkling fails because it doesn’t seal the fruit. Always stir 3-4 minutes until smooth and glossy; cool exactly 10 minutes so it firms but stays pliable. If it tears slightly, loosen with a knife and warm the pan bottom in hot water for 30 seconds before lifting.
Can I substitute ingredients in this Caramel Apple Upside-Down Cake?
No buttermilk? Use whole milk as written; it’s ideal for tenderness. For dairy-free, swap butters for plant-based and use almond milk, but reduce to 1/3 cup as it’s thinner. Gluten-free 1:1 flour works; add xanthan gum if needed. Vegan? Use flax eggs (1 tbsp flax + 3 tbsp water each) and ensure vegan butter/sugar. Apples swap with pears or peaches, adjusting sugar down for sweetness.
Why is my cake dense or sunken in the middle?
Overmixing develops gluten, making it tough; stir only until flour disappears. Cold ingredients deflate air from creaming, so use room temp butter, eggs, milk. Too much batter sinks into apples—spoon gently and spread evenly. Check oven temp with thermometer; under 350°F bakes unevenly. Toothpick test early at 40 minutes to avoid overbaking edges while center sets.
What apples are best and how thin to slice them?
Tart Granny Smith or firm Honeycrisp balance caramel best; avoid soft Red Delicious as they mush. Slice exactly 1/4-inch thick with a mandoline for uniformity—thinner gets soggy, thicker stays crunchy. Peel and core for clean presentation; four medium fill the pan perfectly in an overlapping spiral. Dip in lemon juice if browning before arranging.
Can I make this cake ahead for a party?
Yes, bake a day ahead; it tastes even better as flavors meld. Cool fully, cover, and store at room temp. Reheat slices in 300°F oven 8-10 minutes to soften caramel without sogginess. Freezes great for up to 2 months, so prep weeks early. Serves 8-10; double for crowds but use two pans for even baking.
Caramel Apple Upside-Down Cake
Course: DessertCuisine: AmericanDifficulty: mediumYields8
servingsPrep Time20
minutesCook Time45
minutesCalories450
kcalTotal Time60
MinutesUpside-down cakes look stunning but often stick to the pan, tearing the caramelized fruit top. This recipe uses a stovetop caramel base that seals the apples perfectly, ensuring effortless release when flipped no matter what.
Ingredients
Topping:
4 medium apples, peeled, cored, and sliced 1/4-inch thick
1/2 cup unsalted butter
1 cup packed brown sugar
1 teaspoon ground cinnamon
Cake Batter:
1 1/2 cups all-purpose flour
1 cup granulated sugar
1/2 cup unsalted butter, softened
2 large eggs
1 teaspoon vanilla extract
1 1/2 teaspoons baking powder
1/2 teaspoon salt
1/2 cup whole milk
Directions
- Preheat oven to 350 degrees F.
- For the foolproof pan release topping: Place 1/2 cup butter and brown sugar in a 9-inch round cake pan. Set pan over medium heat on stovetop. Cook, stirring constantly, until butter melts and sugar dissolves into a smooth bubbling caramel, about 3-4 minutes. This creates a sealed, non-stick glaze that locks in the apples and guarantees clean release. Remove from heat.
- Arrange apple slices in a single layer over warm caramel, slightly overlapping. Sprinkle with cinnamon. Set aside.
- In a large bowl, beat softened butter and granulated sugar until light and fluffy, about 2 minutes. Add eggs one at a time, beating well after each. Mix in vanilla.
- In another bowl, whisk flour, baking powder, and salt. Gradually add dry ingredients to wet mixture, alternating with milk, starting and ending with flour. Stir just until combined; do not overmix.
- Gently spoon batter over apples, spreading evenly to edges. This keeps the batter light and prevents sinking into the topping.
- Bake 40-45 minutes until a toothpick inserted in center comes out clean and top is golden.
- Cool in pan on wire rack exactly 10 minutes. The caramel will firm up slightly for perfect release. Run a thin knife around edges, then invert onto serving plate. Lift pan off slowly; topping releases cleanly. Cool completely before slicing. Serve warm or at room temperature.
Notes
- Cool in pan exactly 10 minutes for perfect release. The stovetop caramel creates a sealed, non-stick glaze.