Crispy Golden Chicken Cutlets: The Secret to Endless Crunch
There’s nothing quite like biting into a perfectly golden, crispy chicken cutlet, but achieving that consistent, enduring crunch can be elusive. I’ve spent years perfecting the method for these Crispy Golden Chicken Cutlets, ensuring they never turn soggy and always deliver that satisfying texture everyone craves. This recipe isn’t just about frying chicken; it’s about mastering the “never-soggy” secret that transforms a simple meal into a family favorite.
The Enduring Appeal of Crispy Golden Chicken Cutlets (And Why This Recipe Excels)
The “Never-Soggy” Secret: Unlocking Lasting Crispiness
The true magic of these Crispy Golden Chicken Cutlets lies in a simple yet often overlooked detail: the wire rack. While most recipes recommend draining on paper towels, we take it a step further. Immediately transferring the cooked cutlets to a wire rack allows crucial air circulation beneath, preventing steam from accumulating and creating that dreaded soggy bottom.
This technique locks in the desired crispness, ensuring every bite remains delightfully crunchy, even after a few minutes of resting.
Beyond Basic: Flavor That Delights
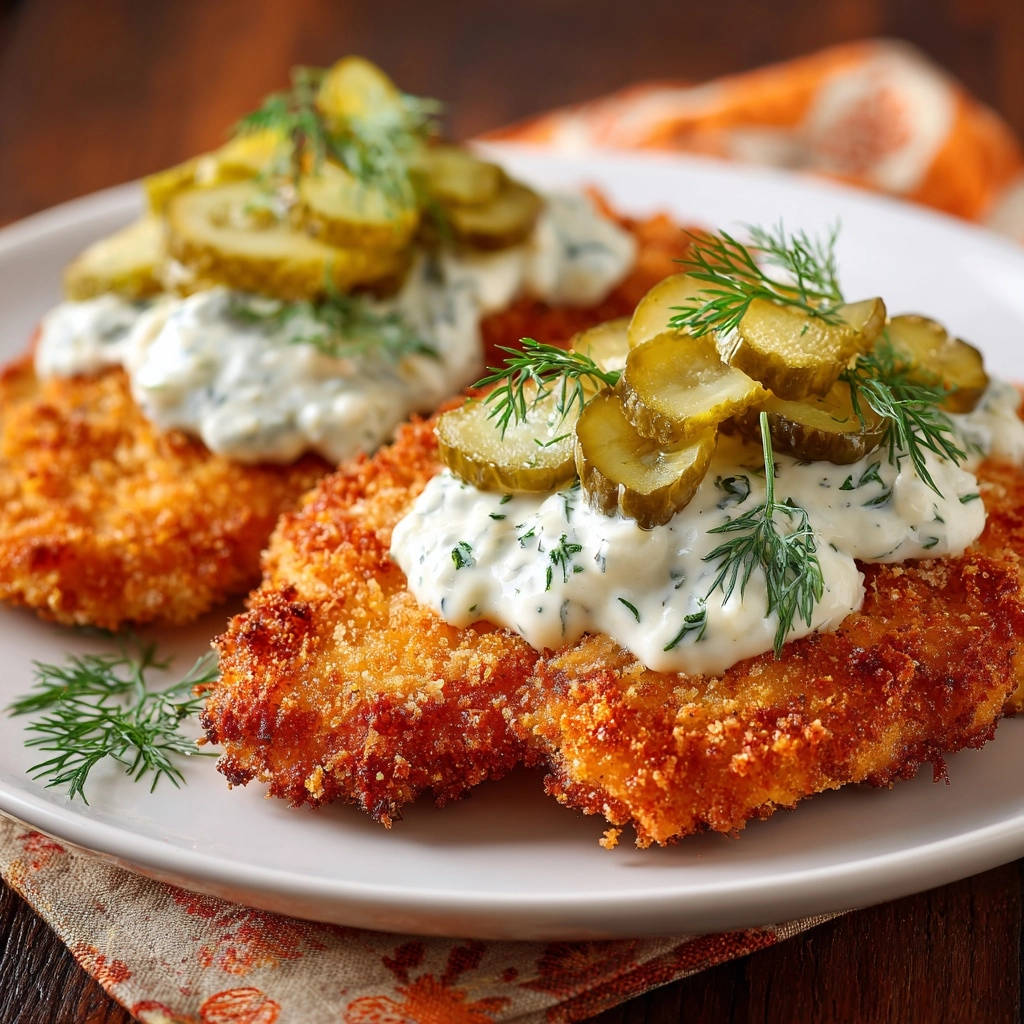
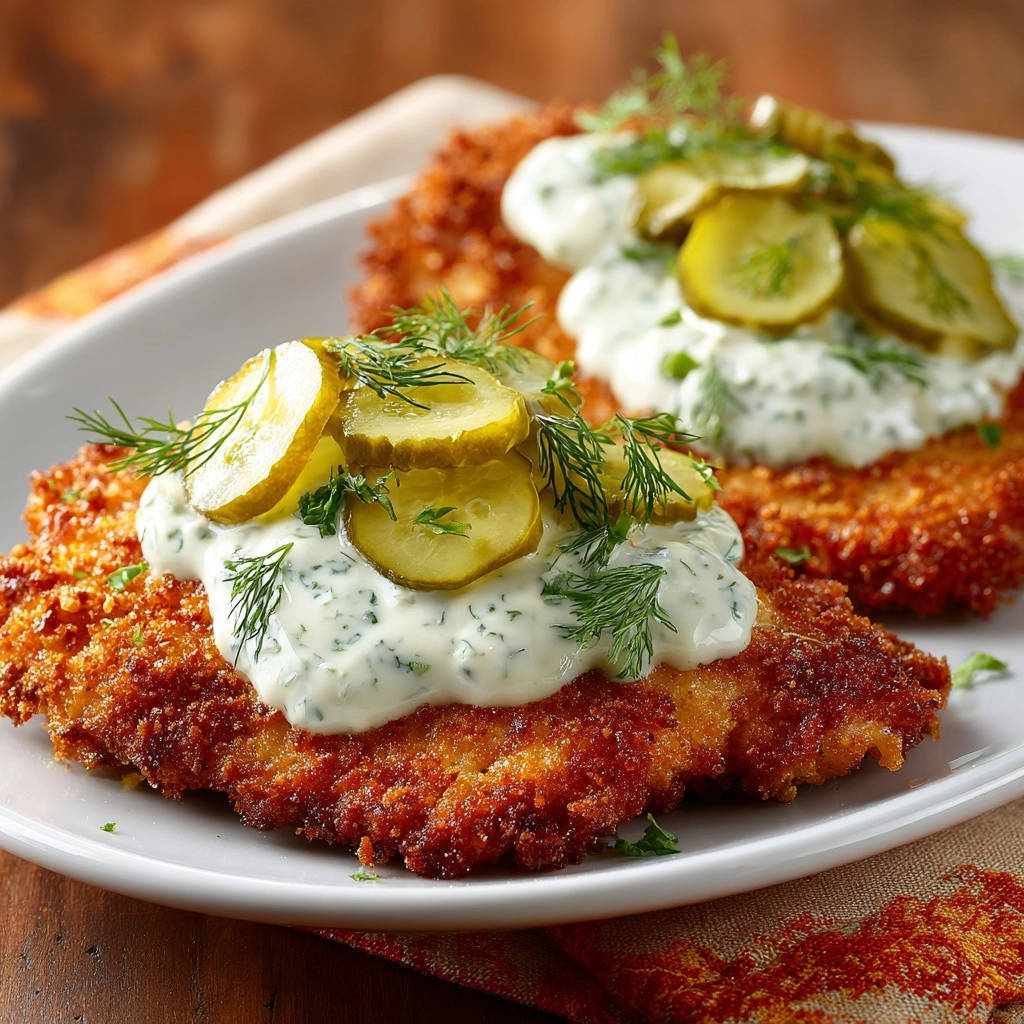
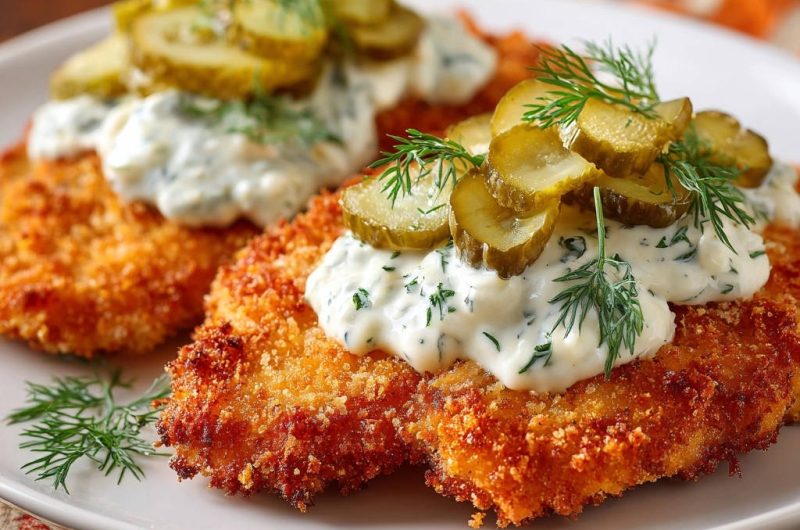
Our Crispy Golden Chicken Cutlets are elevated by a vibrant, fresh dill sauce. This creamy accompaniment, brightened by finely chopped fresh dill, provides a zesty contrast to the rich fried chicken. Paired with sliced dill pickles and garnished with fresh dill sprigs, it transforms a classic dish into something truly special and memorable.
Simple Steps, Stunning Results: Perfect for Any Cook
Despite their restaurant-quality appearance and exceptional crispness, these Crispy Golden Chicken Cutlets are surprisingly straightforward to prepare. Each step is clearly outlined, designed to guide home cooks of all skill levels to achieve stunning, consistently delicious results. The focus is on precision in technique, not complexity, making this recipe incredibly rewarding.
The Building Blocks of Perfection: Ingredients for Your Crispy Golden Chicken Cutlets
The Chicken Canvas: Choosing and Preparing Your Cutlets
For the best Crispy Golden Chicken Cutlets, start with two boneless, skinless chicken breasts, about one inch thick. Pounding them to an even thickness is paramount for quick, uniform cooking and maximum tenderness.
Breading Batter & Golden Coat: Flour, Eggs, and Panko
Our dredging station begins with all-purpose flour seasoned with salt and black pepper, providing a foundational layer for adhesion. Whisked large eggs create the essential binder for the breading.
Crucially, we use Panko breadcrumbs. Their larger, flakier texture is the secret to an incredibly light, airy, and ultra-crispy crust that outperforms traditional breadcrumbs.
The Frying Medium: Oil Selection and Quantity
Vegetable oil is ideal for frying due to its high smoke point and neutral flavor. You’ll need enough to create about a one-inch depth in your skillet, ensuring the cutlets are partially submerged for even cooking and a beautiful golden-brown finish.
Sauce Sensations: Fresh Dill and Creamy Mayonnaise
The accompanying dill sauce is simple yet impactful, combining creamy mayonnaise with finely chopped fresh dill. This fresh herb brings a bright, aromatic quality that perfectly complements the rich chicken. Sliced dill pickles and extra dill sprigs serve as a delightful, tangy garnish.
Tools of the Trade: Equipping Your Kitchen for Frying Success
Pounding for Perfection: Meat Mallet or Heavy Pan
A meat mallet or the bottom of a heavy pan is essential for uniformly pounding chicken breasts. This ensures consistent thickness, promoting even cooking and preventing some parts from being undercooked while others are overdone.
If you pound the chicken thin enough, this same technique keeps the breading crunchy in my recipe for crispy chicken cutlets with gravy.
The Dredging Station Setup: Shallow Dishes
Using three separate shallow dishes is key for an organized and efficient breading process. These allow for thorough coating of the chicken without cross-contamination or excessive mess.
Frying Smarts: Skillet, Tongs, and Thermometer
A large, heavy-bottomed skillet distributes heat evenly, preventing hot spots and ensuring consistent browning. Tongs are indispensable for safely handling hot chicken and a digital thermometer is critical for maintaining optimal oil temperature, directly impacting crispness and cooking safety.
The Wire Rack Advantage: Your Secret Weapon for Crispness
A wire rack set over a baking sheet is non-negotiable for these Crispy Golden Chicken Cutlets. It allows air to circulate around the entire cutlet after frying, preventing steam from softening the bottom and ensuring lasting crispness.
From Prep to Plate: Mastering Your Crispy Golden Chicken Cutlets
Step 1: Pounding for Evenness and Tenderness
Begin by placing each chicken breast between two pieces of plastic wrap. Using a meat mallet or the bottom of a heavy pan, gently but firmly pound the chicken until it is uniformly about 1/4 to 1/2 inch thick. This evenness guarantees consistent cooking and a wonderfully tender finished texture.
Step 2: The Art of the Dredging Station
Prepare your dredging station efficiently. In the first shallow dish, combine the all-purpose flour, salt, and black pepper, whisking to ensure even distribution. In the second dish, whisk the two large eggs until well combined. The third dish is for your Panko breadcrumbs.
Step 3: Crucial Breading Technique for Maximum Crunch
Take one pounded chicken cutlet and dip it thoroughly into the seasoned flour, shaking off any excess. Next, transfer it to the whisked eggs, allowing any extra to drip off. Finally, place the chicken into the Panko breadcrumbs.
This is the critical step for achieving true crispiness: firmly press the Panko breadcrumbs onto both sides of the chicken, ensuring a thick, even coating. The more firmly you press, the better the breading will adhere, leading to a superior, lasting crunch. Repeat this meticulous process with the second chicken cutlet.
Step 4: Achieving Optimal Oil Temperature
Pour vegetable oil into a large, heavy-bottomed skillet until it reaches about a 1-inch depth. Heat the oil over medium-high heat until it reaches a temperature of approximately 350-375 degrees Fahrenheit. You can test the temperature by dropping a small piece of breading into the oil; it should sizzle immediately and vigorously.
Step 5: Frying to Golden Perfection
Carefully place one breaded chicken cutlet into the hot oil. Avoid overcrowding the pan, as this will drastically lower the oil temperature and lead to soggy, pale breading. Fry for about 3-5 minutes per side, or until the breading is a deep, glorious golden brown and the chicken is cooked through, reaching an internal temperature of 165 degrees Fahrenheit.
Step 6: The Critical Drain for Lasting Crispiness
Once perfectly cooked, carefully remove the chicken from the oil using tongs. Immediately transfer the cooked chicken to a wire rack set over a baking sheet lined with paper towels. This crucial step allows air to circulate around the entire cutlet, preventing the bottom from steaming and losing its precious crunch. Repeat with the second chicken cutlet.
Step 7: Whisking Up the Zesty Dill Sauce
While the chicken drains and cools slightly, prepare the bright dill sauce. In a small bowl, combine the mayonnaise and finely chopped fresh dill. Stir well until thoroughly blended.
Step 8: Presenting Your Culinary Masterpiece
Arrange your Crispy Golden Chicken Cutlets on a serving plate. Spoon a generous amount of the zesty dill sauce over each cutlet. Top with sliced dill pickles for an extra tangy bite and garnish with fresh dill sprigs for an elegant finish. Serve immediately to enjoy that perfect, satisfying crunch.
Beyond the Recipe: Pro Tips for Unbeatable Crispy Golden Chicken Cutlets
The Ultimate Pounding Technique: Thin & Even
Achieving truly tender and evenly cooked Crispy Golden Chicken Cutlets starts with proper pounding. Ensure your chicken is a uniform 1/4 to 1/2 inch thick; thicker spots will cook slower, potentially leading to dryness or undercooked areas, while thin spots burn.
Why Pressing the Panko Firmly Matters
Firmly pressing the Panko breadcrumbs onto the chicken is not just a suggestion; it’s a technique. This creates a denser, more cohesive breading that adheres better during frying, resulting in a more pronounced and lasting crunch. It also gives the cutlet a satisfying “shaggy” crust.
Oil Temperature: The Crispy vs. Soggy Divide
Maintaining the correct oil temperature (350-375°F) is paramount for perfectly crispy chicken. If the oil is too cold, the breading will absorb excess oil, becoming greasy and soggy. If it’s too hot, the exterior will brown too quickly, leaving the inside undercooked.
Mastering the Fry: Don’t Overcrowd the Pan
Resist the urge to fry too many cutlets at once. Overcrowding significantly drops the oil temperature, leading to inconsistent browning and, inevitably, soggy breading. Fry in batches if necessary, allowing the oil to return to temperature between additions.
The Wire Rack: Your Best Friend for No-Soggy Bottoms
The wire rack is your secret weapon. After frying, do not place Crispy Golden Chicken Cutlets directly on paper towels. The wire rack allows air to circulate around the entire cutlet, preventing steam from building up and making the bottom crust soft. This simple step preserves that coveted lasting crunch.
Beyond the Basics: Flavor Boosts & Variations
For an extra layer of flavor, consider adding a pinch of garlic powder or smoked paprika to your flour mixture. A squeeze of fresh lemon juice over the finished cutlets can also brighten the flavors beautifully. Experiment with different fresh herbs in the sauce, like parsley or chives, for subtle variations.
Crispy Golden Chicken Cutlets SOS: Troubleshooting Common Issues
Why Aren’t My Cutlets Crispy?
The most common culprits for lack of crispness are oil that isn’t hot enough (below 350°F), overcrowding the pan, or not draining the cutlets on a wire rack. Ensure your oil temperature is correct and fry in batches to maintain heat.
Always drain on a wire rack to allow air circulation and prevent steam from softening the crust.
My Breading Fell Off! What Went Wrong?
Breading can fall off if the chicken wasn’t patted dry before flouring, if excess egg wasn’t allowed to drip off, or most importantly, if the Panko wasn’t pressed firmly enough onto the chicken. Ensure each layer adheres properly before moving to the next.
Chicken is Cooked Outside, Raw Inside?
This usually indicates your oil temperature was too high. The outside browned too quickly before the inside had a chance to cook through. Lower your heat, and always check the internal temperature with a thermometer to ensure it reaches 165°F.
Too Greasy? How to Fix It
Greasy cutlets are often a sign of oil that is too cool. When the oil isn’t hot enough, the breading acts like a sponge, soaking up excess fat. Ensure your oil is at the optimal temperature (350-375°F) and drain immediately on a wire rack after frying.
Your Crispy Golden Chicken Cutlets Queries Answered
Can I Bake or Air Fry These Instead?
While you can bake or air fry chicken cutlets, they won’t achieve the exact same deep golden color or enduring crispness as pan-frying. Baking or air frying will result in a drier, less rich crust. For best results, lightly spray them with oil before baking or air frying.
What are Good Substitutions for Panko Breadcrumbs?
Regular breadcrumbs can be used, but they will yield a less crispy and denser coating compared to Panko. For a unique texture, you could try finely crushed cornflakes or even certain types of crackers, though results will vary significantly.
Can I Make the Dill Sauce Ahead of Time?
Absolutely! The dill sauce can be made up to 2-3 days in advance and stored in an airtight container in the refrigerator. In fact, making it ahead allows the flavors to meld beautifully, enhancing its zestiness.
How Do I Store Leftover Crispy Golden Chicken Cutlets?
Store leftover Crispy Golden Chicken Cutlets in an airtight container in the refrigerator for up to 3-4 days. For optimal crispness upon reheating, avoid stacking them directly on top of each other.
Is it Possible to Prepare Chicken Cutlets Ahead of Frying?
Yes, you can bread the chicken cutlets up to a few hours in advance. Place them on a wire rack set over a baking sheet, cover loosely with plastic wrap, and refrigerate. This can actually help the breading adhere even better before frying.
Beyond the Plate: Serving Suggestions for Your Crispy Golden Chicken Cutlets
Classic Sides That Complement
These Crispy Golden Chicken Cutlets pair beautifully with classic comfort sides. Creamy mashed potatoes, steamed green beans, or a simple crisp garden salad are perfect choices. For a vibrant and flavorful accompaniment, consider a quick side of skillet street-style corn.
Lighter Options for a Balanced Meal
If you’re looking for lighter fare, these cutlets are excellent with a fresh quinoa salad, roasted asparagus, or a medley of colorful roasted vegetables. A side of golden roasted tomatoes adds a lovely sweet-tart balance to the rich chicken.
Creative Serving Ideas
Think beyond the plate! Transform your Crispy Golden Chicken Cutlets into an amazing sandwich by serving them on a brioche bun with lettuce, tomato, and extra dill sauce. They also make fantastic sliders, or can be sliced and added to a fresh Caesar salad for a satisfying main course. For a true delight, enjoy them in our incredible crispy fried chicken sandwich recipe.
Plan Ahead & Preserve: Make-Ahead and Storage Solutions
Chilling Unfried Cutlets
To streamline your cooking process, you can bread the chicken cutlets a few hours before frying. Arrange them in a single layer on a wire rack, cover loosely, and refrigerate. This also helps the breading adhere more effectively.
Storing Leftovers for Best Results
For cooked Crispy Golden Chicken Cutlets, store them in an airtight container in the refrigerator. Consume within 3-4 days for the best quality. Ensure they are completely cool before storing to prevent condensation.
Reheating for Maximum Crispiness
To bring back that amazing crunch, reheat your leftover cutlets in a preheated oven at 375°F (190°C) for 10-15 minutes, or in an air fryer at 375°F (190°C) for 5-8 minutes, until heated through and re-crisped. Avoid the microwave, as it will make them soggy.
Your Culinary Triumph: Enjoying and Sharing Your Crispy Golden Chicken Cutlets
You’ve now unlocked the secret to truly phenomenal Crispy Golden Chicken Cutlets. The satisfaction of a perfectly crunchy bite, paired with that bright dill sauce, is unparalleled. This recipe ensures every meal is a triumph, making weeknights feel special and gatherings unforgettable.
Go ahead, give this recipe a try, and savor the glorious crunch. Don’t forget to share your culinary masterpiece with friends and family – they’ll thank you for introducing them to their new favorite chicken dish!
Chicken Cutlets
Course: Main CourseCuisine: AmericanDifficulty: easy2
servings25
minutes15
minutes950
kcal40
minutesThere’s nothing quite like biting into a perfectly golden, crispy chicken cutlet. This recipe reveals the secret to keeping that delicious crunch locked in, ensuring your cutlets never turn soggy. Served with a fresh, bright dill sauce, it’s a guaranteed crowd-pleaser.
Ingredients
2 boneless, skinless chicken breasts, about 1 inch thick
1/2 cup all-purpose flour
1 teaspoon salt
1/2 teaspoon black pepper
2 large eggs, whisked
1 1/2 cups Panko breadcrumbs
2-3 cups vegetable oil, for frying
1/2 cup mayonnaise
2 tablespoons finely chopped fresh dill, plus extra sprigs for garnish
1/4 cup sliced dill pickles, for garnish
Directions
- Prepare the chicken: Place each chicken breast between two pieces of plastic wrap. Using a meat mallet or the bottom of a heavy pan, pound the chicken until it is about 1/4 to 1/2 inch thick and an even thickness throughout.
- Set up your dredging station: In a shallow dish, combine the all-purpose flour, salt, and black pepper. In a second shallow dish, place the whisked eggs. In a third shallow dish, add the Panko breadcrumbs.
- Bread the chicken: Dip one chicken cutlet into the flour mixture, ensuring it’s evenly coated, then shake off any excess. Next, dip it into the whisked eggs, letting any excess drip off. Finally, place the chicken into the Panko breadcrumbs. This is the crucial step for crispiness: Press the breadcrumbs firmly onto both sides of the chicken, ensuring a thick, even coating. The more firmly you press, the better the breading will adhere and the crispier the final result. Repeat with the second chicken cutlet.
- Heat the oil: Pour the vegetable oil into a large, heavy-bottomed skillet until it reaches about 1 inch deep. Heat the oil over medium-high heat until it reaches approximately 350-375 degrees Fahrenheit. You can test the temperature by dropping a small piece of breading into the oil; it should sizzle immediately.
- Fry the chicken: Carefully place one breaded chicken cutlet into the hot oil. Do not overcrowd the pan, as this will lower the oil temperature and lead to soggy breading. Fry for about 3-5 minutes per side, or until the breading is a deep golden brown and the chicken is cooked through and reaches an internal temperature of 165 degrees Fahrenheit.
- Drain for maximum crispiness: Once cooked, carefully remove the chicken from the oil using tongs. Immediately transfer the cooked chicken to a wire rack set over a baking sheet lined with paper towels. This allows air to circulate around the cutlet, preventing the bottom from steaming and becoming soggy. Repeat with the second chicken cutlet.
- Prepare the dill sauce: While the chicken drains, in a small bowl, combine the mayonnaise and finely chopped fresh dill.
- Serve: Place the crispy chicken cutlets on a serving plate. Spoon a generous amount of the dill sauce over each cutlet. Top with sliced dill pickles and garnish with fresh dill sprigs. Serve immediately and enjoy that perfect crunch!