Classic Coconut Layer Cake: Your Fluffy, Never-Dense Secret
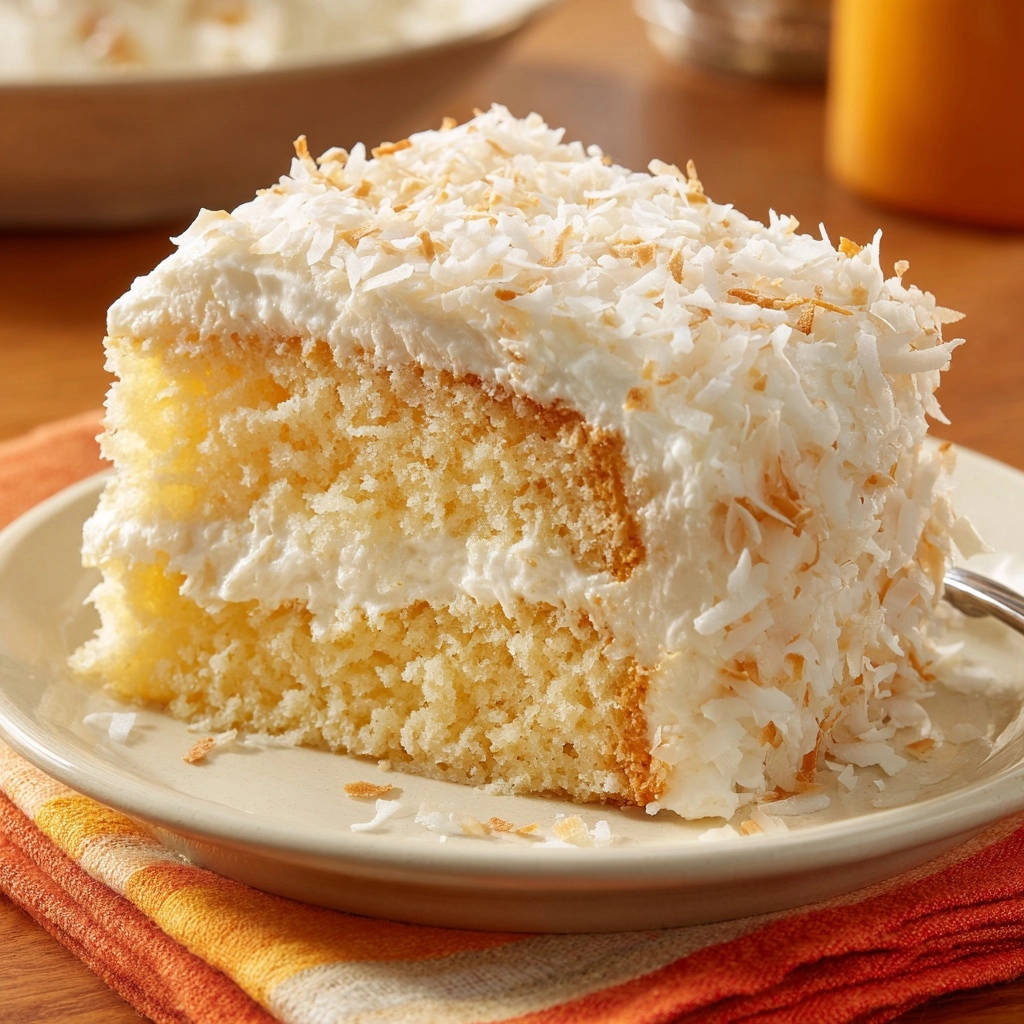
For years, I dreamt of a truly light and airy cake, often ending up with something too heavy or dry. But after countless experiments, I finally mastered the delicate balance needed to create the perfect Classic Coconut Layer Cake.
This recipe delivers on its promise: tender, moist layers paired with a rich, velvety coconut cream cheese frosting, making it the ultimate indulgence that’s surprisingly straightforward to achieve.
Why Our Classic Coconut Layer Cake is Your New Go-To
The “Never Dense” Promise: Achieving That Perfect Crumb
Our method focuses on gentle mixing techniques and precise ingredient temperatures, ensuring air is perfectly incorporated. This results in an incredibly tender, fluffy coconut cake with a melt-in-your-mouth crumb.
Irresistible Flavor Profile: Beyond Just Sweetness
This isn’t just a sweet cake; it’s a symphony of tropical flavors. The subtle sweetness of the cake layers beautifully complements the tangy cream cheese and rich coconut notes in the frosting, creating a harmonious balance.
Designed for Bakers of All Levels
From beginner bakers to seasoned pros, our detailed instructions break down each step, providing critical tips and ‘why’ explanations. You’ll gain confidence and achieve bakery-quality results right in your own kitchen.
Gathering Your Essentials: Ingredients for This Dreamy Cake
For the Light and Tender Cake Layers
Flour & Sweeteners: The Structural Foundation
All-Purpose Flour: The backbone of our cake, providing structure without being too dense. Measure it correctly by spooning it into the cup and leveling it off.
Granulated Sugar: Sweetens the cake and helps tenderize the crumb. Its fine crystals dissolve easily into the batter.
Fats & Liquids: Moisture and Tenderness
Unsalted Butter (softened): Creaming butter incorporates air, which is fundamental for a fluffy cake. Ensure it’s truly at room temperature for optimal aeration.
Large Eggs (room temperature): Bind the ingredients and add richness. Room temperature eggs emulsify better with the butter, creating a smoother, more stable batter.
Whole Milk (room temperature): Provides essential moisture and richness. Like the eggs, room temperature milk integrates seamlessly without curdling the batter.
Leavening & Flavor Boosters
Baking Powder: Our primary leavening agent, ensuring a good rise and an airy texture. Fresh baking powder is key for effective lift.
Salt: Balances the sweetness and enhances all the flavors in the cake, making them more vibrant.
Vanilla Extract: A classic flavor enhancer that complements the coconut beautifully and adds warmth.
Crafting the Velvety Coconut Cream Cheese Frosting
Cream Cheese & Butter: The Rich Base
Cream Cheese (softened): Provides the signature tangy, rich flavor and creamy texture for our frosting. Use full-fat for the best results.
Unsalted Butter (softened): Adds richness, body, and helps stabilize the frosting. Again, room temperature is crucial for a smooth blend.
Sweeteners & Coconut: Flavor and Texture
Powdered Sugar: Sweetens and thickens the frosting, creating its smooth, velvety consistency. Sifting can help prevent lumps.
Vanilla Extract: A touch of vanilla complements the coconut and cream cheese.
Full-Fat Canned Coconut Milk: Essential for a truly tropical coconut flavor and to achieve the perfect spreadable consistency. Do not use reduced-fat varieties.
Sweetened Shredded Coconut: Folded into the frosting for texture and intense coconut flavor, and also used for garnish.
Garnishes for That Finishing Touch
Toasted Coconut Flakes: A beautiful and flavorful garnish that adds visual appeal and a delightful nutty crunch. Toasting truly deepens the flavor.
Essential Tools for Your Baking Success Story
Electric Mixer: Essential for whipping air into the butter and cream cheese, vital for a fluffy cake and smooth frosting.
8-inch Round Cake Pans: For perfectly sized, even layers that bake consistently.
Wire Cooling Rack: Ensures proper air circulation for complete cooling, preventing soggy bottoms.
Mixing Bowls: Several sizes for dry ingredients, wet ingredients, and frosting components, keeping everything organized.
Measuring Cups and Spoons: For accurate ingredient proportions, which is critical for baking success.
Rubber Spatula: For scraping down bowls and gentle folding, preventing overmixing.
Wooden Skewer or Toothpick: For testing cake doneness, ensuring perfectly baked layers.
Baking Perfection: A Step-by-Step Guide to Your Classic Coconut Layer Cake
Preparing Your Workspace and Oven
Preheat your oven to 350 degrees Fahrenheit. Proper oven temperature is vital for even baking and a good rise.
Prepare two 8-inch round cake pans by greasing them thoroughly with butter or baking spray, then dusting lightly with flour. This crucial step prevents the delicate cake layers from sticking.
Mastering the Cake Batter for Fluffiness
In a large bowl, whisk together the dry ingredients: all-purpose flour, granulated sugar, baking powder, and salt. Whisking ensures they are evenly distributed, contributing to a consistent crumb.
In a separate large bowl, using an electric mixer, beat the softened butter until it’s visibly lighter in color and fluffy, about 2 minutes. This crucial step incorporates air, which is the foundation of a light, non-dense cake.
Gradually add the eggs one at a time, beating well after each addition until fully combined. Mix in the vanilla extract, scraping down the sides of the bowl as needed to ensure all ingredients are incorporated evenly.
With the mixer on low speed, add about one third of the dry ingredients to the butter mixture, mixing just until combined. Then, add half of the milk, mixing until just incorporated. Repeat this pattern: another third of dry ingredients, then the remaining milk, and finally the last third of the dry ingredients. Mix ONLY until just combined and no streaks of flour remain; overmixing will develop gluten, resulting in a dense and tough cake.
Baking and Cooling Your Tender Layers
Divide the batter evenly between your two prepared cake pans. Use a kitchen scale for precision, ensuring uniform layers.
Bake for 28 to 32 minutes, or until a wooden skewer inserted into the center comes out clean. This indicates the cakes are fully cooked and will not sink.
Let the cakes cool in the pans for 10 minutes. This allows them to firm up slightly before inverting them onto a wire rack to cool completely. Ensure they are fully cooled before frosting to prevent the frosting from melting.
Whipping Up the Luscious Coconut Cream Cheese Frosting
In a large bowl, beat the softened cream cheese and butter with an electric mixer until smooth and creamy. This takes about 2-3 minutes and is essential for a lump-free frosting.
Gradually add the powdered sugar, one cup at a time, beating until smooth after each addition. Mix in the vanilla extract and coconut milk until the frosting is light and fluffy, achieving a perfect spreadable consistency.
Gently fold 1 cup of sweetened shredded coconut into the frosting for an extra burst of coconut flavor and delightful texture in every bite.
Assembling Your Stunning Coconut Layer Cake
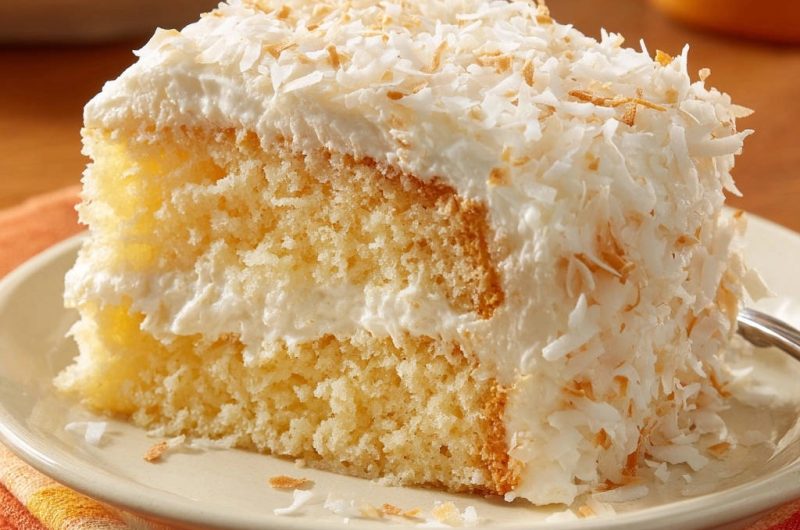
Once the cake layers are completely cool, place one layer on your serving plate. Frost generously between the layers with your prepared coconut cream cheese frosting.
Place the second layer on top, then frost the top and around the sides of the entire cake. Use an offset spatula for smooth, even coverage.
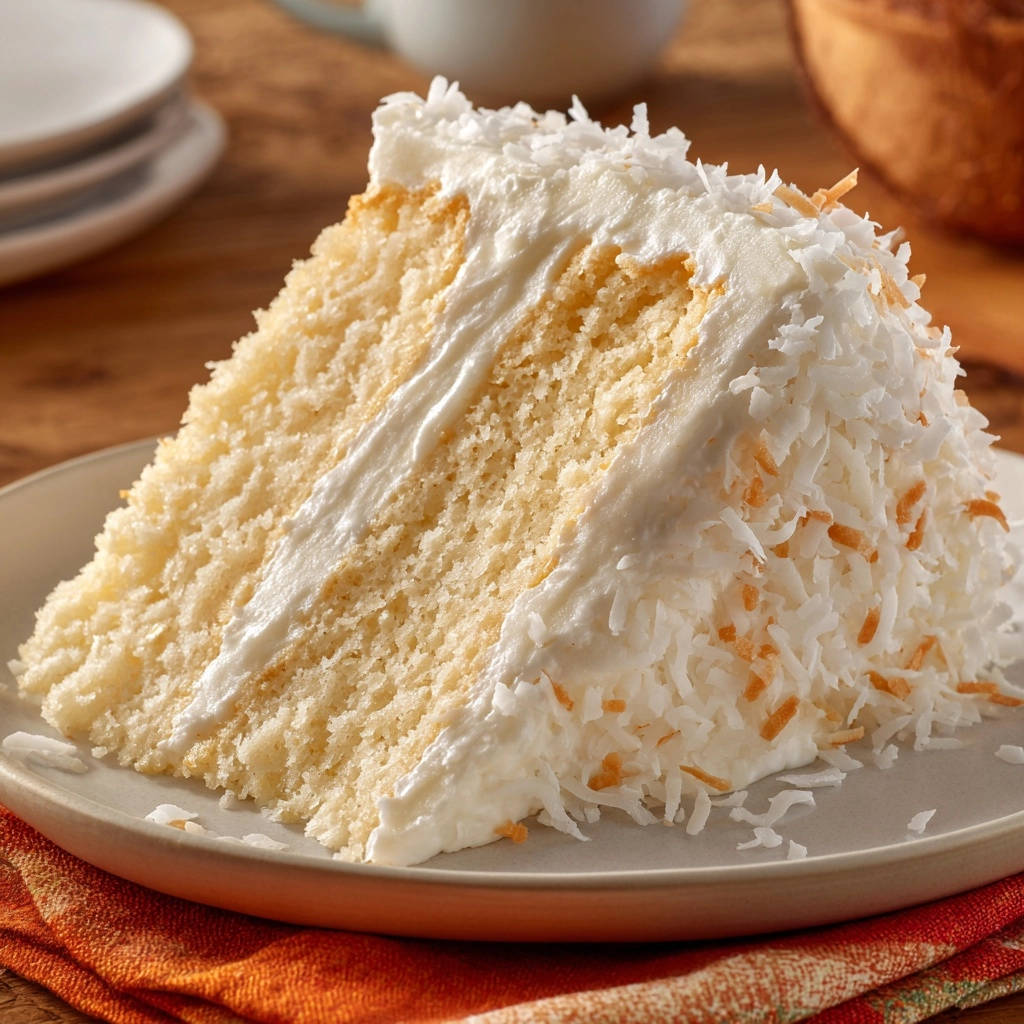
Press the remaining 1/2 cup of sweetened shredded coconut and the toasted coconut flakes onto the top and sides of the cake for a beautiful and delicious garnish. This adds both visual appeal and an irresistible crunch to your Classic Coconut Layer Cake.
Elevate Your Bake: Expert Tips for a Flawless Classic Coconut Layer Cake
The Magic of Room Temperature Ingredients
Ensure your butter, eggs, and milk are all at room temperature. This allows them to emulsify properly, creating a smooth, uniform batter that traps more air, leading to a lighter crumb in your fluffy coconut cake.
Precision Mixing: The Secret to a Light Crumb
Follow the mixing instructions carefully, especially beating the butter until truly light and fluffy, and never overmixing after adding the flour. Overmixing develops gluten, which makes cakes dense and tough, sacrificing the tender cake layers we’re aiming for.
Perfectly Baked Layers Every Time
Use an oven thermometer to ensure your oven is at the correct temperature, as home ovens can vary. Avoid opening the oven door frequently, as this can cause cakes to sink. Test for doneness with a wooden skewer – a clean skewer means it’s ready.
Achieving Silky Smooth Frosting
Start with properly softened cream cheese and butter for your creamy coconut frosting. Beat them thoroughly until completely smooth before gradually adding powdered sugar. This prevents lumps and ensures a velvety texture, making it easier to spread.
Garnishing for Impact
Don’t skip the toasted coconut flakes! Toasting brings out a deeper, nuttier flavor and adds a beautiful golden visual contrast to your Classic Coconut Layer Cake. It elevates the entire presentation of this tropical dessert.
Troubleshooting Common Baking Woes: Your Classic Coconut Layer Cake Rescue Guide
My Cake is Dense or Dry
This is often a result of overmixing the batter after the flour has been added, which develops gluten and makes the cake tough. Ensure you mix only until just combined. Overbaking can also lead to dryness; use a timer and test for doneness promptly with a skewer.
The Layers Sank in the Middle
Sinking can occur if the oven door is opened too early, if the cake is underbaked, or if there’s too much leavening. Ensure your oven temperature is accurate and that the cake is fully cooked before removing it from the oven.
My Frosting is Too Runny or Too Stiff
If runny, gradually add more powdered sugar, one tablespoon at a time, until desired consistency. If too stiff, add a tiny bit more coconut milk (1/2 teaspoon at a time) or cream cheese until it’s spreadable. The temperature of your butter and cream cheese is crucial for consistent results.
Cake Sticks to the Pan
Always grease and flour your cake pans thoroughly, ensuring every surface is coated. You can also line the bottoms with parchment paper for extra insurance, especially with delicate cakes. Ensure the cakes cool for 10 minutes in the pan before inverting.
Serving, Storing, and Enjoying Your Masterpiece
Delightful Serving Suggestions
This Classic Coconut Layer Cake is a showstopper on its own, perfect for any celebration or special dessert. Serve slices with fresh berries like raspberries or strawberries for a bright contrast, or a dollop of whipped cream for extra richness.
Optimal Storage for Freshness
Due to the cream cheese frosting, this cake should be stored in an airtight container in the refrigerator. It will stay fresh and delicious for up to 3-4 days, allowing you to enjoy your homemade coconut cake over several days.
Can I Make This Classic Coconut Layer Cake Ahead?
Yes, you absolutely can! The unfrosted cake layers can be baked, cooled completely, wrapped tightly in plastic wrap, and frozen for up to 2 months. Thaw them in the refrigerator overnight before frosting.
The creamy coconut frosting can also be made a day ahead and stored in an airtight container in the fridge, then re-whipped briefly before use to restore its fluffy texture.
Your Questions Answered: Classic Coconut Layer Cake FAQs
Can I use coconut oil instead of butter?
While coconut oil can be used as a butter substitute in some recipes, this specific Classic Coconut Layer Cake relies on the creaming method with butter for its light texture and rich flavor. Substituting coconut oil may alter the crumb and flavor significantly. For best results, stick to unsalted butter.
How can I make this cake gluten-free?
To make this Classic Coconut Layer Cake gluten-free, substitute the all-purpose flour with a 1:1 gluten-free baking blend that contains xanthan gum. Ensure all other ingredients are certified gluten-free. Baking times might vary slightly, so keep a close eye on it, as gluten-free flours can absorb liquids differently.
What’s the best way to toast coconut flakes?
You can toast coconut flakes in a dry skillet over medium-low heat, stirring constantly until golden, which takes about 3-5 minutes. Alternatively, spread them on a baking sheet and bake at 325°F (160°C) for 5-10 minutes, stirring occasionally. Watch them closely as they can burn quickly!
Can I substitute other milks for whole milk or coconut milk?
For the cake, whole milk provides richness and moisture; you could use 2% milk, but avoid skim for optimal texture. For the creamy coconut frosting, full-fat canned coconut milk is crucial for flavor and consistency. Substituting with lighter milks might make the frosting too thin and less flavorful. For more delicious cake ideas, explore our Zesty Lemon Bundt Cake or a rich Almond Caramel Layer Cake.
How long does the cake last?
Properly stored in an airtight container in the refrigerator, your Classic Coconut Layer Cake will remain delicious for about 3 to 4 days. For the best flavor and texture, allow it to come to room temperature for 15-30 minutes before serving.
Ready to Bake Your Own Classic Coconut Layer Cake Masterpiece?
Now that you have all the secrets to a truly fluffy, never-dense Classic Coconut Layer Cake, it’s time to preheat your oven and create some magic! This recipe is more than just a dessert; it’s an experience waiting to happen, promising rave reviews and delighted smiles with every slice.
Don’t be shy – share your baking triumphs with us! We’d love to see your beautiful Classic Coconut Layer Cakes and hear about your experience. Find more delightful recipes and baking inspiration for your next sweet craving, including our Chewy Coconut Macaroons, which are another coconut lover’s dream!
Coconut Layer Cake
Course: DessertCuisine: AmericanDifficulty: medium12
servings45
minutes30
minutes550
kcal120
minutesStruggled to get that perfect light and airy cake texture? This recipe cracks the code to a truly fluffy Classic Coconut Layer Cake that holds its shape, topped with a rich coconut cream cheese frosting.
Ingredients
For the Cake:
2 and 1/2 cups all purpose flour
1 and 3/4 cups granulated sugar
1 tablespoon baking powder
1/2 teaspoon salt
1 cup (2 sticks) unsalted butter, softened to room temperature
4 large eggs, at room temperature
1 teaspoon vanilla extract
1 cup whole milk, at room temperature
For the Coconut Cream Cheese Frosting:
8 ounces cream cheese, softened
1/2 cup (1 stick) unsalted butter, softened
4 cups powdered sugar
1 teaspoon vanilla extract
1/4 cup coconut milk (canned, full fat)
1 and 1/2 cups sweetened shredded coconut, divided (1 cup for frosting, 1/2 cup for topping)
1/4 cup toasted coconut flakes, for garnish
Directions
- Preheat oven to 350 degrees Fahrenheit. Grease and flour two 8-inch round cake pans.
- In a large bowl, whisk together the flour, granulated sugar, baking powder, and salt. Set aside.
- In a separate large bowl, using an electric mixer, beat the softened butter until light and fluffy, about 2 minutes. This step is crucial for incorporating air, which contributes to a non-dense cake.
- Gradually add the eggs one at a time, beating well after each addition until fully combined. Mix in the vanilla extract. Scrape down the sides of the bowl as needed.
- With the mixer on low speed, add about one third of the dry ingredients to the butter mixture, mixing just until combined. Then add half of the milk, mixing until just incorporated. Repeat with another third of the dry ingredients, then the remaining milk, and finally the last third of the dry ingredients. Mix ONLY until just combined and no streaks of flour remain. Overmixing will develop gluten and result in a dense cake.
- Divide the batter evenly between the prepared cake pans.
- Bake for 28 to 32 minutes, or until a wooden skewer inserted into the center comes out clean.
- Let the cakes cool in the pans for 10 minutes before inverting them onto a wire rack to cool completely.
- To make the frosting: In a large bowl, beat the softened cream cheese and butter with an electric mixer until smooth and creamy.
- Gradually add the powdered sugar, one cup at a time, beating until smooth after each addition. Mix in the vanilla extract and coconut milk until light and fluffy.
- Gently fold 1 cup of sweetened shredded coconut into the frosting.
- Once the cakes are completely cool, frost between the layers, on top, and around the sides of the cake.
- Press the remaining 1/2 cup of sweetened shredded coconut and the toasted coconut flakes onto the top and sides of the cake for garnish.
Notes
- Ensure butter, eggs, and milk are at room temperature. Beat butter thoroughly for airy texture. Do not overmix batter to prevent dense cake.