Mastering the Slow-Roasted Savory Pot Roast
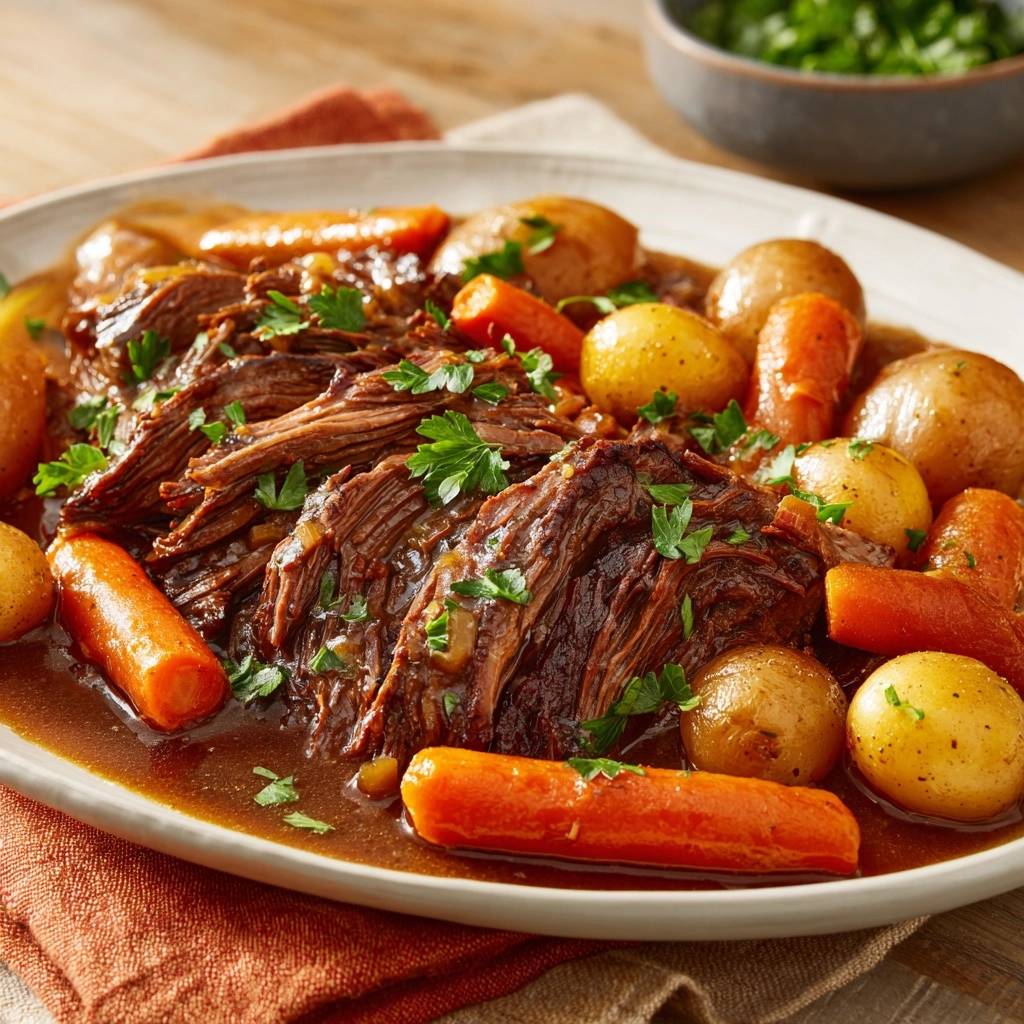
You’ve likely experienced the heartbreak of a pot roast that looks stunning on the platter but eats like a piece of dry, stringy wood. It’s a common kitchen tragedy that usually stems from rushing the process or using the wrong heat. When you get it right, however, the beef doesn’t just break apart; it practically dissolves into a rich, buttery texture that coats your tongue in savory bliss.
The secret to a truly fork-tender result lies in the delicate balance between temperature and time. We aren’t just boiling meat in liquid here. We’re performing a slow, controlled transformation of tough muscle fibers into something luxurious. This Slow-Roasted Savory Pot Roast relies on a specific searing technique and a low-temperature oven phase to ensure every bite is succulent and deeply flavored.
I’ve found that the most important factor is patience during the resting phase. Most people want to shred the beef the second it leaves the oven, but that’s how you lose all the moisture. By letting the meat sit for fifteen minutes, you allow the internal juices to thicken and reabsorb, ensuring the beef stays moist even after it’s sliced. Trust the process, and you’ll never serve a dry roast again.
The Science of Collagen and Heat Control
Beef chuck roast is a hardworking muscle filled with connective tissue called collagen. If you cook this cut quickly over high heat, the proteins tighten up and become incredibly tough. However, when you maintain a steady, low heat, a beautiful chemical reaction occurs. The collagen slowly melts and transforms into gelatin, which provides that signature “melt-in-your-mouth” mouthfeel we all crave.
This transformation generally happens when the internal temperature of the meat stays between 160°F and 180°F for an extended period. By setting your oven to 300°F, you create a gentle environment where the meat can reach this “sweet spot” without the outer layers drying out. It’s the difference between a harsh boil and a gentle braise.
Braising is a moist-heat cooking method that uses both the liquid in the pot and the steam trapped under the lid. This dual-action heating breaks down the tough fibers much more effectively than dry roasting. Therefore, keeping the temperature low ensures the muscle fibers don’t squeeze out their moisture before the collagen has a chance to turn into silky gelatin.
Essential Components for a Rich Braising Liquid
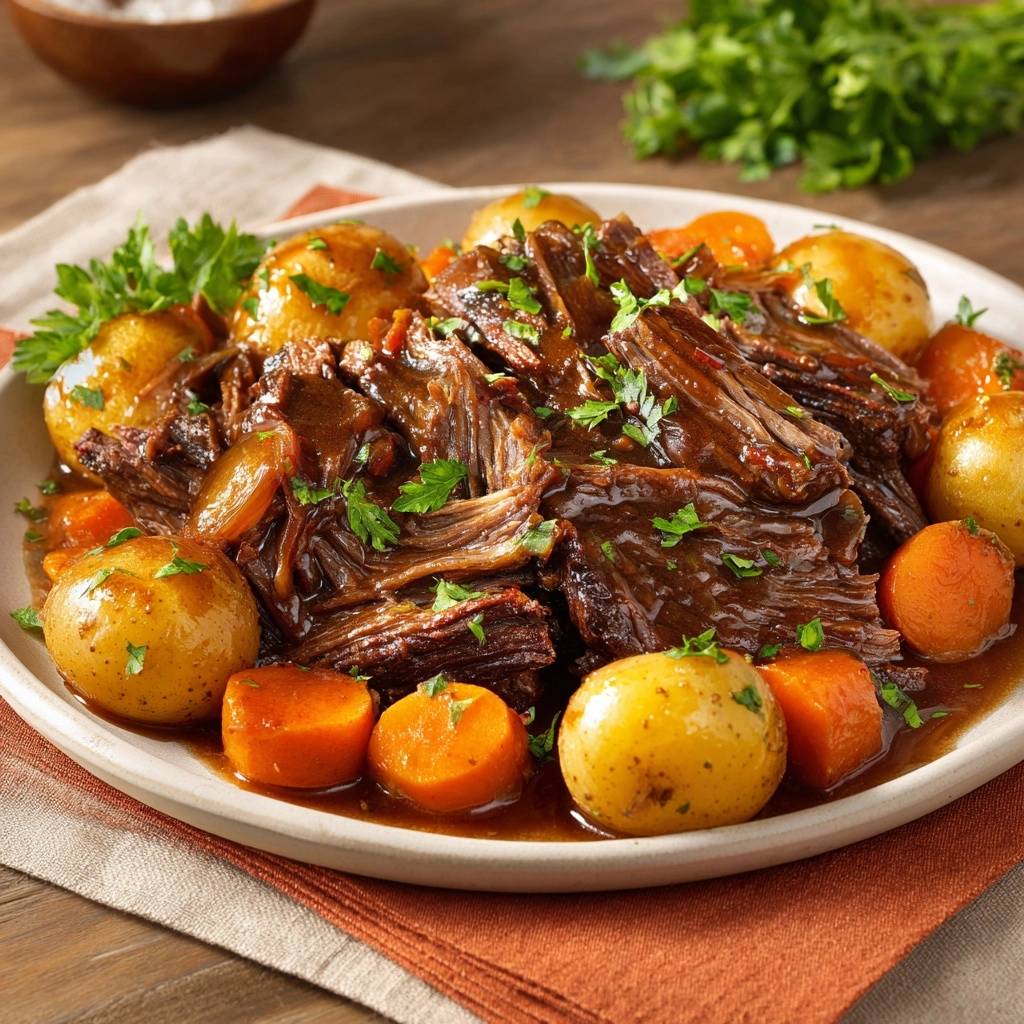
The liquid in your Dutch oven does more than just cook the meat; it becomes the soul of your gravy. I always recommend using baby yellow potatoes because they have a creamy, waxy texture that holds its shape during a long braise. Unlike Russets, which tend to fall apart and turn the liquid grainy, yellow potatoes stay firm and absorb the beefy flavors beautifully.
Tomato paste is another non-negotiable ingredient in this recipe. It acts as a massive umami booster, adding a deep, savory “meatiness” that beef broth alone can’t provide. When you combine that with Worcestershire sauce, you introduce a necessary hit of acidity and fermented complexity. This acidity cuts through the richness of the beef fat, keeping the flavor profile balanced rather than heavy.
Finally, the aromatics create the “Sunday dinner” scent that fills your entire home. Dried thyme and rosemary are sturdy herbs that can handle the long cooking time without losing their punch. Bay leaves add a subtle, floral background note that ties the earthy carrots and onions together. Together, these components create a braising liquid that is far more than the sum of its parts.
Selecting the Right Cut of Beef
For a Slow-Roasted Savory Pot Roast, the chuck roast is the undisputed king. It comes from the shoulder of the cow and contains the perfect ratio of lean meat to intramuscular fat and connective tissue. While you could technically use a brisket or a bottom round, they often lack the consistent marbling found in a chuck roast. You want to look for a piece of meat with plenty of white flecks of fat throughout, as this fat will render down and baste the meat from the inside out as it cooks.
If you enjoy the deep, savory flavor from slow-roasting beef this way, you’ll want to try this braised beef with onions and carrots next.
The Maillard Reaction: Searing for Maximum Flavor
Before the meat ever touches the oven, you must master the sear. This is where the Maillard reaction happens—a chemical reaction between amino acids and reducing sugars that creates hundreds of flavor compounds. To get a perfect sear, you must pat the beef completely dry with paper towels. If the meat is wet, it will steam in the pan instead of browning, and you’ll miss out on that deep, caramelized crust.
Heat your oil until it’s shimmering and just starting to wisps of smoke. When you drop the beef in, you should hear a loud, aggressive sizzle. Don’t move it for at least five minutes. You are looking for a dark, mahogany-brown color on every single side. This process leaves behind “fond,” those little brown bits stuck to the bottom of the pot. That fond is concentrated flavor gold, and it serves as the foundation for your entire sauce.
Step-by-Step: Building the Savory Base
Once the meat is seared and removed, it’s time to build the flavor layers. Toss your onions and carrots into the hot fat left in the pot. As they cook, they’ll release moisture that helps loosen the fond from the bottom. You’ll notice the onions turning translucent and picking up a golden hue from the beef drippings. This is the first step in layering flavors so the final dish doesn’t taste one-dimensional.
Next, stir in your garlic and tomato paste. You want to cook the paste for about a minute until it shifts from a bright red to a deep, brick-red color. This “toasting” of the tomato paste removes the raw metallic taste and unlocks a sweeter, more complex flavor. Pour in a splash of broth now to deglaze, and use a wooden spoon to scrape up every last bit of browned goodness from the bottom of the pot before adding the rest of your broth.
The Low and Slow Oven Phase
Now comes the most important part of the environment: the liquid level. You should only add enough beef broth so that the liquid comes about halfway up the side of the roast. If you submerge the meat completely, you’re stewing it, which can lead to a different texture. By leaving the top half exposed to the steam, you get a more concentrated flavor and a better overall consistency in the meat fibers.
A tight-fitting lid is your best friend during these four hours. It creates a pressurized environment that keeps the moisture from escaping. If your lid is a bit loose, you can place a piece of parchment paper or aluminum foil over the pot before putting the lid on to create a better seal. This trapped steam gently penetrates the meat, ensuring that even the center of a thick three-pound roast becomes tender and juicy.
Timing the Vegetable Addition
Vegetables cook much faster than a large hunk of beef. If you put the potatoes in at the very beginning, they would turn into mush long before the beef was ready. By waiting until the final 60 to 90 minutes of cooking, you ensure the potatoes are perfectly tender but still have enough structural integrity to be poked with a fork. They will spend that final hour soaking up the rendered beef fat and seasoned broth, making them the best part of the meal.
The Resting Period and Gravy Refinement
When the timer goes off, resist the urge to eat immediately. Transfer the beef to a board and cover it loosely with foil. During the long cook, the heat has pushed the juices toward the center of the meat. If you cut it now, those juices will pour out onto the board, leaving the meat dry. Resting allows the fibers to relax and the moisture to redistribute evenly throughout the entire roast.
While the meat rests, you can turn that thin braising liquid into a silky, professional-grade gravy. Whisk your flour and cold water together until no lumps remain, then slowly pour it into the simmering pot juices. You’ll see the liquid transform from a thin broth into a glossy, thick sauce that clings to the back of a spoon. Make sure to simmer it for at least three minutes to cook out the raw flour taste, leaving you with a rich, savory finish.
Troubleshooting Common Pot Roast Obstacles
If your meat is still tough after the allotted time, don’t panic. It simply means the collagen hasn’t finished melting yet. Every piece of meat is different, so just put the lid back on and give it another 30 minutes in the oven. On the other hand, if your sauce tastes too salty, you can add a splash of water or a little more unsalted broth. A tiny squeeze of lemon juice or a teaspoon of vinegar can also help brighten the flavors and mask excess saltiness.
If your gravy ends up lumpy, it’s usually because the slurry was added too quickly or wasn’t whisked enough. You can easily fix this by pouring the gravy through a fine-mesh strainer before serving. Lastly, if the meat seems stringy, check your slicing direction. Always slice against the grain (perpendicular to the long muscle fibers) to ensure the shortest possible fibers in every bite, which makes the meat feel much more tender in your mouth.
Optimal Side Dishes for Beef Pot Roast
Since pot roast is incredibly rich and savory, it pairs best with sides that offer a bit of contrast. A crisp green salad with a sharp lemon vinaigrette provides a refreshing acidity that cleanses the palate between bites of beef. Steamed green beans with a little garlic and butter also add a nice crunch and a pop of color to the plate. Of course, you can’t go wrong with a thick slice of crusty sourdough bread to mop up every last drop of that glossy gravy.
Storage and Reheating for Better Leftovers
Pot roast is one of those rare dishes that actually tastes better the next day. As it sits in the fridge, the flavors in the gravy continue to penetrate the meat. Always store your leftovers in an airtight container with plenty of the gravy poured over the beef. This prevents the meat from oxidizing and drying out in the cold air. When you’re ready to eat, reheat it gently in a covered skillet on the stovetop over low heat to maintain that perfect texture.
Frequently Asked Questions
How should I store leftovers and does this freeze well?
Store leftovers in an airtight container in the refrigerator for up to 4 days. Make sure the meat is completely submerged or well-coated in the gravy to keep it from drying out. This dish freezes exceptionally well for up to 3 months. However, be aware that the potatoes may become slightly grainy after thawing and reheating. For the best results, freeze the meat and gravy together and add fresh potatoes when you reheat the dish.
Why is my pot roast still tough after 4 hours?
Toughness is almost always a sign that the meat needs more time, not less. Beef chuck is very high in connective tissue, and if that tissue hasn’t reached the temperature required to melt into gelatin, the meat will stay tough. Simply cover the pot and return it to the oven for another 30 to 45 minutes. As long as there is liquid in the pot, the meat will eventually tenderize.
Can I use a different cut of meat if I can’t find chuck roast?
If chuck roast isn’t available, the best substitutes are beef brisket or bottom round roast. Brisket has a similar fat content but a more distinct grain, while bottom round is leaner and may require a slightly shorter cooking time to avoid becoming dry. Avoid using “lean” roasts like eye of round, as they lack the fat and collagen necessary for a successful slow braise.
What else can I use for deglazing?
Besides beef broth, a splash of pomegranate juice adds a lovely depth of flavor. The goal of deglazing is to lift the browned bits (fond) from the bottom of the pan, so any flavorful liquid will work. Adding a teaspoon of balsamic vinegar to the broth also adds acidity and complexity.
How do I make sure my gravy isn’t lumpy?
The key to a smooth gravy is the slurry. Always mix your flour with cold water (never hot) and whisk it until it is completely smooth before adding it to the pot. Pour the slurry in a slow, steady stream while whisking the simmering liquid constantly. If lumps do form, simply pour the finished gravy through a fine-mesh sieve into a gravy boat or bowl before serving.
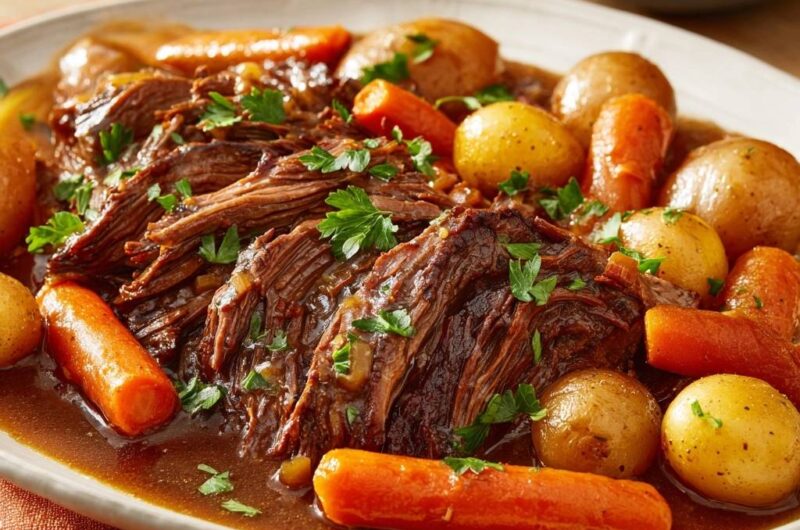
Pot Roast
Course: Main CourseCuisine: AmericanDifficulty: medium6
servings20
minutes4
hours485
kcal260
MinutesA comforting and hearty beef chuck roast slow-cooked with potatoes, carrots, and a rich red grape juice and beef broth gravy. This recipe focuses on searing and low-temperature roasting to break down connective tissue for a tender finish.
Ingredients
3 pound beef chuck roast
1 pound baby yellow potatoes, left whole
4 large carrots, peeled and cut into 3-inch chunks
1 large yellow onion, chopped
3 cups beef broth
2 tablespoons tomato paste
1 tablespoon Worcestershire sauce
3 cloves garlic, minced
2 tablespoons vegetable oil
2 tablespoons all-purpose flour (for the gravy slurry)
1 teaspoon dried thyme
1 teaspoon dried rosemary
2 bay leaves
Salt and black pepper to taste
Fresh parsley, chopped for garnish
Directions
- The most critical step to prevent tough meat is the initial sear. Pat the beef completely dry with paper towels. Season generously with salt and pepper. Heat oil in a large heavy pot or Dutch oven over medium-high heat. Sear the meat for 5 to 6 minutes per side until a deep brown, caramelized crust forms.
- Remove the meat and set it aside on a plate. In the same pot, add the onions and carrots. Cook for 5 minutes to pick up the browned bits (fond) from the bottom of the pan.
- Stir in the garlic and tomato paste, cooking for 1 minute until the paste turns a deep brick red. Pour in a splash of the beef broth now to deglaze the pan, scraping the bottom with a wooden spoon.
- Pour in the beef broth, Worcestershire sauce, thyme, rosemary, and bay leaves. Return the beef and any accumulated juices to the pot. The liquid should come about halfway up the side of the meat.
- To solve the toughness issue, cover the pot with a tight-fitting lid and transfer to a 300°F (150°C) oven. Low and slow heat is mandatory to melt collagen. Cook for 2.5 hours.
- Add the whole baby potatoes to the pot, submerging them slightly in the liquid. Cover and cook for another 60 to 90 minutes, or until the beef is “fork-tender” and pulls apart easily.
- The final secret: Remove the pot from the oven. Transfer the meat to a cutting board and tent loosely with foil to rest for 15 minutes.
- While the meat rests, create the silky gravy shown in the image: Whisk 2 tablespoons of flour with 3 tablespoons of cold water to create a slurry. Bring the pot liquids to a simmer on the stovetop and whisk in the slurry. Simmer for 3-5 minutes until thickened and glossy.
- Thickly slice or pull the beef into large chunks against the grain. Arrange on a platter surrounded by the carrots and potatoes. Pour the thickened gravy over the meat and garnish generously with fresh parsley.
Notes
- The secret to preventing tough meat is the initial sear and the 15-minute resting period after cooking. Always slice against the grain for maximum tenderness.