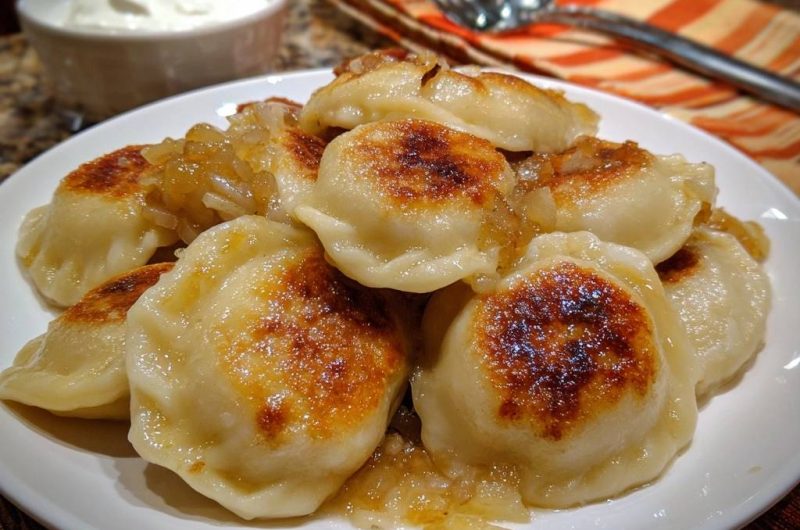
Crispy Pierogi with Caramelized Onions
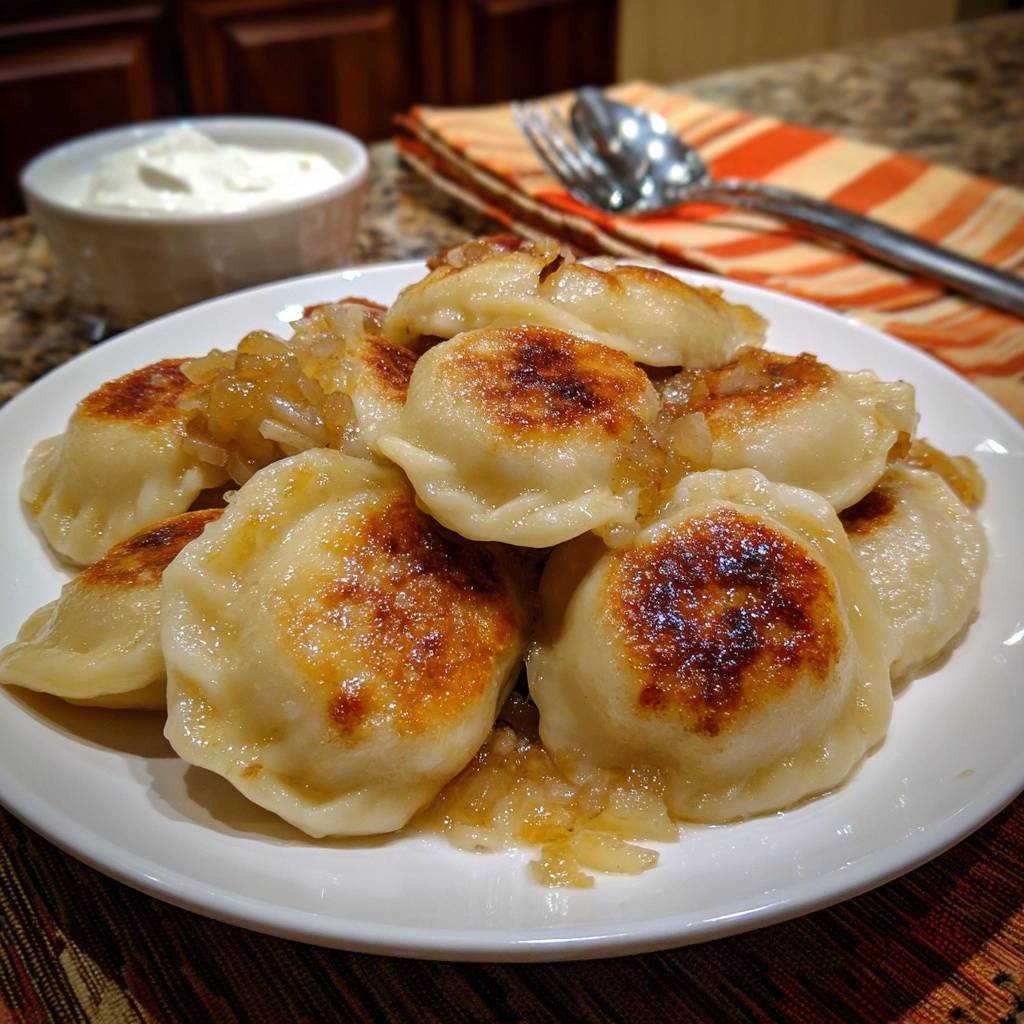
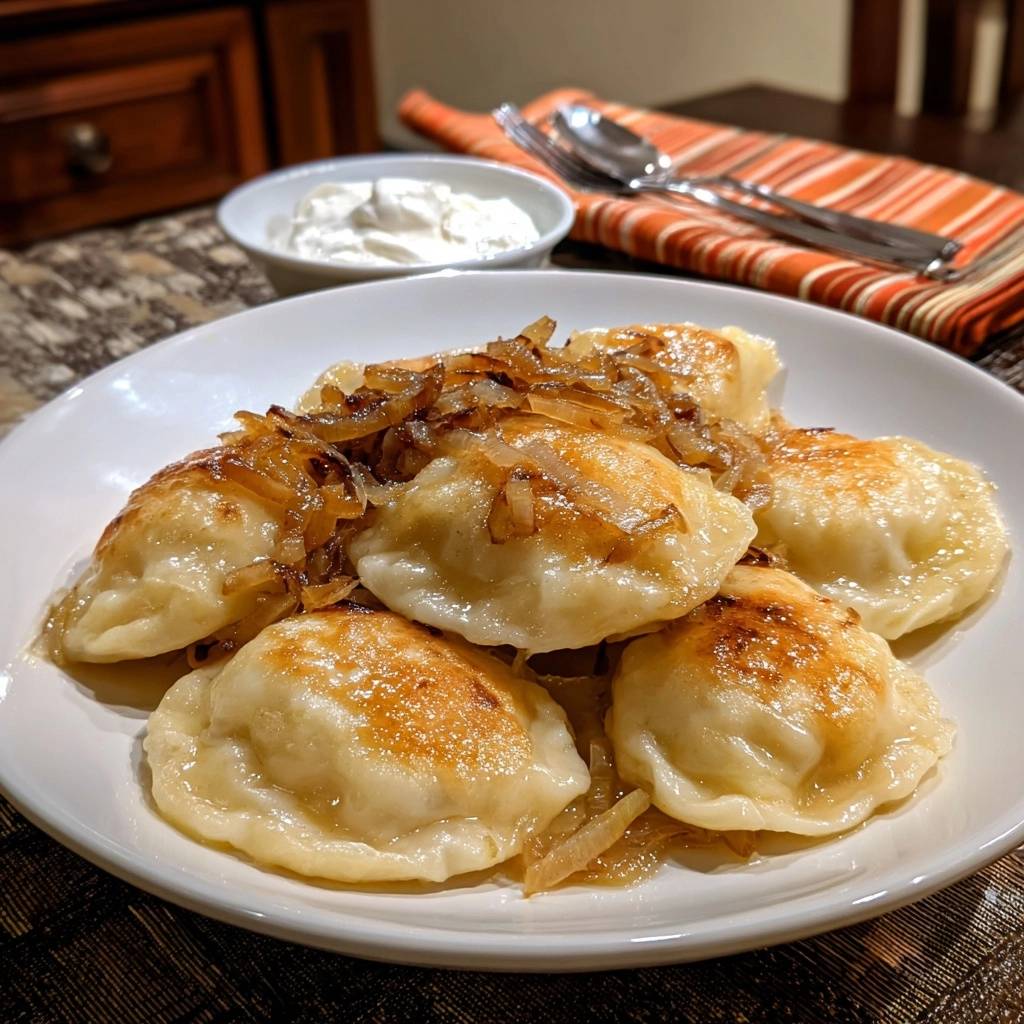
Tired of soggy pierogi that turn to mush after boiling? You know the drill: they come out limp and watery, falling apart on the plate. But this pan-frying method for crispy pierogi with caramelized onions delivers a shatteringly crisp exterior while the inside stays tender and steamy. Dinner’s ready in under 30 minutes, beating takeout every time.
Here’s why it works so well. Traditional boiling steams the dough, leaving no crunch. Frying seals in moisture for that perfect contrast. Plus, those glossy caramelized onions add sweet depth that elevates everything.
The real secret? A screaming-hot pan with foaming butter creates an instant sear. Don’t skip that step, or you’ll end up with steamed sadness. Get ready for restaurant-level results at home.
Why Pan-Frying Transforms Pierogi Texture
Boiling pierogi traps steam inside, but it soaks the dough too. Pan-frying flips the script for crispy pierogi with caramelized onions. High heat crisps the exterior fast, locking tenderness within.
Think Polish street food roots. Vendors fry them fresh for that irresistible crunch. You’ll nail foolproof crispiness without the fuss. In addition, the caramelized onions bring jammy sweetness that pairs perfectly.
However, skip boiling entirely here. Frying alone gives you steamy centers and golden edges. Oh man, that first bite? Pure bliss.
The Perils of Overcrowded Skillets
Cramming pierogi into a full pan steams them instead of crisping. Moisture releases and sogs everything up. For crispy pierogi with caramelized onions, use a single layer always.
Work in batches if needed. Therefore, each one gets hot contact for that deep gold bottom. No more limp disasters.
Butter’s Role in Golden Crispiness
Unsalted butter foams at high heat, searing pierogi perfectly. It browns the dough for nutty flavor in crispy pierogi with caramelized onions. Oil works, but lacks that rich taste.
Butter wins for taste and crisp. Use plenty, and watch the magic happen.
Key Ingredients for Perfect Crispy Pierogi
Start with 20 frozen or fresh pierogi, potato-filled for best results in crispy pierogi with caramelized onions. Potatoes hold shape during frying, staying creamy inside. Thaw frozen ones first in the fridge for easy handling.
Two large yellow onions, thinly sliced, caramelize into sweet gold. They balance the richness perfectly. In addition, 4 tablespoons unsalted butter divided carries all the flavor; don’t skimp.
A half teaspoon salt draws out onion moisture for faster caramelizing. Sour cream on top cuts the richness with tang. For vegan swaps, grab plant-based butter and skip cream or use a dairy-free version.
Choosing Potato-Filled Pierogi
Potato filling withstands heat best for crispy pierogi with caramelized onions. Cheese can ooze out; meat dries fast. Thaw gently to avoid tears.
Slicing Onions for Even Caramelization
Cut onions paper-thin for uniform cooking in crispy pierogi with caramelized onions. Use a sharp knife or mandoline, but watch your fingers. Even slices mean no burnt bits, just sweet gloss.
Science of Caramelizing Onions Slowly
Low heat triggers the Maillard reaction, browning sugars in onions for crispy pierogi with caramelized onions. It takes 15 to 20 minutes; rushing burns them bitter. Patience builds deep, jammy sweetness.
Start pale and watery, end mahogany and sticky. Stir occasionally, lower heat if needed. Visual cue: glossy edges mean they’re ready.
Therefore, salt early to speed moisture release. You’ll smell that candy-like aroma filling your kitchen.
Medium-Low Heat Prevents Scorching
Set medium-low and stir every few minutes for even caramelized onions in crispy pierogi with caramelized onions. High heat chars edges fast. Adjust down if browning too quick.
Equipment Essentials for Crispy Results
A large nonstick skillet shines for crispy pierogi with caramelized onions. Its surface releases pierogi easily after searing. Size matters to fit a single layer without crowding.
Cast iron works if seasoned well, but nonstick forgives beginners. Grab a thin metal spatula for gentle flips. In addition, high sides contain splatters.
High-Heat Tolerance in Skillets
Nonstick handles medium-high without warping for perfect pierogi crisping. It prevents sticking during that crucial sear. Avoid cheap ones that scratch easy.
Phase 1: Mastering Caramelized Onions
Melt 2 tablespoons butter over medium-low. Add sliced onions and salt. Stir occasionally for 15 to 20 minutes until deeply golden in crispy pierogi with caramelized onions.
They soften first, then turn sweet and sticky. Reduce heat if browning fast; scorching ruins the batch. Plate them warm to rest.
That slow transformation smells amazing, like candy onions begging to be tossed with pierogi.
Thin Slicing Technique
Halve onions pole to pole, then slice thinly against the grain. Aim for 1/8-inch for crispy pierogi with caramelized onions. Mandoline speeds it, but use the guard.
Phase 2: High-Heat Sear for Crispiness
Wipe skillet if needed. Add remaining 2 tablespoons butter over medium-high until foaming hot, not smoking. Place pierogi in a single layer for crispy pierogi with caramelized onions.
Fry undisturbed 4 to 5 minutes for deep golden bottoms. The sizzle intensifies as they crisp. Flip gently, cook 3 to 4 minutes more.
Batch if your pan’s small. That undisturbed time seals moisture inside perfectly.
Recognizing the Perfect Sear
Listen for steady sizzle fading slightly; edges lift easy. Bubbles settle on bottoms turning gold for crispy pierogi with caramelized onions. Time it, but trust the cues.
Final Toss and Serving Sour Cream
Return onions to the skillet with crispy pierogi with caramelized onions. Toss gently to coat in buttery glaze, heat 1 minute. Serve hot with a generous sour cream dollop.
The tang cuts through rich onions and crunch. Plate family-style for sharing. It’s comfort food heaven.
For a perfect pairing, try our Mastering the Caramelized Onion and Mushroom Tart.
Avoiding Common Pierogi Pitfalls
Low heat leaves pierogi soggy in crispy pierogi with caramelized onions attempts. Crank it medium-high for sear. Overcrowding steams; always single layer.
Burnt onions? Start lower and stir. Tearing on flip means weak sear; wait longer next time. Patience fixes most issues.
Pro tip: Fresh butter each phase keeps flavors clean. Reheat leftovers in a hot dry pan to recrisp.
Overcrowding Fixes
Use a bigger skillet or batches for crispy pierogi with caramelized onions. Space lets steam escape for crunch. Worth the extra minute.
Flip Without Tearing
Slide spatula under fully, lift confidently. Strong sear holds them together in crispy pierogi with caramelized onions. Practice on one first.
Flavor Variations for Crispy Pierogi
Keep the crisp fry intact for crispy pierogi with caramelized onions twists. Splash apple cider vinegar into onions for tang. Add sliced mushrooms midway for earthiness.
Finish with fresh dill or thyme in butter. These boost without sogginess.
Herb and Garlic Boosts
Mince garlic into onion butter last minute, or stir herbs post-fry for crispy pierogi with caramelized onions. Heat wilts them just right, no mush.
Pairing Sides with Crispy Pierogi
Balance richness with crisp green salad or pickled beets alongside crispy pierogi with caramelized onions. Braised cabbage adds hearty comfort too.
If you enjoy the savory balance of pierogi and onions, try this hearty sausage and potato skillet.
Herbal tea like chamomile refreshes the palate perfectly.
Make-Ahead Guide for Pierogi
Carmelize onions up to 2 days ahead; store airtight in fridge for crispy pierogi with caramelized onions. Reheat gently when frying pierogi.
Fry pierogi fresh, or par-fry and fridge overnight, then recrisp. Freeze uncooked pierogi on a sheet, bag for months. Thaw before frying.
Pro tip: Don’t refreeze cooked ones; texture suffers.
Frequently Asked Pierogi Questions
How do I store leftovers of crispy pierogi with caramelized onions?
Cool completely, then store in an airtight container in the fridge up to 3 days. Reheat in a hot nonstick skillet over medium with a pat of butter to recrisp exteriors; microwave sogs them. They don’t freeze well; onions get watery and pierogi soften on thaw.
What to Serve with Crispy Pierogi
If you’ve got a pan of buttery pierogi and sweet caramelized onions on the table, these two recipes round out the meal with cheesy richness and a dessert that echoes the caramel notes.
- For a dessert that keeps the caramel theme going, the Turtle Cheesecake Bars bring chocolate, pecans, and a smooth cheesecake layer that contrasts nicely with the savory pierogi.
- Another potato-based side
Why are my pierogi soggy instead of crispy?
Most likely overcrowding or low heat steamed them during frying. Use single layer in a screaming-hot pan with foaming butter for that instant sear in crispy pierogi with caramelized onions. Undisturbed cook time seals moisture inside perfectly.
Can I use store-bought pierogi for this recipe?
Absolutely, they’re ideal for crispy pierogi with caramelized onions. Potato-filled hold up best; thaw frozen ones first. Brands like Mrs. T’s or local Polish markets work great without changes.
What vegan substitutions work here?
Swap unsalted butter for plant-based like Earth Balance, and skip sour cream or use cashew-based. Potato pierogi are naturally vegan often. Caramelized onions stay sweet and glossy no problem.
Fresh vs. frozen pierogi: which is better?
Frozen thaw easily and fry crisp for crispy pierogi with caramelized onions; fresh handle gently to avoid bursting. Both shine with this method. Thaw frozen in fridge overnight for best texture.
How do I scale this for a crowd?
Double ingredients but fry in batches to keep single layer for crispy pierogi with caramelized onions. Prep extra onions ahead. Keeps everyone happy with hot, crunchy results.
Crispy Pierogi
Course: Main CourseCuisine: PolishDifficulty: easyYields4
servingsPrep Time10
minutesCook Time30
minutesCalories450
kcalTotal Time40
MinutesTired of limp, watery pierogi? This dead-simple pan-frying technique locks in a shatteringly crisp exterior while keeping the inside tender and steamy, tossed with glossy caramelized onions for restaurant-level results at home.
Ingredients
20 frozen or fresh pierogi (potato filling preferred)
2 large yellow onions, thinly sliced
4 tablespoons unsalted butter, divided
1/2 teaspoon salt
Sour cream, for serving
Directions
- If using frozen pierogi, thaw them in the fridge for easier handling. Slice onions thinly for even caramelizing.
- Melt 2 tablespoons butter in a large nonstick skillet over medium-low heat. Add sliced onions and salt. Cook, stirring occasionally, for 15 to 20 minutes until deeply golden and sweet, reducing heat if they brown too fast. This slow cook prevents scorching. Remove onions to a plate.
- Wipe skillet clean if needed. Add remaining 2 tablespoons butter and heat over medium-high until foaming and hot (but not smoking). This is the key No More Soggy step: the screaming-hot pan with ample butter creates an instant sear that crisps the dough without steaming it.
- Arrange pierogi in a single layer (work in batches if needed; do not overcrowd). Fry undisturbed for 4 to 5 minutes until bottoms are deep golden and crispy. Gently flip with a spatula and fry the other side 3 to 4 minutes more. The undisturbed sear seals the surface, trapping moisture inside for perfect texture.
- Return onions to the skillet, toss everything to coat, and heat through for 1 minute. Serve hot with a dollop of sour cream.
- Crunchy bliss guaranteed!
Notes
- Potato filling preferred. Thaw frozen pierogi in fridge for easier handling. Use a nonstick skillet for best results. Work in batches to avoid overcrowding.