Elegant Glazed Cookies: Achieve Perfect Tender Bites
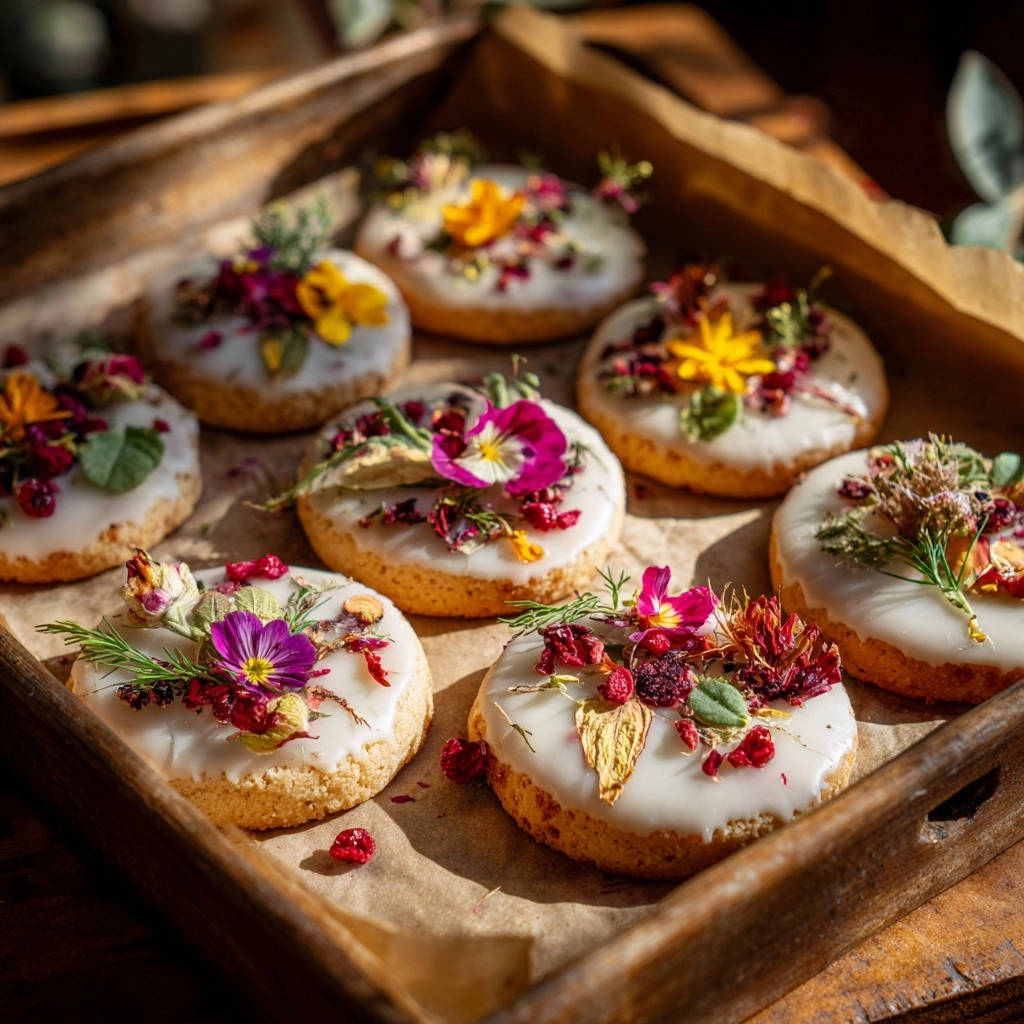
There’s nothing quite like a homemade cookie, yet countless attempts can result in disappointing dryness. After years of perfecting my technique, I discovered the simple secret to consistently achieving that melt-in-your-mouth tenderness. These Elegant Glazed Cookies offer a delicate texture and sophisticated appeal, ensuring they become the showstopper at any gathering.
Why These Elegant Glazed Cookies Will Become Your Go-To
Forget dry, crumbly cookies. This recipe is meticulously crafted to deliver a consistently soft crumb, making every bite a delight. The simple yet impactful techniques used here ensure a professional result without complicated steps.
The Secret to Melt-in-Your-Mouth Tenderness
The core of these cookies’ exceptional texture lies in careful ingredient handling and precise baking. Proper creaming of butter and sugar, gentle mixing to avoid gluten development, and a crucial chilling period all contribute to a tender, never-tough dough. We also focus on under-baking slightly, allowing the cookies to finish setting as they cool, which locks in moisture.
Simple Steps, Impressive Results: Baking Made Easy
Despite their elegant appearance, these glazed treats are surprisingly straightforward to make. The instructions are clear, guiding you through each stage from dough preparation to the final decorative touches. Even novice bakers will confidently achieve beautiful, delicious results with this foolproof recipe.
A Canvas for Creative Decor: Beyond Basic Cookies
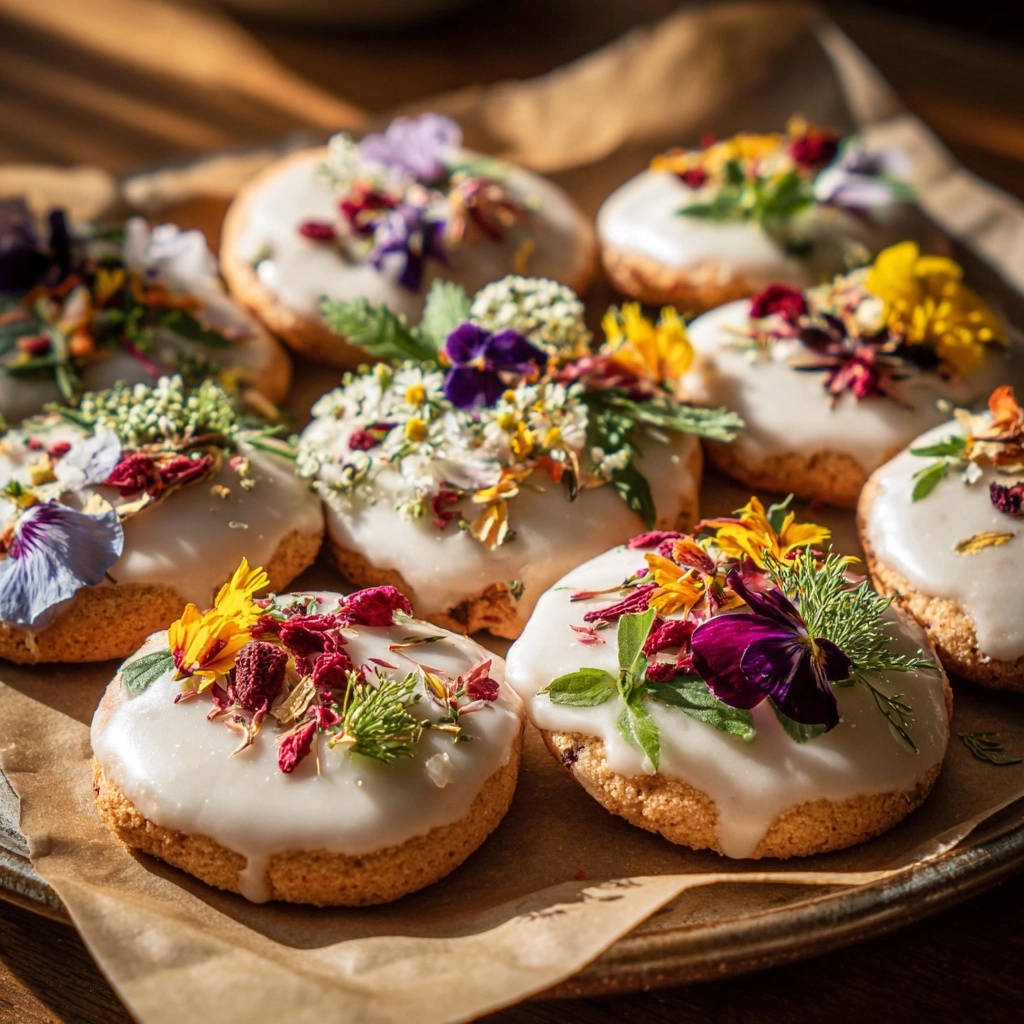
What truly sets these cookies apart is their potential for stunning presentation. The smooth glaze provides a pristine backdrop for artistic adornment. Fresh edible flowers, vibrant dried berries, and even delicate herb sprigs transform these simple cookies into edible works of art, perfect for any special occasion.
Gathering Your Essentials: Ingredients for Exquisite Glazed Cookies
Every exceptional cookie begins with quality ingredients. Here’s what you’ll need to create these beautiful and delicious glazed cookies:
- For the cookies:
- 1 cup (2 sticks) unsalted butter, softened
- 1/2 cup granulated sugar
- 1 teaspoon vanilla extract
- 2 cups all-purpose flour
- 1/4 teaspoon salt
- For the glaze:
- 2 cups powdered sugar
- 3-4 tablespoons milk or water
- 1/2 teaspoon vanilla extract
- For decoration:
- Assorted edible fresh flowers (such as pansies or violas)
- 1/4 cup dried berries (such as dried cranberries or raspberries)
- Small sprigs of fresh edible herbs (such as dill or thyme, sparingly)
Cookie Foundation: Key Dry & Wet Ingredients
Using softened unsalted butter is crucial for proper creaming; it incorporates air effectively without adding unwanted saltiness. Granulated sugar works with the butter to create a light, fluffy base, contributing to the cookie’s tender texture.
Vanilla extract provides warmth and depth, so opt for a good quality pure vanilla. All-purpose flour provides structure, and the salt balances the sweetness while enhancing all other flavors.
Crafting the Perfect Glaze: The Sweet Finish
Powdered sugar is essential for a smooth, lump-free glaze that sets beautifully. The milk or water is your liquid component, allowing you to adjust the glaze to the perfect pourable consistency. A touch more vanilla extract in the glaze echoes the cookie’s flavor, creating a cohesive taste experience.
Edible Adornments: Elevating Your Presentation
Edible fresh flowers like pansies or violas offer a delicate, whimsical touch. Ensure they are specifically culinary grade and pesticide-free. Dried berries provide a pop of color and a chewy contrast, while tiny sprigs of fresh edible herbs like dill or thyme can add an unexpected, sophisticated aroma, used very sparingly.
Essential Tools for Your Cookie-Making Journey
Having the right equipment at hand makes the baking process smooth and enjoyable.
Mixing & Baking Must-Haves
An electric mixer (stand or hand-held) is indispensable for creaming butter and sugar effectively, incorporating the necessary air. You’ll need large mixing bowls for both wet and dry ingredients. A sturdy rolling pin ensures even dough thickness for uniform cookies.
Don’t forget baking sheets and parchment paper to prevent sticking and ensure even baking. A round cookie cutter (approx. 2.5 inches) creates classic shapes, but feel free to use others.
Glazing & Decorating Aids
A wire rack is critical for cooling your cookies completely and allowing the glaze to set without sticking. Placing parchment paper beneath the wire rack saves you from a sticky cleanup. While not strictly necessary, a small offset spatula or pastry brush can help spread glaze if you prefer that method over dipping.
Your Step-by-Step Guide to Perfectly Tender Glazed Cookies
Preparing the Irresistibly Soft Cookie Dough
- Cream Butter and Sugar:
In a large bowl, use an electric mixer to cream the softened unsalted butter and granulated sugar together until they are light and fluffy. This step is crucial; it whips air into the mixture (about 2-3 minutes), which creates a tender, airy crumb in your finished cookies.
- Incorporate Vanilla:
Beat in the vanilla extract until it’s just combined with the creamed butter and sugar. Avoid overmixing here to maintain the aerated structure.
- Combine Dry and Wet Ingredients:
In a separate medium bowl, whisk together the all-purpose flour and salt. Gradually add these dry ingredients to your wet mixture, mixing on low speed only until just combined. Do not overmix; overworking the dough develops gluten, which will result in tough cookies.
- Chill the Dough:
Gather the dough into a flat disc, wrap it tightly in plastic wrap, and refrigerate for at least 30 minutes. Chilling is vital as it firms the butter, preventing the cookies from spreading excessively in the oven, and ensures a more tender, refined bite.
Baking for Golden Perfection
- Preheat Oven and Prepare Pan:
Preheat your oven to 375 degrees Fahrenheit (190 degrees Celsius). Line a baking sheet with parchment paper to ensure easy removal and consistent baking.
- Roll and Cut Dough:
On a lightly floured surface, roll out the chilled cookie dough to a uniform thickness of about 1/4 inch. Use your 2.5-inch round cookie cutter to cut out shapes, then carefully transfer them to your prepared baking sheet.
- Bake Until Just Set:
Bake for 8-10 minutes. The edges should be lightly golden, but the centers should still look slightly soft when you remove them from the oven. This is key for ultimate tenderness, as the cookies will continue to firm up as they cool on the baking sheet.
- Cool Completely:
Let the cookies cool on the baking sheet for 5 minutes before gently transferring them to a wire rack. Allow them to cool completely before glazing to prevent the glaze from melting or becoming runny.
Mastering the Smooth, Glossy Glaze & Final Touches
- Prepare the Glaze:
While the cookies are cooling, whisk together the powdered sugar, 3 tablespoons of milk or water, and vanilla extract in a medium bowl until smooth. If needed, add more milk or water, one teaspoon at a time, until you achieve a smooth, pourable, but not runny, consistency.
- Glaze the Cookies:
Once the cookies are completely cool, dip the top of each cookie into the prepared glaze, allowing any excess to drip off. Place the glazed cookies back onto the wire rack, ideally set over parchment paper for easy cleanup.
- Decorate Immediately and Set:
Immediately after glazing each cookie, artfully arrange your chosen edible fresh flowers, dried berries, and small herb sprigs on top before the glaze begins to set. Allow the glaze to set completely, which can take 30-60 minutes, before serving or storing your beautiful Elegant Glazed Cookies.
Chef’s Secrets: Elevate Your Elegant Glazed Cookies Game
Achieving truly exceptional cookies often comes down to a few expert touches.
Achieving Unmatched Tenderness: Dough Handling Pointers
Properly creaming butter and sugar creates tiny air pockets that contribute to a light texture. Beat until truly light and fluffy, about 2-3 minutes, scraping down the bowl as needed.
When incorporating dry ingredients, mix just until no streaks of flour remain. Overmixing develops gluten, leading to chewy, tough cookies instead of tender ones.
Don’t skip the chilling step! It solidifies the butter, preventing excessive spreading during baking, which maintains the cookie’s shape and keeps it tender.
Watch your oven, not just the timer. Remove cookies when the edges are barely golden and the centers still look slightly underdone. They will continue to bake slightly on the hot pan and firm up as they cool, ensuring maximum tenderness.
Glaze Perfection: Consistency & Application Tips
The ideal glaze consistency is like warm honey-thick enough to coat, but thin enough to flow smoothly. Add liquid sparingly, one teaspoon at a time, until you reach this sweet spot.
For a clean finish, dip the cookie top into the glaze, then gently lift and let excess drip back into the bowl before placing on the rack.
Allow ample time for the glaze to set fully before stacking or storing. This prevents smudges and keeps your elegant decorations intact.
Creative Decorating & Presentation Ideas
Source edible flowers from reputable suppliers or grow them yourself, ensuring they are pesticide-free. Press them gently into the wet glaze for best adhesion.
Experiment with different dried fruits beyond cranberries, such as finely chopped apricots or blueberries. For a beautiful contrast, consider pairing a tart berry with a sweet herb like mint, or a more savory herb like rosemary.
Arrange your glazed cookies on a beautiful platter or in a decorative box for gifting. They make a thoughtful, impressive homemade present.
Common Cookie Conundrums: Solutions for Perfect Results
Why Are My Cookies Tough or Dry?
This is most often due to overmixing the dough. Too much mixing develops gluten, leading to a tough texture. Additionally, overbaking even by a minute or two can dry out your cookies, so watch for those barely golden edges.
My Cookies Spread Too Much!
Excessive spreading typically happens if your butter was too soft, the dough wasn’t chilled long enough, or you used too much flour. Ensure your butter is softened but still cool to the touch, and always chill the dough for at least 30 minutes.
Glaze Is Too Thick/Thin or Not Setting
If your glaze is too thick, add more milk or water a tiny bit at a time. If it’s too thin, gradually whisk in more powdered sugar until desired consistency. Glaze not setting can be due to too much liquid; allowing enough air circulation around the cookies as they dry also helps.
Enjoying Your Elegant Glazed Cookies: Serving & Storage Tips
Best Ways to Serve
These beautiful cookies are perfect for tea parties, bridal showers, or any special gathering where elegance is desired. Serve them alongside a warm cup of coffee or a delicate herbal tea. They also make a thoughtful hostess gift or a delightful addition to a dessert spread, perhaps alongside a vibrant lemon bundt cake.
Proper Storage for Freshness
Store your glazed cookies in an airtight container at room temperature for up to 3-4 days. For optimal freshness and to prevent the glaze from sticking, you can place parchment paper between layers.
Can I Make the Dough Ahead?
Absolutely! The cookie dough can be made up to 2-3 days in advance and stored tightly wrapped in the refrigerator. You can also freeze the raw dough for up to 1 month. Thaw in the refrigerator overnight before rolling and baking.
Frequently Asked Questions About Elegant Glazed Cookies
Can I use different cookie cutters?
Yes, you can absolutely use different cookie cutters! Stars, hearts, or even small squares would be lovely. Just be aware that baking times might vary slightly depending on the size and shape.
Are there gluten-free alternatives for the flour?
While this recipe hasn’t been specifically tested with gluten-free flour blends, a 1:1 gluten-free baking flour blend designed for cookies could work. Results may vary slightly in texture. Consider exploring other naturally gluten-free treats like our chewy coconut macaroons.
How can I make these cookies vegan?
To make them vegan, substitute unsalted butter with a high-quality plant-based butter stick, and use a non-dairy milk (like almond or oat milk) for the glaze. Ensure your sugar is vegan-certified, as some white sugars are processed with bone char.
What other decorations can I use?
Beyond flowers and berries, consider finely chopped nuts, a sprinkle of edible glitter, or small candied citrus peels. You could also pipe additional glaze designs or use food-safe luster dust for a metallic sheen.
Can I freeze the baked Elegant Glazed Cookies?
Yes, you can freeze baked cookies, though the glaze and fresh decorations might be compromised. Freeze unglazed cookies in an airtight container for up to 1 month. Glaze them after thawing. For glazed cookies, freeze them in a single layer until solid, then transfer to an airtight container. Thaw at room temperature. For other delicious desserts that freeze well, try our delightful raspberry crumb bars.
Ready to Impress? Share Your Elegant Glazed Cookies Masterpiece!
Now that you have the secrets to creating truly exceptional Elegant Glazed Cookies, it’s your turn to shine. These beautiful, tender treats are more than just a dessert; they’re an expression of culinary artistry and a guarantee of delighted smiles.
Go ahead, bake a batch, and share your beautiful creations with friends and family. We’d love to see your stunning results! Happy baking!

Cookies
Course: DessertCuisine: AmericanDifficulty: medium24
cookies45
minutes10
minutes60
kcal60
minutesDiscover the secret to perfectly tender, melt-in-your-mouth cookies every time. This easy recipe ensures soft, delightful glazed cookies, beautifully adorned with edible flowers and berries, perfect for any occasion.
Ingredients
For the cookies:
1 cup (2 sticks) unsalted butter, softened
1/2 cup granulated sugar
1 teaspoon vanilla extract
2 cups all-purpose flour
1/4 teaspoon salt
For the glaze:
2 cups powdered sugar
3-4 tablespoons milk or water
1/2 teaspoon vanilla extract
For decoration:
Assorted edible fresh flowers (such as pansies or violas)
1/4 cup dried berries (such as dried cranberries or raspberries)
Small sprigs of fresh edible herbs (such as dill or thyme, sparingly)
Directions
- Achieving Tender Dough: In a large bowl, using an electric mixer, cream together the softened butter and granulated sugar until light and fluffy. This usually takes 2-3 minutes and is crucial for trapping air, which results in a tender crumb.
- Beat in the vanilla extract until just combined.
- In a separate bowl, whisk together the all-purpose flour and salt. Gradually add the dry ingredients to the wet ingredients, mixing on low speed just until combined. Be careful not to overmix; overworking the dough will develop gluten and make the cookies tough.
- Gather the dough into a disc, wrap it tightly in plastic wrap, and refrigerate for at least 30 minutes. Chilling helps prevent spreading and ensures a more tender bite.
- Preheat your oven to 375 degrees Fahrenheit (190 degrees Celsius). Line a baking sheet with parchment paper.
- On a lightly floured surface, roll out the chilled dough to about 1/4 inch thickness. Use a round cookie cutter (approximately 2.5 inches) to cut out shapes. Carefully transfer the cookies to the prepared baking sheet.
- Bake for 8-10 minutes, or just until the edges are lightly golden. Do not overbake; the cookies should still look a little soft in the center when removed from the oven for ultimate tenderness. They will firm up as they cool.
- Let the cookies cool on the baking sheet for 5 minutes before transferring them to a wire rack to cool completely.
- Perfect Glaze Consistency: While the cookies cool, prepare the glaze. In a medium bowl, whisk together the powdered sugar, 3 tablespoons of milk or water, and vanilla extract until smooth. Add more milk or water, one teaspoon at a time, until you reach a smooth, pourable but not runny consistency.
- Once cookies are completely cool, dip the tops of each cookie into the glaze, letting any excess drip off. Place them back on the wire rack over parchment paper for easy cleanup.
- Immediately after glazing each cookie, arrange the edible fresh flowers, dried berries, and small herb sprigs on top before the glaze sets. Allow the glaze to set completely, which may take 30-60 minutes, before serving or storing.
Notes
- Key to tenderness is proper mixing, chilling dough, and not overbaking. Ensure cookies are fully cooled before glazing.