Stuffed French Toast Rolls: Perfectly Sealed & Golden
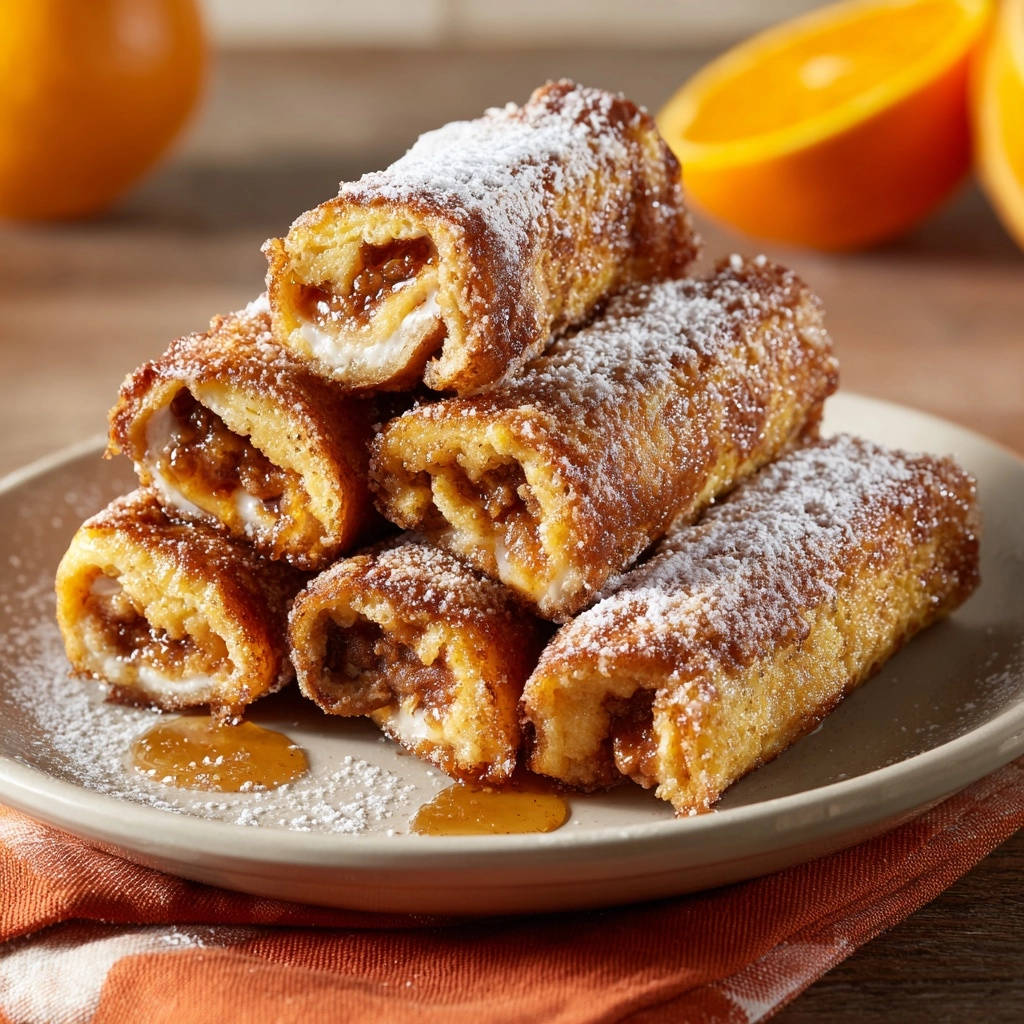
I still recall the disappointment of a messy breakfast: the delicious filling oozing out of French toast rolls all over the pan. After countless experiments, I’ve finally perfected the art of creating delightful Stuffed French Toast Rolls that hold their shape flawlessly.
This recipe isn’t just about a tasty treat; it’s about mastering the simple secrets to a perfectly sealed, golden roll every single time. Prepare to enjoy a sweet, satisfying bite with absolutely no messy mishaps.
If you’re enjoying the warm cinnamon flavor here, this cinnamon sugar bake delivers that same cozy sweetness in every moist bite.
The Secret to Stuffed French Toast Rolls That Never Ooze
There’s nothing more frustrating than preparing a beautiful breakfast, only to see your luscious filling escape the moment it hits the hot skillet. Many home cooks face this challenge when making stuffed French toast, leading to burnt sugar and lost flavor.
Our method for creating perfectly sealed Stuffed French Toast Rolls eliminates this common problem entirely. You’ll achieve a golden, crisp exterior and a warm, contained filling, making every bite a delightful surprise.
Unveiling Our Unique Sealing Technique
The success of these no-ooze rolls lies in a combination of careful bread preparation and strategic cooking. We focus on transforming simple bread slices into pliable envelopes that securely hug your filling.
This involves precise flattening, leaving a critical border for sealing, and a clever cooking technique that “glues” the seam shut, ensuring your filling stays perfectly nestled inside.
Beyond the Plate: Why This Recipe Excels
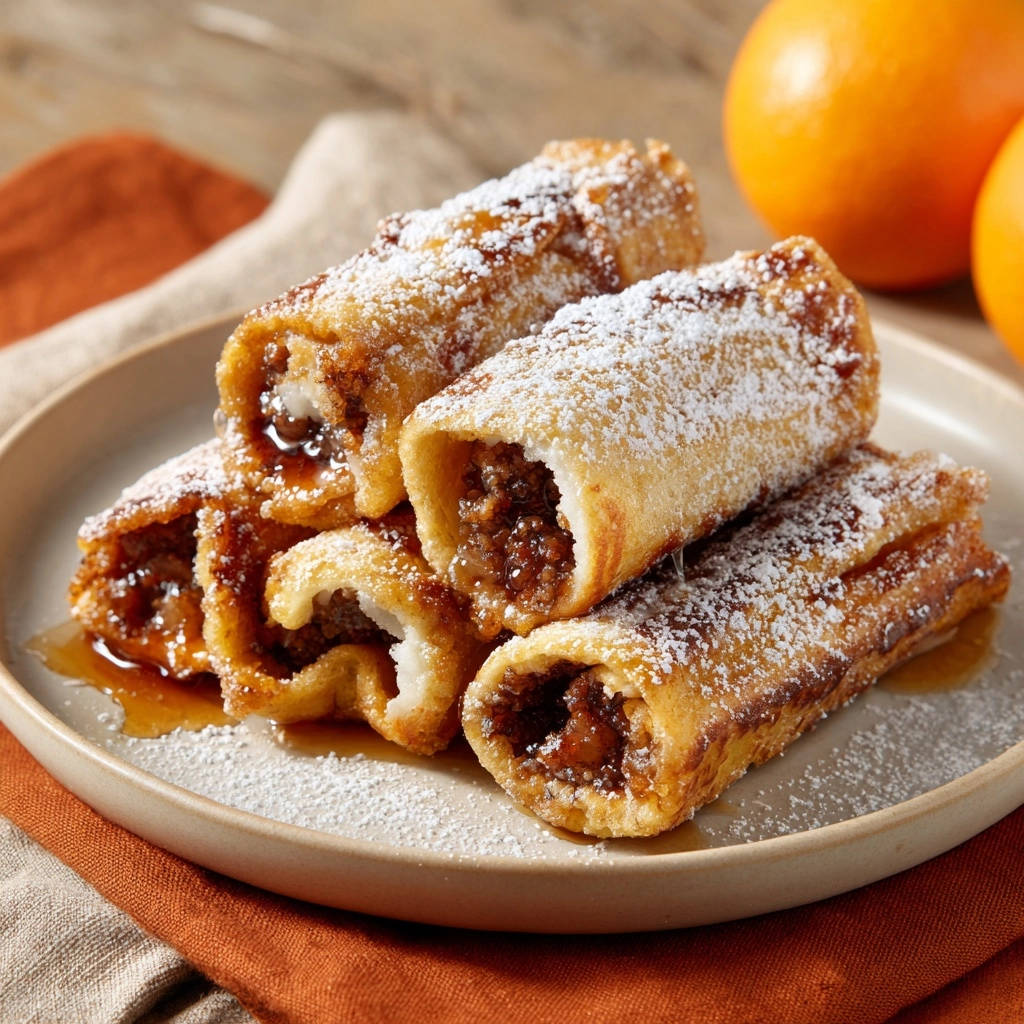
Beyond their leak-proof design, these Stuffed French Toast Rolls are remarkably easy to prepare, making them perfect for busy mornings or leisurely brunches.
Each roll boasts a delightful contrast: a golden-brown, slightly crispy exterior gives way to a soft, fluffy interior with a creamy, sweet burst of apple pie filling. They are a guaranteed crowd-pleaser for any breakfast or dessert occasion.
Gather Your Delights: Essential Ingredients for Flawless Rolls
The Bread & Dairy Duo: Foundation for Fluffiness
The right bread is foundational for pliable, rollable French toast. White sandwich bread is ideal here, as its soft texture flattens beautifully without tearing, creating a strong seal.
Softened cream cheese provides a smooth, tangy counterpoint to the sweet apple filling, contributing to the rich texture. Milk and butter form the classic French toast batter, ensuring a tender crumb and golden finish.
Sweet & Spicy Notes: Crafting the Signature Flavor
Apple pie filling offers a convenient and delicious way to infuse a warm, fruity flavor. Its slightly thickened consistency is also key to preventing leakage.
Ground cinnamon and vanilla extract are essential aromatics. They deepen the overall flavor profile, adding that comforting, classic French toast warmth that elevates the entire dish.
Essential Tools for Your Stuffed French Toast Rolls Journey
Key Equipment for Seamless Preparation
A rolling pin is indispensable for achieving the ultra-thin bread slices required for this recipe. Thin bread ensures pliability and a tight, secure seal around the filling.
A good quality non-stick skillet is crucial for even browning and preventing the delicate rolls from sticking or tearing. It also allows for easy flipping without damaging their shape.
A shallow dish simplifies the egg wash coating process, ensuring each roll is evenly coated without excessive soaking. Tongs provide precise control when turning the rolls, protecting their integrity during cooking.
Your Path to Perfect Stuffed French Toast Rolls: A Step-by-Step Guide
Prepare the Bread: On a clean, flat surface, use a rolling pin to flatten each slice of bread very thinly.
This extra thinness is key to making the bread pliable and creating a strong seal, preventing filling from escaping later.
Fill the Bread: In a small bowl, combine the softened cream cheese and apple pie filling. Spread about 1 to 1.5 tablespoons of this mixture evenly over one side of each flattened bread slice.
Crucially, ensure you leave a small, clean border (about 1/2 inch) free on all four sides. This border is critical for a secure, leak-proof seal.
Roll and Seal: Starting from one of the longer sides, tightly roll up each bread slice.
Once rolled, press firmly along the entire seam to seal it completely. Gently press down on the open ends to further enclose the filling. The flattened bread should stick to itself; if needed, a tiny dab of water on the seam can help it adhere more securely.
Prepare the Egg Wash: In a shallow dish, whisk together the eggs, milk, cinnamon, and vanilla extract until well combined.
A shallow dish makes dipping easier and more even, ensuring a beautiful golden crust.
Dip the Rolls: Gently dip each prepared rolled bread piece into the egg mixture, turning quickly to coat all sides evenly.
Avoid oversoaking, as this can make the rolls soggy and difficult to handle during cooking.
Cook the Rolls: Heat the butter or cooking oil in a large non-stick skillet over medium heat. Once the butter is melted and shimmering (or oil is hot), carefully place the Stuffed French Toast Rolls into the skillet.
Always place them seam-side down first. This initial placement helps to “glue” the seam shut as it cooks and prevent any filling from escaping.
Brown Evenly: Cook for about 2-3 minutes per side, using tongs to turn them, until all sides are golden brown and cooked through.
Adjust heat as necessary to prevent burning, ensuring a consistent golden hue and perfectly cooked exterior.
Serve: Transfer the cooked Stuffed French Toast Rolls to a plate. Dust generously with powdered sugar and serve immediately with maple syrup.
Enjoy these warm, delightful treats fresh from the skillet for the best experience.
Beyond the Recipe: Masterful Tips for Stuffed French Toast Rolls Success
Achieving the Ideal Bread Consistency & Seal
Roll It Thin: Don’t be afraid to really flatten the bread. The thinner it is, the more pliable and less likely to crack it becomes, leading to a tighter seal.
Mind the Border: That 1/2-inch border is non-negotiable. It’s your glue line! Ensure no filling touches it.
Seal with Precision: Pressing firmly along the seam, and gently on the ends, creates a strong barrier. Think of it like sealing an envelope.
Optimizing Your Egg Wash and Frying Method
Quick Dip is Key: A rapid dip prevents sogginess. The bread is thin and absorbs quickly.
Start Seam-Side Down: This golden rule ensures the seam “fries” shut, acting as an extra layer of protection against oozing.
Don’t Rush the Browning: Medium heat allows for even browning without burning, cooking the interior gently.
Creative Filling & Serving Ideas
Flavor Adventure: Experiment with other pie fillings like cherry or blueberry, or even sweet cream cheese with chopped berries. You could also try a savory version with ham and cheese!
Topping Extravaganza: Beyond powdered sugar and maple syrup, consider fresh berries, whipped cream, chocolate sauce, or a dusting of cocoa powder.
Make it a Meal: Pair with crispy bacon or fresh fruit for a complete brunch experience.
Stuffed French Toast Rolls Troubleshooting: Common Fixes
When Filling Escapes: Re-Sealing Solutions
Filling often escapes if the bread wasn’t flattened enough, the border was too small, or the seam wasn’t pressed firmly. Ensure your bread is paper-thin and that you consistently leave that crucial 1/2-inch border.
If a little filling escapes during cooking, quickly press down on the affected area with your tongs. The heat will often help “glue” it back into place, minimizing further leakage.
Soggy Rolls? Correcting Egg Wash & Cook Time
Soggy rolls are usually the result of over-soaking the bread in the egg wash. The thin bread absorbs liquid rapidly, so a quick dip is all that’s needed to coat it adequately.
Insufficient cooking time or heat that is too low can also contribute to a soggy interior. Ensure your skillet is properly preheated to medium and allow enough time for the rolls to cook through.
Uneven Browning Blues: Heat Management
Uneven browning typically stems from inconsistent heat distribution or insufficient preheating of your skillet. Always allow your pan to heat thoroughly before adding the rolls.
Periodically adjust your heat and rotate the rolls with tongs to ensure all sides achieve that beautiful, consistent golden-brown hue. This also helps cook the interior evenly.
Elevating the Experience: Serving, Storing, & Making Ahead
Presentation & Pairing: Serving Suggestions
Beyond a simple dusting of powdered sugar and maple syrup, elevate your Stuffed French Toast Rolls with fresh fruit like sliced bananas or mixed berries. A dollop of whipped cream or a drizzle of chocolate sauce adds an extra touch of indulgence.
For a complete brunch spread, pair these delightful sweet rolls with freshly brewed coffee, orange juice, or even a sparkling mimosa.
Maximizing Freshness: Storage & Reheating
Leftover Stuffed French Toast Rolls can be stored in an airtight container in the refrigerator for up to 2-3 days. For longer storage, freeze them individually on a baking sheet before transferring to a freezer-safe bag, where they’ll last for up to 1 month.
To reheat, bake frozen or refrigerated rolls in a preheated oven at 350°F (175°C) until warmed through and crisp, typically 10-15 minutes for refrigerated and 15-20 minutes for frozen. A toaster oven also works wonderfully for restoring crispness.
Prep Smart: Your Make-Ahead Guide
To save time on busy mornings, you can prepare the cream cheese and apple pie filling mixture a day in advance and store it in the refrigerator. You can also flatten and fill the bread rolls, then store them tightly covered in the fridge overnight.
Having these components ready means you’re just a quick dip and fry away from a delicious breakfast. This makes them perfect for entertaining or enjoying a leisurely weekend without the fuss.
Your Stuffed French Toast Rolls Questions Answered!
Can I use gluten-free or whole wheat bread?
Yes, you can use gluten-free or whole wheat bread, but be aware of potential texture differences. Gluten-free bread may be more delicate and require extra care when flattening and rolling. Whole wheat bread will give a denser roll and a slightly different flavor profile.
What other fillings work well?
The possibilities are endless! Sweet options include cream cheese with mashed berries, chocolate hazelnut spread, or even a banana and peanut butter combination. For a savory twist, try cream cheese with cooked ham and a sprinkle of cheddar cheese.
Can I bake them instead of frying?
While frying offers the best golden crust, you can bake Stuffed French Toast Rolls. Place them on a baking sheet lined with parchment paper and bake at 375°F (190°C) for about 15-20 minutes, flipping halfway, until golden. They may be slightly less crispy but still delicious.
How long do Stuffed French Toast Rolls last?
Cooked Stuffed French Toast Rolls are best enjoyed fresh. However, they can be stored in an airtight container in the refrigerator for 2-3 days. They can also be frozen for up to one month, ideal for a quick grab-and-go breakfast.
Ready to Delight? Share Your Stuffed French Toast Rolls Creation!
You now possess all the secrets to creating perfectly sealed, incredibly delicious Stuffed French Toast Rolls that will impress everyone at your table. It’s time to transform simple ingredients into a breakfast masterpiece.
Don’t wait! Try this recipe for yourself and experience the joy of a flawlessly stuffed French toast treat. We’d love to see your creations! Share your photos on social media and tag us, or leave a comment below to let us know how your perfectly golden, no-ooze rolls turned out!
Embrace the simplicity and deliciousness of these delightful breakfast treats, and say goodbye to messy pans forever!
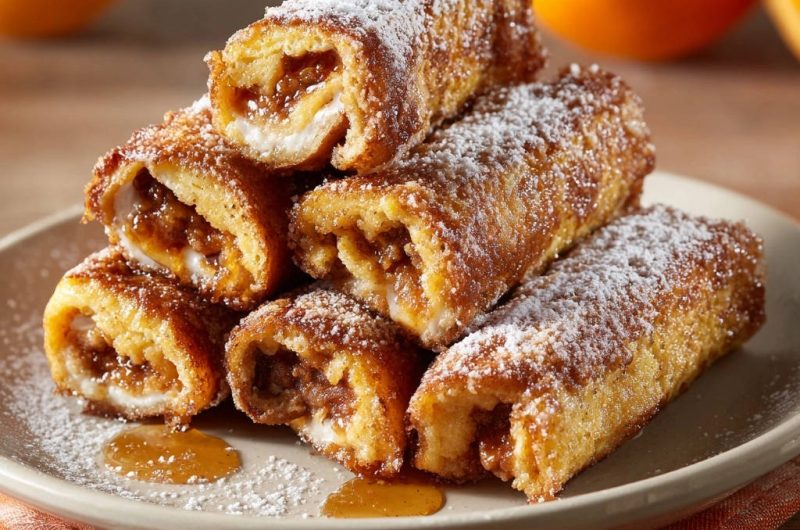
Stuffed French Toast Rolls
Course: BreakfastCuisine: AmericanDifficulty: easy8
rolls20
minutes20
minutes240
kcal40
minutesElevate your breakfast with these delightful Stuffed French Toast Rolls. Learn the simple secrets to keeping your creamy apple filling perfectly nestled inside, ensuring a delicious surprise with every golden, perfectly sealed bite. Say goodbye to messy mishaps!
Ingredients
8 slices white sandwich bread, crusts removed
4 ounces cream cheese, softened
1/2 cup apple pie filling
2 large eggs
1/4 cup milk
1/2 teaspoon ground cinnamon
1/4 teaspoon vanilla extract
2 tablespoons unsalted butter or cooking oil, for frying
Powdered sugar, for dusting
Maple syrup, for serving
Directions
- Prepare the bread: On a clean, flat surface, use a rolling pin to flatten each slice of bread very thinly. This extra thinness is key to making the bread pliable and creating a strong seal.
- Fill the bread: In a small bowl, combine the softened cream cheese and apple pie filling. Spread about 1 to 1.5 tablespoons of this mixture evenly over one side of each flattened bread slice, ensuring you leave a small, clean border (about 1/2 inch) free on all four sides. This border is critical for a secure seal.
- Roll and seal: Starting from one of the longer sides, tightly roll up each bread slice. Once rolled, press firmly along the entire seam to seal it completely. Gently press down on the open ends to further enclose the filling. The flattened bread should stick to itself; if needed, a tiny dab of water on the seam can help it adhere.
- Prepare the egg wash: In a shallow dish, whisk together the eggs, milk, cinnamon, and vanilla extract until well combined.
- Dip the rolls: Gently dip each prepared rolled bread piece into the egg mixture, turning quickly to coat all sides evenly. Avoid oversoaking, as this can make the rolls soggy.
- Cook the rolls: Heat the butter or cooking oil in a large non-stick skillet over medium heat. Once the butter is melted and shimmering (or oil is hot), carefully place the French toast rolls into the skillet, seam-side down first. This initial placement helps to “glue” the seam shut as it cooks and prevent any filling from escaping.
- Brown evenly: Cook for about 2-3 minutes per side, using tongs to turn them, until all sides are golden brown and cooked through. Adjust heat as necessary to prevent burning.
- Serve: Transfer the cooked French toast rolls to a plate. Dust generously with powdered sugar and serve immediately with maple syrup.
Notes
- Key techniques, like thin bread and firm sealing, ensure the filling stays perfectly inside.