Mastering Dark Chocolate Gold Leaf Truffles
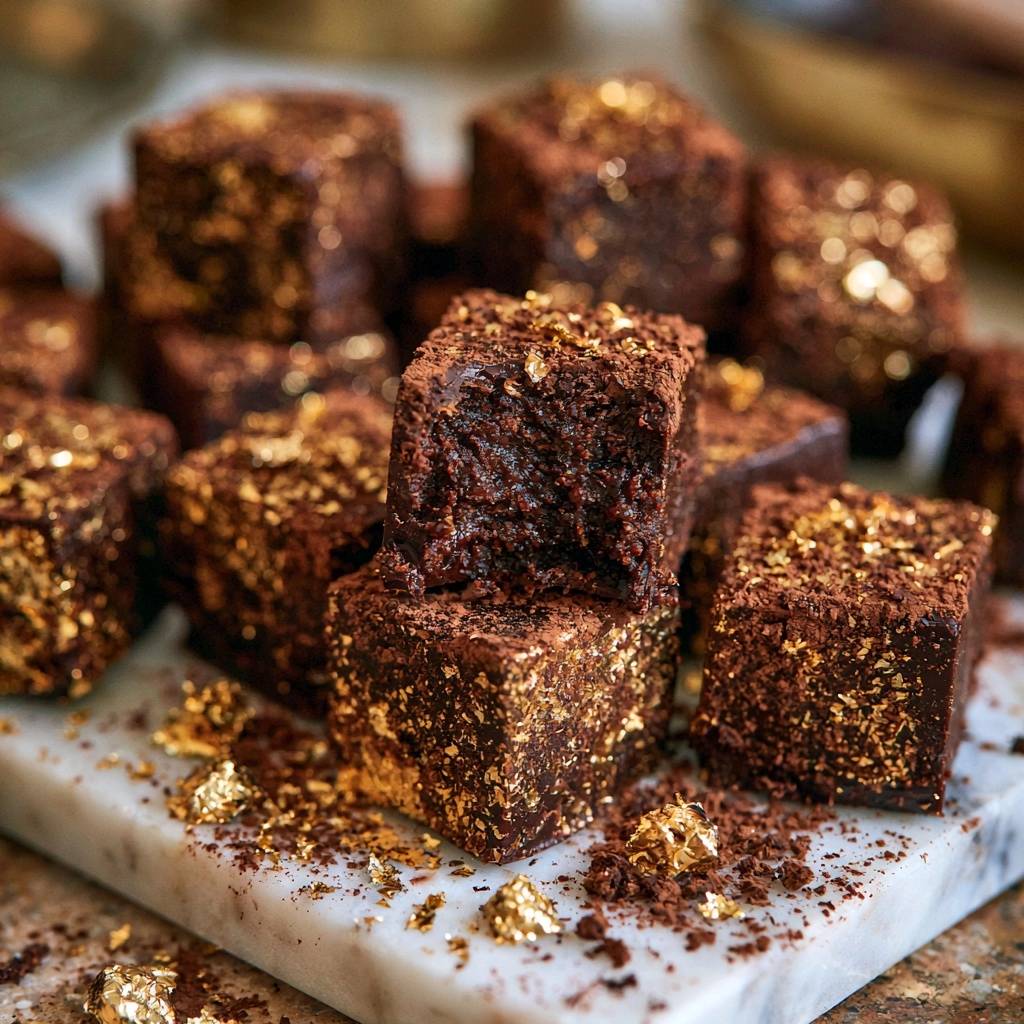
Imagine biting into a chocolate square so smooth it feels like silk on your tongue. These aren’t your average lumpy, hand-rolled truffles that look like a science project. We’re talking about professional-grade, sharp-edged Dark Chocolate Gold Leaf Truffles that look like they belong in a high-end Parisian boutique. Most people think you need a culinary degree to achieve that mirror-like gloss and perfect snap, but the secret actually lies in physics rather than fancy equipment.
The biggest hurdle home cooks face is the dreaded grainy texture. It happens when the chocolate gets too hot or you stir it with too much enthusiasm, causing the fats to separate into a greasy mess. This recipe solves that by using a temperature-controlled emulsion technique. By managing how the cream and chocolate bond, you create a stable ganache that stays creamy even after it sets firmly into those iconic, tall cubes.
The real trick to this recipe is the “center-stir” method. Instead of whisking air into the chocolate, which creates bubbles and a dull finish, you’ll use a spatula to create a tiny whirlpool in the middle of the bowl. This slowly pulls the ingredients together into a tight, glossy emulsion. It’s the difference between a truffle that tastes like a candy bar and one that melts away the second it hits your palate.
The Chemistry of a Perfect Ganache Emulsion
A ganache is essentially a fat-in-water emulsion. You’re trying to force cocoa butter and milk fats to play nicely with the water content in the heavy cream. When these elements bond correctly, they create a suspended network that feels incredibly smooth. However, if the cream is boiling hot, it shocks the chocolate and breaks that delicate bond, leading to an “oil slick” on top of your bowl.
Temperature control is your best friend here. By heating the cream just until it simmers and then letting it sit undisturbed over the chocolate, you allow the temperature to equalize. This gentle approach ensures the cocoa butter melts without reaching its breaking point. Therefore, the resulting ganache remains stable, glossy, and perfectly uniform once it cools down in the fridge.
Selecting Professional Grade Ingredients
Since this recipe has so few ingredients, the quality of each one is magnified. You want to look for dark chocolate with a cacao percentage between 65% and 70%. This range provides enough cocoa butter for a rich mouthfeel while maintaining a deep, sophisticated bitterness. In addition, ensure your heavy cream has at least 36% milk fat to provide the structural integrity needed for those sharp, clean edges.
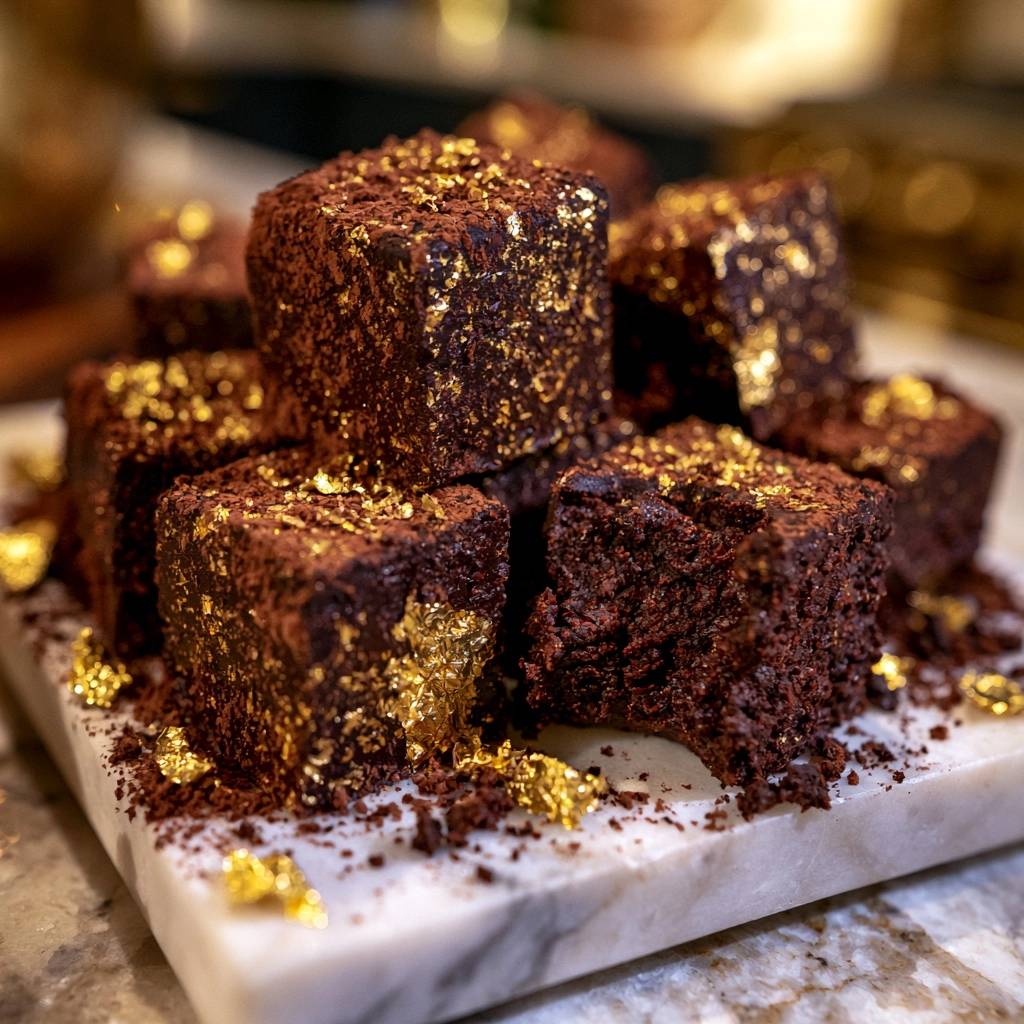
Dutch-process cocoa powder is another non-negotiable for the dusting. Unlike natural cocoa powder, Dutch-process is treated with an alkalizing agent to reduce acidity. This results in a darker color and a smoother, more mellow flavor that won’t overpower the delicate ganache. It also creates a beautiful matte contrast against the shimmering gold leaf flakes you’ll apply at the end.
Why High-Quality Dark Chocolate Matters
Standard grocery store chocolate chips often contain stabilizers and less cocoa butter to help them hold their shape in the oven. For truffles, you need high-quality bars or couverture chocolate. These options contain higher levels of lecithin and cocoa butter, which are essential for achieving that signature “melt” and a glossy finish. When you use the right chocolate, the ganache will have a natural sheen that looks incredibly expensive.
The Role of Unsalted Butter and Sea Salt
Adding room-temperature butter at the very end is a classic pastry chef move. It introduces a secondary layer of fat that lowers the melting point of the truffle, creating a “meltaway” sensation. Meanwhile, the sea salt isn’t there to make the chocolate salty. Instead, it acts as a flavor enhancer that cuts through the richness and makes the floral and earthy notes of the cacao pop.
Essential Tools for Sharp-Edged Truffles
To get those tall, impressive cubes, you need a small pan like a 6×6 inch square or an 8×4 inch loaf pan. Using a larger pan will result in thin, flat truffles that lose their visual impact. Furthermore, put away the whisk and grab a flexible rubber spatula. A whisk incorporates air, which is the enemy of a dense, fudgy ganache. You want to keep the mixture as heavy and air-free as possible.
A digital thermometer is also a fantastic tool if you have one. While you can look for visual cues, hitting that 180°F simmering point exactly ensures the cream is hot enough to melt the chocolate but not so hot that it ruins the emulsion. Precision is what separates a hobbyist from a pro when it comes to working with high-end chocolate.
Phase One: Preparing the Chocolate Base
Start by chopping your chocolate into very fine, uniform shards. If you leave large chunks, they won’t melt at the same rate as the smaller pieces, which often leads to over-stirring and graininess. Think of it like creating a bed of chocolate “snow” that the hot cream can easily penetrate. Once chopped, place the chocolate and sea salt into a dry, heat-proof bowl.
Preparation also includes lining your pan correctly. Use a parchment paper “sling” that hangs over the two long sides of the pan. This allows you to lift the entire block of chilled ganache out in one piece without having to dig it out with a knife. It’s a simple step that saves you from ruining the smooth surface of your truffles later on.
Phase Two: The Temperature-Controlled Steep
Heat your heavy cream in a small saucepan over medium heat. You are looking for the “simmering point,” which is when tiny bubbles start dancing around the edges of the pan. As soon as you see this, remove it from the heat immediately. Pour the hot cream directly over your chopped chocolate, making sure every piece is submerged under the liquid.
Now, here is the part where most people mess up: do not touch it. Cover the bowl with a flat plate to trap the steam and let it sit for exactly five minutes. This “Plate Cover Method” uses residual heat to gently melt the chocolate from the inside out. It is much safer than using a double boiler, which can easily introduce moisture or excessive heat that causes the chocolate to seize.
Phase Three: The Center-Stir Emulsion Technique
After five minutes, remove the plate. Place your rubber spatula in the very center of the bowl and begin stirring in tiny, tight circles. At first, it will look like a mess of liquid and dark streaks, but keep going. Do not lift the spatula or stir wide. By staying in the center, you are creating a concentrated emulsion that will slowly spread to the rest of the bowl.
As you continue, you’ll see a glossy, dark “nucleus” form in the middle. Slowly widen your circles until all the cream is incorporated. The ganache should look like liquid silk. Finally, fold in your cubed, room-temperature butter and vanilla. The butter should disappear into the mixture, leaving behind a mirror-like finish that is completely free of lumps or air bubbles.
Phase Four: Setting and Achieving Structural Integrity
Pour the ganache into your prepared pan and give it a few firm taps on the counter. This helps any trapped air bubbles rise to the surface and pop, ensuring the inside of your truffles is solid and dense. Cover the pan loosely and place it in the refrigerator for at least six hours. Overnight is even better if you have the patience.
During this rest period, the chocolate’s crystalline structure is reforming. This is what gives the truffle its “snap” and allows it to hold its shape at room temperature. If you try to cut them too early, the center will be too soft, and you’ll end up with rounded, messy edges instead of the sharp, professional cubes we’re aiming for.
Phase Five: Precision Cutting for Professional Results
To get those clean, sharp edges, you need to use the “Hot Knife Technique.” Dip a long chef’s knife into a tall container of boiling water for a few seconds. Wipe the blade completely dry with a clean towel. It is vital that the knife is bone-dry, as even a single drop of water can cause the chocolate to bloom or discolor.
Make one long, confident slice through the ganache. Do not use a sawing motion, as this creates jagged edges. After every single cut, you must clean the blade, re-dip it in the hot water, and wipe it dry again. It takes a bit of time, but this is the only way to achieve the perfectly uniform, square look that makes these truffles look so expensive.
Applying Edible Gold Leaf and Cocoa Dust
Once your cubes are cut, lightly dust the tops with your Dutch-process cocoa powder. This provides a bitter contrast to the rich interior. Now comes the luxury touch: the gold leaf. Edible gold leaf is incredibly thin and will stick to your fingers if you touch it, so use a pair of tweezers or a very small, dry paintbrush to handle the flakes.
Apply the gold leaf while the truffles are still slightly tacky from the fridge. Gently press the flakes onto the top or sides of the cubes. The gold doesn’t add flavor, but it adds a level of opulence that makes these the perfect gift or party showstopper. The contrast of the dark, matte cocoa and the shimmering gold is visually stunning.
Troubleshooting Grainy or Separated Ganache
If you notice an oily film on top of your ganache or it looks curdled, don’t panic. This usually means the emulsion has broken because the cream was too hot. You can often save it by adding a teaspoon of room-temperature heavy cream and stirring very gently in the center again. The extra liquid helps the fats and solids re-bind into a smooth mixture.
If your ganache refuses to set and stays like a thick sauce, it’s likely because the cream-to-chocolate ratio was off or the chocolate had a lower cacao percentage than recommended. In this case, you can gently re-melt the mixture over a bowl of warm water and stir in an extra ounce of finely chopped chocolate. Let it set again, and it should firm up beautifully.
Storage and Serving Temperatures
Chocolate is like a sponge for odors, so always store your truffles in an airtight container. They will stay fresh in the refrigerator for up to two weeks. However, for the best flavor release, you shouldn’t eat them straight out of the fridge. Cold temperatures mask the complex notes of the cacao and make the texture feel harder than it should.
Let the truffles sit at room temperature for about 15 to 20 minutes before serving. You want them to be around 65°F. At this temperature, the butter and cocoa butter are soft enough to melt instantly on your tongue, but the truffle still maintains its sharp, square shape. It’s the sweet spot for experiencing the full luxury of the ganache.
Expert Tips for Truffle Customization
Once you master the base recipe, you can start experimenting with sophisticated flavor infusions. You can steep espresso beans or a split vanilla bean in the cream while it heats to add depth. Just remember to strain the cream before pouring it over the chocolate. A teaspoon of orange zest or a pinch of chili powder can also create a unique flavor profile.
If you decide to use a very dark chocolate, such as 80% cacao, you may need to increase the amount of heavy cream slightly. Higher cacao percentages contain more solids and less fat, which can make the ganache too brittle if you don’t adjust the liquid. Stick to the 65-70% range for your first try to ensure you get that perfect, creamy consistency every time.
Frequently Asked Questions
Can I use milk chocolate instead of dark chocolate?
You can, but you will need to change the ratio. Milk chocolate contains more milk solids and sugar, making it much softer than dark chocolate. To get a firm truffle using milk chocolate, you typically need to use a 3:1 ratio of chocolate to cream. If you use the measurements in this recipe with milk chocolate, the truffles will likely be too soft to cut into cubes.
Why is the gold leaf sticking to my fingers and not the chocolate?
Gold leaf is extremely susceptible to static electricity and moisture. If your hands are even slightly damp or if there is a breeze in the room, the leaf will fly everywhere. Always use metal tweezers or a dry wooden skewer to pick up the flakes. Also, make sure you apply the gold before the cocoa powder is too thick, as the leaf needs the tacky surface of the ganache to adhere properly.
How long do these truffles stay fresh?
These truffles will stay fresh for up to two weeks if kept in an airtight container in the refrigerator. Because they contain fresh heavy cream, they are perishable and should not be left at room temperature for more than a few hours. If you need to store them longer, they can be frozen for up to two months, though the texture may change slightly upon thawing.
Can I freeze the ganache block before cutting it?
It is better to let the ganache set slowly in the refrigerator rather than the freezer. Rapid cooling can sometimes cause the cocoa butter to crystallize unevenly, leading to a less-than-perfect texture. However, once the truffles are cut and finished, you can freeze them. Just be sure to thaw them slowly in the fridge to prevent condensation from forming on the surface, which can ruin the gold leaf and cocoa dusting.
Why did my truffles turn out grainy even though I followed the steps?
Graininess is almost always caused by heat or agitation. If your cream was at a rolling boil, it likely separated the fats in the chocolate. Another common culprit is using a whisk; the fast motion breaks the emulsion you are trying to build. Ensure you are using the “center-stir” method with a spatula and that your chocolate is chopped into very fine, even pieces so it melts quickly and gently.
Dark Chocolate Gold Leaf Truffles
Course: DessertCuisine: FrenchDifficulty: easy16
squares20
minutes5
minutes360
Minutes145
kcalFrench
Ingredients
12 ounces high-quality dark chocolate (65-70% cacao), finely chopped
1/2 cup heavy whipping cream (36% fat or higher)
2 tablespoons unsalted butter, room temperature and cubed
1/2 teaspoon vanilla extract
1/4 teaspoon sea salt (to enhance chocolate depth)
1/3 cup unsweetened Dutch-process cocoa powder for dusting
1 sheet edible gold leaf or gold leaf flakes for garnish
Directions
- Line a 6×6 inch or 8×4 inch loaf pan with parchment paper, leaving an overhang on the sides. Using a smaller pan ensures the thick, tall cubes shown in the image.
- Place the finely chopped chocolate and sea salt in a heat-proof glass or metal bowl. Ensure the chocolate is in very small, uniform pieces to allow for even melting without hot spots.
- Heat the heavy cream in a small saucepan over medium heat. Watch for the exact moment small bubbles begin to form around the edges (the simmering point, approx. 180°F). Do not let it reach a rolling boil.
- Pour the hot cream over the chocolate. Cover the bowl with a flat plate for exactly 5 minutes. This traps the residual heat to melt the chocolate gently from the inside out.
- The Secret Step: Using a rubber spatula, start stirring in small circles in the very center of the bowl. Do not whisk or lift the spatula, which incorporates air and causes graininess. Slowly widen the circles until the mixture is glossy and unified.
- Gently fold in the cubed butter and vanilla until fully incorporated and the ganache is mirror-smooth.
- Pour the mixture into the prepared pan. Tap the pan on the counter to remove air bubbles. Refrigerate for at least 6 hours or overnight until completely firm.
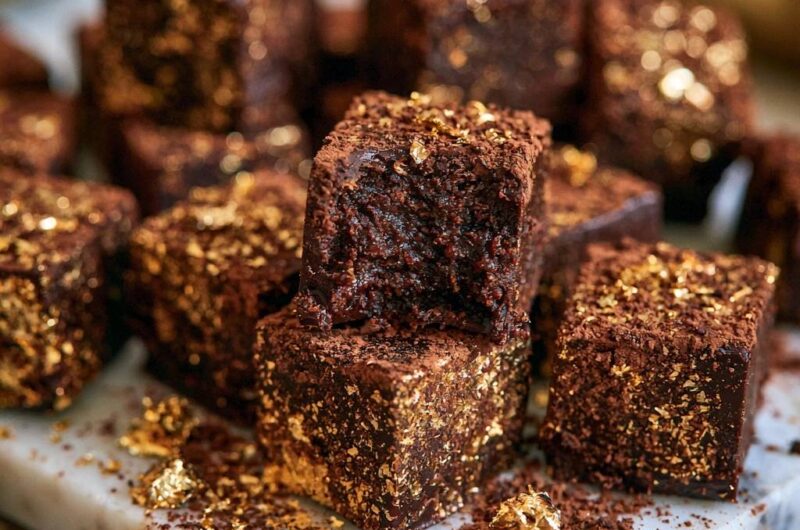
- Lift the parchment out of the pan. Use a sharp chef’s knife dipped in boiling water and wiped completely dry to slice the ganache into uniform cubes. Re-heat and wipe the knife between every single cut for the clean, sharp edges pictured.
- Lightly dust the tops with cocoa powder. Using tweezers, apply the gold leaf flakes generously to the top and sides of the cubes, pressing very gently so they adhere to the tacky surface of the ganache. Serve chilled or slightly below room temperature.
Notes
- To achieve the sharp edges shown in the image, dip your knife in boiling water and wipe it completely dry between every single cut. Use a smaller pan like a 6×6 inch or 8×4 inch loaf pan to ensure thick, tall cubes.