Mastering the Garlic Herb Crusted Salmon Technique
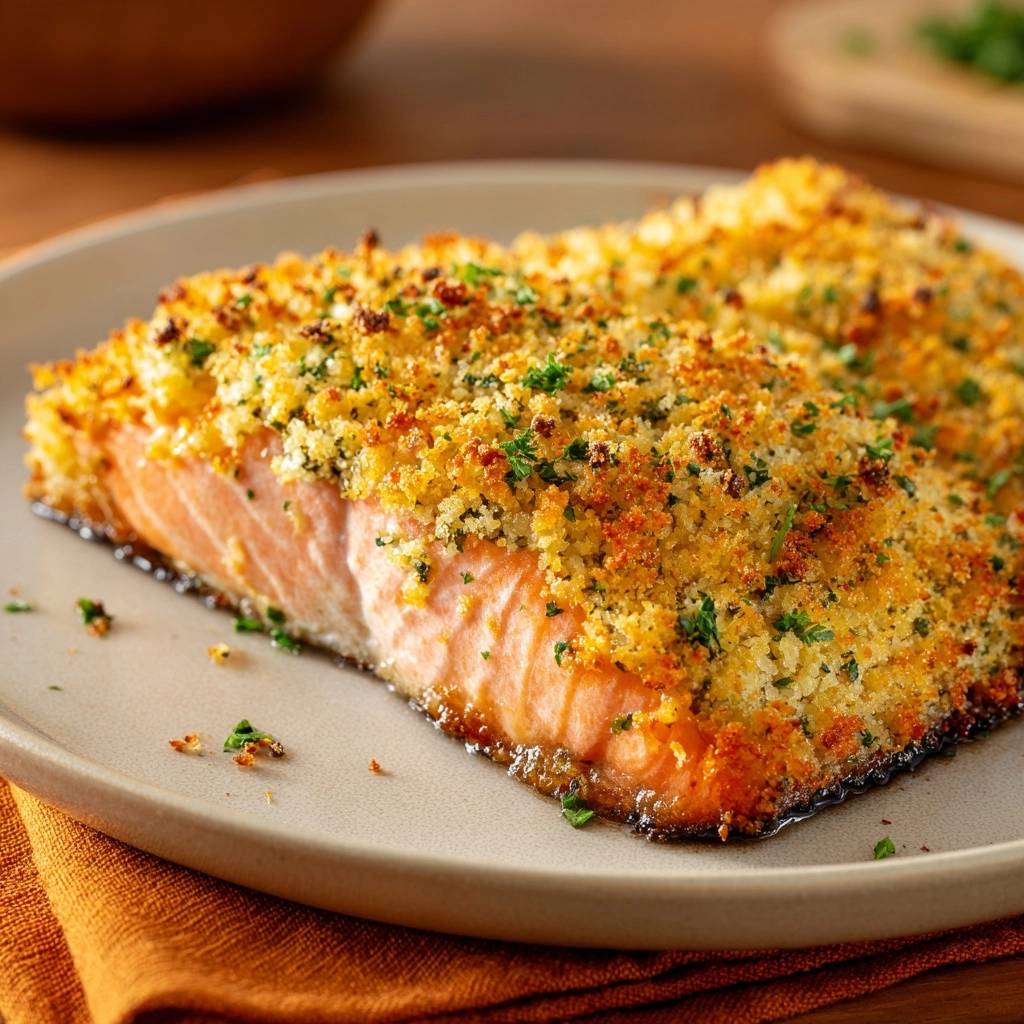
You’ve likely experienced the disappointment of a soggy breadcrumb topping. You’re aiming for a shatteringly crisp, golden shell, but instead, you get a mushy, steamed layer that slides right off the fish. This “Soggy Crust Syndrome” happens because salmon releases a significant amount of moisture as it cooks, which usually turns your topping into a sponge.
The secret to restaurant-quality Garlic Herb Crusted Salmon lies in two specific professional techniques: the moisture barrier and the preheated pan. By creating a fat-based seal between the fish and the crumbs, we lock the juices inside the fillet while keeping the exterior dry and crunchy. It’s a total game-changer for home cooks who want that perfect textural contrast.
I’ve found that the real trick is using mayonnaise as your “glue” rather than just mustard or egg. While it might sound unusual, the oil-and-egg emulsion in mayo acts as a hydrophobic shield. This prevents the salmon’s natural steam from migrating upward, ensuring your Panko stays as crisp as the moment it left the box.
If you love packing on that crispy Panko crust, you will want to try these golden salmon cakes for another satisfying crunch.
The Physics of a Shatteringly Crisp Crust
Cooking is often just a battle against steam. When you put a cold piece of fish in the oven, the water inside begins to evaporate. If you’ve piled breadcrumbs on top, that steam gets trapped, hydrating the crumbs until they become limp. To get a true crunch, we need to manage that moisture and maximize dry heat.
The “Moisture Barrier” method uses a thin layer of fat to seal the surface of the fish. Because oil and water don’t mix, the juices stay in the salmon, keeping it flaky and succulent. Meanwhile, the Panko is free to undergo the Maillard reaction—that beautiful browning process—without being interrupted by rising steam.
Furthermore, we use a preheated baking sheet to tackle the “soggy bottom” problem. By placing the salmon onto a screaming-hot pan, you get an immediate sear on the skin or underside. This mimics the effect of a cast-iron skillet, ensuring the fish cooks evenly from both the top and the bottom simultaneously.
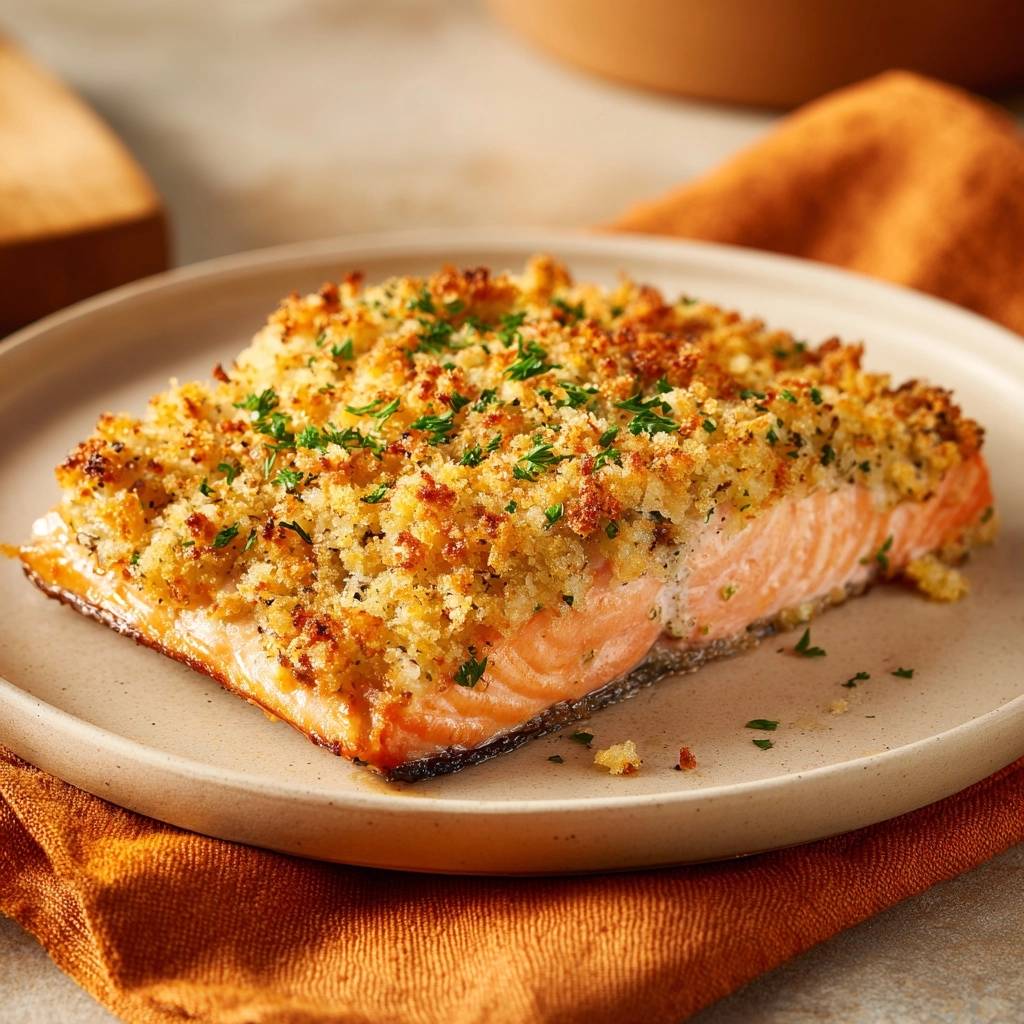
Why Panko Outperforms Standard Breadcrumbs
Standard breadcrumbs are often too fine and dense, leading to a heavy, sandy texture. Panko, however, is made from crustless bread that is processed into large, airy flakes. These jagged edges create a massive amount of surface area for the melted butter to cling to.
Those tiny air pockets are essential for the “crunch” factor. As the salmon roasts, the heat circulates through the gaps in the Panko, frying the crumbs in the garlic butter from all angles. The result is a light, honeycomb-like structure that shatters when you bite into it.
Essential Components for Garlic Herb Crusted Salmon
Quality ingredients make a massive difference when the preparation is this simple. I always recommend center-cut salmon fillets because they have a uniform thickness. This ensures the entire piece of fish reaches the perfect internal temperature at the exact moment the crust turns golden brown.
Freshness is your best friend here. Use real garlic cloves rather than the jarred, pre-minced variety, which can taste metallic and bitter when roasted at high heat. Similarly, fresh lemon zest provides the bright, citrus oils needed to cut through the richness of the butter and salmon.
I prefer using unsalted butter for the crust mixture. This gives you total control over the sodium levels. Since we season the fish directly with salt, using salted butter can often push the dish over the edge into being too salty. You want to taste the sweetness of the salmon and the earthiness of the herbs.
Selecting the Right Salmon Cut
When you’re at the fish counter, look for Atlantic or King salmon for this recipe. These varieties have a higher fat content, which makes them more forgiving under the high heat of a 425°F oven. Sockeye is delicious but much leaner and thinner, meaning it can overcook before your crust is fully browned.
A 6-ounce center-cut fillet is the “Goldilocks” of salmon portions. It’s thick enough to withstand 10 to 12 minutes of roasting without drying out. Avoid the thin tail pieces for this specific method, as they will turn into “salmon jerky” by the time your Panko is crispy.
The Role of Mayonnaise as a Culinary Tool
Don’t let the mayonnaise scare you off! Once it’s baked, you won’t taste “mayo” at all. Instead, you’ll just notice that the fish is incredibly moist. Because mayonnaise is an emulsion of oil and egg yolks, it doesn’t evaporate or soak into the breadcrumbs like water-based binders do.
It acts as a protective, fat-rich glue. It holds the heavy Panko topping in place while providing a rich base that helps the garlic and Dijon flavors meld together. It’s the “pro” secret that separates a home-cooked meal from a five-star restaurant entree.
Phase One: Preparing the Fish for High Heat
The most critical step happens before you even touch the stove: you must dry the fish. I mean really dry it. Use paper towels to press and hold against the surface of the salmon on all sides until no moisture remains. If the surface is wet, the mayo won’t stick, and the fish will steam.
Once the fillets are bone-dry, season them with salt and pepper. Do this just before you’re ready to apply the topping. If you salt the fish too early and let it sit, the salt will draw internal moisture to the surface, undoing all your hard work with the paper towels.
Phase Two: Engineering the Herb Crust Mixture
In a small bowl, toss your Panko with the melted butter, minced garlic, and lemon zest. You want the butter to be melted but not piping hot. If it’s too hot, it can start to “cook” the garlic prematurely, leading to a loss of that fresh, pungent aroma.
Fold in your finely chopped parsley at the very last second. Parsley is delicate, and over-mixing it can bruise the leaves, turning them a dull, dark green. By folding it in gently at the end, the herbs stay vibrant and bright even after their trip through the oven.
Phase Three: Applying the Moisture Barrier and Topping
Whisk your mayo and Dijon together until smooth, then brush a thin, even layer over the top of each fillet. You aren’t looking for a thick frosting here. A thin “paint job” is all you need to create that waterproof seal and provide enough tackiness for the crumbs to stick.
When applying the Panko, don’t just sprinkle it on. Use the palm of your hand to firmly pack the mixture onto the mayo layer. You want to create a structural dome of crumbs. Pressing them down ensures they stay put when you transfer the fish to the hot baking sheet.
Phase Four: The Preheated Pan and Roasting Process
This is where the magic happens. Carefully pull that hot baking sheet out of the oven and drizzle it with olive oil. When you place the salmon down, you should hear a distinct sizzle. That sound is the bottom of the fish searing instantly, which prevents it from sticking and ensures a firm texture.
Roast at 425°F for about 10 to 12 minutes. This high temperature is the sweet spot for salmon. It’s hot enough to crisp the breadcrumbs quickly but fast enough that the interior of the fish stays tender and pink. If you cook it at a lower temperature, the fish will dry out before the crust gets crunchy.
Monitoring Internal Temperature for Precision
Forget the “flake test” with a fork. Poking and prodding the fish breaks the beautiful crust you just built and lets the juices escape. Instead, use an instant-read thermometer. You’re looking for an internal temperature of 135°F for a perfect medium.
Keep in mind “carry-over cooking.” The salmon will continue to rise about 5 degrees in temperature after you pull it out of the oven. Letting it rest for two minutes allows the proteins to relax and the crust to fully firm up before you serve it.
Troubleshooting Common Salmon Texture Issues
Have you ever seen that white stuff seeping out of your salmon? That’s called albumin, a protein that pushes to the surface when the fish is cooked too fast or too long. While it’s perfectly safe to eat, you can minimize it by not overcooking the fish and ensuring it’s at room temperature for 15 minutes before roasting.
If you notice your breadcrumbs are browning too quickly but the fish isn’t done, simply tent a piece of foil loosely over the top. Conversely, if the fish is done but the crumbs look pale, hit it with the broiler for 30 to 60 seconds. Just stay right there and watch it—the broiler can turn “golden” into “burnt” in a heartbeat!
Flavor Variations and Ingredient Swaps
Once you master this technique, you can play with the flavors. If you aren’t a fan of parsley, try fresh dill or tarragon for a more sophisticated, French-inspired profile. You can even swap half the Panko for crushed walnuts or pecans to add a deep, nutty earthiness to the crust.
For those following a gluten-free diet, this recipe works beautifully with gluten-free Panko or even crushed rice crackers. The mayonnaise barrier technique remains exactly the same, providing that essential protection regardless of what type of “crumb” you choose to use.
Optimal Pairings for Garlic Herb Crusted Salmon
Since the salmon is rich and buttery, you want side dishes that offer a bit of acidity or brightness. A shaved fennel and citrus salad is a fantastic companion. The crisp, anise-flavored fennel cuts right through the garlic butter crust.
Roasted asparagus with a heavy squeeze of lemon or a light quinoa pilaf with fresh herbs also works wonders. I generally avoid heavy, cream-based sides like fettuccine alfredo or mashed potatoes, as they can make the whole meal feel a bit too heavy. Think bright, green, and fresh!
Storage and Reheating Without Losing the Crunch
Let’s be honest: breaded fish is always best eaten immediately. However, if you have leftovers, store them in an airtight container in the fridge for up to two days. Do not freeze this dish, as the moisture from freezing will turn the Panko into mush upon thawing.
When reheating, stay far away from the microwave! It will turn your crust into a wet sponge. Instead, use an air fryer or a toaster oven at 350°F for about 5 minutes. This will revive the crunch of the Panko and gently warm the salmon without overcooking the center.
Expert Tips for Professional Presentation
For a final touch of elegance, give the finished salmon a tiny sprinkle of Maldon sea salt right before serving. Those large, crunchy salt flakes provide a final “pop” of flavor. A micro-plane of fresh lemon zest over the top adds a hit of yellow color and a fresh aroma that hits the table before the first bite.
Always let the fish rest for those two minutes on the pan. This allows the juices to redistribute so they don’t all run out the moment you slide a spatula under the fillet. It also gives the mayo-crust bond a moment to set, ensuring the topping stays perfectly intact from the pan to the plate.
Frequently Asked Questions
Can I use frozen salmon for this recipe?
Yes, you can use frozen fillets, but you must thaw them completely in the refrigerator first. Frozen fish tends to release more water than fresh, so it is even more vital to pat them extremely dry with paper towels before applying the mayonnaise and crumbs.
Can I substitute the mayonnaise with something else?
You can use Greek yogurt or extra Dijon mustard, but be aware that the crust won’t be quite as crisp. Mayonnaise is almost entirely fat, which creates the best moisture barrier. Yogurt contains water, which will create a small amount of steam and result in a slightly softer topping.
How do I know if my garlic is burnt?
If the garlic in your crust tastes bitter or looks dark brown/black, it has overcooked. To prevent this, make sure your garlic is minced very finely so it integrates into the butter-soaked crumbs. The moisture in the butter and the protection of the Panko usually keep the garlic from burning at 425°F.
Can I make the herb crust mixture in advance?
You can mix the Panko, garlic, and lemon zest up to a day in advance and keep it in the fridge. However, don’t add the melted butter or fresh parsley until you are ready to cook. The butter will harden and clump if refrigerated, and the parsley will wilt and lose its bright flavor.
Why did my crust fall off the salmon?
This usually happens for two reasons: either the fish wasn’t dried properly before the mayo was applied, or the crust wasn’t packed down firmly enough. Make sure to use your hands to really press the Panko into the mayo layer to create a solid bond that can withstand the heat of the oven.
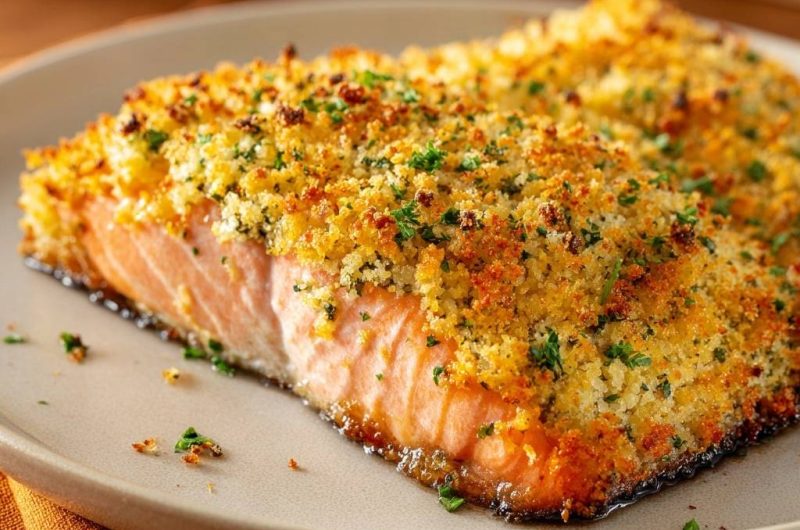
Garlic Herb Crusted Salmon
Course: Main CourseCuisine: AmericanDifficulty: easy4
servings15
minutes12
minutes450
kcal27
MinutesA foolproof method for Garlic Herb Crusted Salmon that avoids soggy toppings. By using mayonnaise as a moisture barrier and high-heat roasting, the fish stays juicy while the Panko crust remains perfectly crunchy.
Ingredients
4 salmon fillets, 6 ounces each (center-cut preferred)
1 cup Panko breadcrumbs
3 tablespoons unsalted butter, melted
2 cloves garlic, minced
1 tablespoon fresh parsley, finely chopped (plus extra for garnish)
1 teaspoon lemon zest
2 tablespoons mayonnaise (The “Pro” moisture barrier)
1 teaspoon Dijon mustard
1/2 teaspoon salt
1/4 teaspoon black pepper
1 tablespoon olive oil (for the pan)
Directions
- Preheat and Prep: Preheat your oven to 425°F (218°C). Place a heavy-duty rimmed baking sheet inside the oven while it preheats. Getting the pan hot first ensures the bottom of the salmon sears and prevents a “soggy bottom.”
- Dry the Fish: Pat the salmon fillets completely dry with paper towels on all sides. This is the most critical step to avoiding a soggy result. Moisture on the surface creates steam, which ruins the crust.
- Season: Season the tops and sides of the fillets with salt and pepper.
- The Crust Mix: In a small bowl, combine the melted butter, minced garlic, lemon zest, and Panko breadcrumbs. Stir until the crumbs are evenly coated with the butter. Fold in the chopped parsley last to keep it vibrant.
- The Moisture Barrier: In a separate small ramekin, whisk together the mayonnaise and Dijon mustard. Brush a thin, even layer of this mixture over the top of each fillet. Unlike mustard alone, the fat in the mayonnaise creates a waterproof seal that prevents the fish’s natural juices from migrating upward into the breadcrumbs.
- Apply the Crust: Press the breadcrumb mixture firmly onto the mayo-mustard layer. Use your hands to pack it into a thick, even mound so it adheres well and covers the entire top surface.
- The Sear-Roast: Carefully remove the hot baking sheet from the oven and drizzle with 1 tablespoon of olive oil. Place the salmon fillets onto the hot oil (they should sizzle).
- Bake: Return the pan to the oven and bake for 10 to 12 minutes. The high heat will crisp the Panko from the top while the preheated pan crisps the skin/bottom.
- Finish: If the crumbs aren’t deeply golden, move the pan to the top rack and broil for 30-60 seconds, watching closely to prevent burning.
- Serve: Remove from the oven when the internal temperature reaches 135°F for medium. Let rest for 2 minutes; the crust will firm up further. Serve immediately to maintain that perfect crunch.
Notes
- The mayonnaise acts as a waterproof seal to prevent juices from making the breadcrumbs soggy. For best results, ensure the internal temperature reaches 135°F and let it rest for 2 minutes before serving.