Toasted Coconut Dream Bake: The Secret to Never-Dry Perfection
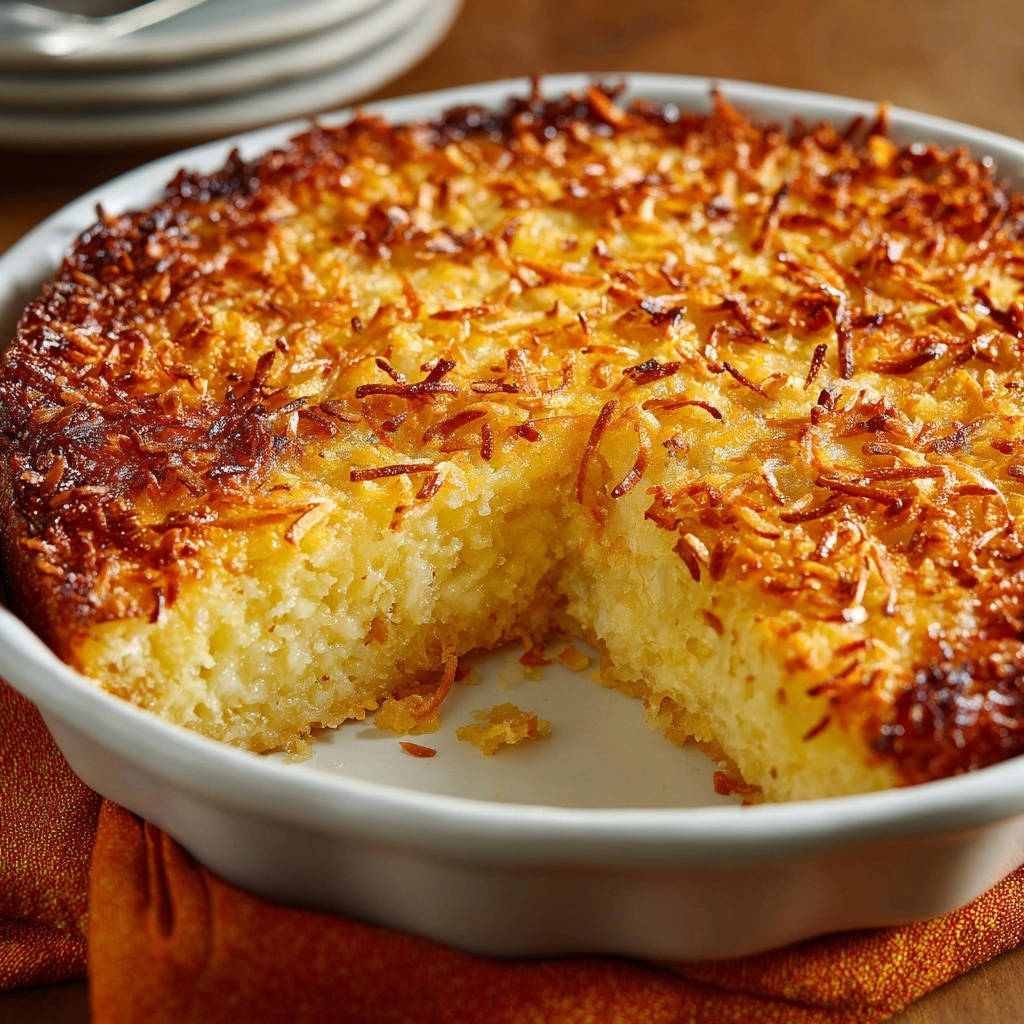
For years, I faced the common baker’s dilemma: a beautiful coconut cake that promised moist tenderness but delivered disappointing dryness. That struggle ended when I perfected this incredible Toasted Coconut Dream Bake, a recipe that guarantees a truly moist, flavorful crumb every single time.
This isn’t just another coconut dessert; it’s a revelation that consistently impresses, making it an absolute must-have for your baking repertoire.
Why This Toasted Coconut Dream Bake Belongs in Your Recipe Box
The “Never Dry” Promise: A Tender Crumb Every Time
The secret to this recipe’s unparalleled moisture lies in a magical second pour of sweetened condensed milk, transforming what could be an ordinary bake into an extraordinarily tender coconut dream. This ingenious technique prevents any hint of dryness, ensuring a luscious texture in every bite.
Irresistible Golden Topping: Crunch and Sweetness in Every Bite
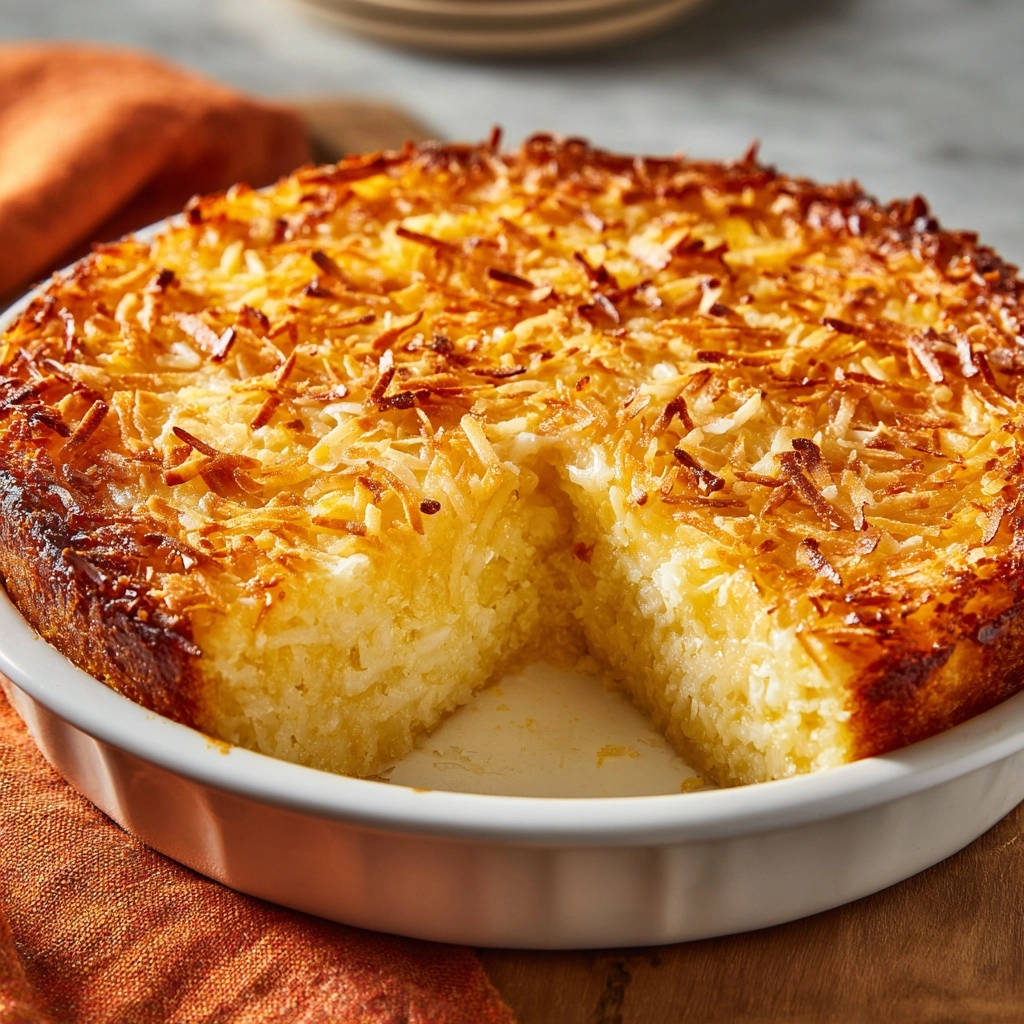
Beyond its tender interior, this bake boasts a glorious, golden toasted coconut topping. This crisp, caramelized layer adds an addictive textural contrast and intensifies the sweet, nutty flavor of the coconut, making each mouthful a delightful experience.
Simplicity Meets Spectacle: Impress Without Stress
Despite its sophisticated appearance and incredible flavor, this Toasted Coconut Dream Bake is surprisingly straightforward to prepare. It’s perfect for both seasoned bakers and novices looking to create an impressive dessert without the fuss.
Gathering Your Essentials: Key Ingredients for Success
The Dry Foundation: Flour, Sugar, and Leavening Agents
All-Purpose Flour: This forms the essential structure of our cake, providing a tender, yet sturdy, crumb. Proper measurement is key for the right texture.
Granulated Sugar: Beyond sweetness, sugar contributes to the cake’s beautiful golden-brown crust and helps maintain moisture. It perfectly balances the rich coconut flavors.
Baking Powder & Salt: Baking powder is our leavening agent, ensuring a light and airy rise. Salt enhances all the other flavors, preventing the cake from tasting flat.
The Wet Blend: Enriching Liquids and Flavor Boosters
Large Eggs: Eggs act as crucial binders, adding richness, structure, and moisture to the batter. Using them at room temperature can lead to a more uniform batter.
Whole Milk: Whole milk delivers significant moisture and richness, contributing to the cake’s incredibly tender texture. You could use 2% milk, but whole milk truly shines here.
Unsalted Butter, Melted: Melted butter infuses the cake with a wonderful flavor and essential fat for moisture. Melting it ensures easy and even incorporation into the batter.
Vanilla Extract: This ubiquitous aromatic elevates all the other ingredients, adding a layer of warm, inviting flavor that complements the coconut beautifully.
Our Star Ingredients: Sweetened Shredded Coconut & Sweetened Condensed Milk
Sweetened Shredded Coconut (Divided): This ingredient plays a dual role: incorporated into the batter for subtle coconut flavor throughout, and sprinkled on top for that iconic, perfectly toasted golden finish. Opt for sweetened for best results.
For a perfect pairing, try our Mastering the Glazed Blueberry Lemon Bundt Cake.
Sweetened Condensed Milk: This is our undisputed “secret weapon” for unparalleled moisture and richness. It magically transforms during baking, creating a truly never-dry Toasted Coconut Dream Bake.
Essential Kitchen Companions for Your Dream Bake Adventure
Basic Baking Gear You’ll Need
9-inch Round Baking Dish: This specific size is crucial for proper baking time and cake thickness. Lightly greasing it ensures your beautiful creation releases without sticking.
Mixing Bowls: You’ll need one large bowl for your dry ingredients and a separate medium bowl for the wet. This two-bowl method ensures thorough mixing of each component.
Whisk & Spatula: A whisk is ideal for combining dry ingredients and wet mixtures smoothly. A spatula is perfect for gently folding the wet into the dry, preventing overmixing.
Measuring for Perfection
Measuring Cups & Spoons: Accuracy is paramount in baking. Using proper measuring tools ensures consistent results and the perfect balance of ingredients every time.
Wire Rack: Essential for cooling the cake evenly. Air circulation around the entire cake prevents the bottom from becoming soggy and allows the condensed milk to fully absorb.
Step-by-Step: Crafting Your Toasted Coconut Dream Bake Perfection
- Prep & Preheat: Setting the Stage
Preheat your oven to 350°F (175°C).
Lightly grease a 9-inch round baking dish with butter or baking spray. This crucial step guarantees the cake releases cleanly after baking, preserving its beautiful form.
- Dry Ingredients: Building the Base
In a large bowl, thoroughly whisk together the all-purpose flour, granulated sugar, baking powder, and salt. This ensures all leavening and seasoning are evenly distributed.
Add 1/2 cup of the sweetened shredded coconut to the dry ingredients and mix well. Incorporating it now ensures a subtle coconut flavor runs throughout the cake’s tender crumb.
- Wet Ingredients: The Flavorful Heart
In a separate medium bowl, whisk together the large eggs, whole milk, melted unsalted butter, and vanilla extract until they are completely combined and smooth.
- Combining for Batter Perfection
Carefully pour the wet ingredients mixture into the large bowl containing your dry ingredients.
For a perfect pairing, try our Mastering the Flourless Dark Chocolate Torte.
Mix gently with a spatula until just combined. It’s okay, even preferable, if a few small lumps remain; overmixing is the enemy of a tender cake as it develops gluten, leading to a tough texture.
- First Bake: The Foundation
Pour the prepared batter evenly into your greased 9-inch round baking dish.
Bake for 20 minutes. This initial bake creates a slightly set, sturdy foundation before we add the transformative topping.
- The Magic Moment: Adding the Condensed Milk and Coconut
Remove the partially baked dish from the oven. Carefully and evenly pour the entire can of sweetened condensed milk over the top of the warm cake. Do not skimp on this step!
Then, sprinkle the remaining 1/2 cup of sweetened shredded coconut evenly over the condensed milk layer. This step is truly key for both moisture and the signature golden, toasted flavor of our Toasted Coconut Dream Bake.
- The Final Golden Finish
Return the dish to the oven and continue baking for another 25-30 minutes.
Bake until the top is beautifully golden brown and a toothpick inserted into the center of the cake comes out with moist crumbs, not wet batter. The cake should feel set to the touch, and the coconut topping gorgeously toasted.
- The Waiting Game: Cooling for Optimal Texture
Once baked, remove the cake from the oven and let it cool completely on a wire rack before attempting to serve.
This patience is a virtue, allowing the sweetened condensed milk to fully absorb into the cake and create that truly dreamy, never-dry texture we’re aiming for.
Mastering Your Bake: Expert Tips & Tricks for Flawless Results
Don’t Overmix the Batter: As noted in the instructions, vigorously mixing the batter develops gluten, which can lead to a tough, dense cake. Mix only until the ingredients are just combined, even if small lumps are visible; these will bake out.
Even Coconut Distribution: When sprinkling the second half of the sweetened shredded coconut over the condensed milk, take care to spread it as evenly as possible. This ensures a uniform golden-brown crust and prevents any areas from browning too quickly.
Trust Your Eyes (and a Toothpick!): While the baking time is a helpful guide, oven temperatures can vary. Always rely on visual cues – a truly golden brown topping – and the toothpick test for perfect doneness, yielding moist crumbs, not wet batter.
What’s Next?
Try these delicious pairings:
Patience is Key for Cooling: It’s tempting to dig into a warm cake, but resist the urge with this Toasted Coconut Dream Bake. Cooling completely is crucial for the condensed milk to fully integrate, resulting in its desired moist and tender texture.
Troubleshooting Your Toasted Coconut Dream Bake: Common Questions Solved
“Why is my Toasted Coconut Dream Bake still dry?”
The most common culprit is overbaking. Ensure you’re pulling the cake out when the toothpick test shows moist crumbs, not completely clean. Also, double-check that you poured the entire can of condensed milk and allowed the cake to cool completely for proper absorption.
“My coconut topping burned, what happened?”
This usually indicates your oven runs hot, or the cake was positioned too close to the top heating element. Next time, consider tenting the cake with aluminum foil during the last 10-15 minutes of baking if the coconut starts to brown too rapidly, or lower your oven temperature slightly for the second bake.
“My cake didn’t rise enough or seems dense.”
This issue often points to old or inactive baking powder. Always use fresh leavening agents. Another common cause is overmixing the batter, which overdevelops gluten, leading to a denser, less airy crumb. Mix only until ingredients are just combined.
Beyond the Oven: Serving, Storage, and Make-Ahead Tips
Perfect Pairings: What to Serve With Your Toasted Coconut Dream Bake
While this incredible bake shines on its own, a simple scoop of premium vanilla bean ice cream or a dollop of freshly whipped cream can elevate the experience. For a decadent twist, consider a light drizzle of high-quality chocolate sauce, or pair it with a refreshing no-bake strawberry cheesecake for a dessert buffet.
Storing for Freshness: Keeping it Delicious
Store your cooled Toasted Coconut Dream Bake loosely covered at room temperature for up to 2-3 days, ensuring it’s protected from drying out. For extended freshness, it can be kept in the refrigerator for up to 5 days, tightly wrapped.
Make-Ahead Magic: Can You Prep This Early?
Absolutely! This cake is wonderfully suited for making a day in advance. The flavors have more time to meld and the condensed milk fully sets, significantly enhancing its moist texture. Simply cover and store as directed, perhaps alongside some chewy coconut macaroons for variety.
Your Sweetest Questions Answered: FAQs About the Dream Bake
Can I use unsweetened shredded coconut for this recipe?
While you certainly can, using unsweetened coconut will significantly alter the flavor profile and overall sweetness of the Toasted Coconut Dream Bake. You might need to slightly increase the granulated sugar in the batter to compensate, but the richness will still be different.
What if I don’t have whole milk? Can I use a substitute?
Yes, you can substitute other dairy milks like 2% or even non-dairy alternatives such as almond milk or oat milk. Be aware that these substitutions might subtly change the richness and final texture, but the core recipe will still perform well.
Is this Toasted Coconut Dream Bake recipe gluten-free adaptable?
Although this recipe hasn’t been specifically tested with gluten-free flours, you will likely achieve good results using a high-quality 1:1 gluten-free baking flour blend that includes xanthan gum. Ensure the blend is suitable for cakes and follow all mixing instructions carefully to avoid density.
How long does the Toasted Coconut Dream Bake last?
When properly stored, your Toasted Coconut Dream Bake will remain deliciously fresh for 2-3 days at room temperature, or up to 5 days if kept in the refrigerator. In our experience, it rarely lasts that long due to its irresistible nature!
Ready to Impress? Share Your Toasted Coconut Dream Bake Masterpiece!
We’re genuinely confident that this Toasted Coconut Dream Bake will swiftly become a beloved, go-to recipe in your kitchen. It consistently delivers that perfect, sought-after blend of moist tenderness and irresistible toasted coconut bliss, earning you rave reviews every time.
Share Your Creations!
We absolutely adore seeing your culinary triumphs! Please share photos of your beautiful Toasted Coconut Dream Bake creations and tag us on social media. Or, simply leave a comment below to tell us just how much you loved it. Happy baking!
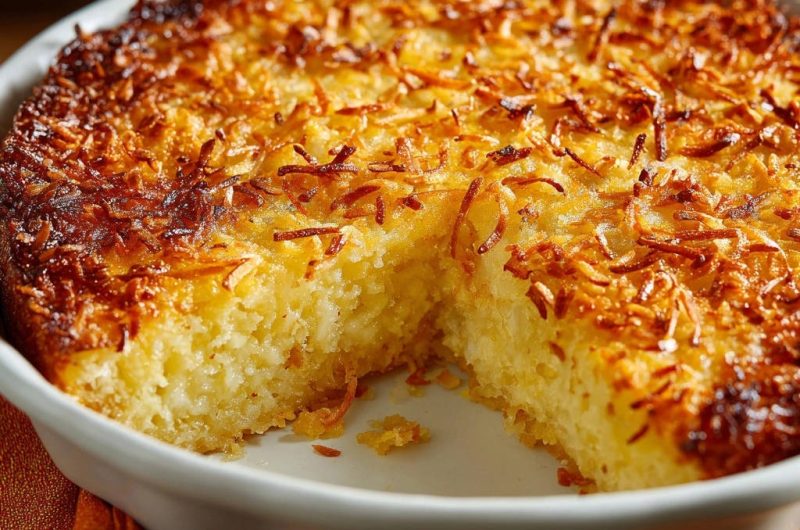
Coconut Dream Bake
Course: DessertCuisine: AmericanDifficulty: medium8
servings20
minutes50
minutes550
kcal70
minutesUnlock the secret to a truly moist and tender coconut bake, featuring an irresistible golden, toasted topping. This recipe guarantees a flavorful dessert that stays tender, making it a game-changer for any occasion. Say goodbye to dry coconut desserts forever!
Ingredients
1 1/2 cups all-purpose flour
1 cup granulated sugar
2 teaspoons baking powder
1/2 teaspoon salt
1 cup sweetened shredded coconut, divided
2 large eggs
1 cup whole milk
1/2 cup unsalted butter, melted
1 teaspoon vanilla extract
1 can (14 ounces) sweetened condensed milk
Directions
- Preheat your oven to 350F (175C). Lightly grease a 9-inch round baking dish.
- In a large bowl, whisk together the flour, granulated sugar, baking powder, and salt. Add 1/2 cup of the sweetened shredded coconut to the dry ingredients and mix well.
- In a separate medium bowl, whisk together the eggs, whole milk, melted butter, and vanilla extract.
- Pour the wet ingredients into the dry ingredients. Mix with a spatula until just combined. Be careful not to overmix; a few small lumps are perfectly okay.
- Pour the batter into the prepared baking dish.
- Bake for 20 minutes.
- Remove the dish from the oven. Carefully pour the entire can of sweetened condensed milk evenly over the top of the partially baked cake. Then, sprinkle the remaining 1/2 cup of sweetened shredded coconut evenly over the condensed milk layer. This step is key for moisture and flavor!
- Return the dish to the oven and continue baking for another 25-30 minutes, or until the top is golden brown and a toothpick inserted into the center of the cake comes out with moist crumbs, not wet batter. The cake should feel set and the coconut topping beautifully toasted.
- Let the cake cool completely on a wire rack before serving. This allows the condensed milk to fully absorb and create that dreamy, never-dry texture.
Notes
- Cooling completely is crucial for the condensed milk to absorb fully, ensuring a dreamy, never-dry texture.