Mastering Chocolate Coconut Lamington Squares: The Anti-Soggy Method
Traditional lamingtons often leave much to be desired, frequently arriving as dry, uninspired sponge cake dipped in a watery cocoa syrup. This classic Australian treat usually suffers from a “soggy bottom” or a crumb that drinks up too much liquid, turning the dessert into a mushy mess. We’re moving away from those thin, sugary washes and embracing a modern, decadent philosophy that prioritizes texture and rich flavor.
The “Anti-Soggy” method focuses on a structural shift, replacing the airy, fragile sponge with a robust, oil-based chocolate crumb. Instead of a thin dip, we use a luxurious ganache-style glaze that sits proudly on the surface. This approach ensures every bite offers a distinct contrast between the velvety chocolate coating and the moist, tender cake inside.
The real secret to success lies in the temperature barrier we create before the chocolate even touches the cake. By flash-freezing the squares, you control exactly how much glaze penetrates the crumb. This professional technique ensures your Chocolate Coconut Lamington Squares look like they came from a high-end patisserie rather than a messy home kitchen.
The Anatomy of a Perfect Chocolate Crumb
Building a better lamington starts with understanding the chemistry of your dry ingredients. All-purpose flour provides the necessary gluten structure to hold up the heavy ganache, while a precise blend of baking powder and baking soda ensures a reliable lift. Since this batter is quite heavy with moisture, the dual leavening agents work together to create air pockets that keep the cake from becoming a dense brick.
Your choice of cocoa powder significantly impacts the final result. Natural cocoa powder, which is more acidic, reacts beautifully with the baking soda to create a light, reddish-brown hue and a sharp chocolate punch. If you prefer a darker, more mellow flavor, you can use Dutch-processed cocoa, but the natural variety provides that classic, nostalgic chocolate taste that pairs so well with sweet coconut.
Salt and vanilla extract might seem like background players, but they’re essential for depth. The salt cuts through the sugar, while the vanilla acts as a flavor bridge between the earthy cocoa and the tropical coconut topping. Without these, the cake would taste flat and one-dimensional.
Why Boiling Water is the Secret Ingredient
You might feel nervous pouring a cup of boiling water into your carefully mixed batter, but this is where the magic happens. The hot water “blooms” the cocoa powder, dissolving any stubborn lumps and releasing the full intensity of the chocolate flavor. It’s a technique often used in high-end chocolate cakes to ensure a deep, aromatic profile.
Furthermore, the boiling water thins the batter to a liquid consistency, which translates to an incredibly moist crumb after baking. Unlike traditional creamed-butter sponges that can dry out quickly, this oil-and-water emulsion stays tender for days. Even after the freezing process, the cake retains a delicate mouthfeel that melts away the moment you take a bite.
Essential Components for the Ganache Glaze
A proper glaze needs enough fat to stay flexible but enough structure to hold its shape. We use semi-sweet chocolate chips because they contain stabilizers that help the glaze set firmly. Milk chocolate is often too soft and sweet for this application, while very dark chocolate can become brittle and crack when you try to bite into the square.
Heavy cream provides the liquid base for our ganache, creating a rich emulsion that clings to the cake. The addition of room-temperature butter at the very end is a professional baker’s trick. It adds a high-gloss sheen to the finish and ensures the chocolate feels silky on the tongue rather than waxy.
The Physics of the Flash-Freeze Technique
The most common failure in lamington making is the “sponge-soak,” where the cake absorbs the glaze like a thirsty towel. To prevent this, we use the physics of heat transfer. By freezing the cut cake squares for 45 minutes, you create a cold thermal barrier on the exterior of the crumb.
When the warm ganache hits the frozen surface, the chocolate seizes slightly and begins to set almost instantly. This prevents the liquid from migrating into the center of the cake. You get a clean, defined line between the dark chocolate coating and the dark cake, maintaining the structural integrity of the dessert.
This technique also makes the squares much easier to handle. Chocolate cake is notoriously fragile, but a semi-frozen square won’t crumble or fall apart when you’re pouring the glaze. It gives you total control over the aesthetic, allowing for those beautiful, natural drips down the sides.
Step-by-Step: Baking the Chocolate Base
Start by preparing your 9×13 inch pan with a generous coating of grease and a dusting of flour. This ensures the cake releases cleanly, which is vital for getting those sharp, professional edges. Once you’ve whisked your ingredients and stirred in the boiling water, pour the thin batter in and get it into the oven immediately to keep the leavening agents active.
Bake for 30 to 35 minutes, but don’t just rely on the timer. Use the “spring-back” test: gently press the center of the cake with your finger. If it bounces back, it’s done. A toothpick should also come out clean or with just a few moist crumbs. Let the cake cool completely in the pan; rushing this step will lead to a gummy texture.
Precision Cutting and the Freezing Phase
To get 12 uniform squares, I recommend using a ruler. It sounds extra, but geometric precision is what separates a home bake from a showstopper. Cut the cake into three rows of four. If the edges are a bit domed, you can trim the very top off to create a flat surface for the glaze to sit on.
Transfer the squares to a parchment-lined tray, making sure they aren’t touching. Slide them into the freezer for exactly 45 minutes. You’re looking for the “Goldilocks” zone here. The squares should be firm to the touch and cold, but not frozen into solid blocks of ice, which would make them unpleasant to eat immediately after glazing.
Emulsion Mastery: Crafting the Thick Chocolate Coating
When making the ganache, patience is your best friend. After pouring the hot cream over the chocolate chips, let it sit undisturbed for five full minutes. This allows the heat to penetrate the center of the chocolate without introducing air. If you whisk too early, you’ll end up with tiny air bubbles that ruin the smooth finish.
Whisk gently starting from the center and moving outward until the mixture is glossy. Once you stir in the butter, check the consistency. You want it at the “ribbon stage,” where the chocolate falls off the whisk and leaves a visible trail on the surface for a few seconds. If it’s too runny, let it sit for another few minutes to thicken.
The Art of the Drip and Coconut Application
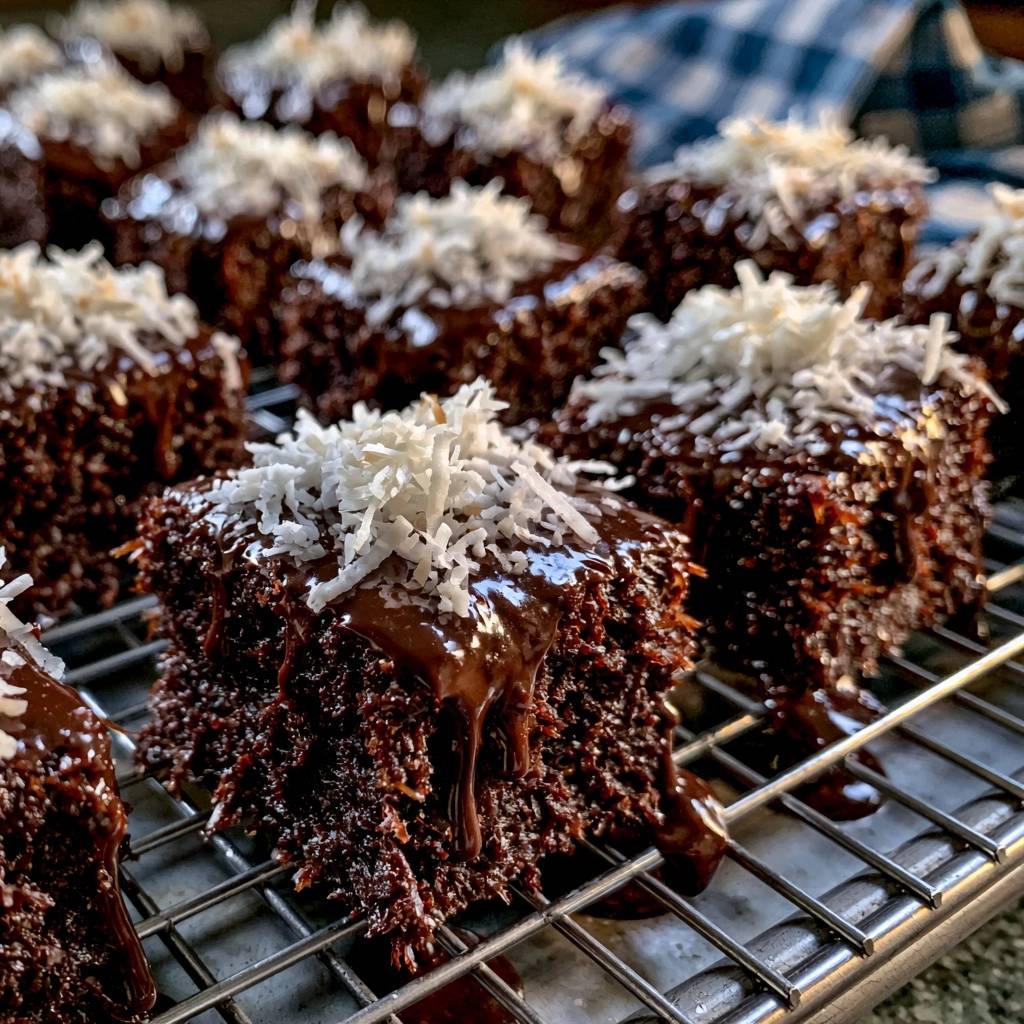
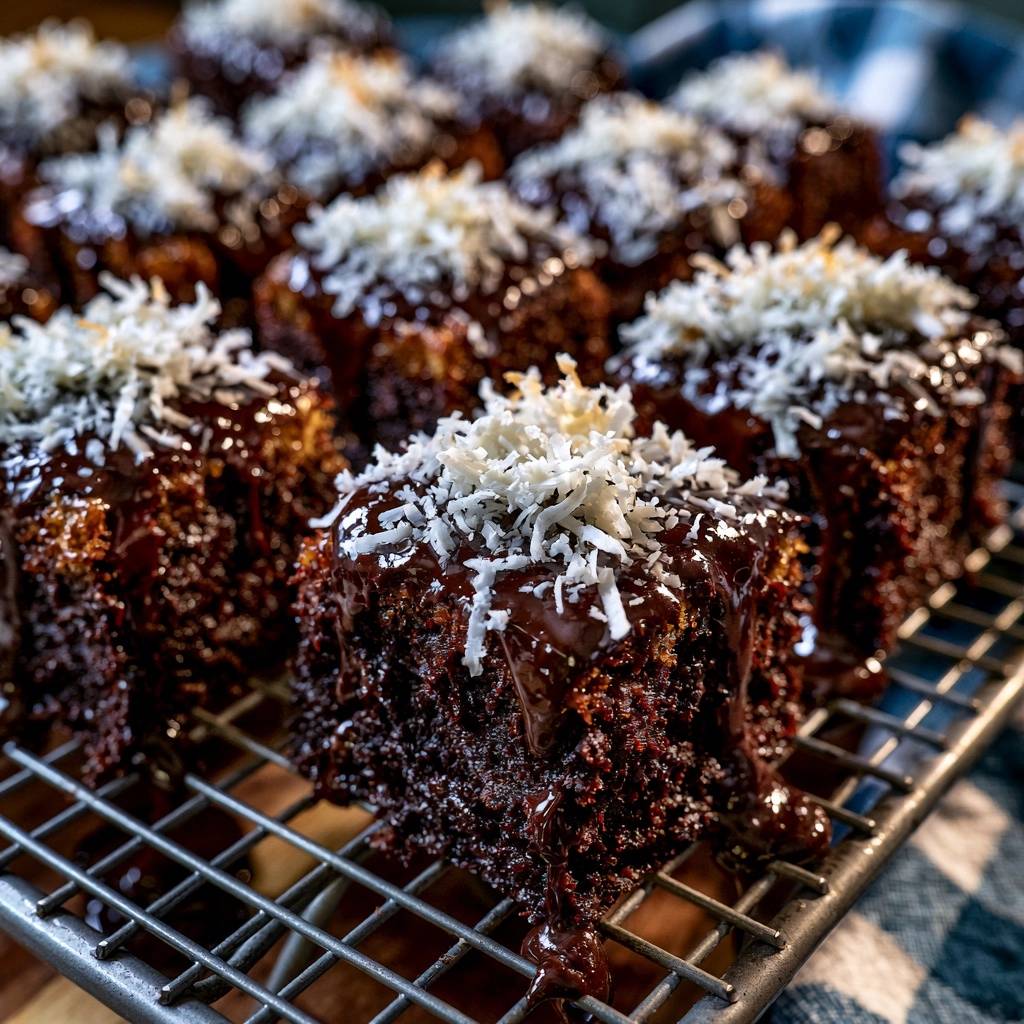
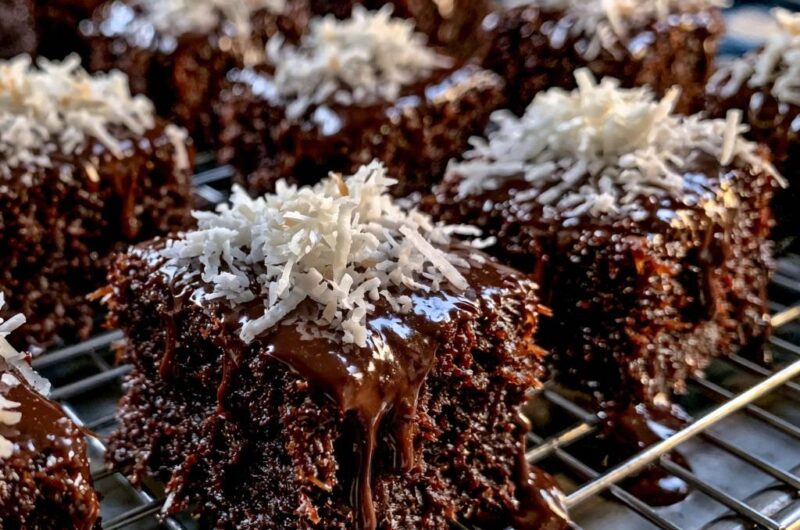
Set up your assembly line with a wire rack over parchment paper to catch the excess. Use a small ladle to pour the glaze over the center of each frozen square. Let the chocolate naturally flow toward the edges and run down the sides. This creates a handcrafted, artisanal look that is much more appealing than a perfectly dipped, factory-made square.
Timing is everything for the coconut. You must apply the shredded coconut while the glaze is still tacky. If you wait too long, the coconut will just bounce off the set chocolate. By placing a generous pinch only in the center, you highlight the contrast between the snowy white coconut and the dark, glossy chocolate drips.
Troubleshooting Common Lamington Failures
If your glaze is running straight off the cake and leaving a thin, translucent coating, it’s likely too warm. Let the ganache cool at room temperature for ten minutes to thicken up. Conversely, if the glaze is too thick to pour, a five-second zap in the microwave will loosen it back up to a workable consistency.
For those struggling with crumbling cake during the glazing process, the fix is almost always a longer freeze. If the crumb is too soft, it can’t stand up to the weight of the chocolate. Ensure your freezer is set to a low temperature and give the squares a full hour if your kitchen is particularly warm.
If the coconut won’t stick, you might be working in a very dry environment where the glaze sets too fast. Try glazing and topping two squares at a time rather than doing the whole batch at once. Finally, if the center of your cake feels dry, check your oven calibration; you might be baking at a higher temperature than the dial suggests.
Storage Logistics and Make-Ahead Strategies
These squares store beautifully at room temperature in an airtight container for up to two days. The ganache actually acts as a protective seal, keeping the moisture locked inside the cake. If you need to keep them longer, they will last in the refrigerator for five days, though the coconut may lose a bit of its crunch.
You can also freeze the fully decorated squares. Wrap them individually in plastic wrap and place them in a freezer bag. When you’re ready to eat, let them thaw in the fridge overnight. The texture remains remarkably close to fresh, making these a perfect make-ahead option for parties or busy weekends.
Expert Tips for Chocolate Coconut Lamington Squares
Can I use desiccated coconut instead of shredded?
You certainly can, but the texture will change significantly. Shredded coconut provides a chewy, moist bite that complements the soft cake. Desiccated coconut is much finer and drier, which can make the dessert feel a bit sandy. If you use desiccated, I recommend lightly toasting it first to bring out more flavor.
How do I get cleaner cuts on the cake?
The “hot knife” technique is the gold standard here. Dip a long, sharp chef’s knife into a tall container of hot water, wipe it dry, and make one clean slice. Repeat the dipping and drying for every single cut. This melts through the crumb slightly and prevents the cake from tearing or sticking to the blade.
Can I substitute the vegetable oil?
Vegetable oil is preferred because it stays liquid at room temperature, ensuring a moist crumb. You can use melted butter for a richer flavor, but keep in mind the cake will be slightly firmer when cold. Avoid using applesauce as a substitute here, as it adds too much moisture and will compromise the “Anti-Soggy” structure we worked so hard to build.
Why is my glaze dull instead of shiny?
A dull glaze usually happens if the butter was too cold when added or if the cream was boiled too vigorously, causing the fats to separate. Ensure your butter is truly room temperature—soft enough that your finger leaves an indent—so it emulsifies perfectly into the warm chocolate. A quick whisking at the end should bring back that professional sheen.
How do I store leftovers?
Store these in a single layer in an airtight container. If you must stack them, place a piece of parchment paper between the layers to prevent the coconut from pulling the glaze off the square below. They stay fresh at room temperature for 48 hours, but for the best texture, keep them in a cool, dry spot away from direct sunlight.
Why did my cake sink in the middle?
This usually happens if the oven door was opened too early or if the leavening agents (baking soda/powder) are expired. The boiling water batter is very thin, so it needs that initial blast of heat to set the structure. Make sure your oven is fully preheated before the pan goes in, and don’t peek until at least 25 minutes have passed.
Chocolate Coconut Lamington Squares
Course: DessertCuisine: Australian and American FusionDifficulty: easy12
servings25
minutes35
minutes60
Minutes340
kcalAustralian and American Fusion
Ingredients
2 cups all-purpose flour
1.5 cups granulated sugar
3/4 cup unsweetened cocoa powder
1.5 teaspoons baking powder
1.5 teaspoons baking soda
1 teaspoon salt
2 large eggs
1 cup whole milk
1/2 cup vegetable oil
2 teaspoons vanilla extract
1 cup boiling water
For the Ganache Glaze & Topping:
1.5 cups semi-sweet chocolate chips
3/4 cup heavy cream
2 tablespoons unsalted butter, room temperature
1.5 cups shredded sweetened coconut (for topping only)
Directions
- Preheat your oven to 350°F (175°C). Grease and flour a 9×13 inch baking pan.
- In a large bowl, whisk together flour, sugar, cocoa, baking powder, baking soda, and salt. Add eggs, milk, oil, and vanilla. Beat on medium speed for two minutes until smooth.
- Stir in the boiling water by hand. The batter will be very thin; this ensures a moist crumb. Pour into the prepared pan.
- Bake for 30 to 35 minutes, or until a toothpick inserted in the center comes out clean. Allow the cake to cool completely in the pan.
- Once cooled, cut the cake into 12 uniform squares. Place the squares on a parchment-lined baking sheet and freeze for at least 45 minutes. This is the critical “Anti-Soggy” step; the frozen exterior prevents the warm glaze from penetrating too deep.
- Prepare the glaze: Place chocolate chips in a heat-proof bowl. Heat the heavy cream in a small saucepan until it just begins to simmer. Pour the hot cream over the chocolate. Let sit for 5 minutes, then whisk until glossy. Whisk in the butter for extra shine.
- Place the frozen cake squares on a wire cooling rack set over a sheet of parchment paper.
- Using a spoon or small ladle, pour the warm chocolate glaze over each square, allowing it to coat the top and naturally drip down the sides as shown in the image.
- Immediately, while the glaze is still wet and tacky, pinch a generous amount of shredded coconut and place it only on the top center of each square.
- Let the squares sit for 20 minutes at room temperature to allow the glaze to set before serving.
Notes
- Freezing the cake squares for at least 45 minutes is the critical step to ensure the glaze coats the exterior without soaking into the core.