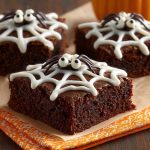
Halloween Spiderweb Brownies: Never Dry, Always Fudgy

There’s nothing worse than biting into a Halloween treat that promises spooky delight, only to find it disappointingly dry and crumbly. I’ve been there, but I cracked the code to consistently moist, chewy, and truly fudgy Halloween Spiderweb Brownies. This recipe isn’t just simple; it’s a game-changer, guaranteeing incredible texture and flavor every single time.
The Halloween Spiderweb Brownies Secret: Why This Recipe Works
The magic of these Halloween Spiderweb Brownies lies in a few key techniques that ensure an intensely rich and utterly fudgy bite. We avoid the common pitfalls of cakey brownies by understanding the science behind moisture and texture.
That same careful approach to texture is what makes this golden cherry cobbler so reliably moist without getting soggy.
Our method prioritizes precise mixing and careful baking, locking in that desirable chewiness. You’ll achieve a crackly top, a dense interior, and a deep chocolate flavor that perfectly complements the fun spiderweb design.
This recipe builds trust through reliable results, making it your go-to for impressive, never-fail spooky season treats that both kids and adults will adore.
What You’ll Need: Gathering Your Ingredients for Spooky Sweetness
Getting your ingredients ready is the first step to a flawless batch of Halloween Spiderweb Brownies. Understanding their roles ensures the perfect outcome.
The Fudgy Brownie Foundation
Unsalted Butter, Melted: Provides the rich fat content crucial for a dense, fudgy texture. Melting it ensures even distribution throughout the batter.
Granulated Sugar: Not only sweetens but also helps create that signature shiny, crackly top crust on your brownies.
Large Eggs: Act as an emulsifier, binding the ingredients, adding structure, and contributing to the brownies’ moist and chewy consistency.
Vanilla Extract: Enhances and rounds out the chocolate flavor, adding a warm, aromatic depth that’s essential for any great brownie.
Cocoa & Chocolate Power: Deep, Rich Flavor
All-Purpose Flour: Provides just enough structure without making the brownies too cakey. Proper measuring is key to maintaining fudginess.
Unsweetened Cocoa Powder: Delivers intense chocolate flavor. Using good quality cocoa makes a noticeable difference in the final taste.
Salt: Balances the sweetness and amplifies the chocolate notes, making the brownies taste even richer and more complex.
Semi-Sweet Chocolate, Melted: Infuses another layer of deep chocolate flavor and helps achieve that wonderfully gooey, melt-in-your-mouth texture.
Crafting the Web: Icing Essentials
Powdered Sugar: Forms the smooth base for the white spiderweb icing, dissolving easily for a perfect piping consistency.
Milk: Used to adjust the icing to the ideal thickness for drawing delicate lines and creating distinct spiderweb patterns.
Vanilla Extract: Adds a pleasant flavor to the sweet icing, complementing the rich brownies underneath.
Spooky Details: Dark Chocolate & Candy Eyes
Dark Chocolate, Melted: Creates contrast for the spider bodies and legs, adding another layer of chocolate and visual interest.
Small Candy Eyes: These adorable details bring your spiders to life, transforming simple brownies into truly festive Halloween Spiderweb Brownies.
Your Baking Arsenal: Essential Tools for Spiderweb Success
9×13 inch Baking Pan: This standard size is perfect for creating a batch of thick, fudgy brownies, ensuring even baking and easy cutting.
Parchment Paper: Crucial for preventing sticking and allowing for effortless removal of the entire brownie slab from the pan.
Large Mixing Bowls: Essential for separating wet and dry ingredients before combining, and for ample space during mixing.
Whisk: Used to thoroughly combine ingredients, especially for aerating eggs and ensuring no lumps in the dry mix.
Rubber Spatula: Ideal for gently folding in dry ingredients and scraping down the sides of bowls, ensuring all batter is incorporated.
Piping Bags (or Ziplock Bags): Key for precise application of the white icing for spiderwebs and melted dark chocolate for spiders.
Toothpicks: Your essential tool for dragging the icing to create the signature spiderweb design on each brownie square.
Wire Rack: Necessary for cooling the brownies completely, allowing them to set properly and achieve their ideal chewy, fudgy texture.
Weaving the Web: Step-by-Step Halloween Spiderweb Brownies
- Prep Your Pan:
Preheat your oven to 350°F (175°C). Line a 9×13 inch baking pan with parchment paper, leaving an overhang on the sides for easy removal, and lightly grease it.
- Melt & Whisk the Base:
In a large bowl, whisk together the melted butter and granulated sugar until well combined and smooth. This foundational step creates the dense, rich base critical for fudgy brownies.
- Eggs & Vanilla:
Add the eggs one at a time, whisking vigorously after each addition until the mixture becomes glossy and lighter in color. Stir in the vanilla extract for a fragrant depth of flavor.
- Combine Dry Ingredients:
In a separate, medium-sized bowl, whisk together the all-purpose flour, unsweetened cocoa powder, and salt. This ensures even distribution of dry ingredients throughout the batter.
- Gentle Mixing & Chocolate Infusion:
Gradually add the dry ingredients to the wet, mixing only until just combined. Do not overmix, as this develops gluten and leads to cakey brownies. Stir in the melted semi-sweet chocolate until fully incorporated, creating a truly rich batter for your Halloween Spiderweb Brownies.
- Bake to Fudgy Perfection:
Pour the brownie batter into the prepared baking pan and spread it evenly. Bake for 25 to 30 minutes, or until a toothpick inserted into the center comes out with moist crumbs attached, but no wet batter. Slightly underbaking is key for that signature fudgy texture.
- Cool Completely:
Let the brownies cool completely in the pan on a wire rack before cutting. This crucial step allows them to set into that perfect chewy, fudgy consistency without falling apart.
- Whip Up the Web Icing:
For the decorating icing, in a small bowl, whisk together the powdered sugar, milk, and vanilla extract until smooth. Adjust consistency with tiny bits more milk or powdered sugar as needed, aiming for a pipeable but not runny texture.
- Create the Spiderweb Design:
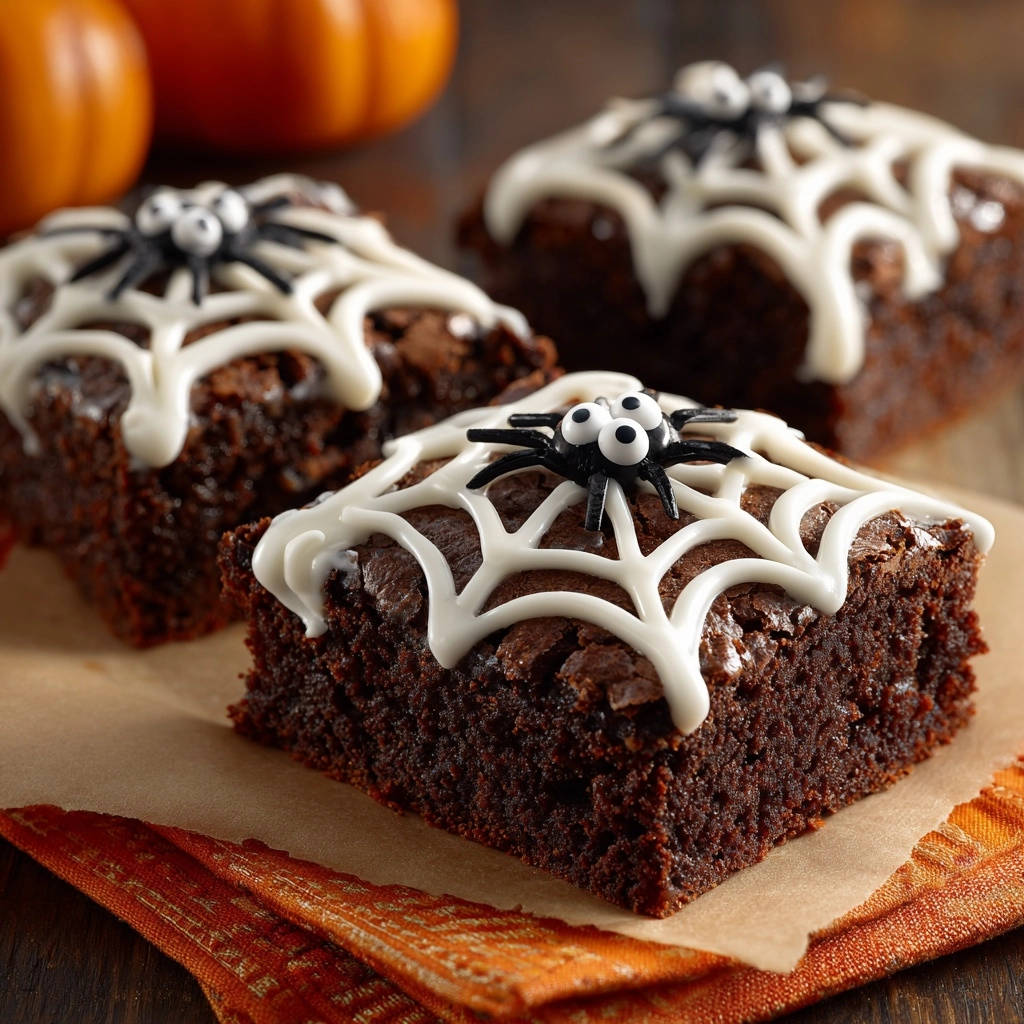
Once cooled, cut the brownies into squares. Transfer the white icing to a small piping bag (or a ziptop bag with a tiny corner snipped off). Pipe concentric circles on each brownie, then use a toothpick to drag lines from the center outwards to form the web.
- Pipe Your Spiders:
Melt the dark chocolate and transfer it to another small piping bag with a tiny snip. Pipe small oval shapes for spider bodies on top of the spiderwebs, then pipe thin legs extending from the body, bringing your Halloween Spiderweb Brownies to life.
- Add the Eyes:
Gently place two small candy eyes on each spider while the chocolate is still wet to secure them. Allow all the decorations to set before serving your spooky treats.
Secrets to Spooky Success: Pro Tips for Your Halloween Spiderweb Brownies
Don’t Overmix! The Golden Rule: Gently fold in dry ingredients to avoid developing gluten, which results in cakey rather than deliciously fudgy brownies.
The Underbake Advantage: For maximum fudginess, remove brownies from the oven when a toothpick still has moist crumbs attached, not liquid batter. They will continue to set as they cool.
Patience in Cooling: Resist the urge to cut warm brownies! Cooling completely allows the texture to set, ensuring that perfect chewy and fudgy consistency.
Icing Consistency is King: Adjust your white icing with tiny increments of milk or powdered sugar until it’s smooth and pipes easily without being too runny or too stiff.
Chocolate Quality Matters: Using good quality cocoa powder and semi-sweet chocolate will significantly enhance the depth of flavor and richness of your Halloween Spiderweb Brownies. Invest in good ingredients for superior taste.
Precision with the Web: For cleaner spiderweb lines, wipe your toothpick clean between dragging strokes to prevent smudging and ensure crisp designs.
Troubleshooting Your Terrific Treats
My Halloween Spiderweb Brownies are Dry and Cakey.
This is usually due to overmixing the batter, which develops too much gluten, or overbaking them. For future batches, mix just until the dry ingredients are incorporated and remove from the oven when a toothpick inserted in the center has moist crumbs, not wet batter.
The Spiderweb Icing is Spreading or Too Stiff.
If your icing is spreading, it’s too thin; gradually whisk in more powdered sugar until it reaches a pipeable consistency. If it’s too stiff, add milk in very tiny increments (1/4 teaspoon at a time) until it’s smooth and flows easily from the piping bag.
My Spiders’ Legs are Breaking or Not Sticking.
Ensure your melted dark chocolate for the spiders is not too hot or too thick. If too thick, a tiny bit of neutral oil (like vegetable oil) can help. Place the candy eyes immediately after piping the spider bodies while the chocolate is still wet to ensure they adhere properly.
Serving, Storing, and Making Ahead
Creative Ways to Serve Your Spooky Delights
Serve your Halloween Spiderweb Brownies on a festive platter to showcase their fun design. They are fantastic on their own, but also pair wonderfully with a scoop of vanilla ice cream or a dollop of whipped cream.
For a perfect pairing, try our Mastering Triple Chocolate Chunk Brownie Cookies.
These brownies make excellent party favors! Wrap individual squares in cellophane bags with a spooky tag for a charming treat guests can take home. For a complete autumn dessert spread, these brownies pair beautifully with our decadent pumpkin pie truffles.
How to Store Halloween Spiderweb Brownies for Freshness
Store undecorated brownies in an airtight container at room temperature for up to 3-4 days. Once decorated, store them in a single layer in an airtight container to prevent smudging, also at room temperature, for up to 2-3 days.
If you need to keep them longer, they can be refrigerated for up to a week. For ultimate freshness, bring them back to room temperature before serving.
Can I Prepare These Brownies in Advance?
Absolutely! The brownies themselves can be baked up to two days in advance. Cool them completely, then store in an airtight container.
You can prepare the white icing a day ahead and store it in the refrigerator. Just bring it to room temperature and whisk briefly before piping. It’s best to pipe the dark chocolate spiders and add the candy eyes on the day of serving for the freshest look.
FAQs: All Your Halloween Spiderweb Brownies Questions Answered
Can I use regular unsweetened cocoa powder?
Yes, you can use regular unsweetened cocoa powder. However, Dutch-processed cocoa powder, which is what’s typically recommended, has been alkalized to reduce its acidity, resulting in a darker color and a milder, less bitter chocolate flavor. Regular cocoa will still work, but may yield a slightly lighter brownie with a more intense chocolate tang.
What’s the best way to cut clean squares?
For perfectly clean brownie squares, ensure your Halloween Spiderweb Brownies are completely cooled – ideally chilled in the refrigerator for 30 minutes. Use a large, sharp knife, warming it under hot water and wiping it clean between each cut. This prevents sticking and smudging the designs.
Can I make these dairy-free or gluten-free?
Making them dairy-free is quite achievable! Substitute unsalted butter with a high-quality plant-based butter alternative and use dairy-free milk for the icing. For gluten-free, use a 1:1 gluten-free all-purpose flour blend. Be aware that texture might be slightly altered, but they’ll still be delicious.
How long do decorated brownies last?
Decorated Halloween Spiderweb Brownies will maintain their best quality for about 2-3 days when stored in an airtight container at room temperature. The decorations, particularly the candy eyes, can sometimes absorb moisture over time, so enjoy them while they’re at their spooky peak!
Cast Your Spell: Share Your Halloween Spiderweb Brownies Creation!
There’s immense satisfaction in crafting treats that not only taste incredible but also capture the spirit of the season. These Halloween Spiderweb Brownies are truly a testament to that, bringing smiles and spooky joy to everyone who tries them.
I encourage you to embrace the fun of baking and let your creativity shine with this recipe. Don’t be afraid to add your own spin, maybe some Halloween sprinkles, or even different colored candy eyes!
What to Serve with Your Spiderweb Brownies
These fudgy brownies are rich and chocolatey, so pair them with something equally indulgent or a contrasting creamy treat.
- For a double-chocolate morning-after treat, the Ultra-Gooey Chocolate Cinnamon Rolls share that same soft, fudgy vibe with a warm spice kick.
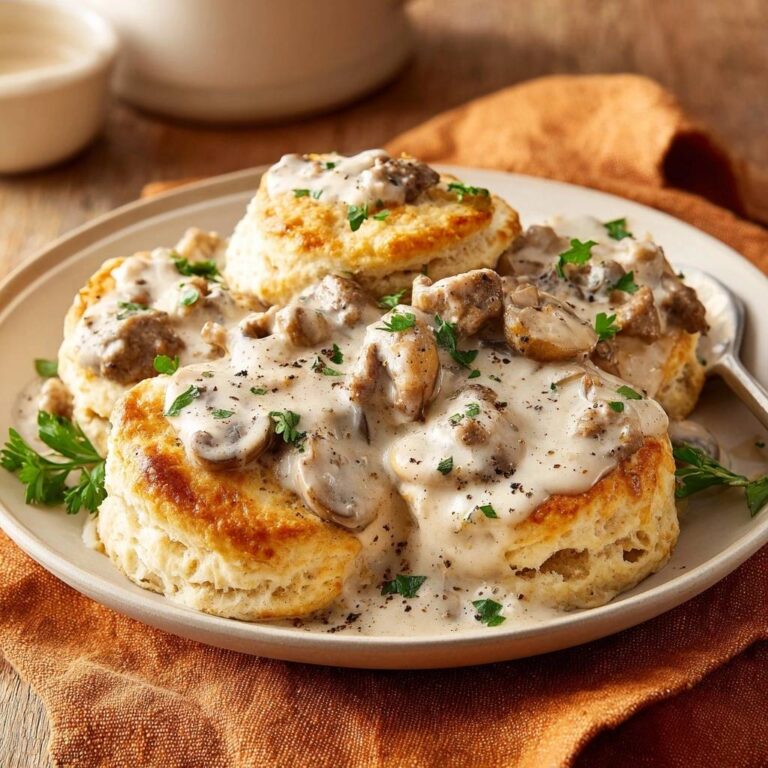
- To balance the sweetness with a savory, buttery side, the Southern Biscuits and Mushroom Gravy offer a rich, earthy contrast that works surprisingly well for a Halloween brunch spread.
I’d love to see your creations! Share your pictures and experiences on social media, and tag us to spread the spooky baking inspiration. If you adored these fudgy delights, be sure to explore our collection of other fall-inspired baked goods, perfect for any occasion.
Brownies
Course: DessertCuisine: AmericanDifficulty: medium12
brownies45
minutes30
minutes450
kcal180
minutesDiscover the secret to perfectly fudgy and incredibly moist brownies every time. This recipe transforms classic brownies into festive Halloween spiderweb treats, complete with adorable chocolate spiders and candy eyes. Ideal for spooky season gatherings, these brownies are sure to be a hit.
Ingredients
For the Brownies:
1 cup unsalted butter, melted
2 cups granulated sugar
4 large eggs
2 teaspoons vanilla extract
1 cup all purpose flour
3/4 cup unsweetened cocoa powder
1/2 teaspoon salt
4 ounces semi sweet chocolate, melted
For the Decorating Icing:
1 1/2 cups powdered sugar
2 tablespoons milk
1/2 teaspoon vanilla extract
2 ounces dark chocolate, melted (for spiders)
Small candy eyes
Directions
- Preheat your oven to 350°F (175°C). Line a 9×13 inch baking pan with parchment paper, leaving an overhang on the sides for easy removal, and lightly grease it.
- In a large bowl, whisk together the melted butter and granulated sugar until well combined and smooth. This creates a dense, rich base for fudginess.
- Add the eggs one at a time, whisking well after each addition until the mixture is glossy and lighter in color. Stir in the vanilla extract.
- In a separate bowl, whisk together the all purpose flour, unsweetened cocoa powder, and salt.
- Gradually add the dry ingredients to the wet ingredients, mixing only until just combined. Do not overmix. Overmixing develops gluten, which leads to cakey brownies. Stir in the melted semi sweet chocolate until fully incorporated.
- Pour the brownie batter into the prepared baking pan and spread evenly.
- Bake for 25 to 30 minutes, or until a toothpick inserted into the center comes out with moist crumbs attached, but not wet batter. Slightly underbaking is key for a fudgy texture. Overbaking will result in dry brownies.
- Let the brownies cool completely in the pan on a wire rack before cutting. This is crucial for them to set into that perfect chewy, fudgy consistency.
- For the decorating icing, in a small bowl, whisk together the powdered sugar, milk, and vanilla extract until smooth. If too thick, add a tiny bit more milk; if too thin, add a tiny bit more powdered sugar.
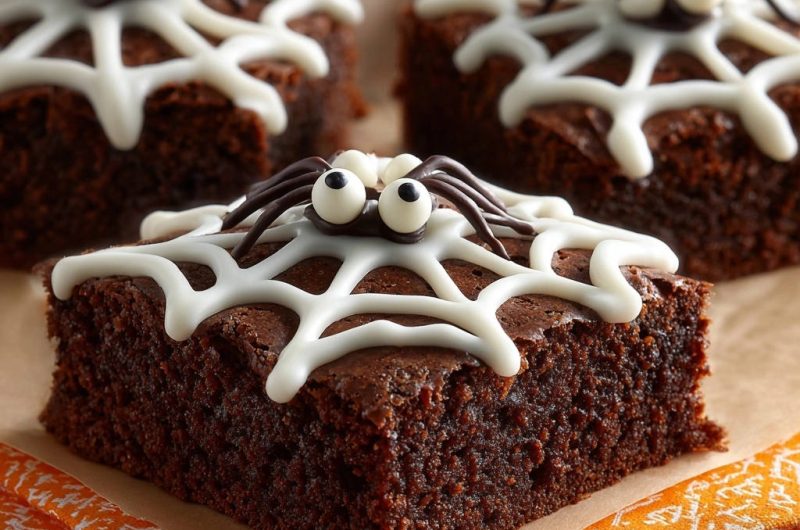
- Once brownies are cool, cut them into squares. Transfer the white icing to a small piping bag or a ziptop bag with a tiny corner snipped off. Pipe concentric circles on each brownie square to create a spiderweb design, then use a toothpick to drag lines from the center outwards.
- Melt the dark chocolate. Transfer it to another small piping bag with a tiny snip. Pipe small oval shapes for spider bodies on top of the spiderwebs, then pipe thin legs extending from the body.
- Gently place two candy eyes on each spider while the chocolate is still wet to secure them. Let the decorations set before serving.
Notes
- Slightly underbaking is key for a fudgy texture. Let brownies cool completely before cutting for best consistency.