Red Velvet Cinnamon Rolls: Your Secret to Fluffy Perfection
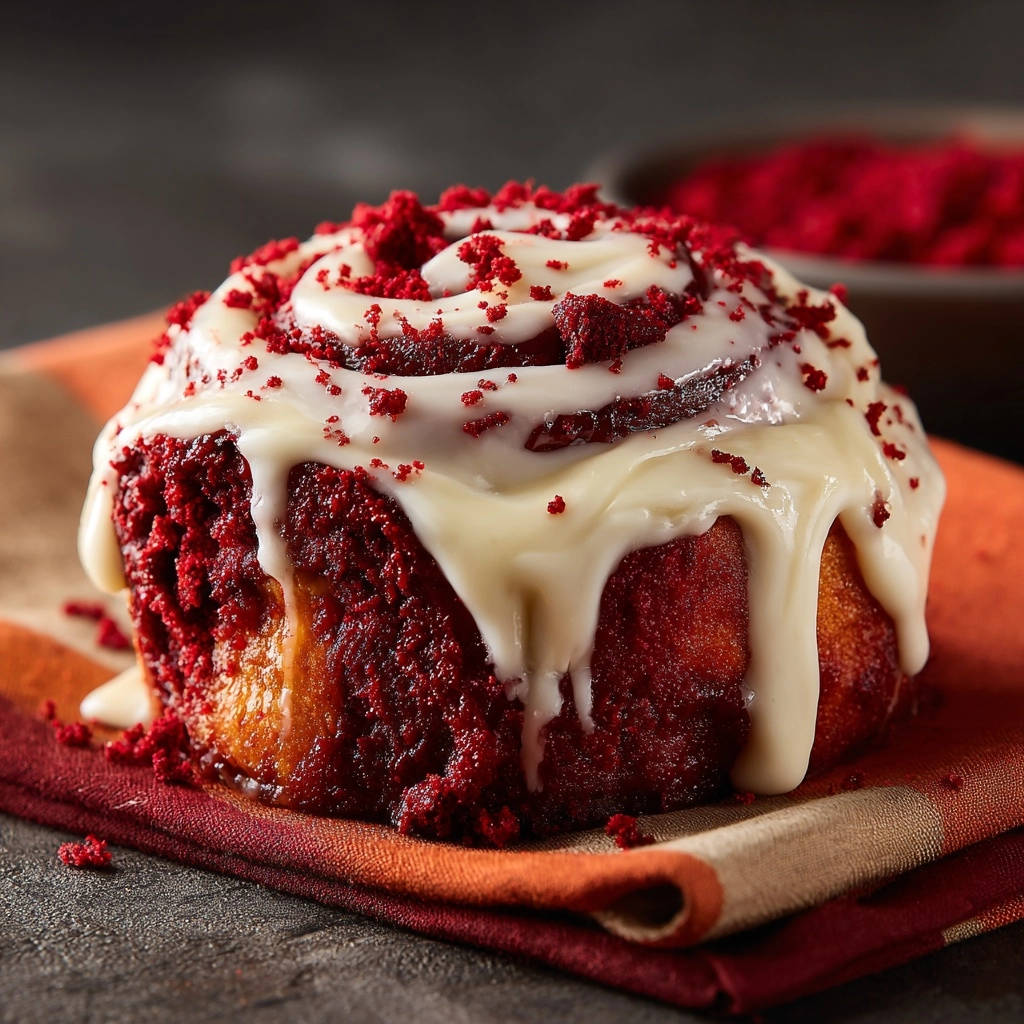
Why These Red Velvet Cinnamon Rolls Will Be Your New Favorite
The “Never Dry, Always Fluffy” Promise
This recipe meticulously addresses the common pitfall of dry cinnamon rolls. With specific techniques and ingredient ratios, each bite guarantees a melt-in-your-mouth experience.
That Irresistible Red Velvet Flavor & Hue
Beyond the stunning visual, these rolls offer the signature red velvet taste. Expect subtle cocoa notes, a hint of tang, and the vibrant red color that makes this dessert so iconic.
Bakery-Quality Results, Right at Home
You don’t need professional baking experience to achieve professional results. This guide breaks down every step, ensuring even novice bakers can create homemade cinnamon rolls that rival any bakery.
Gather Your Culinary Palette: Ingredients for Success
For the Velvety Soft Dough
Warm Milk (105-115°F): Crucial for activating the yeast. Not too hot, not too cold!
Active Dry Yeast: The leavening agent responsible for the rolls’ rise and airy texture.
Granulated Sugar: Feeds the yeast and adds sweetness to the dough.
All-Purpose Flour: The structural backbone of the dough. Measure accurately for best results.
Unsweetened Cocoa Powder: Provides the characteristic subtle chocolate flavor of red velvet.
Salt: Balances the sweetness and enhances all the flavors in the dough.
Large Egg (Room Temperature): Adds richness, moisture, and aids in the dough’s structure.
Unsalted Butter (Melted & Cooled): Contributes tenderness and a buttery flavor.
Red Food Coloring (Gel or Liquid): Essential for achieving the vibrant red hue. Gel coloring offers a deeper color with less liquid.
White Vinegar: Reacts with the cocoa and food coloring to deepen the red color and adds a subtle tang, a hallmark of classic red velvet.
The Decadent Cocoa Filling
Unsalted Butter (Softened): Creates a smooth, spreadable base for the filling.
Granulated Sugar: Adds sweetness and a slight crunch to the filling.
Unsweetened Cocoa Powder: Intensifies the chocolate notes within the roll, complementing the dough.
Cream Cheese Frosting: The Essential Topping
Cream Cheese (Softened): The star ingredient for that signature tangy and creamy frosting. Full-fat works best.
Unsalted Butter (Softened): Adds richness and helps achieve a smooth consistency.
Powdered Sugar: Provides sweetness and structure for a silky smooth frosting.
Vanilla Extract: Enhances the overall flavor profile of the frosting.
Milk or Cream: Used to adjust the frosting’s consistency, ensuring it’s perfectly spreadable.
Your Essential Tools for Baking Excellence
From Mixing Bowls to Baking Dishes
Having the right equipment streamlines the baking process. Gather these items before you start to ensure a smooth journey to delicious Red Velvet Cinnamon Rolls.
Large Mixing Bowls: For combining ingredients and dough rising.
Measuring Cups & Spoons: For accurate ingredient measurement.
Whisk: To blend dry ingredients smoothly.
Rolling Pin: For evenly flattening the dough.
9×13 Inch Baking Dish: The perfect size for baking a dozen rolls.
Sharp Knife or Unflavored Dental Floss: For clean, precise cuts of the roll log.
Electric Mixer (Optional but Recommended): For beating butter and cream cheese for the frosting.
Crafting Your Masterpiece: Step-by-Step Red Velvet Cinnamon Rolls
- Activate the Yeast:
In a large bowl, combine the warm milk and 1 tablespoon of granulated sugar. Sprinkle the active dry yeast over the top and let it sit for 5-10 minutes.
The mixture should become foamy, which is your visual cue that the yeast is alive and ready to make your rolls rise beautifully.
- Combine Dry Ingredients:
In a separate medium bowl, whisk together the 3 1/2 cups of all-purpose flour, the remaining granulated sugar, unsweetened cocoa powder, and salt.
This step ensures that all dry ingredients are evenly distributed, preventing pockets of unmixed flour or salt.
- Mix Wet and Dry:
Add the room-temperature egg, melted and slightly cooled butter, red food coloring, and white vinegar to the activated yeast mixture. Stir until everything is well combined.
Gradually add the whisked dry ingredients to the wet mixture, mixing until a shaggy, cohesive dough begins to form. Avoid overmixing at this stage.
- Knead to Perfection:
Turn the shaggy dough out onto a lightly floured surface. Knead for 8-10 minutes until the dough transforms into a smooth, elastic ball.
Proper kneading is essential here, as it develops the gluten, creating the sturdy yet flexible structure needed for delightfully fluffy velvet cinnamon buns.
- The First Rise (Bulk Fermentation):
Place the kneaded dough in a lightly oiled bowl, turning it once to coat all sides. Cover the bowl tightly with plastic wrap.
Let it rise in a warm, draft-free spot for 1 to 1 1/2 hours, or until it has visibly doubled in size. This crucial first rise is where the yeast develops much of the dough’s flavor and texture.
- Whip Up the Cocoa Filling:
While your dough is undergoing its first rise, prepare the irresistible filling. In a small bowl, cream together the softened unsalted butter, granulated sugar, and unsweetened cocoa powder until the mixture is smooth and uniform.
This simple combination creates a rich, decadent layer that melts into the rolls during baking.
- Roll Out the Dough:
Once the dough has doubled in size, gently punch it down to release the air. Turn it out onto a lightly floured surface.
Using a rolling pin, roll the dough into a large rectangle, approximately 12×18 inches. Aim for an even thickness across the entire rectangle.
- Spread the Delicious Filling:
Evenly spread the prepared cocoa filling over the rolled-out dough. Be sure to leave a small, clean border (about 1/2 inch) along one of the long edges.
This border will help you securely seal the log later, preventing any filling from oozing out.
- Roll and Seal:
Starting from the long edge opposite the border, tightly roll the dough into a snug log. Work carefully to keep the roll even and firm.
Once rolled, pinch the seam firmly along the border to seal the log completely. A tight seal is crucial for maintaining the shape of your Red Velvet Cinnamon Rolls.
- Slice into Rolls:
Using a sharp knife or a piece of unflavored dental floss, cut the log into 12 equal rolls. For clean cuts with floss, slide it under the log, cross the ends, and pull.
Place the cut rolls, facing cut-side down, into a lightly greased 9×13 inch baking dish. Ensure they are spaced somewhat evenly.
- Arrange for the Second Rise:
Cover the baking dish loosely with plastic wrap or a clean kitchen towel.
- The Second Rise (Proofing):
Let the rolls rise again in a warm place for another 30-45 minutes, or until they appear noticeably puffy and almost doubled in size.
This second proof is absolutely vital for achieving that incredibly light, airy, and tender texture in your finished rolls.
- Preheat and Bake:
While the rolls are proofing, preheat your oven to 375°F (190°C). Once preheated, bake the rolls for 20-25 minutes.
They should be lightly golden brown around the edges and cooked through. Remember: Do not overbake! This is the single biggest cause of dry rolls; they should still feel incredibly soft to the touch when removed.
- Prepare the Signature Frosting:
While the rolls are baking, prepare the decadent cream cheese swirl frosting. In a medium bowl, beat together the softened cream cheese and butter until smooth and creamy.
Gradually add the powdered sugar, beating until the mixture is light and fluffy. Stir in the vanilla extract, then add milk or cream one tablespoon at a time until your desired spreadable consistency is reached.
- Frost and Serve:
Remove the rolls from the oven and let them cool in the pan for just a few minutes, about 5-10. This allows them to set slightly.
Generously spread the prepared cream cheese frosting over the warm rolls. If desired, sprinkle with extra red velvet cake crumbs for garnish. Serve warm and savor your perfectly fluffy Red Velvet Cinnamon Rolls!
Phase 1: Bringing the Dough to Life
Phase 2: Preparing the Filling & Shaping the Rolls
Phase 3: The Second Proof, Baking & Frosting
Unlocking the “Soft & Fluffy” Secret: Expert Baking Tips
Don’t Rush the Yeast: Patience with yeast activation pays off. A properly foamy mixture ensures a powerful rise and ultimately, a lighter texture.
Perfect Kneading is Key: Under-kneading results in a dense, tough roll, while over-kneading can also create a rubbery texture. Aim for a dough that feels smooth, supple, and springs back gently when pressed.
The Warm, Draft-Free Zone: Both dough rises thrive in consistent warmth. Consider placing the bowl in a slightly warm (but turned off) oven or a microwave with a cup of hot water for an ideal environment.
Roll Dough Evenly: A uniformly thick rectangle of dough ensures that all your cinnamon rolls bake consistently and look professional.
Dental Floss for Clean Cuts: For perfectly neat, un-smashed rolls, unflavored dental floss is your best friend. It slices through the dough without compressing it.
The “Don’t Overbake” Mantra: This is arguably the most crucial tip for achieving moist fluffy baked goods. Remove your rolls when the edges are just barely golden; they will continue to cook slightly from residual heat.
Frost Warm, Not Hot: Frosting rolls when they’re warm allows the luscious topping to melt ever so slightly into the crevices, creating an incredibly gooey experience. However, very hot rolls will turn the frosting into a puddle.
Troubleshooting Your Red Velvet Cinnamon Rolls: Common Hiccups & Fixes
Problem: My Dough Didn’t Rise
Inactive yeast is the most common culprit. Ensure your warm milk isn’t too hot (it kills yeast) or too cold (it won’t activate it). Old yeast can also be a factor; always check expiry dates.
A cold environment will significantly slow down or halt the rise. Find a consistently warm, draft-free spot for proofing.
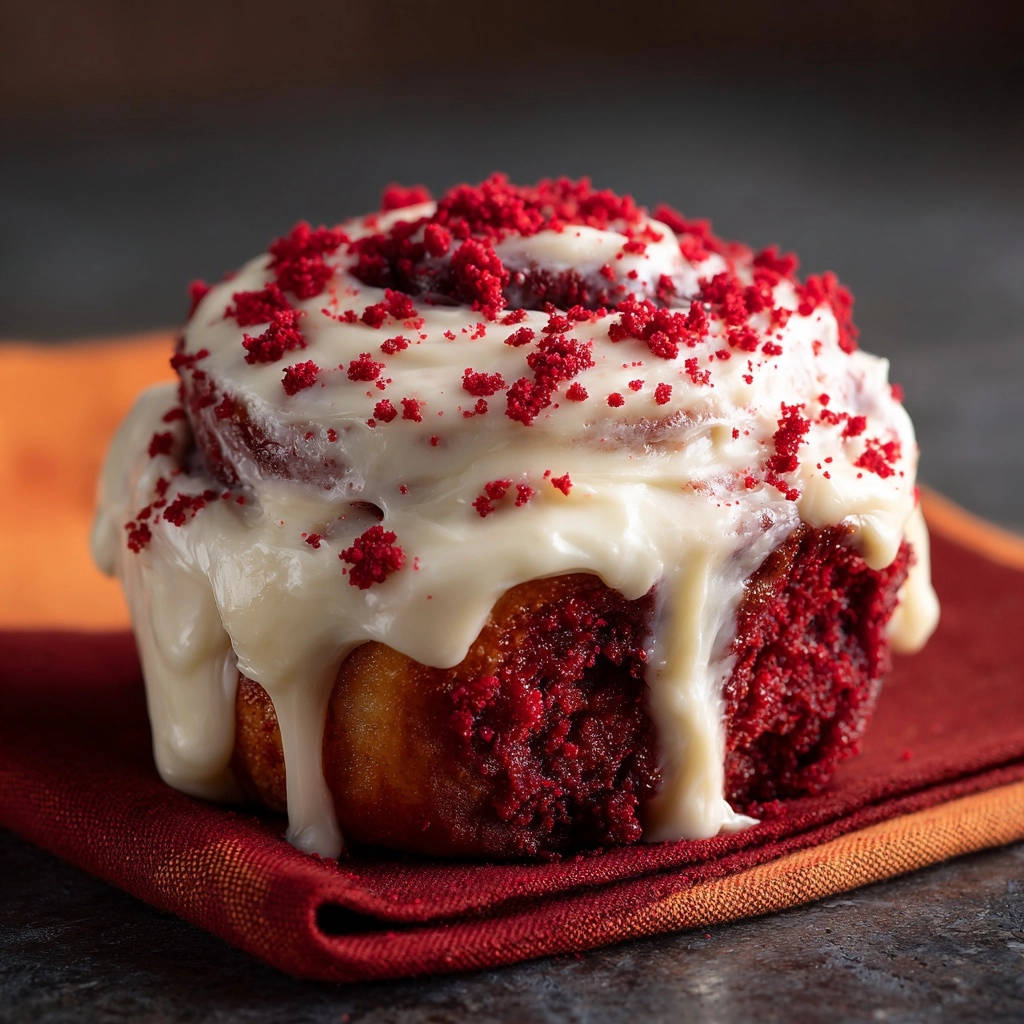
Problem: Rolls are Dry and Dense
Over-measuring flour is a common issue; use a kitchen scale for accuracy or the “spoon and level” method. Under-kneading can also result in a dense texture, as gluten isn’t fully developed.
Most importantly, overbaking is the primary cause of dry rolls. Remove them from the oven when they are just set and lightly golden, not deeply browned.
Problem: Rolls Unraveled During Baking
This usually happens if the dough wasn’t rolled tightly enough or if the seam wasn’t pinched securely closed. Ensure your log is firm and the seam is well-sealed before slicing.
Problem: Frosting is Too Runny or Too Stiff
If your frosting is too runny, gradually beat in more powdered sugar, a tablespoon at a time, until it reaches the desired thickness. For frosting that’s too stiff, add a tiny bit more milk or cream, a teaspoon at a time, until it’s perfectly spreadable.
Beyond the Bake: Serving, Storing, and Making Ahead
The Best Way to Serve
These Red Velvet Cinnamon Rolls are undeniably best served warm, allowing the frosting to slightly melt and the rolls to retain their soft, gooey texture. A sprinkle of red velvet cake crumbs or extra cocoa powder makes for a lovely garnish.
For a perfect pairing, try our Mastering the Glazed Lemon Blueberry Loaf.
Storing Leftover Delights
Store any leftover rolls in an airtight container at room temperature for up to 2 days, or in the refrigerator for up to 5 days. Reheat briefly in the microwave for that fresh-baked warmth.
Making Red Velvet Cinnamon Rolls Ahead
You can prepare the dough the night before. After the first rise, punch down the dough, form and slice the rolls, and arrange them in the baking dish.
Cover tightly with plastic wrap and refrigerate overnight. The next morning, let them come to room temperature and proof for about 1-1.5 hours before baking. You can also freeze baked, unfrosted rolls for longer storage; thaw and warm before frosting.
Your Top Questions Answered: Red Velvet Cinnamon Rolls FAQs
Can I use instant yeast instead of active dry?
Yes, you can! Instant yeast can typically be used interchangeably with active dry yeast. You may not need to proof it first; simply add it directly to your dry ingredients, then combine with wet ingredients.
What if I don’t have red food coloring?
While the red color is iconic for Red Velvet Cinnamon Rolls, it’s primarily for visual appeal. If you omit it, your rolls will still taste fantastic but will have a light brown, cocoa-tinted hue instead of vibrant red.
Can I make these gluten-free?
Converting yeast-based recipes to gluten-free can be tricky. While possible with a 1:1 gluten-free flour blend that contains xanthan gum, the dough’s consistency and rise might differ. Expect a less elastic dough and adjust liquid as needed.
How long do Red Velvet Cinnamon Rolls stay fresh?
For optimal freshness and taste, consume your rolls within 2-3 days at room temperature, or up to 5 days if stored in the refrigerator. Always keep them in an airtight container.
Can I freeze the baked rolls?
Absolutely! To freeze, bake the rolls as directed but do not frost them. Once completely cooled, wrap each roll individually in plastic wrap, then place them in a freezer-safe bag for up to 2 months. Thaw at room temperature, warm gently, and then frost before serving.
Ready to Indulge? Share Your Red Velvet Cinnamon Rolls Masterpiece!
Now that you’re armed with the secrets to perfectly soft, vibrant, and delicious Red Velvet Cinnamon Rolls, it’s time to get baking! There’s immense satisfaction in pulling a warm pan of these beauties from the oven, filling your home with their irresistible aroma.
If you love the vibrant color and soft texture in these rolls, you’ll also enjoy this bright and tangy glazed cranberry orange loaf.
We’d love to see your creations! Share your experience and photos of your fluffy homemade cinnamon rolls; let’s spread the joy of these truly exceptional treats.
What to Serve with Red Velvet Cinnamon Rolls
These sweet, fluffy rolls are rich and indulgent, so you’ll want sides that balance the sugar with savory or creamy notes. Here are two options that pair well with the red velvet base.
- A creamy, sweet-savory side like Skillet Creamed Corn offers a thick, buttery contrast to the cinnamon-spiced dough, making each bite feel complete.
- For a hearty, earthy counterpoint, try Southern Biscuits and Mushroom Gravy — the savory gravy and soft biscuits echo the roll’s texture while cutting through the sweetness.
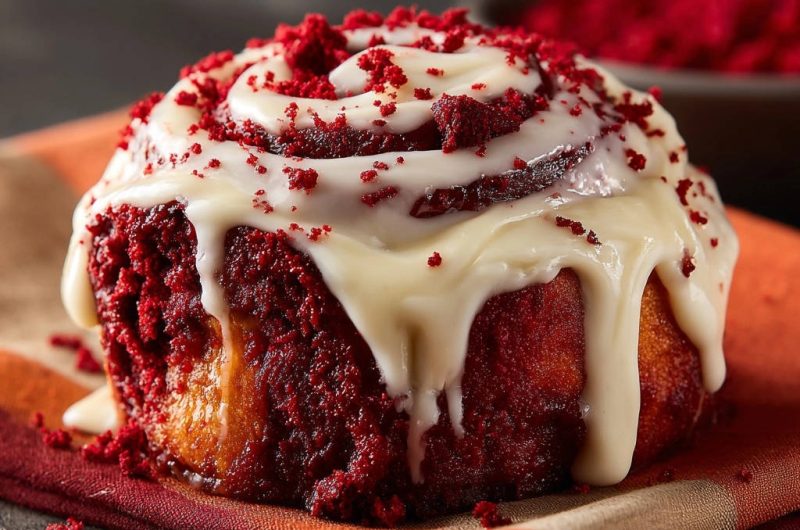
Red Velvet Cinnamon Rolls
Course: DessertCuisine: AmericanDifficulty: medium12
rolls50
minutes20
minutes150
kcal180
minutesAfter countless attempts, I finally unlocked the secret to rolls that are perfectly soft and fluffy every single time. Get ready for bakery-quality deliciousness right in your own kitchen.
Ingredients
For the Rolls:
1 cup warm milk (about 105-115 degrees F)
2 1/4 teaspoons active dry yeast (one packet)
1/2 cup granulated sugar, divided
3 1/2 cups all-purpose flour, plus more for dusting
2 tablespoons unsweetened cocoa powder
1 teaspoon salt
1 large egg, room temperature
1/2 cup unsalted butter, melted and cooled slightly
1 tablespoon red food coloring (gel or liquid)
1 teaspoon white vinegar
For the Filling:
1/2 cup unsalted butter, softened
1/2 cup granulated sugar
1 tablespoon unsweetened cocoa powder
For the Cream Cheese Frosting:
4 ounces cream cheese, softened
1/4 cup unsalted butter, softened
2 cups powdered sugar
1 teaspoon vanilla extract
1-2 tablespoons milk or cream
For Garnish:
Red velvet cake crumbs (optional)
Directions
- In a large bowl, combine the warm milk and 1 tablespoon of the granulated sugar. Sprinkle the yeast over the top and let it sit for 5-10 minutes until foamy. This shows the yeast is active, which is essential for a good rise.
- In a separate bowl, whisk together 3 1/2 cups flour, the remaining granulated sugar, cocoa powder, and salt.
- Add the egg, melted butter, red food coloring, and vinegar to the yeast mixture. Stir until well combined. Gradually add the dry ingredients to the wet ingredients, mixing until a shaggy dough forms.
- Turn the dough out onto a lightly floured surface and knead for 8-10 minutes until the dough is smooth and elastic. This proper kneading develops the gluten, creating the structure for fluffy rolls.
- Place the dough in a lightly oiled bowl, turning once to coat. Cover with plastic wrap and let rise in a warm, draft-free place for 1-1 1/2 hours, or until doubled in size. This crucial first rise allows the yeast to work its magic and develop flavor and texture.
- While the dough rises, prepare the filling. In a small bowl, cream together the softened butter, granulated sugar, and cocoa powder until smooth.
- Once the dough has doubled, gently punch it down. Turn it out onto a lightly floured surface and roll it into a large rectangle, about 12×18 inches.
- Spread the prepared filling evenly over the dough, leaving a small border along one long edge.
- Starting from the long edge opposite the border, tightly roll the dough into a log. Pinch the seam to seal.
- Using a sharp knife or unflavored dental floss, cut the log into 12 equal rolls. Place the rolls cut-side down in a lightly greased 9×13 inch baking dish.
- Cover the baking dish with plastic wrap or a clean kitchen towel and let the rolls rise again in a warm place for another 30-45 minutes, or until noticeably puffy and almost doubled. This second proof is vital for achieving that light, fluffy texture.
- Preheat your oven to 375 degrees F (190 degrees C).
- Bake the rolls for 20-25 minutes, or until lightly golden brown on the edges and cooked through. Do not overbake them, as this is the primary cause of dry rolls. They should still feel soft to the touch.
- While the rolls bake, prepare the frosting. In a medium bowl, beat together the softened cream cheese and butter until smooth. Gradually add the powdered sugar, beating until creamy. Stir in the vanilla extract and then add milk or cream one tablespoon at a time until the desired consistency is reached.
- Remove the rolls from the oven and let them cool for just a few minutes in the pan. Spread the cream cheese frosting generously over the warm rolls.
- If desired, sprinkle with red velvet cake crumbs for garnish. Serve warm and enjoy your perfectly fluffy red velvet cinnamon rolls!
Notes
- Do not overbake to prevent dry rolls.