Mastering Classic Buttery Shortbread Cookies with a Crisp Snap
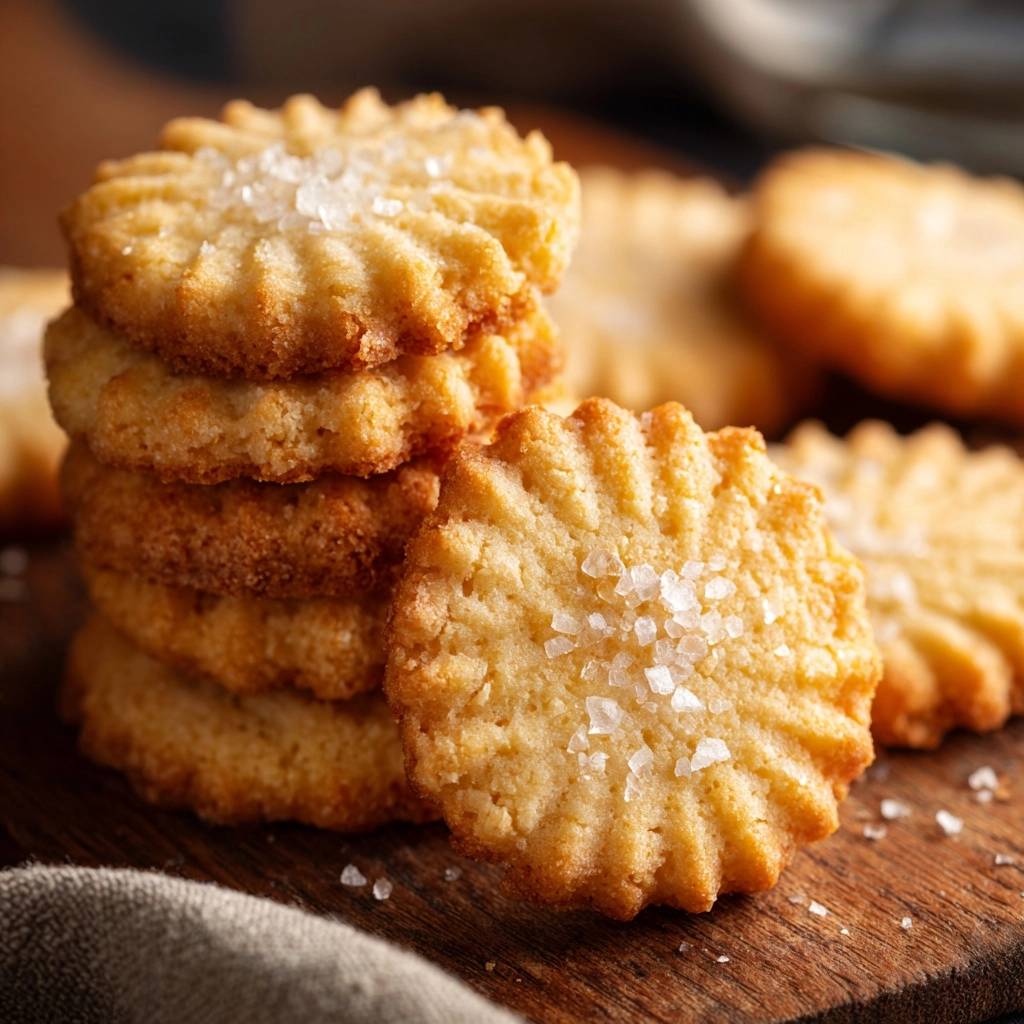
The first bite of a perfect shortbread cookie should be an event. You’re looking for that distinct, audible snap that gives way to a rich, buttery melt on the tongue. It’s a delicate balance between a sandy, crumbly texture and a sturdy, golden base that doesn’t crumble into dust the moment you pick it up.
If you enjoy working with simple doughs that come together quickly, you might also like this savory herb soda bread.
However, many home bakers struggle with the dreaded “soggy bottom,” where the top looks finished but the underside remains pale and doughy. This happens when moisture gets trapped or the butter melts too quickly before the flour structure sets. This recipe solves that frustration by using a specific temperature-staggering technique to ensure a professional, bakery-style crunch every single time.
The secret to this success lies in the chilled-dough method. When cold fats hit a hot oven, they create immediate steam lift, which prevents the base from becoming dense. By chilling the dough for at least 30 minutes, you’re guaranteeing that the cookies hold their shape and develop a crisp, toasted bottom that stands up to any glass of milk or cup of tea.
The Anatomy of a Perfect Shortbread Cookie
Shortbread is a masterpiece of minimalism, traditionally relying on the 3-2-1 ratio of flour, butter, and sugar. While the history of this Scottish classic is rooted in simplicity, modern ovens and ingredients require a bit more finesse to achieve the ideal texture. You want a cookie that feels substantial and “short”—a baking term meaning the high fat content inhibits long gluten strands from forming.
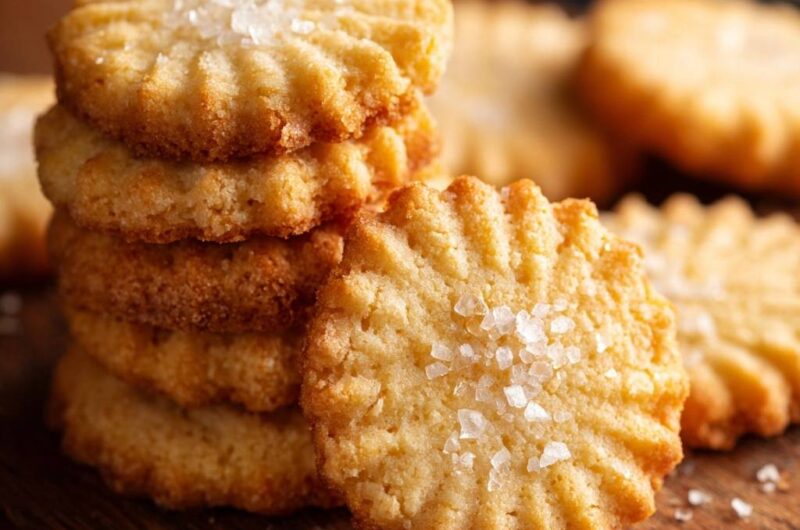
This specific version optimizes that ratio to create a cookie that is structurally sound but still possesses that signature sandy crumb. Unlike a standard sugar cookie, which is often soft and chewy, a classic shortbread should be firm. When you break it in half, it should snap cleanly. The finish should be a beautiful, pale gold on top with a deeper, bronzed hue along the scalloped edges and the bottom rim.
Essential Ingredients for Classic Buttery Shortbread Cookies
Because there are so few ingredients, the quality of each one is amplified. I always recommend using a high-fat, European-style butter. These butters have less water content than standard grocery store brands, which leads to a richer flavor and a much crispier texture. Since butter is the primary flavor profile here, this isn’t the place to skimp.
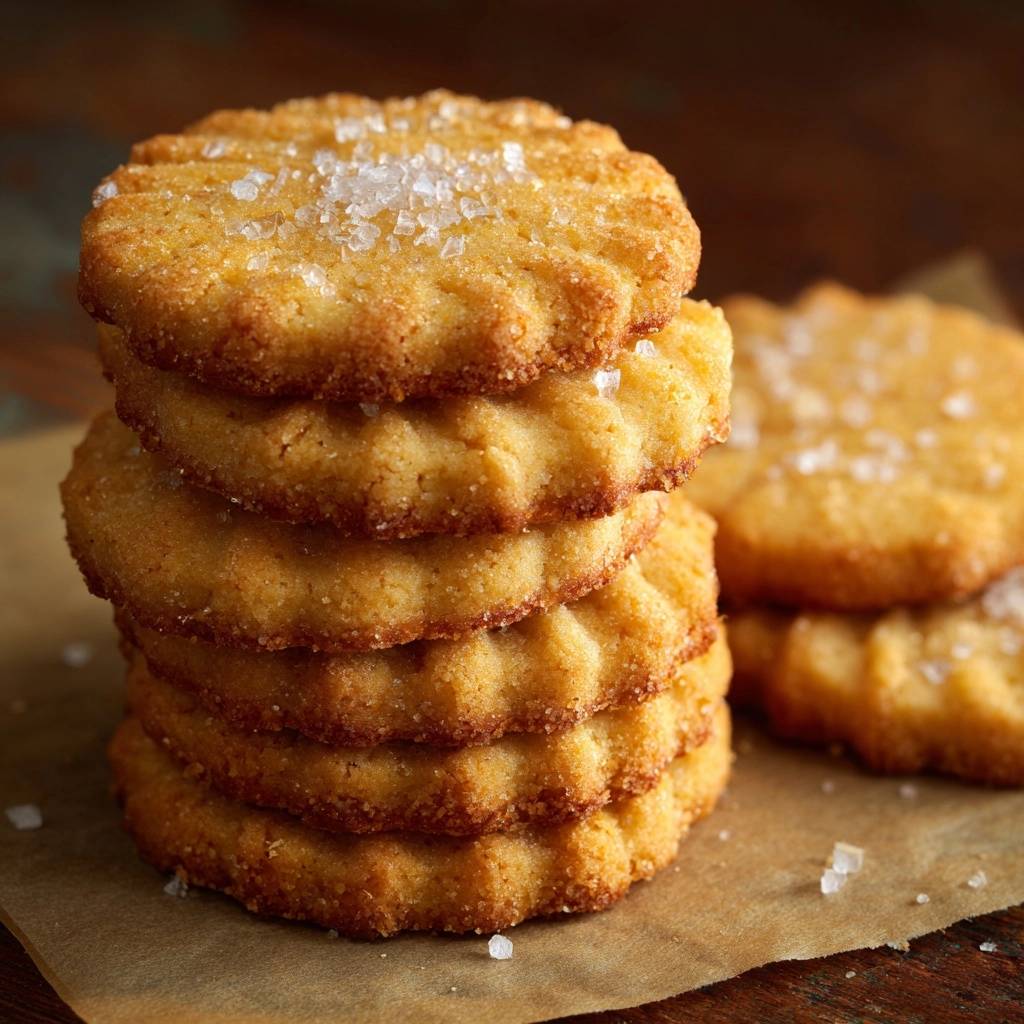
Furthermore, we use granulated sugar instead of powdered sugar in this recipe. While powdered sugar creates a “melt-in-your-mouth” softness, granulated sugar provides the structural integrity and the “crunch” factor we’re after. The tiny crystals help aerate the butter during the creaming process and caramelize slightly during the bake. Finally, use fine sea salt rather than standard table salt. The finer grains dissolve evenly into the fat, ensuring you don’t end up with salty hot spots in an otherwise sweet cookie.
Why Sifting Your Flour is Non-Negotiable
Sifting your flour might feel like an annoying extra step, but it’s the difference between a clumpy cookie and a professional one. Sifting aerates the flour, making it easier to incorporate into the butter without overworking the dough. If you just scoop the flour directly from the bag, it’s likely packed down, which leads to using too much flour and ending up with a dry, chalky mess.
To measure correctly, use the “spoon and level” method. Gently spoon the sifted flour into your measuring cup until it overflows, then level it off with the back of a knife. This ensures your flour-to-butter ratio remains perfect, keeping the dough cohesive but light.
The Science of Temperature and Texture
The interaction between cold dough and a hot oven is pure kitchen chemistry. When you chill the dough, the butter solidifies completely. Once those cold cookies enter the 325°F oven, the butter takes longer to melt, giving the flour time to set its structure. As the water in the butter eventually evaporates, it creates tiny steam pockets that result in a light, crisp snap rather than a heavy, greasy slab.
We bake these at 325°F because it’s the “sweet spot” for shortbread. A higher temperature would brown the outside too fast, leaving the middle raw. This lower, slower heat allows the moisture to bake out of the center of the cookie gradually. It ensures the entire cookie reaches the same level of doneness, eliminating the “pale center” problem that plagues so many batches.
Step-by-Step: Achieving the Golden Snap
Start by creaming your softened butter and granulated sugar. You’re looking for a “pale and fluffy” appearance, which usually takes about 3 full minutes with a mixer. This step isn’t just about mixing; it’s about beating air into the fat. Once you add the vanilla, the mixture should look like thick, pale frosting. This aeration is what gives the shortbread its delicate, sandy bite.
When it’s time to add the flour and salt, turn your mixer to the lowest setting. Mix only until the dough just comes together. It will look a bit crumbly at first, but if you can pinch a piece and it holds its shape, it’s ready. Stop immediately! If you keep mixing, you’ll develop the gluten, and your cookies will turn out tough and bread-like instead of crisp and tender.
Pressing and Shaping for Even Heat Distribution
After the dough has chilled and you’ve rolled it into balls, it’s time to use a fluted cookie stamp or a tart tamper. Pressing the dough flat does more than just make it look pretty. The deep radial ridges created by the stamp increase the surface area of the cookie. This allows the heat of the oven to penetrate the thickest part of the dough more efficiently.
By increasing the surface area, you ensure the center bakes at nearly the same rate as the edges. This is a major win for preventing that doughy middle. If you don’t have a stamp, you can use the tines of a fork to create a cross-hatch pattern, which serves the same functional purpose of helping the heat move through the dough.
Solving the Soggy Bottom: The Cooling Rack Rule
One of the biggest mistakes you can make is letting your cookies sit on the hot baking sheet for too long after they come out of the oven. While “carry-over cooking” is real, a solid metal pan also traps steam. If that steam has nowhere to go, it gets reabsorbed into the bottom of the cookie, turning your hard-earned crunch into a soft, limp mess within minutes.
Immediately transfer the cookies to a wire cooling rack. This allows air to circulate around the entire cookie—top, sides, and bottom. This airflow “locks in” the crispness as the fats solidify. You’ll notice the texture change from slightly fragile when hot to a firm, satisfying snap once they reach room temperature.
Troubleshooting Common Shortbread Failures
If your cookies spread into a giant buttery puddle, your butter was likely too warm when the tray went into the oven, or you didn’t chill the dough long enough. Always ensure the dough feels firm to the touch before baking. If the cookies are too hard or “toothy,” you probably over-mixed the flour, which activated the gluten. Remember: mix until *just* combined.
Bland cookies are usually the result of low-quality vanilla or skipping the salt. Even in a sweet cookie, salt is the engine that drives the flavor. If the bottoms are burnt but the tops are still raw, check your oven rack position. Shortbread does best on the middle rack. Also, avoid dark-colored non-stick baking sheets, as they absorb too much heat and can scorch the bottoms before the centers are done.
Flavor Variations and Botanical Infusions
Once you master the base recipe, you can get creative with sophisticated additions. Try rubbing a tablespoon of fresh lemon or orange zest into the sugar before creaming it with the butter. This releases the essential oils for a bright, citrusy punch. For a floral twist, a teaspoon of culinary lavender buds ground into the flour adds a wonderful aroma.
If you love texture, finely chopped toasted pecans or walnuts can be folded in at the very end. Just make sure the nuts are chopped very small so they don’t interfere with the cookie’s structural integrity. You can even swap the vanilla extract for almond or maple extract to completely change the flavor profile while keeping that perfect, buttery snap.
Storage Logistics: Maintaining the Crunch
Shortbread is famous for its long shelf life, but it is very sensitive to humidity. To keep them crisp, store them in a truly airtight container at room temperature. They will stay fresh and snappy for up to two weeks. If you live in a humid climate, use the “sugar cube hack”: place one or two sugar cubes in the container with the cookies. The sugar cubes will absorb any stray moisture before the cookies do.
For longer storage, these cookies freeze beautifully. Place them in a freezer-safe bag with the air squeezed out, and they’ll last for up to three months. When you’re ready to eat them, let them thaw at room temperature inside the bag to prevent condensation from forming on the surface of the cookies, which would ruin the texture.
Expert Baking FAQ
Can I use salted butter instead of unsalted?
It is best to stick with unsalted butter for shortbread. Commercial salted butter has an inconsistent amount of salt and, more importantly, a higher water content than unsalted butter. This extra water can interfere with the “short” texture of the dough, potentially making the cookies tougher or causing them to spread more in the oven.
Why did my cookie stamp stick to the dough?
This is a common issue when the butter in the dough starts to soften. To fix this, dip your cookie stamp in a little bit of all-purpose flour before each press, shaking off the excess. If it’s still sticking, pop your rolled dough balls back into the fridge for 5 to 10 minutes to firm up the surface before trying again.
How do I know they are done if they look pale?
Don’t wait for the tops to turn brown, or you’ll overbake them. The primary indicator of doneness for shortbread is the bottom edge. Use a spatula to gently lift one cookie; if the bottom rim and the underside are a deep, golden brown, they are done. The centers should remain a pale, toasted gold color.
Can I make this dough in advance?
Yes, you can make the dough up to 48 hours in advance. Wrap it tightly in two layers of plastic wrap to prevent it from absorbing any “fridge smells” like onions or garlic, which butter absorbs very easily. When you’re ready to bake, let the dough sit on the counter for about 10 minutes so it’s pliable enough to roll, then proceed with the recipe.
What is the best baking sheet for shortbread?
A heavy-duty, light-colored aluminum baking sheet is the gold standard. Light-colored pans reflect heat more evenly, preventing the bottoms from browning too quickly. Avoid thin, dark, or non-stick pans, as they tend to create “hot spots” that can lead to burnt edges and raw centers.
Shortbread Cookies
Course: DessertCuisine: BritishDifficulty: easy24
cookies15
minutes20
minutes145
kcal35
MinutesA foolproof recipe for traditional shortbread cookies using a chilled-dough method and specific baking cues to ensure a professional, crunchy texture and deep golden edges.
Ingredients
1 cup unsalted butter, softened to room temperature
1/2 cup granulated sugar
2 cups all-purpose flour, sifted
1/4 teaspoon fine sea salt
1 teaspoon vanilla extract
2 tablespoons coarse sparkling sugar (or flaky sea salt) for topping
Directions
- Cream the softened butter and granulated sugar in a large bowl until pale and fluffy. This should take about 3 minutes to ensure the sugar is fully incorporated. Stir in the vanilla extract.
- Gradually add the sifted flour and salt. Mix on low speed just until the dough comes together into a crumbly but cohesive mass. Do not overwork the dough or the cookies will become tough.
- To solve the soggy bottom issue, wrap the dough in plastic and chill in the refrigerator for at least 30 minutes. Cold dough hitting a hot oven creates the immediate steam lift needed for a crisp base.
- Preheat your oven to 325°F (165°C). Line a heavy-duty baking sheet with parchment paper.
- Roll the chilled dough into 1-inch balls. Place them on the baking sheet. Using a fluted cookie stamp or a fluted tart tamper, press down firmly to create the deep radial ridges and scalloped edges shown in the image.
- Sprinkle the centers of the pressed cookies with a concentrated pinch of coarse sparkling sugar.
- Bake for 18 to 22 minutes. The secret to the perfect snap is to look for the scalloped edges and the bottom rim to turn a deep golden brown while the center remains a pale, toasted gold.
- Immediately transfer the cookies to a wire cooling rack. Leaving them on the hot pan will cause steam to trap underneath, ruining the crunch. Cooling on a rack allows air to circulate, locking in that professional crisp texture.
Notes
- To prevent a soft texture, ensure the dough is chilled for at least 30 minutes and transfer cookies to a wire rack immediately after baking to allow air circulation.