Mastering Roasted Butternut Squash with Feta and Cranberries
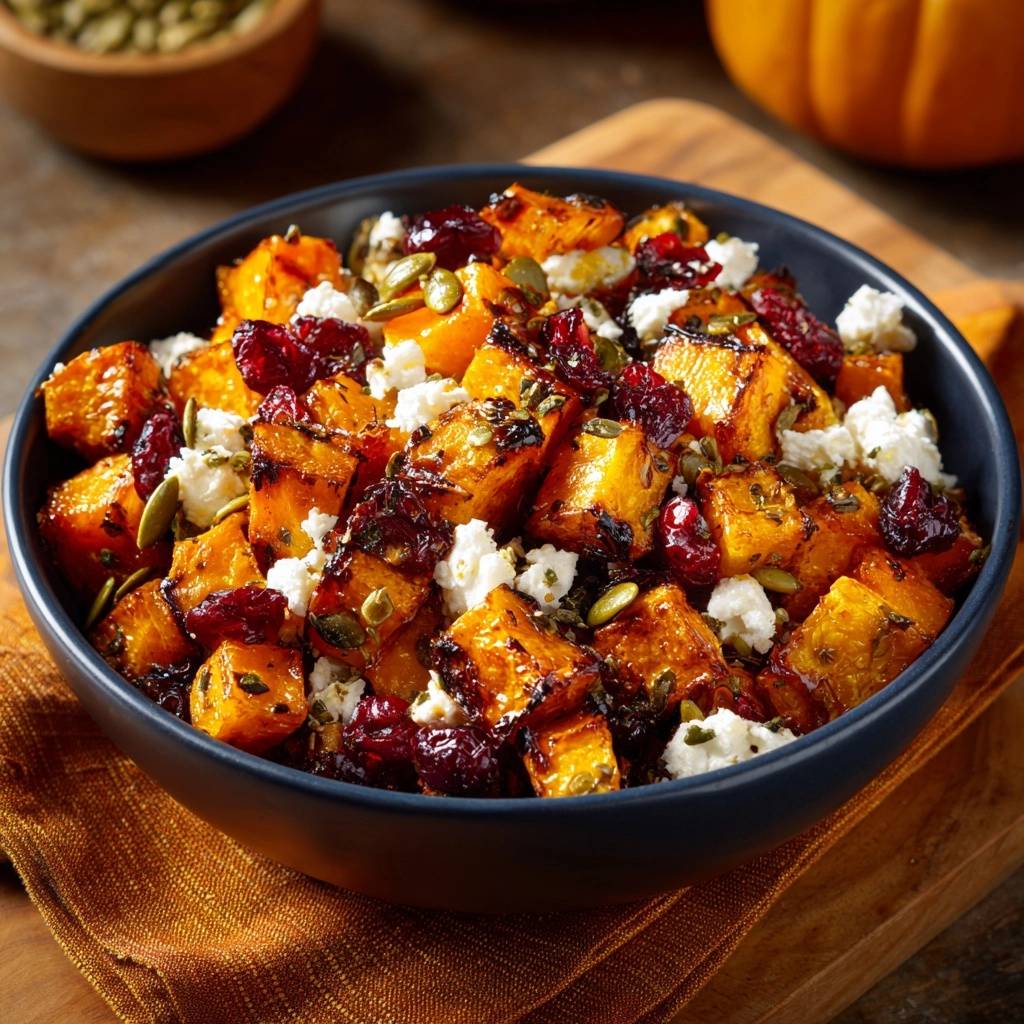
Most people have a love-hate relationship with roasted squash. You crave those golden, caramelized edges you see in food magazines, but you usually end up with a pile of mushy, steamed cubes that collapse the second your fork touches them. It’s frustrating to spend twenty minutes peeling and chopping only to serve a side dish that lacks any structural integrity or textural excitement.
The secret to restaurant-quality roasted squash isn’t a fancy oven or a secret spice blend. It’s all about moisture management and surface area. By mastering the “Anti-Soggy Bottom” method, you create a firm, seared exterior that stands up to the creamy weight of feta and the chewy pop of tart cranberries. This dish is a masterclass in sensory contrast, pitting the earthy sweetness of the squash against salty cheese and crunchy pepitas.
I’ve found that the biggest mistake home cooks make is treating the baking sheet like a storage container rather than a cooking tool. If you want that perfect bite, you have to respect the space between the cubes. The secret is a screaming hot, preheated sheet pan that sears the squash on contact, locking in the shape before the interior has a chance to turn into a puree.
The Physics of Caramelization: Why Most Squash Fails
To get that deep, nutty flavor, we need to trigger the Maillard reaction. This chemical reaction between amino acids and reducing sugars gives browned food its distinctive flavor. However, moisture is the absolute enemy of this process. If your squash cubes are touching each other, they release steam, which gets trapped between the pieces and effectively boils the vegetable instead of roasting it.
When you crowd a pan, the temperature drops significantly, and the squash sits in a shallow pool of its own liquid. This leads to that limp, pale texture that everyone dislikes. By giving each cube at least half an inch of “breathing room,” you allow the dry heat of the oven to circulate fully. This evaporates surface moisture instantly, allowing the natural sugars to caramelize into a beautiful, structural crust.
Essential Components for Roasted Butternut Squash with Feta and Cranberries
Success starts at the grocery store. When selecting your butternut squash, look for one that feels heavy for its size with a matte, blemish-free skin. A shiny skin often indicates the squash was picked too early and won’t have the high sugar content needed for superior browning. Avoid any squash with soft spots or deep “scars” that might indicate rot on the inside.
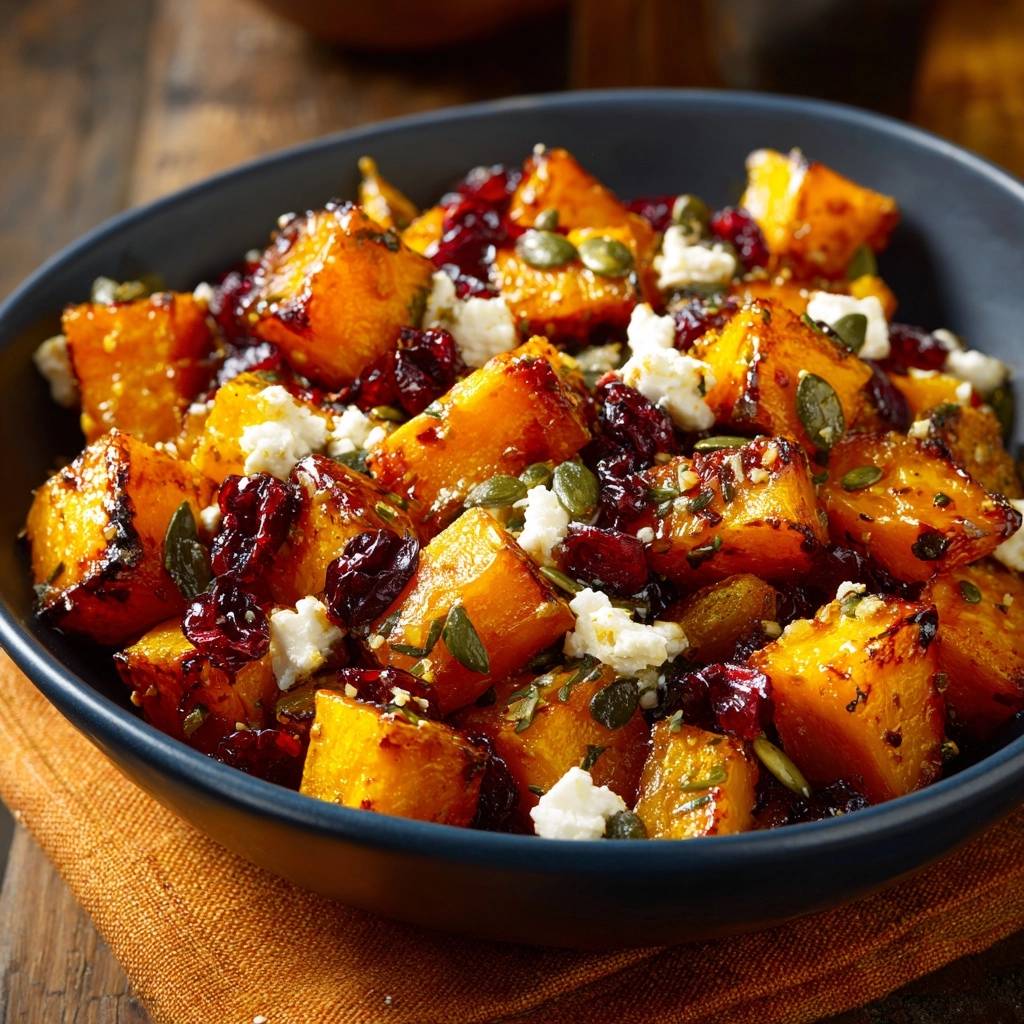
For the seasoning, dried thyme is actually superior to fresh in this specific high-heat application. Fresh thyme leaves are delicate and often incinerate at 425 degrees F, leaving behind a bitter, burnt taste. Dried thyme is more resilient and slowly releases its oils into the squash as it roasts. Pair this with a high-quality sea salt; the larger flakes provide a subtle crunch and a more nuanced saltiness than standard table salt.
The oil choice is equally critical. You want a high-quality olive oil, but don’t drown the vegetables. You only need enough to create a thin, shimmering coat. Too much oil acts as a heat insulator and can actually make the squash greasy rather than crispy. Think of the oil as a conductor that helps the oven’s heat penetrate the surface of the squash evenly.
Selecting the Right Feta and Cranberries
Not all feta is created equal. For this recipe, I highly recommend a block of Greek feta made from sheep’s milk. It has a higher fat content and a sharper tang that cuts through the sweetness of the honey and squash. Cow’s milk feta tends to be saltier and more crumbly, which is fine, but it lacks the creamy “melt-in-your-mouth” quality that makes this dish feel luxurious.
When it comes to cranberries, look for the “low sugar” or “fruit juice sweetened” varieties if possible. Standard dried cranberries are often coated in a heavy syrup that can become overly sticky when heated. You want them to soften and plump up slightly in the oven’s residual heat without turning into a sugary jam that overpowers the savory notes of the thyme.
The Preheated Sheet Pan Technique
This is the “Skyscraper” technique that separates amateur cooking from professional results. By placing your empty baking sheet in the oven while it preheats, you are essentially creating a giant griddle. When the room-temperature squash hits that 425°F metal, you’ll hear a distinct sizzle. That sound is the moisture on the bottom of the squash evaporating instantly.
This “thermal shock” sears the cellular structure of the squash, creating a firm base. It’s the same logic behind searing a steak before finishing it in the oven. If you start with a cold pan, the squash and the metal heat up together slowly, allowing the juices to leak out and pool. A hot pan ensures the bottom of the cube is already browning while the top begins its roasting journey.
Step-by-Step: Achieving the Perfect Roast
Phase one is all about the prep. You must peel the squash thoroughly until you reach the bright orange flesh, removing all the tough, fibrous white under-skin. When cubing, aim for exactly 1-inch pieces. If they are too small, they’ll vanish into mush; if they are too large, the outside will burn before the inside is tender. Consistency in size ensures every piece finishes at the exact same time.
Phase two involves the coating. Toss the cubes in a large bowl rather than on the pan. This ensures every single side is lightly kissed by the oil and spices. You’re looking for a thin, even sheen. If you see oil pooling at the bottom of the bowl, you’ve used too much. Use your hands to massage the thyme and pepper into the flesh so the flavors are deeply embedded.
Phase three is the roast itself, and it requires patience. Follow the “No-Flip” rule. Let the squash sit undisturbed on that hot pan for at least 20 minutes. This allows the structural crust to form. If you flip too early, you’ll tear the delicate, softening flesh. You want to see a dark, golden-brown ring around the base of each cube before you even think about moving them.
The Five-Minute Finish: Softening the Cranberries
Adding the cranberries at the very end is a deliberate move. If you roast them for the full 30 minutes, they will turn into hard, bitter little pebbles. By tossing them onto the pan for the final five minutes, the residual heat and the small amount of oil on the pan gently rehydrate them. They will puff up slightly and take on a glossy, jewel-like appearance.
This short window also allows the cranberry juices to mingle slightly with the squash’s caramelization. It creates a natural glaze that bridges the gap between the savory vegetable and the sweet fruit. When you pull the pan out, the cranberries should be soft to the touch but still hold their shape, providing a chewy contrast to the tender squash.
If the sweet-savory pairing appeals to you, this pumpkin pecan caramel cheesecake builds on similar warm autumn flavors.
Avoiding Common Mistakes: The Troubleshooting Guide
The most common failure point is over-oiling. It’s tempting to add an extra splash for “flavor,” but excess fat leads to limp, greasy vegetables. If your squash looks shiny and wet after 15 minutes instead of matte and browning, you likely overdid the oil. Next time, use a tablespoon less and ensure you toss the cubes vigorously in a bowl first.
Another frequent mistake is a low oven temperature. Some people worry that 425°F is too high and will burn the squash. However, a lower temperature (like 350°F) won’t evaporate the moisture fast enough, leading to that dreaded “steamed” texture. Trust the high heat; it is the only way to get the exterior to crisp up while the interior stays creamy.
Finally, watch your cube size. If you cut the squash into half-inch pieces, they will lose their structural integrity and turn into a puree when you try to fold in the feta. Stick to the 1-inch rule. It provides enough “meat” in the center to stay firm while the edges get that beautiful, dark roast. If you notice the edges getting too dark too fast, simply move the pan to a lower rack.
Flavor Variations and Ingredient Swaps
If you have a nut allergy or simply don’t like pumpkin seeds, you can easily stick with the pepitas or swap them for toasted sunflower seeds. For those looking for a different herb profile, sage is a classic partner for butternut squash. You can fry whole sage leaves in a little oil until crispy and crumble them over the top for a sophisticated, earthy finish.
For a vegan-friendly version, you don’t have to skip the creamy element. There are excellent almond-based or cashew-based feta alternatives that provide that necessary saltiness. Alternatively, you can make “nutritional yeast clusters” by mixing yeast with a little oil and salt to create savory, crunchy bits that mimic the flavor profile of cheese without the dairy.
Optimal Pairings for Roasted Butternut Squash
This side dish is incredibly versatile because it hits so many flavor notes. It pairs beautifully with roasted chicken, where the balsamic glaze complements the savory skin. It also works as a stunning centerpiece for a vegetarian meal when served over a bed of warm quinoa or farro. The acidity in the cranberries and glaze helps cut through the richness of heavier proteins like braised lamb.
If you’re serving this at a dinner party, consider the “temperature play.” The squash should be hot, but the feta should be added at the very last second so it stays cool and firm. This temperature contrast makes the dish feel much more dynamic on the palate. The cool, salty pop of cheese against the warm, honey-drizzled squash is a guaranteed crowd-pleaser.
Make-Ahead Strategies and Storage Logistics
While this dish is undoubtedly best served fresh from the oven, you can prep the squash up to two days in advance. Peel and cube it, then store it in an airtight container with a paper towel to absorb any excess moisture. Do not toss it in oil until you are ready to roast, or the salt will draw out the water and make the squash soggy before it even hits the pan.
If you have leftovers, avoid the microwave at all costs. The microwave will turn the squash into mush and make the feta rubbery. Instead, use a toaster oven or an air fryer at 400°F for about 5 minutes. This will re-crisp the edges of the squash and soften the feta just enough. It won’t be exactly like the first day, but it will be far superior to a soggy microwave bowl.
Expert Troubleshooting: Roasted Butternut Squash with Feta and Cranberries
Can I use frozen butternut squash for this recipe?
I don’t recommend it if you want the “Anti-Soggy” result. Frozen squash is blanched before freezing, which breaks down the cell walls and introduces a massive amount of internal moisture. When it thaws in the oven, it almost always collapses into a soft texture. If you must use frozen, roast it at 450°F and accept that it will be softer than fresh squash.
Why did my feta melt into a puddle?
This usually happens if you use a “feta-style” salad cheese or a very high-moisture cow’s milk feta. These varieties have a lower melting point. To prevent this, ensure you are using a firm, aged Greek feta and fold it in gently at the very end. If the squash is screaming hot, the feta will naturally soften, but it should still hold its cubed or crumbled shape.
How do I peel a butternut squash without losing my mind?
Butternut squash skin is notoriously tough. The pro-tip is to poke a few holes in the skin with a fork and microwave the whole squash for about 60 seconds. This doesn’t cook the vegetable, but it softens the skin just enough for a standard Y-peeler to glide through it. Also, make sure you cut off both ends to create a stable, flat base before you start peeling.
Can I substitute honey with maple syrup?
Absolutely. Maple syrup offers a more woodsy, autumnal flavor that pairs perfectly with squash. Just be aware that maple syrup has a slightly lower burning point than honey because of its sugar structure. Keep a close eye on the pan during the final five minutes to ensure the glaze doesn’t turn from caramelized to burnt.
What is the best way to toast pepitas if I bought them raw?
If your pumpkin seeds aren’t pre-toasted, toss them in a dry skillet over medium heat for 3 to 5 minutes. Shake the pan constantly. You’ll know they are done when they start to “pop” like popcorn and smell slightly nutty. Remove them from the hot pan immediately so they don’t continue to cook and burn.
The Final Assembly: Presentation and Texture Balance
The final assembly is where the dish truly comes together. Once the squash and cranberries are out of the oven, drizzle the honey and balsamic glaze directly onto the sheet pan. The residual heat will thin the honey, allowing it to coat the cubes evenly without you having to stir too vigorously. This minimizes the risk of breaking the squash cubes.
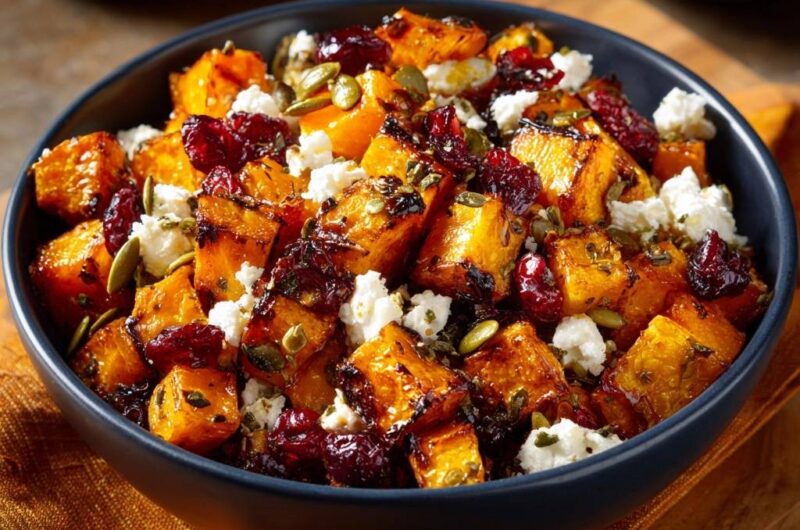
Transfer everything to a wide, shallow serving bowl rather than a deep one. This prevents the weight of the top layer from crushing the bottom layer. Sprinkle the feta and pepitas over the top and give it one very gentle fold. You want the white of the feta and the dark purple of the cranberries to pop against the orange squash. Serve it immediately while the textures are at their peak contrast.
Roasted Butternut Squash
Course: Side DishCuisine: AmericanDifficulty: easy4
servings15
minutes30
minutes245
kcal45
MinutesA restaurant-quality roasted squash dish that avoids the common pitfall of sogginess. By using a preheated sheet pan and proper spacing, the squash develops a firm, caramelized exterior that pairs perfectly with sweet and savory toppings.
Ingredients
1 large butternut squash, peeled and cut into 1-inch cubes
3 tablespoons olive oil
1 teaspoon dried thyme
1/2 teaspoon sea salt
1/4 teaspoon black pepper
1/2 cup dried cranberries
1/2 cup crumbled feta cheese
1/4 cup toasted pumpkin seeds (pepitas)
1 tablespoon honey
1 tablespoon balsamic glaze (optional, for visual depth)
Directions
- Place a large, rimmed baking sheet inside your oven and preheat to 425 degrees F. This is the critical step: placing the squash onto a screaming hot surface prevents the bottom from steaming and getting soggy.
- In a large bowl, toss the squash cubes with olive oil, thyme, salt, and pepper until every piece is thinly and evenly coated. Do not over-oil, as excess fat leads to limp vegetables.
- Carefully remove the hot baking sheet from the oven. Immediately spread the squash across the pan in a single layer. Ensure there is at least half an inch of space between each cube. If the pan is crowded, the squash will release steam and turn to mush.
- Roast for 20 to 25 minutes. Do not flip the squash until the final 5 minutes of cooking. This allows the underside to develop a structural “sear” and deep browning that locks in the texture.
- During the final 5 minutes of roasting, sprinkle the dried cranberries directly onto the sheet pan with the squash. This slightly softens the cranberries and allows them to release a bit of juice, mimicking the glossy, dark appearance seen in the image.
- Remove from the oven and drizzle with honey and balsamic glaze while still on the hot pan.
- Transfer the squash and cranberries to a serving bowl and gently fold in the crumbled feta and pumpkin seeds. Serve immediately while the contrast between the warm, firm squash and cool feta is at its peak.
Notes
- The critical secret to preventing a soggy bottom is placing the squash onto a preheated baking sheet and ensuring pieces do not touch, which allows steam to escape rather than softening the vegetable.