Two-Tone Pumpkin Pecan Caramel Cheesecake: Crack-Free & Creamy
For years, the dream of a perfectly smooth, uncracked cheesecake felt like an unattainable myth for my home baking. I’d seen countless beautiful cheesecakes emerge from the oven, only for them to develop those dreaded fissures during cooling. However, after much experimentation, I finally perfected a technique that guarantees a flawless, crack-free Two-Tone Pumpkin Pecan Caramel Cheesecake every single time.
This recipe isn’t just about avoiding cracks; it’s about crafting an absolutely show-stopping dessert that combines the warmth of pumpkin and pecan with the rich decadence of caramel and creamy vanilla. It’s truly special.
Why This Two-Tone Pumpkin Pecan Caramel Cheesecake Will Be Your New Go-To
The Secret to a Flawless, Crack-Free Top (Finally!)
The days of cracked cheesecakes are over. This recipe incorporates a meticulously tested water bath and a specific slow-cooling method that eliminates the drastic temperature changes notorious for causing surface cracks.
You’ll achieve a stunningly smooth, picture-perfect top that will impress everyone.
Layers of Pure Indulgence: Pumpkin, Vanilla, Pecan, & Caramel
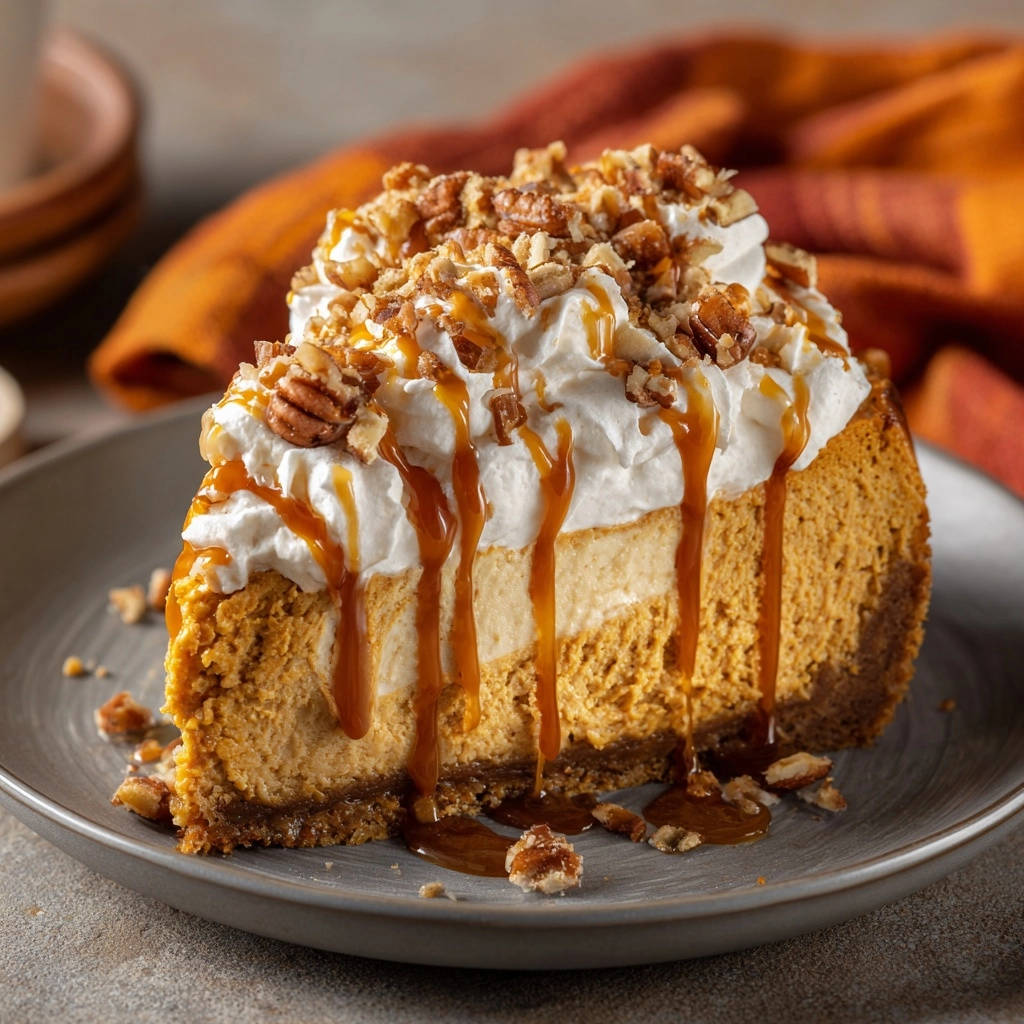
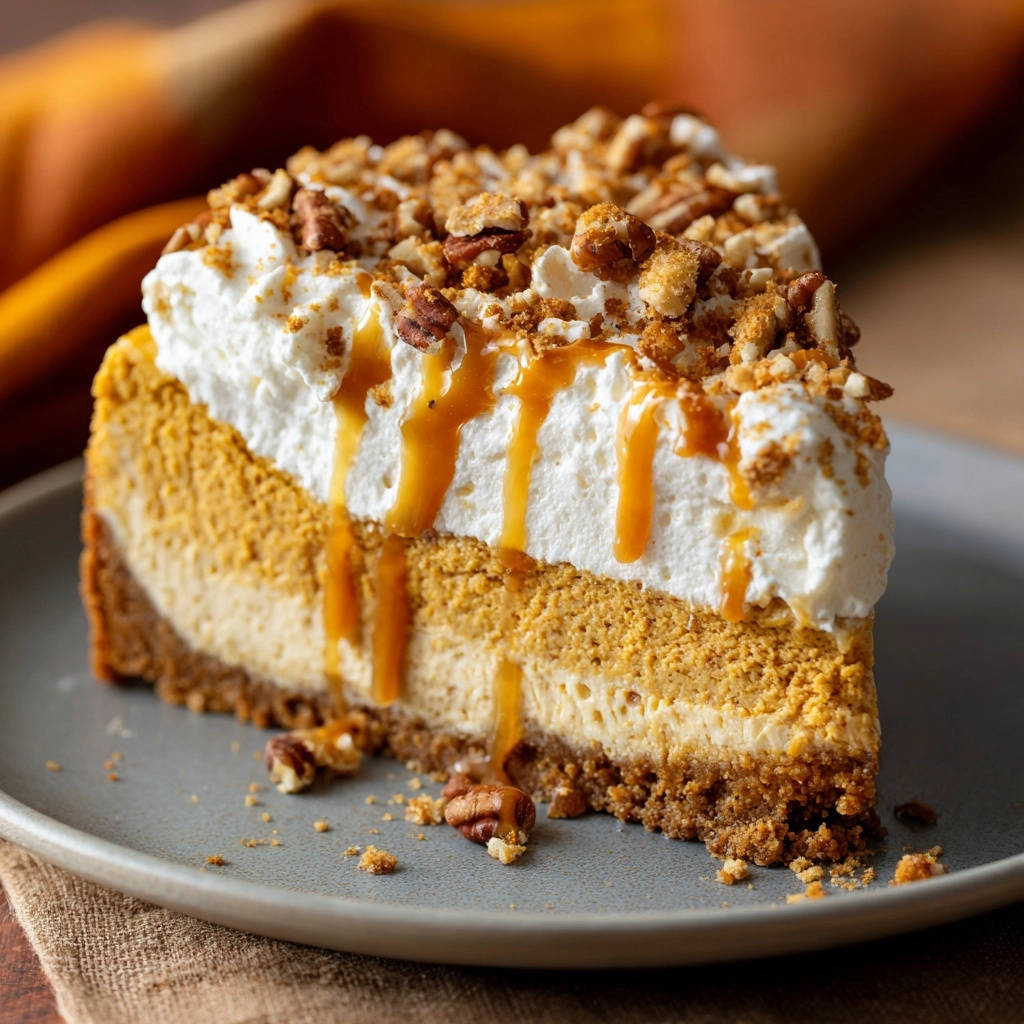
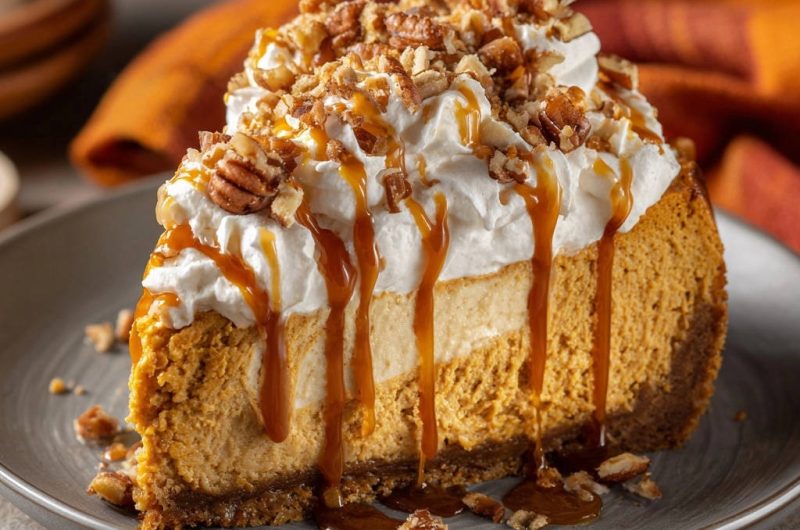
Beyond its visual appeal, this cheesecake delivers an incredible sensory experience. It features two distinct, velvety cheesecake layers – a spiced pumpkin and a classic vanilla – creating a beautiful two-tone effect.
These rich layers are crowned with airy homemade whipped cream, a generous drizzle of warm caramel, and a scattering of crunchy pecans for ultimate decadence. It’s a symphony of flavors and textures in every bite.
A Crowd-Pleaser for Any Occasion
Whether it’s a holiday gathering, a special celebration, or simply a treat for yourself, this Two-Tone Pumpkin Pecan Caramel Cheesecake is guaranteed to be a hit. Its impressive appearance and unforgettable taste make it ideal for any event.
For a perfect pairing, try our Mastering the Caramel Apple Pecan Upside-Down Cake.
Prepare for rave reviews and requests for the recipe!
Essential Tools for Your Cheesecake Masterpiece
The Indispensable Springform Pan
A 9-inch springform pan is non-negotiable for cheesecakes. Its removable sides allow for easy release without damaging the delicate edges of your perfectly baked dessert.
This design is crucial for maintaining the cheesecake’s pristine shape.
Electric Mixer: Your Arm Saver
An electric mixer, either stand or hand-held, is essential for achieving smooth, lump-free cream cheese batters. It provides consistent speed and power, ensuring all ingredients are well-combined without overmixing.
This prevents unwanted air incorporation, which can lead to cracks.
The Roasting Pan for the Perfect Water Bath
A large roasting pan is vital for creating the water bath. This gentle, moist baking environment is the ultimate secret to a crack-free and evenly cooked cheesecake.
The roasting pan should be large enough to comfortably hold your foil-wrapped springform pan.
Other Helpful Utensils
You’ll also need a few other items to ensure success. Mixing bowls of various sizes are helpful for preparing different components, and a sturdy spatula is perfect for scraping down bowl sides.
A wire rack is crucial for proper cooling, allowing air circulation around the cheesecake.
The Building Blocks: Ingredients for Your Two-Tone Cheesecake
For the Irresistible Graham Cracker Crust
The crust is a simple yet essential foundation. Graham cracker crumbs provide a subtly sweet, crunchy base that perfectly complements the creamy cheesecake layers.
Melted butter binds the crumbs and sugar together, creating a firm, flavorful crust when baked.
Creamy Pumpkin Cheesecake Layer Essentials
For the pumpkin layer, softened cream cheese is paramount for a smooth, lump-free batter. Pure pumpkin puree, not pie filling, ensures authentic pumpkin flavor without added spices or sweetness you can’t control.
Room temperature eggs and sour cream integrate more seamlessly into the batter, preventing curdling and promoting a silky texture. Vanilla extract and pumpkin pie spice enhance the autumnal flavor profile, while a pinch of salt balances the sweetness.
The Smooth Vanilla Cheesecake Layer Components
The vanilla layer relies on softened cream cheese for its luxurious texture. Granulated sugar provides the perfect sweetness, while a room temperature egg and sour cream contribute to its custardy smoothness.
Vanilla extract adds that classic, comforting aroma and taste, making it a beautiful counterpoint to the spiced pumpkin.
Luxurious Toppings: Whipped Cream, Caramel & Pecans
Very cold heavy cream, powdered sugar, and vanilla extract are whipped into a light, airy topping that provides a delicate contrast to the rich cheesecake. The chill of the cream is key for stiff peaks.
Warm caramel sauce adds a buttery, sweet drizzle, while chopped pecans offer a delightful crunch and nutty flavor, completing this decadent Two-Tone Pumpkin Pecan Caramel Cheesecake.
Your Path to Two-Tone Pumpkin Pecan Caramel Cheesecake Perfection: Step-by-Step
- Prepare Your Pan and Oven:
Preheat your oven to 325°F (160°C). Tightly wrap the bottom and sides of a 9-inch springform pan with two layers of heavy-duty aluminum foil. This meticulous wrapping is your crucial first step in preventing any water bath leaks and ensuring a perfectly uniform bake.
- Craft the Graham Cracker Crust:
In a medium bowl, combine graham cracker crumbs, 1/4 cup granulated sugar, and melted butter until well mixed. Press this mixture firmly into the bottom of the foil-wrapped springform pan, using the bottom of a glass to create an even, compact layer.
Bake the crust for 10 minutes; this pre-baking step creates a sturdy, flavorful foundation that won’t become soggy. Remove it from the oven and let it cool slightly.
- Mix the Decadent Pumpkin Cheesecake Layer:
In a large bowl, use an electric mixer on low speed to beat the 24 ounces of softened cream cheese and 1 cup granulated sugar until smooth and creamy. Be careful not to overmix, as incorporating too much air can lead to cracks during baking.
Beat in the pumpkin puree, 1/4 cup sour cream, 1 teaspoon vanilla extract, pumpkin pie spice, and salt until they are just combined. Add the two large eggs one at a time, beating on low speed only until each egg is incorporated, scraping down the sides of the bowl as needed to ensure everything is mixed evenly. Do not overbeat.
Pour this rich pumpkin batter over the cooled crust in the springform pan.
- Prepare the Smooth Vanilla Cheesecake Layer:
In a separate medium bowl, beat the 8 ounces of softened cream cheese and 1/4 cup granulated sugar on low speed until smooth. Mix in the 2 tablespoons sour cream and 1/2 teaspoon vanilla extract until just combined.
Add the one large egg, beating on low speed only until it is just incorporated into the mixture. Gently spoon or pour this vanilla batter over the pumpkin layer in the springform pan. For a subtle marbled effect, you can gently swirl the layers with a knife, but keep this minimal to maintain distinct layers.
- Assemble Your Two-Tone Masterpiece:
Once the pumpkin and vanilla batters are layered, your cheesecake is ready for its critical water bath. Take a moment to admire your two-tone creation before the next step.
- Set Up the Essential Water Bath:
Place the foil-wrapped springform pan carefully into a larger roasting pan. Slowly pour hot water into the roasting pan until it comes about halfway up the sides of the springform pan. This water bath is the fundamental secret to a perfectly even bake and prevents those dreaded cracks by providing a moist, gentle heat.
- Bake to Perfection:
Carefully transfer the roasting pan with the cheesecake to your preheated oven. Bake for 60 to 75 minutes, or until the edges are set and the center jiggles only slightly when gently shaken.
A slight jiggle indicates a perfectly baked cheesecake that will firm up beautifully as it cools.
- Execute the Crack-Free Cooling Method:
This step is where the crack-free magic is solidified. Turn off the oven, but leave the cheesecake in the water bath with the oven door ajar for 1 hour. This slow, gradual cooling prevents drastic temperature changes that cause cracking.
After one hour, remove the cheesecake from the oven and the water bath, carefully unwrap the foil, and let it cool completely on a wire rack at room temperature.
- Chill for Optimal Texture:
Once fully cooled to room temperature, cover the cheesecake tightly with plastic wrap and refrigerate for at least 6 hours, or preferably overnight. Chilling is absolutely crucial for the cheesecake to set properly and achieve its signature rich, dense, and stable texture.
This also allows the flavors to meld beautifully.
- Prepare Your Dreamy Toppings:
When you’re ready to serve, prepare the whipped cream. In a very cold bowl with cold beaters, whip the very cold heavy cream, powdered sugar, and 1 teaspoon vanilla extract on high speed until stiff peaks form.
The cold equipment and ingredients are key to achieving light, stable whipped cream.
- Garnish and Serve Your Creation:
Carefully remove the sides of the springform pan from the chilled cheesecake. Generously top your Two-Tone Pumpkin Pecan Caramel Cheesecake with the freshly whipped cream, drizzle with slightly warmed caramel sauce, and sprinkle with chopped pecans.
Slice and savor every luxurious bite of your perfectly crafted dessert!
If you enjoy working with cream cheese and a water bath, you’ll find the same method in this creamy New York cheesecake.
The Secret Sauce: Mastering a Crack-Free Cheesecake Every Time
The Essential Foil Wrap and Water Bath Technique
Wrapping your springform pan with a double layer of heavy-duty aluminum foil is your primary defense against water seepage. This ensures your crust remains crisp and the cheesecake bakes without issue.
The water bath itself creates a moist, even baking environment. This gentle heat transfer prevents the cheesecake edges from drying out and setting too quickly, which is a common cause of cracks.
Gentle Mixing: Avoiding Air Pockets
Overmixing cheesecake batter is a common mistake that incorporates too much air. This air expands rapidly during baking, causing the cheesecake to puff up, then contracts drastically during cooling, leading to unsightly cracks.
Always beat cream cheese and sugar on low speed, and add eggs one at a time, mixing just until incorporated. This technique is vital for a dense, creamy texture.
The Crucial Slow Cooling Method
The slow cooling method-leaving the cheesecake in the turned-off oven with the door ajar-is the ultimate safeguard against cracks. Drastic temperature changes are a shock to the delicate cheesecake structure.
By gradually reducing the temperature, you allow the cheesecake to settle gently, preventing any sudden contraction that could lead to fissures. This hour-long process is non-negotiable for a flawless top.
Perfectly Chilled for Stability
After cooling at room temperature, adequate chilling is paramount. Refrigerating the cheesecake for at least 6 hours, or ideally overnight, allows its structure to fully set and firm up.
This ensures clean slices, a stable texture, and prevents any further structural issues that might arise from premature cutting.
Elevate Your Cheesecake: Pro Tips & Creative Variations
Tips for the Fluffiest Whipped Cream
Always start with very cold heavy cream, powdered sugar, and vanilla extract. Use a chilled bowl and cold beaters for your electric mixer; you can even chill them in the freezer for 10-15 minutes prior.
Whip on high speed until stiff peaks form, but watch carefully to avoid over-whipping, which can turn cream grainy. For another delightful pumpkin treat, consider making these decadent pumpkin pie truffles.
Achieving the Perfect Marbled Effect
To create a subtle marbled effect with your two-tone layers, after gently pouring the vanilla batter over the pumpkin layer, use a butter knife or skewer. Insert it into the batter and swirl it through only a few times.
Less is more here; over-swirling will blend the colors completely, losing the two-tone distinction.
Customizing Your Toppings
While the pecan and caramel topping is classic, feel free to customize. Consider adding chocolate shavings, a sprinkle of sea salt flakes over the caramel, or even a different type of nut like walnuts or toasted almonds.
A drizzle of raspberry sauce or a dollop of cranberry compote could offer a lovely tart contrast. For another exceptional dessert that pairs well with caramel, try an almond caramel layer cake.
Ingredient Substitutions for Dietary Needs
For a gluten-free crust, simply use gluten-free graham cracker crumbs. For a dairy-free option, there are excellent plant-based cream cheeses and heavy creams available, though textures may vary slightly.
Always check ingredient labels to ensure they meet your specific dietary requirements and adjust baking times if necessary.
Troubleshooting Common Cheesecake Conundrums
Why is My Cheesecake Cracked?
Cracks are most often caused by overmixing the batter, baking at too high a temperature, or cooling too quickly. Our recipe directly addresses these with gentle mixing, precise oven temperature, and the slow-cooling water bath method.
Ensuring your cream cheese and eggs are at room temperature also helps prevent cracks by allowing for smoother incorporation.
My Cheesecake is Too Soft/Runny
If your cheesecake is too soft, it likely needed a few more minutes in the oven or insufficient chilling time. The center should still have a slight jiggle, but not be liquid, when it comes out of the oven.
Always allow the cheesecake to chill for at least 6 hours, or ideally overnight, for optimal firmness and texture.
The Crust is Soggy or Hard
A soggy crust can result from the water bath leaking (ensure foil is tight!) or not pre-baking it sufficiently. A hard crust might mean it was pressed too tightly or baked for too long before adding the filling.
Aim for a firm, golden-brown crust that holds its shape but isn’t impenetrable.
Uneven Layers or Marbling
Uneven layers often occur if the batters are poured too quickly or forcefully. Gently spooning the second layer over the first helps maintain distinctness.
For marbling, a light, quick swirl with a knife is enough; excessive swirling will merge the layers rather than marble them.
Serving Suggestions, Storage, and Make-Ahead Magic
The Art of Serving Your Cheesecake
For the cleanest slices, dip your knife in hot water and wipe it clean between each cut. This prevents sticking and ensures a beautiful presentation.
Serve the Two-Tone Pumpkin Pecan Caramel Cheesecake chilled, allowing its creamy texture and distinct flavors to shine.
Pairings for Your Cheesecake
This pumpkin pecan caramel cheesecake is rich and creamy, so you want sides that cut through the sweetness and add a savory note or a bright contrast.
- For a warm, earthy side that balances the cheesecake’s sweetness, try this Roasted Butternut Squash with Feta and Cranberries for a tangy, salty counterpoint.
- Spread something cool and tart alongside each slice with this Creamy Cranberry Apricot Cheese Spread, which pairs the cheesecake’s nutty crust with a fruity zip.
How to Store Leftovers for Maximum Freshness
Store any leftover cheesecake in an airtight container or tightly wrapped with plastic wrap in the refrigerator. This will keep it fresh for up to 3-4 days.
Always ensure it’s well-covered to prevent it from absorbing other refrigerator odors.
Making Ahead: A Time-Saving Strategy
This Two-Tone Pumpkin Pecan Caramel Cheesecake is an ideal make-ahead dessert. You can bake and chill it up to two days in advance, storing it covered in the refrigerator without the toppings.
Add the whipped cream, caramel, and pecans just before serving for the freshest presentation and best texture.
Your Top Questions About Two-Tone Pumpkin Pecan Caramel Cheesecake, Answered!
Can I use canned pumpkin pie filling instead of pure pumpkin puree?
No, it’s not recommended. Canned pumpkin pie filling contains added spices and sweeteners, which will alter the intended flavor and sweetness balance of this recipe.
Always opt for pure pumpkin puree for the best results in your Two-Tone Pumpkin Pecan Caramel Cheesecake.
How do I know when my cheesecake is perfectly baked?
Look for edges that are set and slightly puffed, while the very center should still have a slight jiggle when gently shaken. It should not look liquid or wobbly across the entire surface.
The internal temperature should be around 150-155°F (65-68°C) if you’re using a thermometer.
Can I make this cheesecake gluten-free?
Yes, absolutely! Simply substitute the graham cracker crumbs in the crust with your favorite brand of gluten-free graham cracker crumbs. The rest of the cheesecake ingredients are naturally gluten-free.
What if I don’t have a springform pan?
While a springform pan is ideal, you can use a regular 9-inch round cake pan. Line the bottom and sides with parchment paper, leaving an overhang to lift the cheesecake out once chilled. Be aware this method can be trickier for presentation.
How long does this cheesecake last in the refrigerator?
When properly covered and refrigerated, your Two-Tone Pumpkin Pecan Caramel Cheesecake will remain fresh and delicious for 3 to 4 days.
For optimal enjoyment, consume within this timeframe.
Ready to Create Your Own Masterpiece?
Now that you’re equipped with all the secrets to a crack-free, show-stopping dessert, it’s time to create your own Two-Tone Pumpkin Pecan Caramel Cheesecake. Gather your ingredients, follow these detailed steps, and prepare to impress everyone with your culinary prowess.
Don’t forget to share your beautiful creations and let us know how your perfect cheesecake turned out!
Pumpkin Pecan Caramel Cheesecake
Course: DessertCuisine: AmericanDifficulty: medium4
9-inch cheesecake (12-16 servings)45
minutes1
hour550
kcal660
minutesExperience the ultimate creamy, rich indulgence with this Two-Tone Pumpkin Pecan Caramel Cheesecake. This recipe provides the secret to a perfectly smooth, crack-free top every time, combining luscious pumpkin and vanilla layers with a delightful pecan caramel topping.
Ingredients
For the Crust:
1 and 1/2 cups graham cracker crumbs
1/4 cup granulated sugar
6 tablespoons unsalted butter, melted
For the Pumpkin Cheesecake Layer:
24 ounces cream cheese, softened to room temperature
1 cup granulated sugar
1/2 cup pure pumpkin puree (not pie filling)
2 large eggs, room temperature
1/4 cup sour cream, room temperature
1 teaspoon vanilla extract
1 teaspoon pumpkin pie spice
Pinch of salt
For the Vanilla Cheesecake Layer:
8 ounces cream cheese, softened to room temperature
1/4 cup granulated sugar
1 large egg, room temperature
2 tablespoons sour cream, room temperature
1/2 teaspoon vanilla extract
For the Topping:
1 and 1/2 cups heavy cream, very cold
1/4 cup powdered sugar
1 teaspoon vanilla extract
1/2 cup caramel sauce, warmed slightly
1/2 cup chopped pecans
Directions
- Preheat your oven to 325 degrees Fahrenheit (160 degrees Celsius). Wrap the bottom and sides of a 9-inch springform pan tightly with two layers of heavy duty aluminum foil. This is your first line of defense for a crack-free cheesecake and preventing water bath leaks.
- Prepare the crust: In a medium bowl, combine graham cracker crumbs, 1/4 cup granulated sugar, and melted butter until well mixed. Press the mixture firmly into the bottom of the foil-wrapped springform pan. You can use the bottom of a glass to help create an even layer. Bake for 10 minutes, then remove from oven and let cool slightly.
- Prepare the pumpkin cheesecake layer: In a large bowl, using an electric mixer on low speed, beat the 24 ounces softened cream cheese and 1 cup granulated sugar until smooth and creamy. Be careful not to overmix, as incorporating too much air can lead to cracks. Beat in the pumpkin puree, 1/4 cup sour cream, 1 teaspoon vanilla extract, pumpkin pie spice, and salt until just combined. Add the 2 large eggs one at a time, beating on low speed only until each egg is incorporated, scraping down the sides of the bowl as needed. Do not overbeat. Pour this pumpkin batter over the cooled crust in the springform pan.
- Prepare the vanilla cheesecake layer: In a separate medium bowl, beat the 8 ounces softened cream cheese and 1/4 cup granulated sugar on low speed until smooth. Mix in the 2 tablespoons sour cream and 1/2 teaspoon vanilla extract. Add the 1 large egg, beating on low speed until just incorporated. Gently spoon or pour this vanilla batter over the pumpkin layer in the springform pan. You can gently swirl with a knife for a marbled effect if desired, but keep it minimal.
- Set up the water bath: Place the foil-wrapped springform pan into a larger roasting pan. Carefully pour hot water into the roasting pan until it comes about halfway up the sides of the springform pan. This water bath is the secret to a perfectly even bake and prevents those dreaded cracks!
- Bake for 60 to 75 minutes, or until the edges are set and the center jiggles only slightly when gently shaken.
- The crack-free cooling method: Turn off the oven, but leave the cheesecake in the water bath with the oven door ajar for 1 hour. This slow cooling prevents drastic temperature changes that cause cracking. After 1 hour, remove the cheesecake from the oven and the water bath, carefully unwrap the foil, and let it cool completely on a wire rack at room temperature.
- Once fully cooled, cover the cheesecake with plastic wrap and refrigerate for at least 6 hours, or preferably overnight, for best texture and stability.
- When ready to serve, prepare the whipped cream: In a cold bowl with cold beaters, whip the very cold heavy cream, powdered sugar, and 1 teaspoon vanilla extract on high speed until stiff peaks form.
- Remove the sides of the springform pan from the chilled cheesecake. Top generously with whipped cream, drizzle with warm caramel sauce, and sprinkle with chopped pecans. Slice and serve immediately.
Notes
- Features a water bath and slow cooling method for a perfectly crack-free cheesecake.