Mastering the Warm Pepper Jelly Cream Cheese Dip
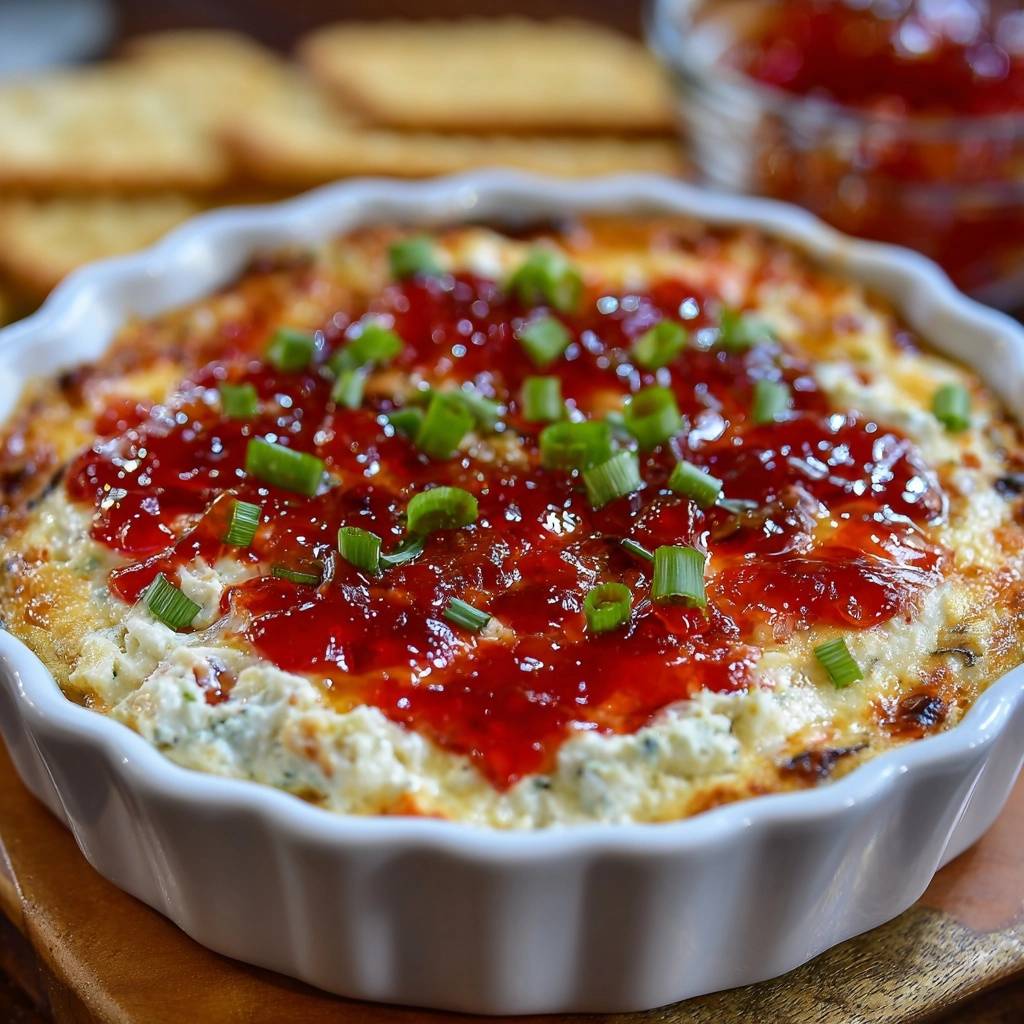
Imagine plunging a buttery cracker into a cloud of molten, savory cheese topped with a shimmering layer of sweet and spicy red pepper jelly. The contrast between the cooling, tangy cream cheese and the vibrant kick of the jelly creates an addictive bite that keeps everyone hovering around the appetizer table. It is the ultimate comfort food with a sophisticated edge, perfect for any gathering where you want to impress without spending hours in the kitchen.
However, many home cooks struggle with the dreaded “oil slick” that often plagues baked cheese dishes. You know the one—where a pool of yellow grease separates from the solids, leaving the dip looking unappetizing and feeling grainy on the tongue. This recipe solves that problem entirely by focusing on a specific layering technique and temperature control to ensure a high-gloss, perfectly emulsified finish every single time.
The secret to this flawless texture lies in the addition of mayonnaise and sour cream to the base. While it might seem like a small detail, these ingredients act as powerful stabilizers that hold the fats in place even under high heat. By following this method, you will achieve a dip that stays creamy and cohesive from the first scoop to the very last, proving that a little bit of kitchen science goes a long way.
The Science of Emulsification in Hot Dips
When you heat cheese, the protein structure begins to collapse, releasing the fat trapped inside. In many standard recipes, this fat separates and rises to the top, creating a greasy mess. This “breaking” happens because there is nothing to bind the oil to the moisture in the cheese. Therefore, we use mayonnaise and sour cream as our secret weapons to prevent this culinary disaster.
Mayonnaise is a stable emulsion of oil and egg yolks, and those egg yolks contain lecithin, a natural emulsifier. When you mix mayo into your cream cheese base, it acts as a bridge between the fats and the liquids. In addition, the lactic acid in the sour cream helps to further stabilize the proteins, ensuring they stay suspended in a smooth, velvety matrix rather than clumping together.
By incorporating these stabilizers, you create a dip that can withstand the intense heat of the oven without losing its integrity. The result is a high-gloss finish that looks professional and feels incredibly luxurious. You won’t find any yellow grease pools here; instead, you get a consistent, spreadable texture that holds up beautifully throughout your entire party.
Why Hand-Grated Cheese Prevents Grainy Textures
If you have ever noticed a gritty or sandy texture in your melted cheese, the culprit is likely the bag of pre-shredded cheese from the grocery store. Manufacturers coat those shreds in cellulose or potato starch to keep them from sticking together in the package. Unfortunately, these anti-clumping agents interfere with the melting process and prevent the cheese from fully integrating into the dip.
Hand-grating your sharp white cheddar and pepper jack is a non-negotiable step for a premium result. Freshly grated cheese lacks those powdery additives, allowing it to melt at a lower temperature and bond seamlessly with the cream cheese base. This simple extra five minutes of effort ensures a smooth, stretchy melt that feels like silk in your mouth.
Essential Components for the Perfect Spread
The foundation of this dip is full-fat cream cheese, and I strongly recommend you don’t reach for the “light” or “Neufchâtel” versions. Full-fat cream cheese provides the structural integrity needed to support the weight of the other cheeses and the jelly. It has a lower water content, which means it won’t become runny or watery when it hits the heat of the oven.
For the flavor profile, sharp white cheddar offers a sophisticated punch that cuts through the richness of the cream. Unlike yellow cheddar, which often contains annatto for color, white cheddar provides a clean, sharp finish that pairs beautifully with the sweetness of the jelly. The pepper jack adds a subtle background heat and a wonderful “pull” that makes the dip feel substantial.
Don’t overlook the green onions, as they provide two distinct layers of flavor. We use the white parts inside the dip for a mild, toasted onion aroma that develops during baking. The green tops are reserved for the end, adding a fresh, crisp bite and a pop of color that balances the deep, cooked flavors of the cheese and jelly.
Selecting the Right Pepper Jelly Heat Level
Red pepper jelly is the classic choice for this dish because its vibrant color looks stunning against the white cheese. It typically offers a mild to medium heat that most guests can enjoy. However, if you want to change the vibe, a green jalapeño jelly provides a more herbaceous, bright flavor that works well with the pepper jack.
If you enjoy the balance of sweet and tangy in this dip, you’ll love the similar flavor in this creamy cranberry apricot cheese spread.
For those who love a serious kick, a habanero or ghost pepper jelly can be used, but use it sparingly. The high sugar content in any pepper jelly is vital because it balances the saltiness of the cheddar and the tang of the sour cream. This sweet-and-salty harmony is exactly what makes this appetizer so incredibly craveable.
Step-by-Step: Achieving the Non-Breaking Melt
Creating the perfect dip is about more than just mixing ingredients; it is about the order of operations. By following these three distinct phases, you ensure that the fats stay emulsified and the textures remain distinct. You want the cheese to be the star, with the jelly acting as a bright, flavorful crown.
Phase 1: Aerating the Base Mixture
Start by beating your softened cream cheese, sour cream, and mayonnaise together until the mixture is completely smooth. You should not see any lumps of cream cheese at all. This step is about more than just mixing; it is about aerating the base to create a light, spreadable foundation.
If your cream cheese is too cold, it will stay lumpy, so make sure it is truly at room temperature. Once the base is smooth, you can gently fold in your hand-grated cheeses and spices. This ensures that the shredded cheese is evenly distributed throughout the creamy matrix, which leads to a consistent melt in every square inch of the baking dish.
Phase 2: The High-Heat Baking Strategy
We bake this dip at 375°F, which is slightly higher than the standard 350°F used for many casseroles. This “sweet spot” temperature allows the top of the cheese to brown and develop those delicious toasted spots before the internal fats have a chance to break. You are looking for the edges to become deeply golden and bubbly.
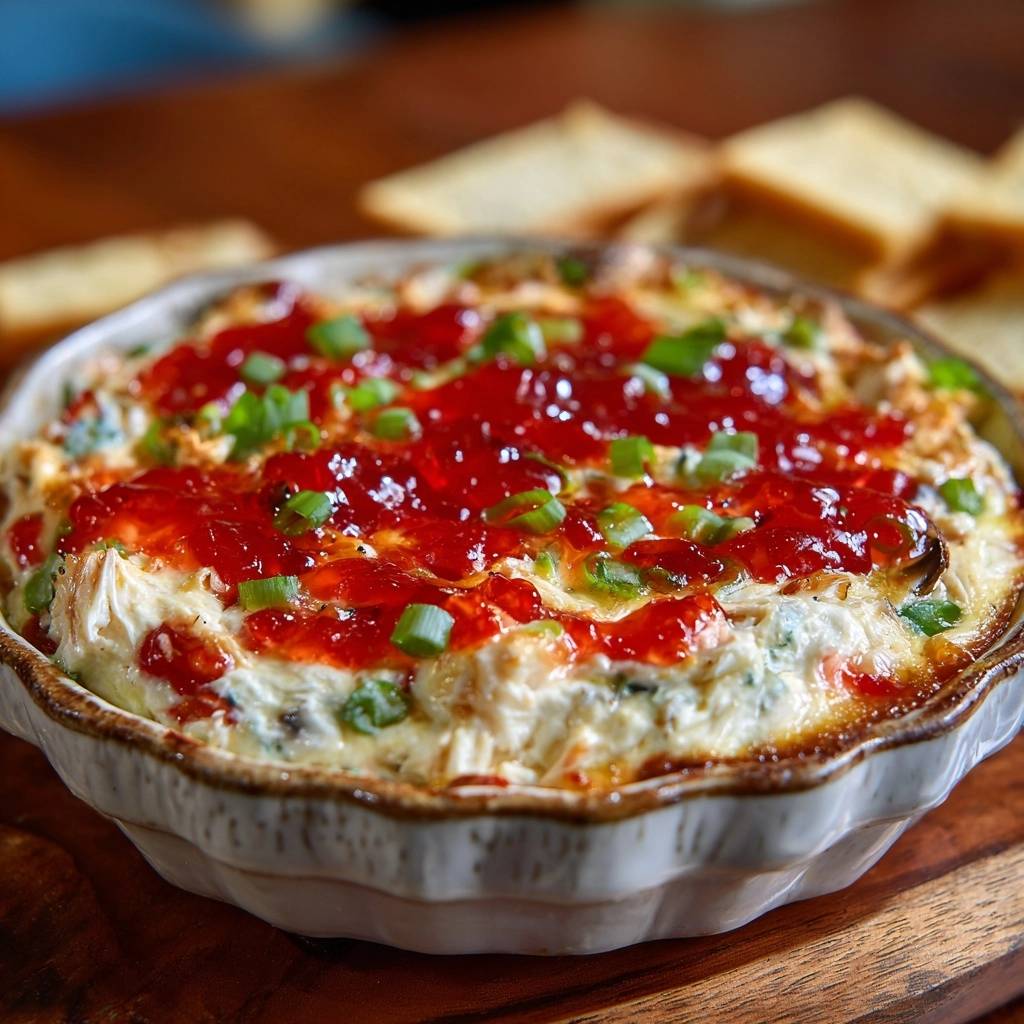
Using a fluted ceramic baking dish is ideal because ceramic holds heat evenly and prevents hot spots that could cause the cheese to scorch. As the dip bakes, you will see the surface transform from a pale white to a beautiful, mottled gold. This browning adds a nutty depth of flavor that contrasts perfectly with the cool jelly you will add later.
Phase 3: The Critical Five-Minute Rest
The most common mistake people make is pouring the jelly onto the dip the second it comes out of the oven. If you do this, the intense heat will immediately liquefy the jelly, causing it to run off the sides or sink into the cheese. You must let the dip rest for exactly five minutes on the counter.
During this resting period, the cheese structure firms up just enough to support the weight of the jelly. The jelly will still warm up from the residual heat, but it will stay exactly where you put it. This creates that beautiful layered look where the jelly sits proudly on top, surrounded by a border of toasted, bubbly cheese.
Troubleshooting Common Cheese Dip Failures
If you find that your dip looks a bit too thick before it goes into the oven, don’t panic. You can stir in a tablespoon of room-temperature heavy cream or milk to loosen it up. However, avoid adding cold liquids, as this can cause the fats in the cream cheese to seize and create a lumpy texture.
In the rare event that you see a little oil starting to bead on the surface after baking, you can usually fix it with a very gentle stir in the center before the resting period. This re-incorporates the fats into the stabilizers. Also, keep in mind that glass dishes tend to hold heat longer than ceramic, so if you use glass, you might need to pull the dip out a minute or two earlier to prevent overcooking.
Flavor Variations and Ingredient Swaps
While the cheddar and pepper jack combo is a classic, you can easily customize this dip to suit your palate. For a deeper, more complex flavor, try swapping the pepper jack for smoked gouda. The smokiness pairs exceptionally well with the sweetness of the red pepper jelly and adds a sophisticated campfire vibe to the dish.
You can also boost the aromatics by adding a teaspoon of roasted garlic paste or a pinch of smoked paprika to the cream cheese base. If you want a bit more texture, finely diced pimientos or even some chopped sun-dried tomatoes can be folded in with the grated cheese. Just remember to keep the ratios the same so the emulsion remains stable.
What to Serve With This Dip
The warm pepper jelly cream cheese dip is both sweet and spicy, so pair it with something crunchy or flaky to balance the texture.
- These Crispy Garlic Potato Wedges add a salty, crunchy contrast that cuts through the creamy dip.
- Use Flaky Buttermilk Biscuits for tearing and dipping – the buttery layers are a natural match for the jelly glaze.
Optimal Pairings for a Warm Appetizer
A dip this rich and creamy requires a sturdy “dipper” that won’t snap under pressure. Butter crackers are the traditional choice because their salty, flaky texture complements the smooth cheese perfectly. However, toasted baguette rounds are another excellent option, providing a satisfying crunch and a neutral base that lets the pepper jelly shine.
For a lighter approach, try serving this with thick-cut vegetable batons like bell peppers or cucumbers. The cool, crisp vegetables offer a refreshing contrast to the warm, spicy cheese. If you want to go the artisanal route, sourdough crisps or even thick-cut pita chips provide enough structural integrity to handle a generous scoop of the dip.
Expert Tips for Hosting and Presentation
When serving this at a party, you can keep the dip warm for longer by placing the ceramic dish on a decorative wooden board, which acts as an insulator. If the dip starts to firm up too much after an hour, a quick 30-second zap in the microwave will usually bring it back to its molten glory. Just be sure to stir the jelly back into the center gently.
For a professional presentation, don’t just glob the jelly on top. Stir the jelly in its jar first to loosen the pectin, then spoon it into the center and use the back of the spoon to swirl it toward the edges. Leave about an inch of the browned cheese visible around the perimeter. This “bullseye” effect looks stunning and lets your guests see all the delicious textures they are about to enjoy.
Make-Ahead Instructions and Storage
You can easily prepare the cheese base up to 24 hours in advance. Simply mix everything together, spread it into your baking dish, and cover it tightly with plastic wrap in the refrigerator. When you are ready to serve, let the dish sit on the counter for 20 minutes to take the chill off before popping it into the oven.
Never add the jelly until after the dip has baked and rested. If you have leftovers, store them in an airtight container in the fridge for up to three days. To reheat, use the oven at 300°F until warmed through, or use the microwave in short 20-second bursts. Avoid freezing this dip, as the sour cream and mayonnaise will break upon thawing, resulting in a grainy, watery mess.
Expert Troubleshooting and FAQ
Can I use low-fat cream cheese for this recipe?
It is best to avoid low-fat or “light” cream cheese for this specific dip. Low-fat versions have a much higher water content and contain more fillers to mimic the texture of fat. When heated, that extra moisture often releases, which can make your dip runny and prevent the beautiful golden browning on top. Stick to full-fat blocks for the best structural integrity and flavor.
Why did my pepper jelly sink to the bottom of the dish?
This usually happens if the jelly is added too soon after the dip comes out of the oven. If the cheese is still in its fully liquid, molten state, the weight of the jelly will cause it to plunge through the surface. Make sure to observe the full five-minute resting period. This allows the proteins to “set” just enough to create a platform for the jelly to sit on.
Can I make this dip in a slow cooker instead of the oven?
While you can melt the ingredients in a slow cooker, you will miss out on the best part of this recipe: the toasted, browned cheese crust. The high-heat baking at 375°F creates a complex flavor profile through the Maillard reaction that a slow cooker simply cannot replicate. If you must use a slow cooker, keep it on the low setting and stir frequently to maintain the emulsion.
What is the fastest way to soften cream cheese?
The best way is to leave it on the counter for about an hour. However, if you are in a rush, you can take the cream cheese out of the foil wrapper and microwave it on a plate for 15 to 20 seconds. Be very careful not to melt it; you just want it soft enough that your finger leaves an indentation when you press it. Softening is crucial for a lump-free, smooth base.
How do I fix the dip if it tastes too salty?
The saltiness usually comes from the combination of the sharp cheddar and the crackers you serve it with. If the dip itself tastes too salty, you can stir in an extra dollop of sour cream or a bit more plain cream cheese to dilute the salt. Alternatively, serve the dip with unsalted dippers like toasted baguette slices or fresh vegetable sticks to balance the overall flavor profile.
If you’re a fan of sweet and salty combinations, you have to try this loaded peanut butter cup cheesecake dip.
Pepper Jelly Cream Cheese Dip
Course: AppetizerCuisine: AmericanDifficulty: easy8
servings10
minutes20
minutes210
kcal30
MinutesThis recipe solves the common frustration of greasy cheese dips by using a specific layering technique and stabilizers like mayonnaise and sour cream. By using hand-grated cheese and a high-temperature bake, you achieve a smooth, emulsified dip that stays creamy and glossy.
Ingredients
16 ounces full-fat cream cheese, softened to room temperature
1/2 cup sour cream
1 cup sharp white cheddar cheese, hand-grated
1/2 cup pepper jack cheese, hand-grated
1/4 cup mayonnaise (the secret stabilizer for a high-gloss, non-breaking finish)
2 green onions, thinly sliced (whites and greens separated)
1/2 teaspoon garlic powder
1/4 teaspoon onion powder
1/2 cup red pepper jelly
Butter crackers or toasted baguette slices for serving
Directions
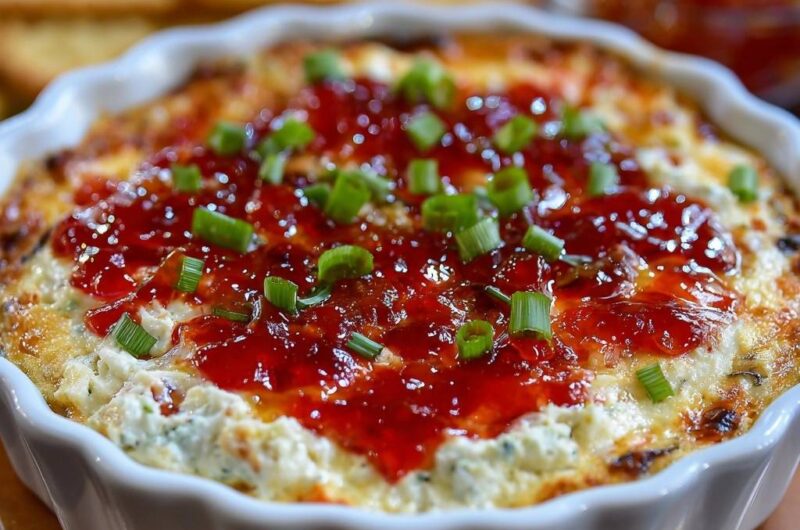
- Preheat your oven to 375°F (190°C). A slightly higher temperature ensures the top browns beautifully as shown in the image before the internal fats have time to break and separate.
- To prevent oily separation, do not use pre-shredded bagged cheese. Those contain potato starch or cellulose that prevents proper melting and causes the fats to break. Hand-grate your cheddar and pepper jack for a smooth, stable bind.
- In a medium bowl, beat the softened cream cheese, sour cream, and mayonnaise together until completely smooth. The combination of sour cream and mayonnaise acts as a powerful emulsifier to keep the dip creamy under heat.
- Fold in the hand-grated cheeses, garlic powder, onion powder, and the white parts of the green onions.
- Spread the mixture into a small ovenproof fluted ceramic baking dish. Smooth the top, but leave a slight texture so the peaks can brown.
- Bake for 18 to 20 minutes. Watch for the edges to become deeply golden and bubbly, with toasted brown spots appearing on the surface of the cheese.
- Remove from the oven and let it sit for 5 minutes. This resting period is crucial; it allows the cheese structure to firm up slightly so the jelly sits on top rather than melting into a liquid mess.
- Stir the pepper jelly in its jar to loosen it. Spoon the jelly into the center of the warm dip, spreading it toward the edges but leaving a border of the browned cheese visible.
- Garnish with the reserved green onion tops and serve immediately with butter crackers.
Notes
- To prevent oily separation, avoid pre-shredded bagged cheese as the anti-caking agents prevent proper melting. Resting the dip for 5 minutes after baking is crucial to ensure the jelly sits perfectly on top.