Mastering the Hot Fudge Chocolate Pudding Cake
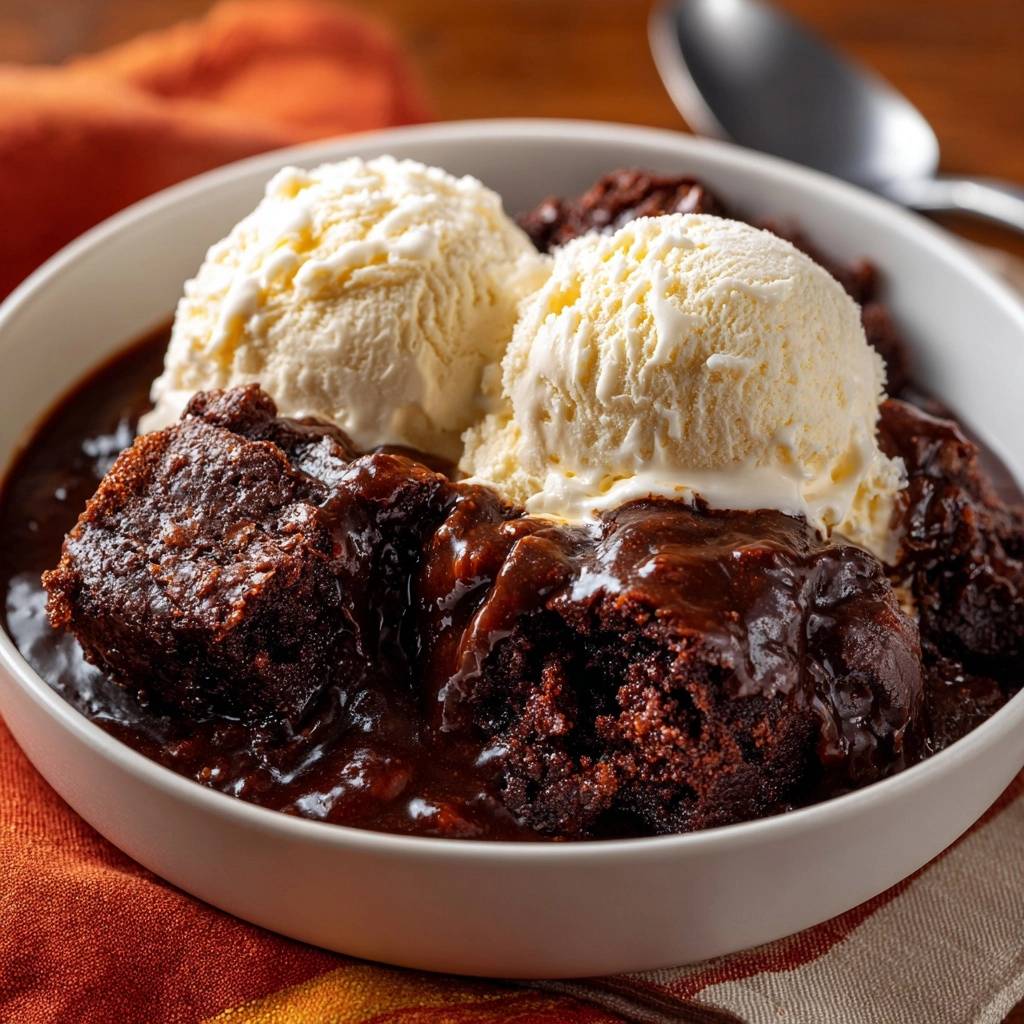
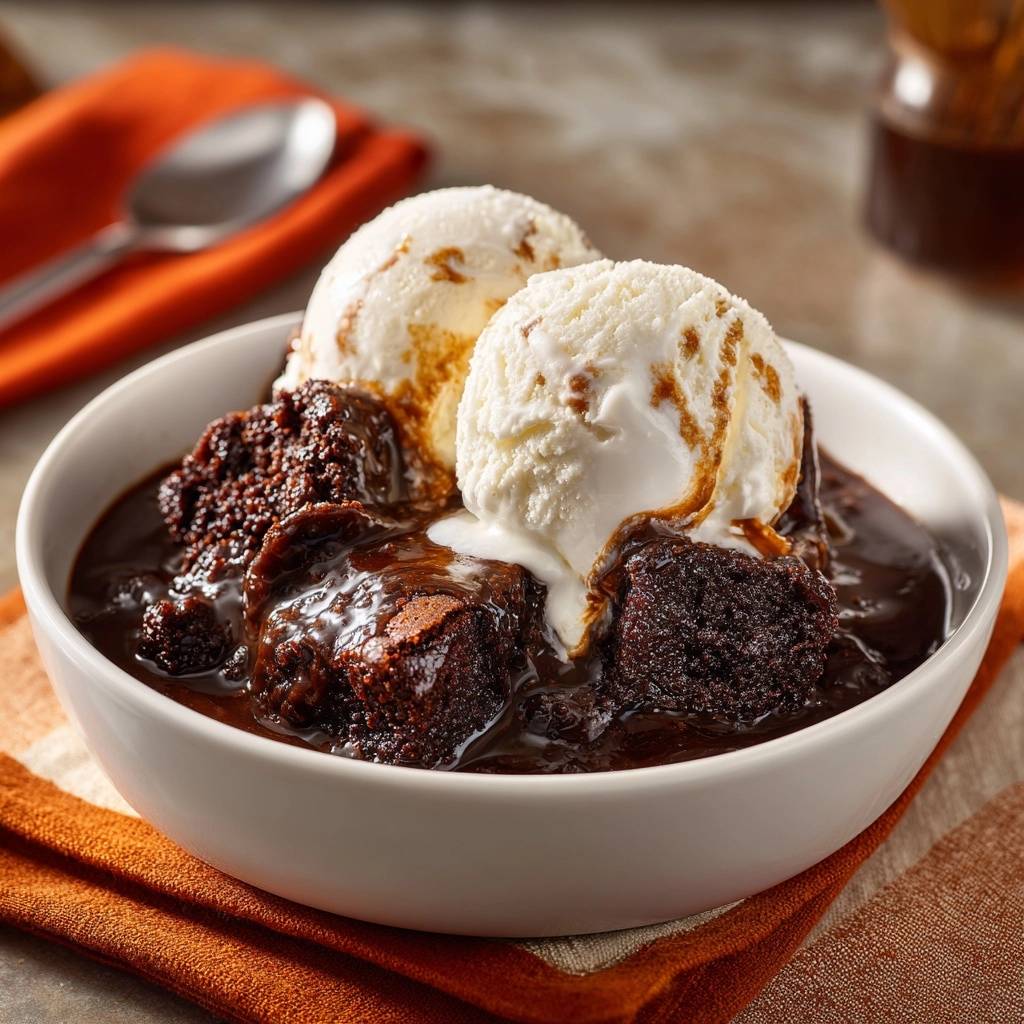
Imagine digging your spoon through a cloud-like layer of dark, springy chocolate cake only to strike a hidden reservoir of molten, glossy fudge. The contrast is startling. You get the warmth of a fresh brownie and the silky indulgence of a warm ganache in a single bite. It’s the kind of dessert that makes the room go quiet the moment it hits the table.
Most people shy away from “lava” style cakes because they often turn out as a pile of undercooked, mushy batter. However, this recipe solves that structural nightmare with a clever bit of kitchen physics. We aren’t relying on underbaking the center to get that gooey effect. Instead, we’re creating a self-saucing masterpiece that builds its own fudge factory right at the bottom of the pan.
The secret to this “anti-soggy” success lies in the sugar barrier. By layering a specific mixture of cocoa and brown sugar over the batter before adding liquid, you create a physical shield. This allows the cake to rise and set perfectly while the boiling water transforms the sugar underneath into a thick, bubbling sauce. It’s a foolproof technique that guarantees a distinct cake top and a liquid gold bottom every single time.
The Anatomy of a Self-Saucing Dessert
A self-saucing pudding is a bit of a culinary magic trick. It’s a vintage technique that gained massive popularity as a depression-era staple because it relies entirely on basic pantry staples. You don’t need expensive chocolate bars or heavy cream to create a high-end finish. You just need the right ratio of moisture to heat.
This version avoids the dreaded “soggy bottom” by utilizing the principles of density. The cake batter is dense and full of leavening agents, while the water added to the top is thin. As the heat of the oven penetrates the dish, the cake expands and floats upward. Meanwhile, the sugar and cocoa on top dissolve into the water and sink, thickening into a rich syrup as they go.
Therefore, the result isn’t a mess of wet cake. It’s a two-tiered experience. You get a fully baked, tender sponge on top and a decadent, warm pudding sauce underneath. It’s the ultimate comfort food that feels much more sophisticated than the simple ingredients suggest.
Essential Components for the Chocolate Base
The foundation of this cake starts with all-purpose flour. While you might be tempted to use cake flour for a lighter crumb, all-purpose provides the necessary protein structure. This strength is vital because the cake needs to hold its shape while literally floating on a bed of hot liquid. Without that structure, the cake would simply dissolve into the sauce.
Baking powder is your best friend here. It creates the tiny air pockets that act like little life jackets for the batter. In addition, using whole milk is a non-negotiable for the best flavor. The fat content in whole milk provides a richer mouthfeel and a more tender crumb than skim or low-fat options. It helps the chocolate flavor feel “round” and full rather than sharp.
Selecting the Right Cocoa Powder
When you’re standing in the baking aisle, reach for standard unsweetened natural cocoa powder. Natural cocoa is acidic, and that acidity is what reacts with the baking powder to give the cake its lift. If you use Dutch-processed cocoa, which has been neutralized, you might find the cake doesn’t rise quite as high or stay as fluffy.
Furthermore, stay far away from hot cocoa mixes or sweetened powders. These contain milk solids and stabilizers that will completely throw off the chemistry of the sauce. You want the pure, bitter punch of 100% cocoa to balance out the sweetness of the sugars. This creates a deep, dark chocolate profile that isn’t cloying.
The method of layering the batter works beautifully for this glazed blueberry lemon bundt cake as well.
The Role of Melted Butter and Vanilla
Melted butter is the key to achieving a fudgy, brownie-like texture in the cake portion. Unlike softened butter that you cream with sugar to create air, melted butter keeps the crumb tight and moist. It ensures that even the “dry” part of the dessert feels decadent and rich on the tongue.
Don’t skip the vanilla extract, either. It might seem counterintuitive to add vanilla to a chocolate cake, but it acts exactly like salt does in a savory dish. It enhances the floral and earthy notes of the cocoa. Without it, the chocolate can taste a bit flat or one-dimensional. A single teaspoon makes the whole dish pop.
The Science of the Sugar Barrier
This is the most critical part of the entire process. Once your batter is in the pan, you’ll mix light brown sugar and cocoa powder together. You must sprinkle this evenly over the raw batter. This layer acts as a semi-permeable membrane. It’s a barrier that prevents the boiling water from immediately soaking into the flour and turning it into paste.
The brown sugar is particularly important here because of its molasses content. It adds a depth of flavor and a slight stickiness that helps the sauce thicken properly. As the water sits on top of this sugar layer, it slowly dissolves the granules. This creates a heavy, saturated syrup that eventually migrates to the bottom of the dish as the cake rises through it.
Step-by-Step: Mixing the Chocolate Batter
When you start mixing your dry ingredients with the milk and melted butter, you’ll notice the batter is quite thick. It should look more like a stiff brownie batter than a pourable cake batter. This thickness is intentional. It needs to be sturdy enough to support the weight of the sugar and water you’re about to pour on top.
Use a sturdy spatula and stir until the streaks of flour just disappear. However, be very careful not to over-mix. If you work the batter too much, you’ll develop the gluten in the flour. This results in a tough, rubbery cake that fights back when you bite into it. Stop the moment it looks smooth and uniform.
The Boiling Water Pouring Technique
Now comes the part that feels wrong but is so right. You need to pour 1 1/4 cups of boiling water over the top of your sugar-covered batter. The water must be truly boiling, not just hot from the tap. The high heat immediately starts the starch gelatinization process in the flour, helping the cake set its structure before it gets too wet.
To do this without ruining the layers, hold a large spoon upside down over the pan. Slowly pour the water over the back of the spoon. This disperses the stream so it doesn’t “drill” a hole through your sugar barrier and into the batter. Move the spoon around to cover the whole surface. Whatever you do, do not stir! If you stir, you’ll end up with a muddy, grey mess instead of a layered cake.
Thermal Dynamics: Baking the Pudding Cake
As the dish sits in the 350°F oven, a beautiful bit of chemistry happens. The baking powder reacts to the heat, causing the cake to expand and pull away from the sides of the dish. Because the cake is lighter than the sugar-water mixture, it floats to the top. Meanwhile, the sugar and cocoa below emulsify into a thick, bubbling fudge.
If you enjoy playing with chocolate variations, try this rich and fudgy flourless dark chocolate torte for a deeper, denser dessert.
You’ll know it’s done when the top of the cake looks matte and feels bouncy to a light touch. You should see the dark fudge sauce bubbling up around the edges of the pan. This usually takes about 30 to 35 minutes. If the center still looks wet or wobbles like Jell-O, give it another few minutes. You want a firm “crust” on top to contrast with the liquid below.
The Critical Ten-Minute Rest Period
I know it’s hard to wait when the kitchen smells like a chocolate factory, but the resting period is mandatory. When the cake first comes out of the oven, the sauce underneath is very thin and watery. It needs time for the starches and sugars to settle and thicken into a glossy, coat-the-back-of-the-spoon consistency.
During these ten minutes, carry-over cooking finishes the center of the cake perfectly. If you scoop into it immediately, the sauce will run all over the plate and look thin. After ten minutes, it transforms into a rich, velvety fudge that clings to the cake. It’s the difference between a chocolate soup and a world-class dessert.
Troubleshooting Your Hot Fudge Chocolate Pudding Cake
If your cake ends up dry, the most likely culprit is over-baking or water that wasn’t hot enough. If the water is lukewarm, the cake takes too long to rise, and the moisture evaporates before the sauce can form. Always use a kettle to get that water to a rolling boil right before you pour.
On the other hand, if your sauce is thin and didn’t thicken, you might have accidentally disturbed the sugar barrier. If the water mixes into the batter before it hits the oven, the sauce won’t have the right concentration of sugar to thicken. Next time, be even more gentle with the “back of the spoon” pour and ensure your brown sugar is free of large, hard lumps.
Flavor Variations and Ingredient Swaps
Once you’ve mastered the base recipe, you can start playing with the flavor profile. A popular trick among bakers is adding a teaspoon of espresso powder to the brown sugar topping. Coffee doesn’t make the cake taste like mocha; instead, it intensifies the chocolate notes, making them taste darker and more complex.
You can also swap the vanilla extract for peppermint extract during the holidays for a “thin mint” vibe. Or, try adding a pinch of flaky sea salt over the sugar layer before pouring the water. The salt cuts through the intense sweetness of the fudge and makes the whole dish feel much more grown-up and balanced.
Serving Suggestions and Temperature Contrast
This dessert is all about the contrast between hot and cold. The cake and sauce are intensely rich and warm, so you need something cold and creamy to break it up. A large scoop of high-quality vanilla bean ice cream is the gold standard. As the ice cream melts into the warm fudge, it creates a creamy swirl that is absolutely heavenly.
If you want something a little less sweet, try a dollop of unsweetened whipped cream or even a splash of cold heavy cream poured directly into the bowl. The tartness of fresh raspberries also pairs beautifully with the dark chocolate. The acidity of the fruit cuts through the sugar and refreshes your palate between bites.
What to Serve Alongside
This hot fudge chocolate pudding cake works well as the centerpiece of a dessert spread. Here are two recipes that pair nicely with its deep chocolate flavor.
- For another gooey, chocolate-filled treat, these Ultra-Gooey Chocolate Cinnamon Rolls bring a hint of warm spice that complements the cake.
- For a lighter contrast, these Fluffy Blueberry Pancakes offer a bright, fruity counterpoint, making them a great option for a weekend brunch spread.
Storage and Reheating for Optimal Texture
This cake is undoubtedly at its peak about 15 minutes after it leaves the oven. However, if you have leftovers, you can store them in an airtight container in the fridge for up to three days. Just be aware that the cake will continue to absorb some of the sauce as it sits, so it won’t be quite as “saucy” the next day.
To reheat, put a portion in a microwave-safe bowl and heat it in 20-second bursts. This “re-melts” the fudge sauce and softens the cake without drying it out. I don’t recommend freezing this dish. The emulsion of the sugar, water, and butter in the sauce tends to break and become grainy once it’s thawed and reheated.
Expert Tips for Success
Firstly, always use a deep enough dish. An 8-inch square pan is standard, but make sure it has at least 2-inch sides. The sauce bubbles vigorously in the oven, and you don’t want chocolate dripping onto the floor of your oven. If you’re worried, place a baking sheet on the rack below to catch any potential drips.
Secondly, ensure your brown sugar is fresh and soft. If you use hard, pebble-like lumps of brown sugar, they won’t dissolve evenly in the boiling water. This leads to grainy spots in your sauce. If your sugar is hard, microwave it for a few seconds with a damp paper towel to soften it before mixing it with the cocoa.
Lastly, check your oven calibration. Because this recipe relies on specific timing to keep the sauce liquid, an oven that runs too hot will evaporate the sauce and leave you with a dry cake. A cheap oven thermometer can save you a lot of heartbreak by ensuring you’re actually baking at 350°F.
Frequently Asked Questions
Can I use white sugar instead of brown sugar for the topping?
You can use white sugar in a pinch, but the sauce won’t be as rich. Brown sugar contains molasses, which adds moisture and a caramel-like depth to the fudge. If you use only white sugar, the sauce will be thinner and taste more like a simple chocolate syrup rather than a thick fudge.
Why did my cake sink in the middle?
A sunken center usually happens if the baking powder is expired or if the boiling water was poured too forcefully. If the water breaks through the batter, it weighs down the center and prevents it from rising. Additionally, ensure you don’t open the oven door too early, as the sudden drop in temperature can cause a fragile cake to collapse.
Can I make this in a slow cooker?
Yes, this recipe adapts well to a slow cooker. Follow the same layering steps in the crockpot insert. Cook on high for about 2 to 2.5 hours. The texture will be even more moist and pudding-like, though you won’t get the same slightly crisp “crust” on top that an oven provides.
Is it possible to make this gluten-free?
You can substitute the all-purpose flour with a high-quality 1:1 gluten-free flour blend. Look for one that contains xanthan gum to help with the structure. The cake might be slightly more delicate, so be extra careful when pouring the boiling water to ensure the batter stays intact.
Can I double the recipe for a larger crowd?
You can double the ingredients, but you must move to a larger pan, such as a 9×13 inch baking dish. Do not try to double it in a deep, small bowl, or the center will never cook through before the edges burn. The surface area is key to allowing the cake to rise through the liquid properly.
Chocolate Pudding Cake
Course: DessertCuisine: AmericanDifficulty: easy6
servings10
minutes35
minutes350
kcal45
MinutesThis ‘Anti-Soggy Bottom’ cake solves the common issue of mushy lava cakes. By layering a cocoa-sugar barrier and pouring boiling water on top without stirring, the cake rises to the top while a glossy fudge sauce develops underneath.
Ingredients
1 cup all-purpose flour
3/4 cup granulated sugar
1/4 cup unsweetened cocoa powder
2 teaspoons baking powder
1/4 teaspoon salt
1/2 cup whole milk
1/4 cup (4 tablespoons) melted butter
1 teaspoon vanilla extract
1/2 cup packed light brown sugar
1/4 cup unsweetened cocoa powder (for topping)
1 1/4 cups boiling water
Vanilla ice cream for serving
Directions
- Preheat your oven to 350 degrees F (175 degrees C).
- In a medium bowl, whisk together the flour, granulated sugar, 1/4 cup cocoa powder, baking powder, and salt.
- Stir in the milk, melted butter, and vanilla extract until the batter is smooth and thick. Spread this batter evenly into an ungreased 8-inch square baking dish or a 2-quart deep baking dish.
- In a small separate bowl, mix the brown sugar and the remaining 1/4 cup cocoa powder until no large lumps remain. Sprinkle this mixture evenly over the top of the raw batter. This sugar layer acts as the barrier that prevents the cake from absorbing too much liquid.
- Carefully pour the boiling water over the back of a large spoon onto the sugar layer, moving the spoon around to distribute the water evenly without disturbing the batter underneath. Do not stir. Leaving the water on top is the essential step to ensure the cake stays fluffy while the sauce develops at the bottom.
- Bake for 30 to 35 minutes until the top of the cake is set and bouncy to the touch, and the sauce is bubbling around the edges.
- Let the cake stand for 10 minutes before serving. This resting period is critical; it allows the sauce to transition from a thin liquid to a thick, glossy fudge.
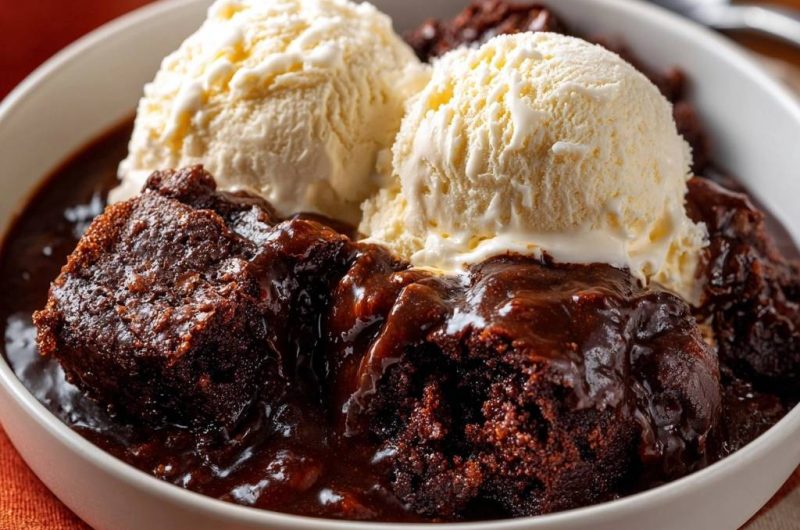
- Spoon the warm cake into bowls, making sure to scoop deep to get the rich fudge sauce from the bottom, and top with two large scoops of vanilla ice cream as shown in the image.
Notes
- The 10-minute resting period after baking is critical to allow the sauce to thicken from a thin liquid into a glossy fudge. Serve with vanilla ice cream for the best experience.