Mastering Glazed Balsamic Chicken and Asparagus
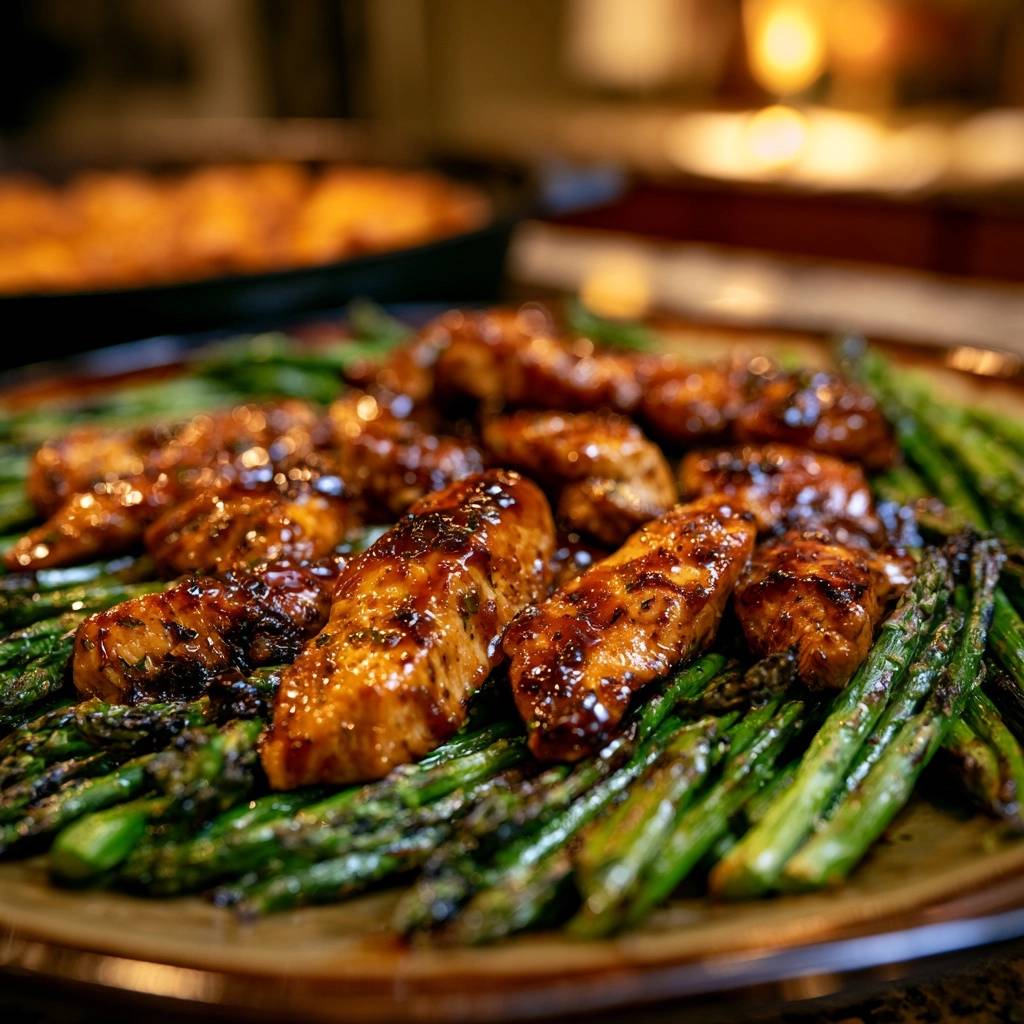
Stop settling for rubbery, flavorless chicken breasts that dry out before the vegetables are even tender. We’ve all been there, staring at a plate of gray meat and mushy greens, wondering where the flavor went. The struggle of cooking lean proteins and fibrous vegetables simultaneously often leads to one being overdone while the other stays raw.
This guide moves you beyond basic pan-frying and into the realm of professional deglazing and reduction techniques. You’re going to learn how to balance the sharp acidity of balsamic vinegar with the deep sweetness of honey and brown sugar. The goal isn’t just a meal; it’s a high-gloss, restaurant-quality finish that coats every bite.
The secret to juicy results is all in the sear and rest method. By using a high-heat glaze technique, we lock in the moisture while creating a rich, caramelized exterior. I’ve found that removing the chicken just before it’s fully cooked allows the residual heat to finish the job, keeping the fibers supple rather than tough.
The Chemistry of the Perfect Balsamic Reduction
Balsamic vinegar is a complex ingredient, and understanding its chemistry changes how you cook with it. As the vinegar hits the hot pan, the acetic acid begins to evaporate, leaving behind concentrated grape must and sugars. When we add honey and brown sugar, we’re creating a multi-layered caramelization process.
The honey provides a floral sweetness and a viscous body, while the brown sugar introduces molasses, which aids in the Maillard reaction. This reaction is the chemical dance between amino acids and reducing sugars that gives seared meat its savory, browned crust. Without these sugars, the balsamic would remain too thin and acidic to cling to the chicken.
The “fond,” or those little browned bits stuck to the bottom of your skillet, is the foundation of the entire flavor profile. When you pour the liquid glaze into the pan, it acts as a solvent, lifting those concentrated meat juices and incorporating them into the sauce. This process, known as deglazing, ensures that no flavor is wasted and the sauce has a deep, savory backbone.
Essential Components for Glazed Balsamic Chicken and Asparagus
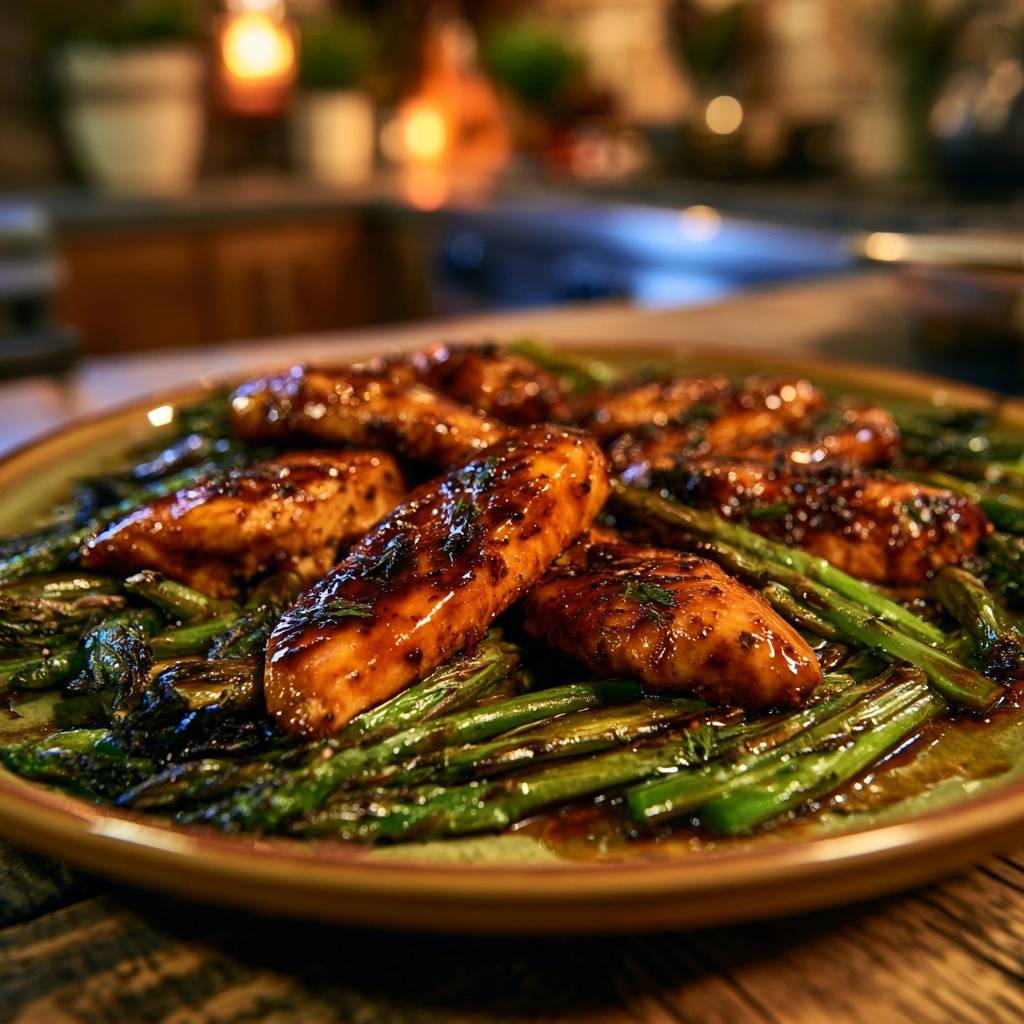
Quality ingredients are the difference between a mediocre Tuesday night dinner and a meal you’ll crave. For the poultry, I highly recommend chicken tenders or breast strips. The increased surface-area-to-sauce ratio means every single bite gets a heavy coating of that sticky balsamic reduction.
When it comes to asparagus, look for a vibrant green color and tightly closed tips. You want a distinct “snap” when you bend a stalk; if it bends without breaking, it’s likely aged and will turn out woody. Freshness is paramount here because the quick sauté won’t soften old, fibrous stalks.
You might notice we use dried oregano during the cooking phase rather than fresh. This is a deliberate choice to prevent burning. Fresh herbs have a high water content and delicate leaves that turn bitter and black under high heat, whereas dried oregano rehydrates in the glaze, releasing its earthy oils slowly.
Selecting and Prepping Your Poultry
Before the chicken even touches the pan, you need to season it generously with salt and pepper. This isn’t just for flavor; salt draws out surface moisture, which then evaporates quickly in the pan to allow for a better sear. If the surface is wet, the chicken will steam instead of browning.
Uniform thickness is your best friend in the kitchen. If your chicken strips vary wildly in size, the small ones will turn into shoe leather while the thick ones stay raw. Take a moment to slice them evenly, or lightly pound the thicker ends so they cook at the same rate.
Asparagus Anatomy: Trimming for Texture
To prep your asparagus, don’t just hack off the ends with a knife. Find the natural breaking point by holding a stalk at the base and the middle, then bending it until it snaps. The spear will naturally break right where the woody, tough part ends and the tender part begins.
If you have pencil-thin stalks, they will cook in a flash, likely under two minutes. If you’ve picked up jumbo stalks, you might need to add a splash of water to the pan to create a bit of steam, ensuring the center softens before the outside burns. Adjust your timing based on the diameter of your produce.
The Heat Management Strategy: Avoiding Dry Meat
The “Sear and Rest” method is the core value of this recipe. Most home cooks make the mistake of cooking the chicken all the way through in the first step. By the time you add the vegetables and the sauce, that chicken has been on the heat for ten minutes too long, resulting in a dry, chalky texture.
Instead, sear the chicken until a dark, golden-brown crust forms, but remove it while it’s still slightly undercooked in the very center. This is where “carry-over cooking” comes into play. As the chicken sits on a plate, the internal temperature continues to rise, gently finishing the meat without the harsh direct heat of the skillet.
The final 60-second toss in the reduced glaze is all you need to bring the meat back up to serving temperature. This brief re-introduction to heat allows the chicken to absorb the sauce without losing its internal juices. It’s a professional trick that guarantees a tender result every single time.
Step-by-Step: Executing the High-Heat Glaze
Cooking is a sensory experience, and you need to pay attention to the cues your pan is giving you. Start by heating your olive oil until it’s shimmering. You’ll know it’s ready when a tiny piece of chicken sizzles violently the moment it touches the oil. If the oil is smoking, it’s too hot; pull it off the burner for a moment.
As you whisk the balsamic, honey, and garlic together, the aroma will be sharp and pungent. Don’t worry, that intensity mellows out significantly once it hits the heat and begins to reduce. The goal is a balanced syrup that tastes both bright and deeply caramelized.
Phase 1: Achieving the Golden Crust
When you add the chicken to the skillet, leave it alone! The biggest mistake is moving the meat too soon. It needs undisturbed contact with the hot metal to develop that crust. If you try to flip it and it sticks, it’s not ready to turn yet.
Be careful not to crowd the pan. If the chicken strips are touching each other, the temperature of the skillet will drop, and the meat will release juices that boil rather than sear. Work in two batches if your skillet isn’t large enough to give every piece its own space.
Phase 2: Deglazing and Asparagus Sauté
Once the chicken is resting, toss the asparagus into the hot oil and fond. You’ll hear a loud sizzle as the moisture from the vegetables hits the pan. Use a wooden spoon to scrape up those browned bits; this is where the flavor lives. The asparagus should turn a bright, neon green.
Pour in the balsamic mixture. It will bubble vigorously and the steam might catch the back of your throat—that’s just the vinegar reducing. Watch the bubbles; as they get larger and slower, you’ll know the water has evaporated and the sugars are thickening into a true glaze.
Phase 3: The Final Emulsion and Glaze Reduction
When the sauce reaches a “nappe” consistency—meaning it’s thick enough to coat the back of a spoon without immediately running off—it’s time to bring the chicken back. Don’t forget to pour in any juices that accumulated on the resting plate; that’s pure flavor and helps emulsify the sauce.
Toss everything together for just one minute. You’ll see the sauce transform from a liquid into a high-gloss coating that clings to the chicken and asparagus. The meat will finish cooking in this gentle, moist environment, ensuring it stays incredibly succulent.
Troubleshooting Common Texture Issues
If your sauce becomes too thick and tacky, almost like hard candy, don’t panic. Simply add a tablespoon of water or chicken broth and whisk it in over low heat to loosen the reduction. This usually happens if the heat was too high or the sauce reduced for an extra minute.
On the flip side, if the sauce stays thin and watery, you likely didn’t let it bubble long enough before adding the chicken back. Remove the chicken again, turn the heat to high, and let the liquid reduce for another 30 to 60 seconds until it looks syrupy. Then, re-incorporate the meat.
If your asparagus ends up mushy, it was likely in the pan too long. Next time, pull the asparagus out with the chicken and only add it back for the final toss. For a glaze that feels too acidic, a tiny pinch of extra brown sugar can help round out the sharp edges of the vinegar.
Flavor Variations and Ingredient Swaps
While chicken breasts are the classic choice, you can easily swap them for boneless, skinless chicken thighs. Thighs have a higher fat content, making them even more forgiving and flavorful, though they may require an extra two minutes of searing time to render the fat properly.
If asparagus isn’t in season, broccolini or sugar snap peas make excellent substitutes. Both have a similar “snap” and hold up well to the high-heat glaze. For those who like a bit of heat, doubling the red pepper flakes or adding a teaspoon of Dijon mustard to the glaze adds a sophisticated depth.
You can also experiment with the acid. While balsamic is the star here, adding a squeeze of fresh lemon juice at the very end can brighten the dish significantly. The citrus cuts through the heavy sweetness of the honey and provides a fresh top note that balances the earthy oregano.
Optimal Side Dish Pairings
Since the balsamic glaze is so bold and flavorful, you want side dishes that are relatively neutral to soak up the extra sauce. Roasted baby potatoes are a fantastic choice; their crispy skins and fluffy interiors are the perfect vessel for the sticky reduction.
For a lighter option, try a lemon-infused quinoa or a simple cauliflower mash. The slight nuttiness of the quinoa complements the balsamic, while a creamy mash provides a nice textural contrast to the crisp asparagus. Avoid heavily seasoned rice pilafs, as the competing spices can overwhelm the palate.
A simple crusty bread is also a great addition. You’ll find yourself wanting to swipe every last drop of that glaze off the plate, and a piece of warm sourdough or a baguette is the best tool for the job. Keep the sides simple so the chicken and asparagus remain the stars of the show.
Storage, Reheating, and Meal Prep Logistics
This dish stores remarkably well, making it a favorite for meal prep. Place leftovers in an airtight container and keep them in the fridge for up to four days. The glaze will thicken and solidify slightly when cold, but it will liquefy again once heated.
To reheat without turning the chicken into rubber, avoid the high-power setting on your microwave. Use the “low and slow” method, or better yet, toss everything back into a hot skillet with a splash of water. The water will steam the chicken gently and loosen the glaze back to its original silky consistency.
I don’t recommend freezing this specific dish. Asparagus has a high water content, and the cell walls will collapse during the freezing and thawing process, leaving you with mushy vegetables. The balsamic sauce can also break and become grainy when frozen and reheated.
Expert Tips for Professional Presentation
Presentation is the final step in mastering this dish. Instead of just scooping it onto a plate, use the “Platter Method.” Arrange the asparagus in a neat, aligned bed on a large serving platter, then shingle the glazed chicken strips across the top.
Drizzle any remaining reduction from the pan directly over the meat in a zig-zag pattern. This highlights the high-gloss finish and ensures the first bite is packed with flavor. A heavy garnish of fresh parsley provides a necessary pop of color against the dark, rich tones of the balsamic.
For a final touch of expertise, sprinkle a pinch of flaky sea salt over the chicken just before serving. The large salt crystals provide a tiny crunch and a burst of salinity that makes the sweetness of the honey and the tang of the vinegar truly sing. It’s a small detail that makes a massive difference.
Frequently Asked Questions
Can I use frozen asparagus for this recipe?
It’s best to avoid frozen asparagus for this specific preparation. Frozen vegetables are blanched before freezing, which breaks down their cellular structure. When you try to sauté them at high heat, they release too much water and become mushy rather than crisp-tender. If you must use frozen, thaw them completely and pat them very dry with paper towels, but expect a softer texture.
What is the best substitute for balsamic vinegar?
If you’re out of balsamic, you can mimic the profile by mixing one part Sherry vinegar or Red Wine vinegar with a half-part of extra sweetener (like more honey or maple syrup). While it won’t have the exact syrupy depth of a true balsamic, the acidity and sugar balance will still work well with the chicken and asparagus.
How do I prevent the garlic from burning in the glaze?
Garlic burns quickly and becomes bitter, but in this recipe, it’s protected by the liquid. By whisking the minced garlic into the balsamic and honey mixture before it hits the pan, the liquid acts as a buffer. The garlic simmers in the reduction rather than frying in the oil, allowing its flavor to infuse the sauce without the risk of scorching.
Is this recipe suitable for a cast iron skillet?
Cast iron is excellent for getting a superior sear on the chicken, but you must be careful. Balsamic vinegar is highly acidic and can react with the iron if the seasoning on your pan isn’t perfect, potentially giving the sauce a metallic taste. If your cast iron is well-seasoned, it’s fine for a quick reduction, but a stainless steel or non-stick skillet is generally a safer bet for acid-heavy sauces.
Can I double the recipe for a large group?
You can certainly double the ingredients, but you must cook in batches. Overcrowding the pan is the fastest way to ruin this dish. If you put 3 lbs of chicken in one skillet, the temperature will plummet, the meat will steam, and you’ll lose that beautiful golden crust. Sear the chicken in two or three rounds, then do the same for the asparagus before combining everything at the very end.
Glazed Balsamic Chicken and Asparagus
Course: Main CourseCuisine: AmericanDifficulty: easy4
servings10
minutes15
minutes25
Minutes360
kcalAmerican
Ingredients
1.5 lbs chicken breast tenders or sliced breast strips
1 lb fresh asparagus, woody ends trimmed
1/4 cup balsamic vinegar
2 tablespoons honey
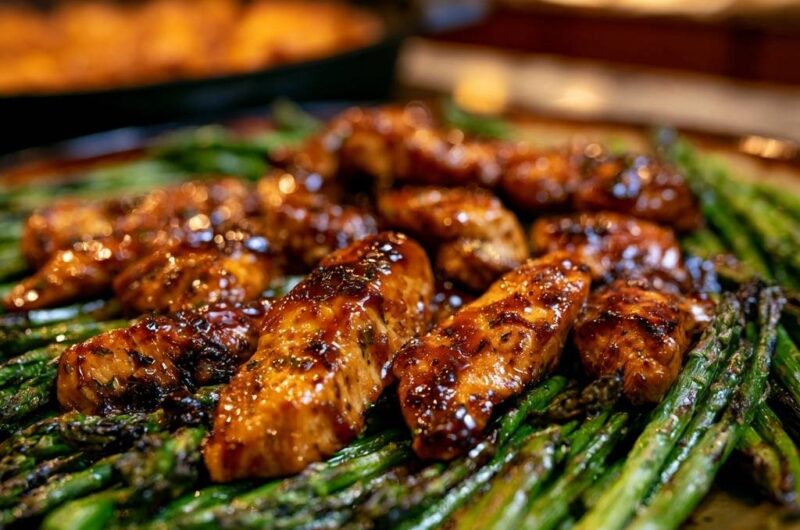
1 tablespoon brown sugar (for deep caramelization shown in image)
2 cloves garlic, minced
1 tablespoon olive oil
1 teaspoon dried oregano
1/2 teaspoon red pepper flakes (optional)
Salt and black pepper to taste
Fresh parsley for garnish
Directions
- In a small bowl, whisk together the balsamic vinegar, honey, brown sugar, minced garlic, and oregano to create your glaze. Set this aside.
- Season the chicken strips generously with salt and pepper. This is crucial for drawing out the right amount of surface moisture for a better sear.
- Heat the olive oil in a large skillet over medium-high heat. Once the oil is shimmering but not smoking, add the chicken in a single layer.
- To solve the dry meat problem, sear the chicken for 3-4 minutes per side until a dark, golden-brown crust forms. Do not crowd the pan; work in batches if necessary. Remove the chicken from the skillet while it is still slightly undercooked in the very center and set it aside on a plate. The chicken is done when it reaches 165°F (74°C) in the thickest part.
- Immediately add the asparagus to the same hot skillet. Sauté for 3 to 4 minutes, using the moisture from the vegetables to scrape up any browned bits (fond) from the bottom of the pan.
- Pour the balsamic glaze into the skillet with the asparagus. Let it bubble and reduce for 1-2 minutes until it thickens into a syrupy consistency that coats the back of a spoon.
- Return the chicken and any accumulated juices to the skillet. Toss everything together for 60 seconds. This final step finishes the cooking process gently within the sauce, ensuring the meat stays incredibly tender and develops the high-gloss finish seen in the image.
- Arrange the asparagus in a neat bed on a platter and place the glazed chicken strips on top. Drizzle any remaining thick glaze from the pan over the meat and garnish with fresh parsley.
Notes
- To ensure the juiciest results, do not crowd the pan during the searing process and allow the chicken to finish cooking gently within the reducing sauce.