The Science of Southern Meringue Banana Pudding
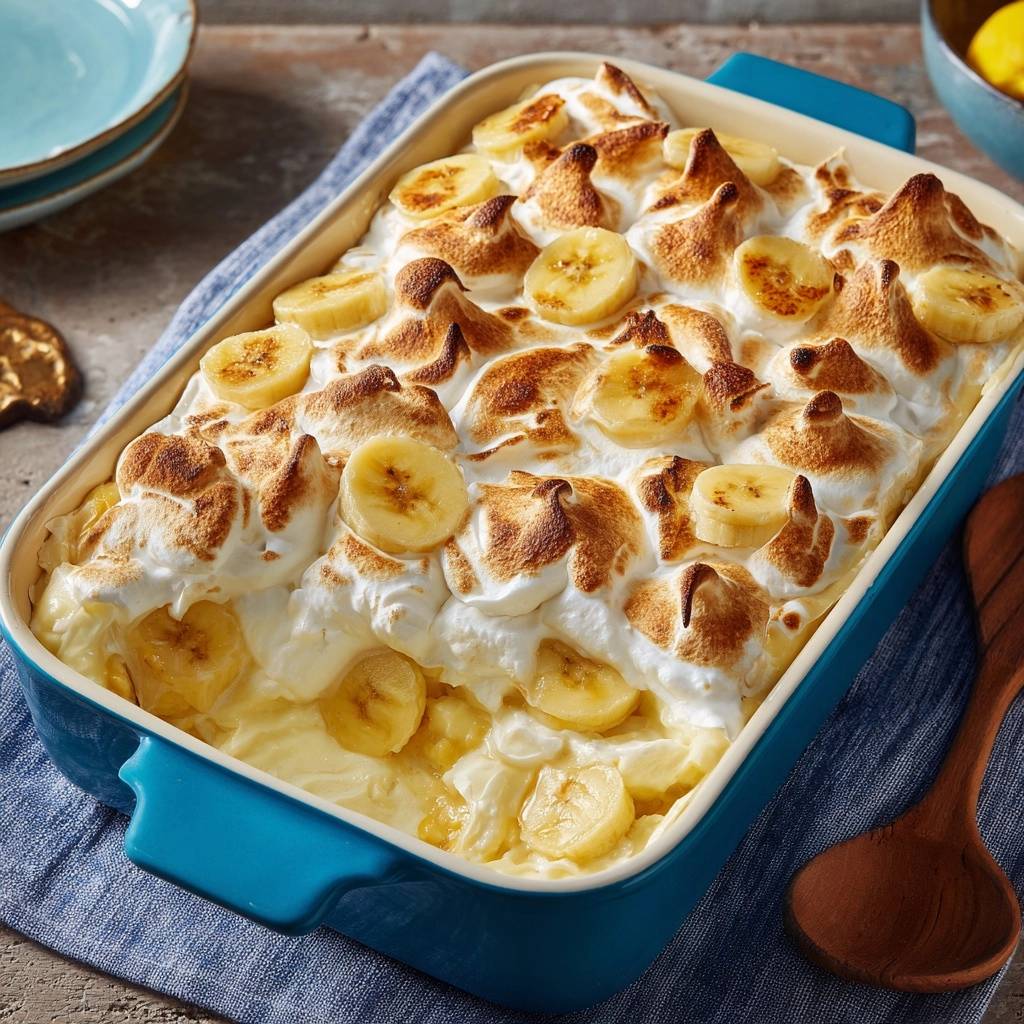
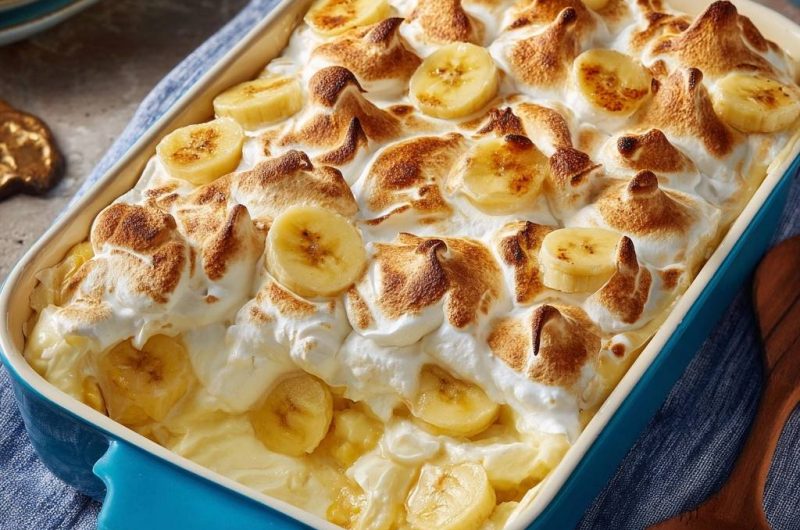
Southern Meringue Banana Pudding is the undisputed crown jewel of church potlucks and Sunday dinners. While many modern versions rely on instant mixes and whipped topping, the authentic classic is a labor of love built on a foundation of warm, cooked custard. It’s a dish defined by the contrast between the cloud-like, toasted meringue and the rich, velvety layers of vanilla cream and fruit.
Choosing the traditional “cooked” method over a shortcut isn’t just about nostalgia; it’s about structural integrity. A homemade custard provides a depth of flavor that boxed puddings simply can’t replicate. When you pull this dish from the oven, the aroma of toasted sugar and warm vanilla fills the kitchen, signaling a dessert that’s as much about the sensory experience as it is about the taste.
The secret to this “Anti-Soggy” version lies in the temperature management during assembly. Most people make the mistake of letting their components cool separately, which leads to a watery mess. By following this specific technique, you’ll ensure your pudding stays thick, your cookies stay cake-like, and your meringue never slides off the top. It’s the definitive way to honor this Southern staple.
Defining the Anti-Soggy Bottom Technique
Nothing ruins a beautiful dessert faster than a watery, soggy base that turns into mush overnight. This “weeping” usually happens when moisture from the bananas and the meringue seeps into the custard. To fight this, we use the physics of heat to our advantage by assembling the dish while the custard is still steaming hot.
When you spread fresh meringue over boiling-hot custard, the heat from below begins to “cook” the bottom of the meringue immediately. This creates a structural bond, or a moisture barrier, that prevents the layers from separating. Instead of a runny, spoonable soup, you end up with a stable, sliceable dessert that holds its shape on the plate.
This strategy prioritizes a clean, distinct layering system. By sealing the edges of the dish with the meringue while the base is hot, you trap the steam. This steam helps the vanilla wafers soften into a perfect, cake-like texture without losing their identity or becoming a saturated pile of crumbs.
Essential Components for a Stable Custard Base
The custard is the heart of this dish, and every ingredient plays a specific role in its stability. We use all-purpose flour as our primary thickener because it provides a more resilient set than cornstarch. While cornstarch can break down and become watery if over-stirred or stored too long, flour maintains a sturdy, creamy body over several days.
Whole milk is non-negotiable here because the fat content is vital for a luxurious mouthfeel. If you use skim or low-fat milk, the custard will lack the necessary richness to stand up to the sweet meringue. The fat also helps carry the flavor of the vanilla extract, ensuring every bite is aromatic and deep.
Finally, we finish the custard with two tablespoons of unsalted butter. Stirring this in at the very end creates a “velvet” finish and adds a subtle sheen to the cream. It acts as an emulsifier, smoothing out the texture and providing a professional, glossy look that sets this recipe apart from basic puddings.
Selecting the Right Bananas for Texture
Ripeness is everything when it comes to the fruit layer. You want “cheetah-spotted” bananas—yellow with small brown flecks—because they offer the perfect balance of sugar and starch. They are sweet enough to flavor the pudding but firm enough to hold their shape between the layers of cream.
Avoid using solid black, overripe bananas for this specific recipe. While they are great for banana bread, they contain too much liquid and will release excess moisture into your custard. This extra water is a primary cause of the dreaded “soggy bottom” that we are trying to avoid.
The Role of the Vanilla Wafer
Vanilla wafers act as the structural “sponge” of the pudding. As the hot custard sits on the cookies, they absorb just enough moisture to transform from a crunchy cracker into a soft, tender crumb. This creates a texture similar to a trifle or a layered sponge cake.
If you use cold pudding, the cookies stay too hard; if the pudding is too thin, they turn to mush. The “Anti-Soggy” method hits the sweet spot. It ensures the wafers are softened by the heat but protected by the thickness of the flour-based custard.
For the best results with the vanilla wafer layer, follow the same build order in this creamy banana meringue pudding.
Mastering the Tempering Process
Tempering is the most technical part of the recipe, but it’s the key to a smooth, lump-free result. If you dump cold egg yolks directly into a pot of boiling milk, they will scramble instantly. To prevent this, you must slowly introduce the heat to the eggs to raise their temperature gradually.
Start by whisking about half a cup of the hot milk mixture into your beaten yolks in a separate bowl. Whisk vigorously as you pour the hot liquid in a thin, steady stream. Once the yolk mixture feels warm to the touch, you can safely pour it back into the main saucepan without fear of making “egg drop” pudding.
Look for the “ribbon stage” as the custard finishes cooking. When you lift your spoon, the custard should fall back into the pot in a thick, slow ribbon that holds its shape for a second before disappearing. If you do happen to get a few small lumps, simply pour the finished custard through a fine-mesh sieve for a perfectly silky texture.
Building the Layers for Maximum Structural Integrity
Assembly is a race against the clock because you need that heat. Start with a very dense layer of vanilla wafers at the bottom of your dish, leaving no large gaps. This base layer acts as the foundation for the entire dessert, so make sure it’s solid and even.
When adding the bananas, use a “shingling” technique where the slices slightly overlap. This ensures that every single spoonful contains a piece of fruit. Pour half of the steaming custard over the first layers, then repeat the process immediately to keep the internal temperature as high as possible.
The “Hot Assembly” rule is the most important step for a successful meringue. You want to see steam rising from the dish as you begin topping it. This heat is what will anchor the meringue to the pudding, preventing it from sliding around or “floating” once it’s chilled.
The Chemistry of a Stable Meringue
Meringue is essentially a foam made of trapped air bubbles held together by egg white proteins. To get the best volume, you must use a clean glass or metal bowl. Plastic bowls often retain microscopic traces of oil, which act as an enemy to egg whites and will prevent them from ever reaching stiff peaks.
Cream of tartar is your secret weapon for stability. It’s an acid that lowers the pH of the egg whites, making the protein bonds stronger and more flexible. This prevents the meringue from collapsing under its own weight or “beading” (forming little sugar droplets) while it sits in the refrigerator.
Always use room temperature egg whites for the best results. Cold whites are more stable but take much longer to whip and won’t reach the same impressive height. Giving them 30 minutes on the counter before you start whisking makes a world of difference in the final fluffiness.
Achieving Stiff, Glossy Peaks
Start beating your egg whites on medium speed until they become foamy and white. Once you reach “soft peaks”—where the tips curl over like a wave when you lift the beaters—it’s time to add the sugar. Do not rush this part or your meringue will be gritty.
Add the sugar one tablespoon at a time, beating for about 30 seconds between each addition. This ensures the sugar crystals fully dissolve into the protein structure. Keep going until the peaks stand straight up and look as shiny as patent leather; this is the “stiff, glossy” stage you’re looking for.
Sealing the Edges to Prevent Shrinkage
When you spread the meringue over the hot pudding, don’t just pile it in the center. Use a spatula to push the meringue all the way to the very edges of the baking dish. It needs to touch the glass or ceramic sides to create an “anchor.”
For a silky, creamy dessert with a completely different base, try this creamy pomegranate nut rice pudding.
This physical connection to the sides of the dish prevents the meringue from shrinking as it cools. If you don’t seal the edges, the meringue will pull away from the sides, leaving a gap where moisture can collect. A proper seal keeps the pudding protected and the presentation beautiful.
Precision Finishing: Broiling vs. Baking
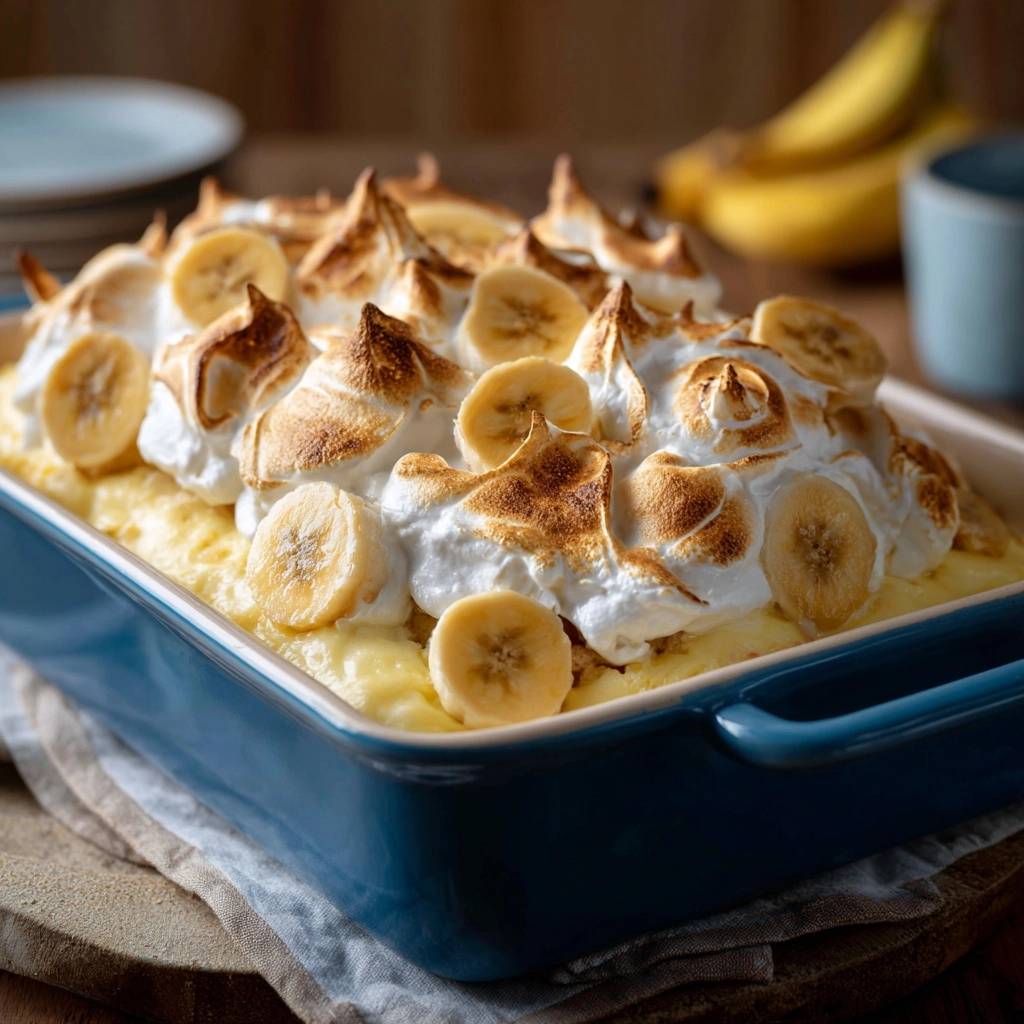
While you can bake the meringue at 400°F for a few minutes, the broiler is the superior tool for a professional look. The intense, direct heat creates a high-contrast finish, deeply toasting the tips of the peaks while leaving the valleys snowy white. This creates a stunning visual that looks like it came from a high-end bakery.
However, the broiler requires 100% of your attention. The sugar in the meringue can go from perfectly golden to burnt in a matter of seconds. Keep the oven door cracked and watch it the entire time. You are looking for the Maillard reaction to turn those peaks a rich, toasted brown.
For a signature finish, nestle a few fresh banana slices into the valleys of the meringue after browning. This adds a pop of color and hints at the delicious fruit hidden underneath. It’s a small touch that makes the dish look as good as it tastes.
The Critical Cooling and Setting Phase
I know it’s tempting to dive in while it’s warm, but you absolutely cannot eat this pudding right away. The starch molecules in the flour need time to “set” and create a firm structure. If you cut into it too early, the custard will run everywhere and the layers will collapse.
Let the dish sit on a wire rack at room temperature for exactly one hour. This slow initial cooling prevents condensation from forming under the meringue. After that, move it to the refrigerator for at least four hours. This is when the magic happens and the flavors of the vanilla and banana truly permeate the wafers.
During this chilling window, the wafers reach that perfect cake-like consistency. The custard becomes thick and sliceable, and the meringue firms up. Patience is the final ingredient that turns a good pudding into a legendary Southern dessert.
Troubleshooting Common Pudding Pitfalls
If your meringue “weeps” or leaks a sugary syrup, it’s usually because the sugar wasn’t fully dissolved or the custard wasn’t hot enough during assembly. Next time, try adding the sugar even more slowly and ensure you are topping the pudding while it’s still steaming. This creates the necessary bond to hold the moisture in place.
A runny custard after chilling usually means it wasn’t cooked long enough on the stove. You must see the mixture bubble and then cook it for an additional two minutes after adding the yolks. This ensures the flour and eggs are fully activated as thickeners. If it’s already cold and runny, you can’t fix it, but it will still taste great as a “spoonable” dessert!
To prevent a “skin” from forming on the custard, make sure your meringue covers every square inch of the surface. If you are making the custard ahead of time without meringue, press a piece of plastic wrap directly onto the surface of the hot cream. This stops the air from drying out the top layer.
If your cookies turned to mush, your custard might have been too thin or you used overripe bananas. The starch in the flour is what keeps the moisture in check. Ensure you measure your flour accurately using the “spoon and level” method to get the right thickness every time.
Make-Ahead Strategies and Storage
This pudding is best served the day it is made, but it will stay delicious in the refrigerator for up to three days. Keep it uncovered or very loosely tented with foil to prevent the meringue from becoming sticky. After the first day, the meringue may lose some of its crispness, but the flavor of the pudding actually improves as it sits.
What to Serve with Banana Pudding
If you’re serving this creamy Southern banana pudding, consider adding another sweet treat that shares its comforting, oven-baked warmth.
- Pair it with Gooey Cinnamon Rolls with Heavy Cream Secret for a soft, caramelized contrast to
Do not attempt to freeze this dish. The cell structure of the bananas will break down upon thawing, turning them into grey mush. Additionally, the meringue will collapse and become a watery mess. This is a fresh dessert meant to be enjoyed within a few days of baking.
If your meringue starts to look a little “beaded” or wet after a day in the fridge, you can sometimes refresh it. A very quick pass with a kitchen torch can crisp up the exterior again, though it won’t fix any internal weeping. It’s always best to serve it within 24 hours for the peak sensory experience.
Expert Tips for Professional Presentation
For a truly impressive “beehive” look, use a piping bag with a large round tip to apply the meringue. Instead of spreading it flat, pipe large mounds or “kisses” all over the top of the hot pudding. This creates more surface area for browning and looks much more sophisticated than a simple spread.
If you want total control over the browning, use a handheld kitchen torch instead of the broiler. This allows you to brown the sides and peaks with precision without heating up the rest of the dish. It’s a great way to get that “charred” look while keeping the custard underneath perfectly chilled.
Finally, consider serving this in a clear glass trifle bowl or a glass baking dish. The beauty of Southern Banana Pudding is in the visible layers of golden wafers, pale yellow bananas, and rich cream. Seeing those distinct levels through the glass builds anticipation before the first bite is even taken.
How do I store leftovers?
Store your pudding in the refrigerator for up to 3 days. It is best to leave it uncovered or very loosely covered with a tent of foil. Do not use plastic wrap directly on the meringue, as it will stick and ruin the beautiful peaks. Note that the bananas may begin to brown slightly after 24 hours, but they are still perfectly safe and delicious to eat.
Why did my meringue pull away from the sides of the dish?
This is called shrinkage, and it happens when the meringue isn’t properly “anchored.” When you spread the meringue over the hot pudding, you must make sure it touches the glass or ceramic edges of the baking dish all the way around. This creates a physical bond that holds the meringue in place as it cools and prevents it from sliding toward the center.
Can I use gluten-free flour for the custard?
Yes, you can substitute a 1:1 gluten-free all-purpose flour blend for the custard thickener. However, avoid using almond or coconut flour, as they do not have the starch content required to thicken the milk into a stable custard. The texture may be slightly different, but a high-quality starch-based GF blend works well.
What if I don’t have cream of tartar?
If you don’t have cream of tartar, you can substitute it with an equal amount of white vinegar or lemon juice. The acid is necessary to stabilize the egg white proteins. While the liquid acids work, cream of tartar is preferred because it doesn’t add any extra moisture to the foam, resulting in a slightly more stable meringue.
Why is my pudding watery at the bottom?
Watery pudding is usually caused by using bananas that are too ripe or by letting the custard cool before adding the meringue. Overripe bananas release liquid as they sit in the sugar-heavy custard. Additionally, if the custard is cold when the meringue is added, the meringue will “weep” and create a layer of sugar water at the bottom of the dish.
Can I use a hand mixer for the meringue?
Absolutely! A hand mixer works perfectly for whipping egg whites. Just be sure your beaters are completely clean and free of any grease or oil. Start on a low speed until the whites are foamy, then increase to high speed as you gradually add the sugar to ensure you reach those stiff, glossy peaks.
Banana Pudding
Course: DessertCuisine: AmericanDifficulty: mediumYields8
servingsPrep Time25
minutesCook Time15
minutesCalories420
kcalTotal Time40
MinutesThis recipe solves the common problem of watery banana pudding by sealing hot custard with a fresh meringue. Layered with vanilla wafers and ripe bananas, it results in a thick, creamy dessert with a perfectly toasted topping.
Ingredients
3/4 cup granulated sugar
1/3 cup all-purpose flour
1/4 teaspoon salt
4 large egg yolks, beaten (save whites for meringue)
2 1/2 cups whole milk
1 1/2 teaspoons vanilla extract
2 tablespoons unsalted butter
1 box (11 oz) vanilla wafer cookies
5 large ripe bananas, sliced
4 large egg whites, room temperature
1/2 teaspoon cream of tartar
1/2 cup granulated sugar (for meringue)
Directions
- In a medium saucepan, whisk together 3/4 cup sugar, flour, and salt. Gradually whisk in the milk until smooth and no lumps remain.
- Cook over medium heat, stirring constantly with a whisk or wooden spoon, until the mixture thickens and begins to bubble.
- Temper the egg yolks by slowly whisking about 1/2 cup of the hot milk mixture into the yolks. Pour the warmed yolk mixture back into the saucepan. Cook for 2 more minutes while stirring constantly to ensure a thick, velvety custard.
- Remove from heat and stir in the butter and vanilla extract until fully incorporated.
- To prevent a soggy bottom, immediately layer vanilla wafers in the bottom of an 8×8 or 9×9 inch baking dish. Top with a generous layer of sliced bananas and half of the hot custard. Repeat the layers once more, ending with custard.
- While the custard is still steaming hot, prepare the meringue. In a clean glass or metal bowl, beat the egg whites and cream of tartar until soft peaks form. Gradually add 1/2 cup sugar, one tablespoon at a time, beating on high speed until stiff, glossy peaks form.
- Transfer the meringue to a piping bag with a large round tip (or use a spoon) to create the distinct, high peaks shown in the image. Spread or pipe the meringue over the hot pudding immediately, making sure to seal it all the way to the edges of the dish.
- Nestle fresh banana slices into the valleys of the meringue peaks for the signature visual finish.
- Place the dish under a broiler for 1-3 minutes, watching very closely, until the tips of the meringue are deeply toasted and golden brown. (Alternatively, bake at 400°F for 5 minutes, but the broiler achieves the specific high-contrast char seen in the image).
- Let the pudding cool on a wire rack for 1 hour, then refrigerate for at least 4 hours. This allows the custard to set firmly and the flavors to meld without the cookies becoming overly saturated.
Notes
- To prevent weeping, ensure the meringue is spread over the custard while it is still steaming hot. Sealing the meringue to the edges of the dish is crucial for stability.