Mastering the Dark Chocolate Pistachio Mousse Parfait
Imagine plunging your spoon into a cloud of rich, bittersweet cocoa followed by a layer of earthy, salted nut cream that feels like pure silk. Most people avoid making mousse at home because they’re tired of ending up with a gritty, separated mess that looks more like curdled milk than a high-end dessert. You deserve a treat that actually delivers on that promise of a velvet-smooth finish.
The secret to this Dark Chocolate Pistachio Mousse Parfait isn’t just in the ingredients; it’s in the physics of the emulsion. We’re ditching the standard “stir and hope” method for a specific temperature-tempering technique that ensures your chocolate stays fluid and your pistachio cream stays light. By controlling the fat stabilization, you’ll create a dessert that holds its shape while melting instantly on your tongue.
I’ve found that the biggest mistake home cooks make is using chocolate that’s either too hot or too cold when folding. If it’s over 100°F, it’ll deflate your whipped cream into a puddle; if it’s under 85°F, you’ll get waxy little lumps. Aim for exactly 90°F—it’s the “Goldilocks” temperature where the chocolate is liquid enough to blend but cool enough to keep the air bubbles intact.
The Science of Achieving Velvet Texture
Creating a stable mousse is essentially a lesson in chemistry. When you melt dark chocolate, you’re working with cocoa butter, which is a very stable fat at room temperature. However, the moment that fat hits the cold water content in heavy cream, it wants to solidify. If you don’t introduce the two elements gradually, the chocolate “seizes,” turning into those frustrating grains that ruin the mouthfeel.
Heavy whipping cream acts as your structural scaffold here. You need a minimum of 36% milk fat to ensure the air bubbles you beat into the liquid stay trapped. These fat globules surround the air, creating a foam that can support the weight of the dense chocolate ganache. Without that high fat content, your mousse will collapse under its own weight within minutes of assembly.
Pistachios present their own challenge because they contain fibrous plant matter. If you just chop them, you’re left with a sandy texture. By processing them until their natural oils release, you create a fluid paste. These oils actually help stabilize the mousse further, acting as an emulsifier that bridges the gap between the airy cream and the solid nut particles.
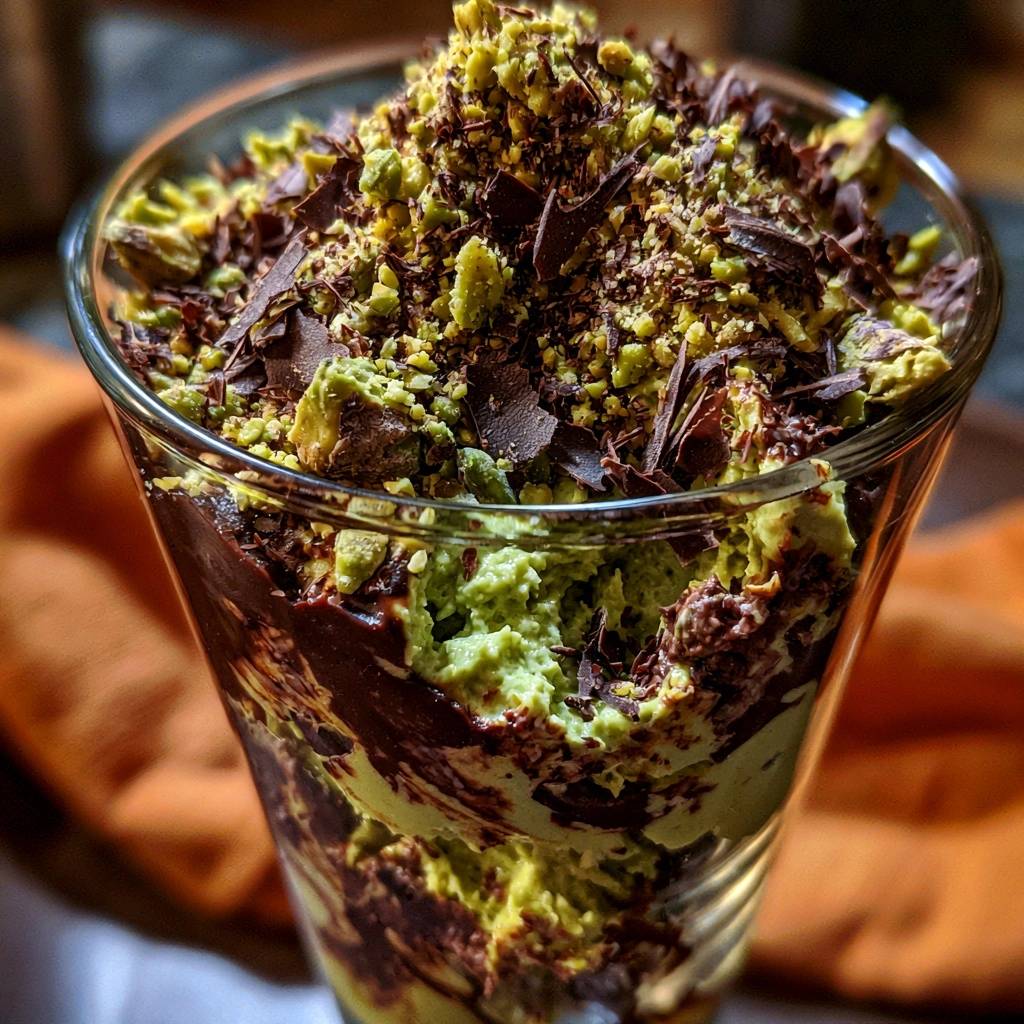
Essential Components for Dark Chocolate Pistachio Mousse Parfait
Quality is everything when you only have a handful of ingredients. For the chocolate, look for a cacao percentage between 60% and 70%. This range provides a sophisticated bitterness that cuts through the richness of the cream. If you go higher than 70%, the chocolate becomes too brittle and difficult to temper; if you go lower, the dessert becomes cloyingly sweet and loses its “dark” character.
Your pistachios must be roasted but unsalted. Roasting deepens the flavor, giving it a toasted, savory edge that pairs beautifully with dark cocoa. If you use raw nuts, the flavor will be too “green” and grassy. I always recommend using powdered sugar instead of granulated sugar. Powdered sugar contains a tiny bit of cornstarch which helps stabilize the peaks, and it dissolves instantly, ensuring there’s zero grit in the final bite.
Don’t skip the vanilla extract, even though this is a chocolate and nut dish. Vanilla acts as a flavor enhancer, much like salt does in savory cooking. It rounds out the sharp edges of the dark chocolate and makes the pistachio flavor pop. Use a high-quality bean paste or extract rather than imitation flavoring for the best results.
Selecting the Right Dark Chocolate
If you can find it, use couverture chocolate. This type of chocolate contains a higher percentage of cocoa butter than standard grocery store baking bars. The extra fat means it melts more fluidly and creates a much glossier ganache. Standard bars often contain more lecithin and stabilizers, which can sometimes make the mousse feel slightly “tacky” on the roof of your mouth.
The Role of High-Speed Blending
A standard food processor is great for pesto, but for a professional mousse, you really need a high-speed blender. The goal is to pulverize the pistachio skins until they are microscopic. If you see any flecks of brown or dark green, keep blending. Passing the final paste through a fine-mesh sieve is the “pro move” that separates a good home cook from a pastry chef.
Step-by-Step: Crafting the Ultra-Smooth Pistachio Base
Start by tossing your pistachios into the blender with the milk and a touch of sugar. At first, it’ll look like coarse sand. Don’t panic and add more liquid! Keep processing for the full 3 to 5 minutes. You’ll watch it transform from a dry meal into a thick clump, and finally into a glossy, pourable butter as the nuts release their internal oils.
Once the paste is liquid, let it sit for a few minutes. The friction from the blender blades actually heats the paste up quite a bit. If you fold hot pistachio butter directly into your whipped cream, the cream will melt instantly. You want it to be room temperature before it ever touches the dairy.
Temperature Control: Melting the Dark Chocolate Ganache
When you pour that hot cream over your chopped chocolate, resist the urge to stir immediately. Let it sit for a full minute. This allows the heat to penetrate the center of the chocolate pieces evenly. When you finally whisk it, start from the center and work your way out in small circles until the mixture is glossy and streak-free.
Now comes the “90°F Rule.” If you don’t have a kitchen thermometer, test a drop on your bottom lip. It should feel neither hot nor cold. If it feels warm, wait another two minutes. If it starts to feel thick and resistant, it’s getting too cold, and you should briefly place the bowl over a pot of steaming water for five seconds to loosen it back up.
Aeration Techniques for a Stable Mousse
Folding is a specific movement, not just stirring. Use a wide silicone spatula. Cut through the center of the bowl, scrape along the bottom, and flip the mixture over the top. This preserves the millions of tiny air bubbles you worked so hard to beat into the cream. If you stir vigorously, you’ll pop those bubbles and end up with a dense chocolate pudding instead of a light mousse.
Always use the “One-Third Rule.” Take a small scoop of your whipped cream and stir it into the heavy chocolate ganache. Don’t worry about being gentle here; you’re just trying to “lighten” the chocolate so its density matches the rest of the cream. Once that first bit is combined, you can gently fold in the rest without losing your loft.
Assembling the Dark Chocolate Pistachio Mousse Parfait Layers
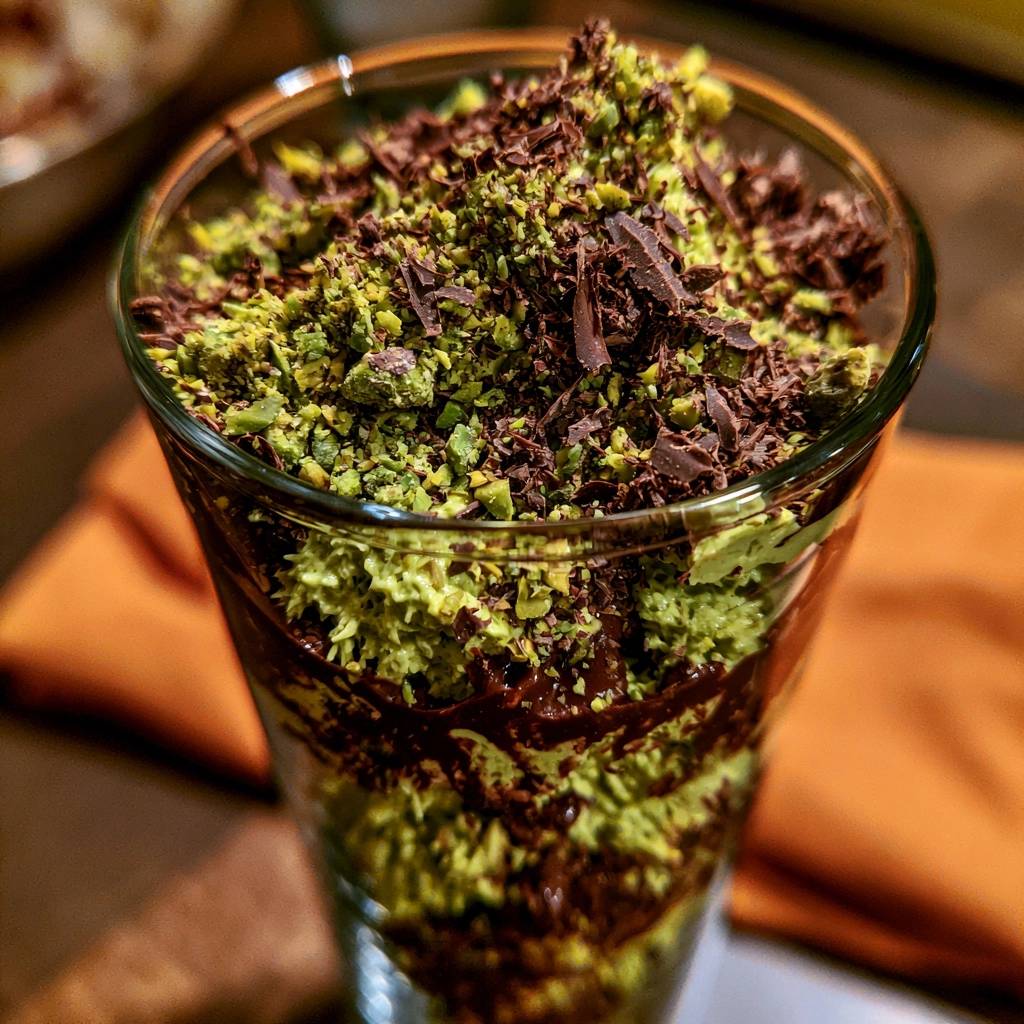
For the cleanest look, use piping bags to fill your glasses. If you spoon the mousse in, you’ll likely get smudges on the sides of the glass that hide the beautiful color contrast. Start with the dark chocolate, then the pistachio, and repeat. I like to give the glass a gentle tap on the counter after each layer to remove any large air pockets.
If you want a more “rustic” look, you can use a long spoon to lightly swirl the edges where the two colors meet. Just be careful not to over-mix, or you’ll lose the distinct green and brown layers. The visual appeal of this dish comes from that sharp contrast between the deep cocoa and the pale, minty green of the pistachio.
Troubleshooting Common Mousse Failures
If your mousse looks like a “greasy mess,” you likely over-whipped the cream before adding the chocolate. Once cream passes the stiff peak stage, the fat begins to clump into butter. If this happens, you can sometimes save it by whisking in a tablespoon of cold, un-whipped heavy cream to smooth it back out.
Waxy lumps usually mean your chocolate was too cold when you added the cream. The cold dairy caused the cocoa butter to snap back into a solid state instantly. To fix this, you can place the entire bowl over a warm water bath and whisk gently until the lumps melt, though you will lose some of the airy texture.
Fixing a Grainy Pistachio Paste
If your blender is struggling and the paste remains gritty, add a single teaspoon of a neutral oil like grapeseed or avocado oil. This provides just enough lubrication to help the blades catch the nuts. Don’t add more milk, as too much water-based liquid can cause the nut oils to separate and become clumpy.
Rescuing Seized Chocolate
If a drop of water accidentally gets into your melting chocolate and it turns into a dry, crumbly paste, don’t throw it away! Paradoxically, adding more liquid is the fix. Whisk in a tablespoon of boiling water or very hot cream. This will dissolve the sugar and cocoa particles that have clumped together, restoring the smooth flow.
Make-Ahead Strategy and Stabilization Time
You might be tempted to eat this immediately, but it needs at least two hours in the fridge. This isn’t just about temperature; it’s about the fats. The cocoa butter and milk fat need time to “set” and form a solid structure. A chilled mousse has a much cleaner break when you put a spoon through it compared to a room-temperature one.
You can easily make these 24 hours in advance. In fact, the pistachio flavor often deepens after a night in the fridge. Just make sure to cover the tops tightly with plastic wrap. Mousse is mostly fat and air, which means it acts like a sponge for “fridge smells” like onions or leftovers if left uncovered.
Expert Tips for Professional Presentation
The topping is what takes this from a home dessert to a restaurant-quality dish. I like to crush the extra pistachios into two different sizes. Some should be a fine dust that coats the surface, while others should be larger “pebbles” for crunch. This contrast in textures makes every bite interesting.
Choose your glassware wisely. Tall, narrow glasses like sparkling grape juice flutes or small juice glasses show off the layers best. Since this is a very rich dessert, a smaller, elegant portion is usually more satisfying than a large bowl. The dark chocolate shavings on top add a final hit of intense cocoa that prepares the palate for the richness below.
Frequently Asked Questions
Can I use white chocolate instead of dark?
You can, but you’ll need to adjust the ratios. White chocolate contains no cocoa solids and much more sugar and fat. It is significantly softer than dark chocolate. To get a stable white chocolate mousse, you should reduce the amount of heavy cream used in the ganache by about 25%, or the layers will be too runny to stack.
Why is my pistachio mousse turning brown?
This is usually caused by oxidation or using older nuts. Pistachios lose their vibrant green color when exposed to air for too long. To keep the color bright, ensure you are using fresh nuts and get the mousse into the refrigerator as soon as it’s whipped. Some chefs add a tiny drop of natural green food coloring, but a high-speed blender usually extracts enough chlorophyll from the skins to keep it naturally green.
How long will the parfaits stay fresh in the fridge?
These parfaits are best enjoyed within 2 to 3 days. After that, the whipped cream begins to lose its structure and may start to “weep” liquid at the bottom of the glass. Always keep them tightly covered with plastic wrap to prevent the surface from developing a dry skin or absorbing other flavors from your refrigerator.
Is there a dairy-free alternative for this specific method?
Yes, you can substitute the heavy cream with full-fat coconut cream. You must chill the coconut milk cans overnight and only use the thick, waxy cream that rises to the top. Follow the same folding instructions, but be aware that coconut cream melts at a lower temperature than dairy, so keep the parfaits very cold until the moment you serve them.
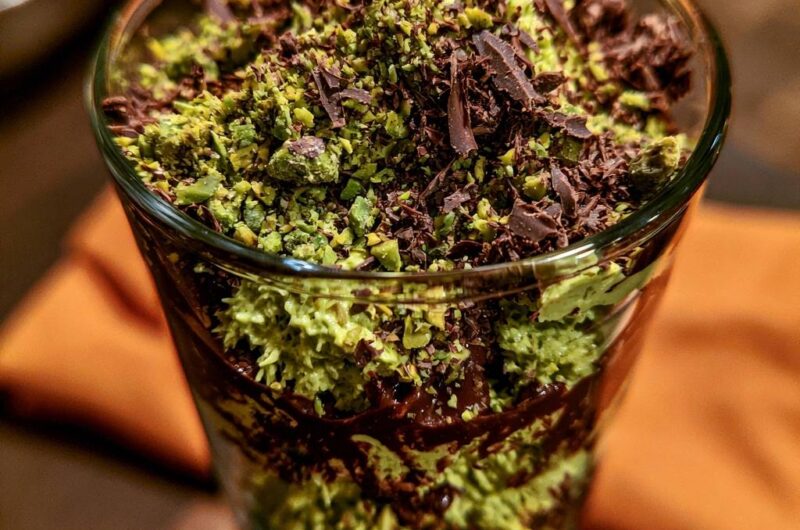
Dark Chocolate Pistachio Mousse Parfait
Course: DessertCuisine: French and American FusionDifficulty: easy4
servings25
minutes5
minutes30
Minutes410
kcalFrench and American Fusion
Ingredients
1 1/2 cups heavy whipping cream, divided and chilled
6 ounces high-quality dark chocolate (60-70% cacao), finely chopped
1/2 cup shelled pistachios, roasted and unsalted (plus 2 tbsp for topping)
3 tablespoons powdered sugar, divided
1 teaspoon vanilla extract
2 tablespoons whole milk
1/4 cup dark chocolate shavings (for topping)
Directions
- Create the Smooth Pistachio Base: To solve the grainy texture issue, place 1/2 cup pistachios in a high-speed blender or food processor with the milk and 1 tablespoon of powdered sugar. Process for 3 to 5 minutes, scraping down the sides, until it forms a completely liquid, buttery paste. For a professional, ultra-vibrant green finish, pass this paste through a fine-mesh sieve to remove any remaining microscopic skin fragments.
- Melt the Chocolate: Place the chopped dark chocolate in a heat-proof bowl. In a small saucepan, heat 1/4 cup of the heavy cream until it just begins to simmer. Pour the hot cream over the chocolate and let sit for 1 minute, then whisk until a glossy ganache forms. Let it cool until it is just barely warm to the touch (about 90°F). This is the secret: if the chocolate is too hot, it will deflate the cream; if it is too cold, it will create hard, waxy lumps.
- Whip the Cream: In a separate chilled bowl, beat the remaining 1 1/4 cups heavy cream, the remaining 2 tablespoons of powdered sugar, and vanilla extract until medium-firm peaks form.
- Incorporate the Chocolate: Gently fold one-third of the whipped cream into the cooled chocolate ganache to lighten it. Once combined, fold this mixture back into half of the remaining whipped cream. This creates the dark chocolate mousse layer.
- Incorporate the Pistachio: Fold the ultra-smooth pistachio paste into the remaining half of the whipped cream until fully incorporated and a uniform pale green color is achieved.
- Layer the Parfait: To match the visual depth of the image, use a spoon or piping bag to alternate layers of the dark chocolate mousse and the pistachio mousse into tall glasses. Ensure the layers are distinct but slightly swirled at the edges.
- The Professional Topping: Finely crush the extra 2 tablespoons of pistachios until they are a mix of dust and small pebbles. Combine with the chocolate shavings. Apply a thick, generous layer of this mixture to the top of each glass, covering the mousse entirely. Chill for at least 2 hours before serving to allow the fats to stabilize for a perfect, non-grainy set.
Notes
- To ensure the smoothest texture, pass the pistachio paste through a fine-mesh sieve and ensure the chocolate ganache cools to approximately 90 degrees Fahrenheit before folding in the whipped cream.