Mastering Bakery Style Chocolate Chunk Cookies with the Pan-Banging Technique
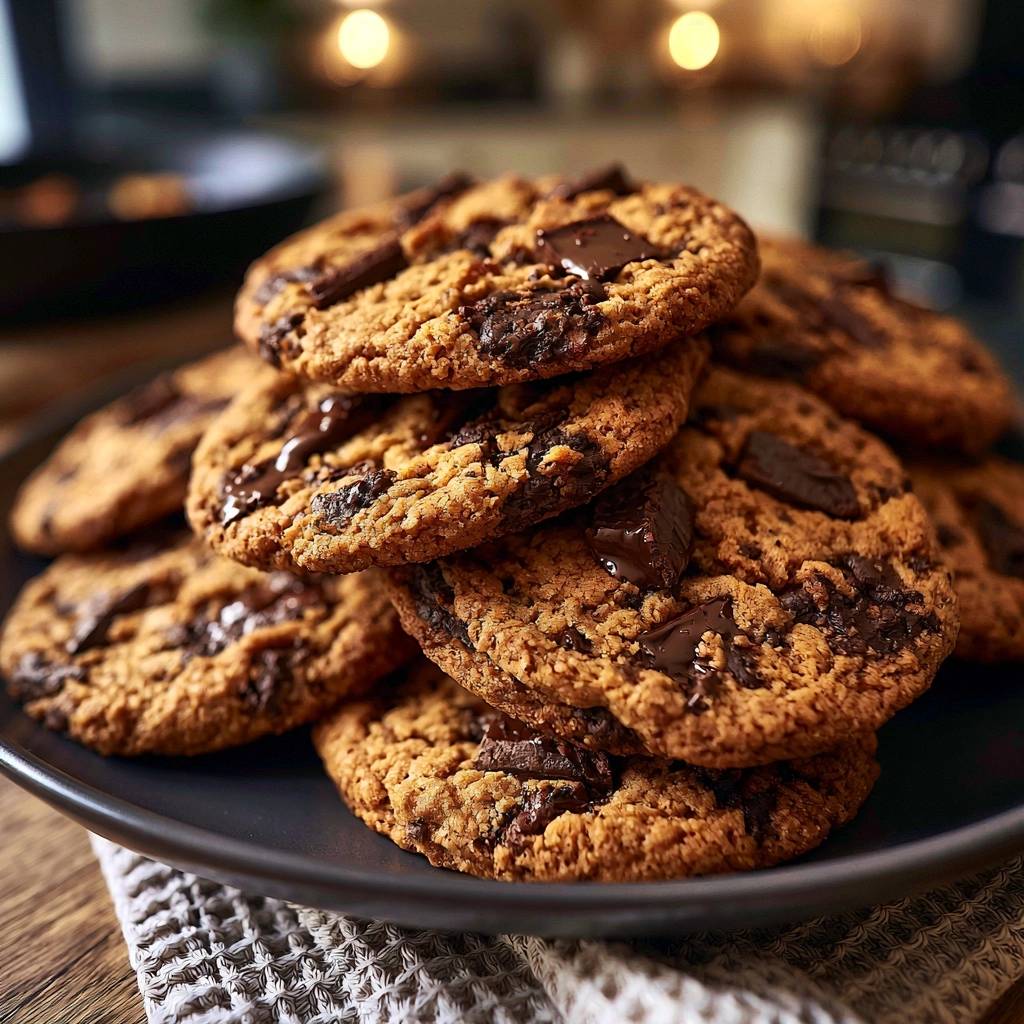
Imagine biting into a cookie that shatters with a crisp, golden-brown edge before giving way to a center so soft it borders on fudge. This isn’t the soft, cakey mound you find at a grocery store; it’s the sophisticated, rippled masterpiece found in high-end urban pastry shops. The secret to this professional texture lies in the “Anti-Soggy Bottom” philosophy, which prioritizes a sturdy, caramelized base over the greasy, limp underside that plagues most home-baked batches.
Most cookies fail because they rely on too much moisture or improper fat management, leading to a “steamed” rather than “baked” texture. By controlling the water content and using specific mechanical movements during the bake, we create those iconic concentric ripples that look as good as they taste. It’s about engineering a cookie that maintains its structural integrity while delivering a massive hit of molten chocolate.
The real game-changer here is the temperature of your ingredients. While many recipes call for softened butter, we’re taking it a step further by browning it to remove excess water. This ensures the dough stays dense and rich rather than puffing up like a muffin. If you’ve ever wondered why your cookies spread into a single giant puddle, it’s usually a lack of temperature control or improper fat-to-flour ratios.
The Maillard Reaction: Why Browned Butter Changes Everything
When you melt butter and continue to cook it, you’re initiating the Maillard reaction. This chemical process evaporates the water content—which usually makes up about 15% of American butter—and toasts the remaining milk solids. The result is a liquid gold known as beurre noisette, which provides a deep, nutty aroma that masks the raw, metallic taste of flour.
Using 100% butterfat instead of creamed, aerated butter completely changes the cookie’s “snap.” Traditional creaming methods trap air, leading to a fluffy, cake-like crumb. Browned butter, however, creates a dense, chewy environment that allows the sugars to caramelize more effectively. This concentrated flavor profile is the foundation of any true bakery-style treat, offering a complexity that plain butter simply cannot match.
Essential Components for Bakery Style Chocolate Chunk Cookies
Every ingredient in this recipe serves a specific structural purpose. Dark brown sugar is non-negotiable because it contains more molasses than its light counterpart. This makes it hygroscopic, meaning it pulls moisture from the air to keep the cookie centers chewy for days. Without it, you lose that essential “bend” in the middle of the cookie.
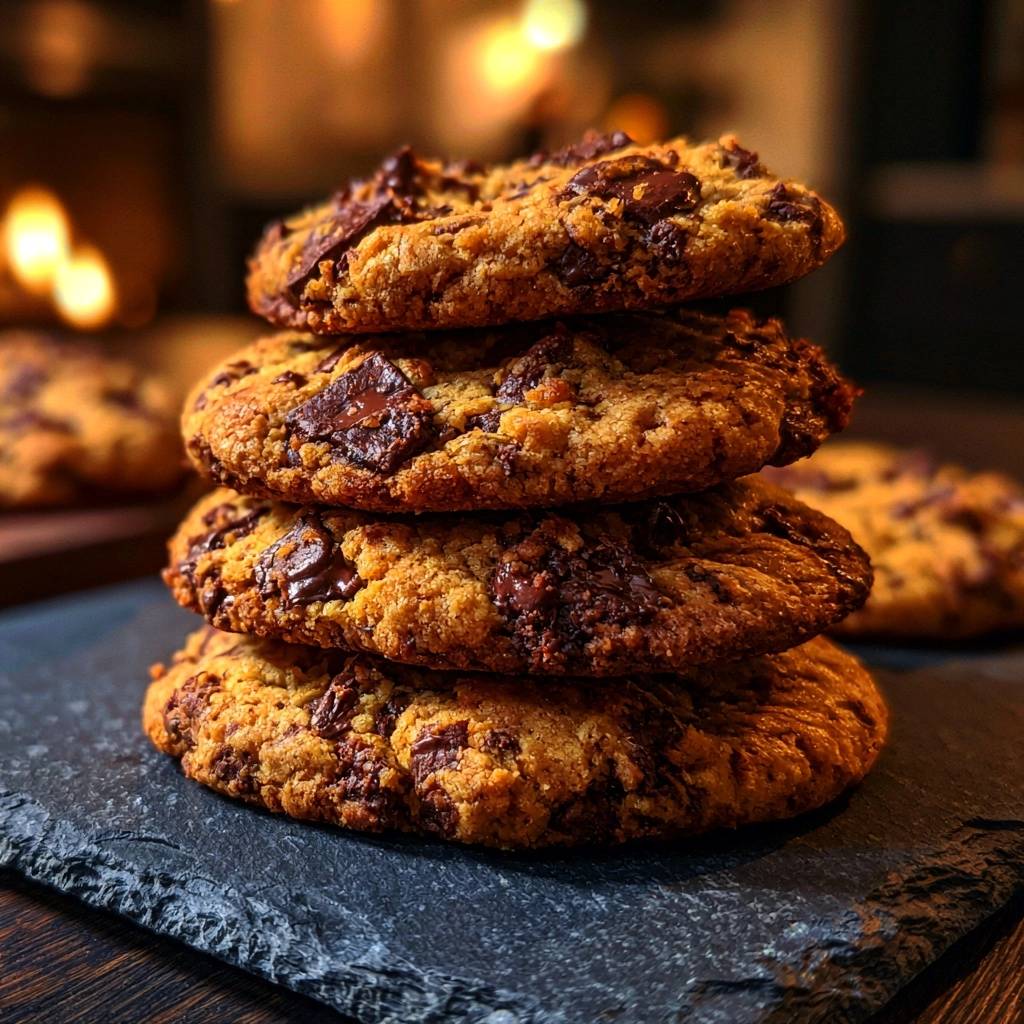
The addition of an extra egg yolk is another professional secret. While the whole egg provides structure, the extra yolk adds pure fat and lecithin. This emulsifies the dough without the drying effect of an extra egg white, which can often make cookies feel tough or “bready.” It’s the difference between a standard snack and a rich, decadent dessert.
Finally, ditch the stabilized chocolate chips. Chips are designed to hold their shape and contain less cocoa butter, which results in a waxy mouthfeel. High-quality dark chocolate bars, hand-chopped into uneven chunks, are the way to go. These chunks melt into pools of liquid silk, creating “chocolate veins” throughout the dough that ensure every bite is loaded with flavor.
Selecting the Right Flour and Leavening Agents
All-purpose flour is the workhorse here because it sits at a 10-12% protein content. This provides enough gluten to support those heavy chocolate chunks without making the cookie feel like a piece of sourdough. We use baking soda specifically because it encourages browning and reacts with the acidic molasses in the brown sugar. This creates a craggy rise that eventually collapses into those beautiful ripples.
The Importance of Salt and Vanilla Ratios
Salt is the most underrated ingredient in baking. Using sea salt inside the dough and a finishing touch of flaky salt on top creates a flavor bridge. It cuts through the intense richness of the dark chocolate and the sweetness of the sugars. Combined with two full teaspoons of vanilla extract, it creates an aromatic depth that makes the cookie taste “expensive.”
Step-by-Step: Preparing the Dough for Maximum Flavor
Once your browned butter has cooled slightly, you’ll whisk in the sugars. This is where the magic happens. You need to whisk the egg, yolk, and vanilla into the butter-sugar mixture vigorously for at least two minutes. You’ll notice the color change from a dark grainy brown to a pale, glossy tan. This creates a meringue-like structure on the surface, which is how you get that coveted shiny, crackle top.
However, once you add the dry ingredients, you must put the whisk away. Use a spatula to fold the flour in until just a few white streaks remain. Over-mixing at this stage develops too much gluten, which will turn your cookies into tough, rubbery discs. You want to stop the moment the dough comes together to keep the texture tender and delicate.
The Science of the Chill: Preventing Cookie Spread
Patience is an ingredient in this recipe. Chilling the dough for at least an hour allows the flour to fully hydrate. During this time, the starches break down into simple sugars, and the fats solidify. If you bake the dough while it’s warm, the butter will melt instantly in the oven, causing the cookies to spread into thin, greasy wafers before the edges have a chance to set.
A cold dough ball ensures the outside sets firmly while the inside stays cool longer. This temperature differential is what creates the contrast between the crispy rim and the soft core. If you can wait 24 hours, the flavor will deepen even further, taking on notes of toffee and butterscotch. It’s a hard wait, but the results are undeniably better.
Achieving the Ripple: The Pan-Banging Method Explained
The pan-banging method is a technical maneuver that creates the signature “wrinkled” look. About eight minutes into the bake, the cookies will have puffed up in the center. By lifting the side of the baking sheet and letting it drop against the oven rack, you force the air out of the dough. This causes the center to collapse and pushes the edges outward.
You’ll repeat this “bang” every two minutes until the end of the bake. Each time you drop the pan, a new ripple forms. This creates concentric circles of varying textures—some parts are thin and crunchy, while others remain thick and soft. It’s a physical way to manipulate the dough’s structure for a more interesting mouthfeel.
Engineering the Perfect “Anti-Soggy” Cookie Bottom
To get that perfect snap, you need the right equipment. Light-colored, heavy-duty aluminum pans are the gold standard. Dark pans absorb too much heat and will burn the bottoms before the centers are done. Similarly, silicone mats should be avoided here. They act as an insulator, trapping steam under the cookie and resulting in a soft, pale, and soggy base.
Parchment paper is the best choice because it allows for even heat distribution. Once the cookies come out of the oven, let them sit on the hot pan for at least five to ten minutes. This “carry-over” cooking is vital. The residual heat from the metal continues to fry the bottom of the cookie slightly, ensuring it sets into a crisp, sturdy crust that can hold up all those chocolate chunks.
Troubleshooting Common Baking Obstacles
If your cookies come out too puffy, you likely measured your flour by scooping the cup into the bag, which packs it down. Always fluff your flour first or use a scale. If they are too flat, your dough might have been too warm, or your baking soda might be expired. Test your soda by dropping a pinch into vinegar; if it doesn’t fizz violently, throw it out.
Lack of ripples usually stems from not banging the pan hard enough or using a pan that is too flimsy. You need a heavy sheet that can withstand the impact. Also, ensure your oven is truly at 375°F. A low oven temperature won’t create the initial “puff” needed to make the ripples when the pan is dropped.
Storage and Preservation for Long-Term Freshness
Baked cookies stay fresh in an airtight container for up to three days. If they start to lose their crunch, pop them into a 300°F oven for two or three minutes to revive the bottom crust. For long-term storage, freeze the raw dough balls. You can bake them straight from the freezer; just add two minutes to the total bake time and start the pan-banging a little later.
Expert Tips for Professional Results
For the most consistent results, weigh your ingredients in grams. A “cup” of flour can vary by as much as 30 grams depending on how it’s packed, which is enough to ruin a batch. Precision is the hallmark of a great baker. Also, make sure your browned butter isn’t boiling hot when you add the sugar, or you’ll melt the sugar crystals and lose the desired texture.
If you want that “Instagram-ready” look, use the “Scoot” method. Immediately after taking the cookies out of the oven, place a large round glass or cookie cutter over a cookie and move it in a circular motion. This rounds out any wonky edges into a perfect circle. Finally, press a few extra chocolate chunks and a pinch of flaky salt onto the tops of the warm cookies for a beautiful finish.
Frequently Asked Questions
Can I use chocolate chips instead of chunks?
You can, but the result won’t be the same. Chocolate chips contain stabilizers that prevent them from melting into those beautiful, gooey pools. Hand-chopped chocolate bars have a higher cocoa butter content, which creates a much better texture and a more intense flavor profile.
Why did my cookies not ripple?
The most common reason is a weak “bang” or a pan that is too light. You need to drop the pan firmly enough to see the center of the cookie deflate. Additionally, if your oven temperature is too low, the cookies won’t rise enough to create the air pockets that eventually become ripples.
Can I substitute the dark brown sugar for light brown?
Yes, but you will lose some of the depth of flavor and moisture. Dark brown sugar has more molasses, which contributes to the chewy texture and the rich, toffee-like taste. If you use light brown, your cookies might be slightly crispier and less flavorful.
Why is my butter not browning?
Browning butter requires patience and medium heat. If the heat is too low, the water won’t evaporate quickly enough. If it’s too high, you’ll burn the butter before it browns. Use a light-colored saucepan so you can see the milk solids turning amber at the bottom.
Do I really need the extra egg yolk?
The extra yolk is essential for that “bakery” richness. It provides fat and emulsifiers that create a dense, fudgy center. Without it, the cookie will still be good, but it will have a lighter, more standard texture rather than the decadent mouthfeel of a professional cookie.
How do I store the leftovers?
Store baked cookies in an airtight container at room temperature for up to 3 days. To keep them soft, you can put a piece of white bread in the container; the cookies will absorb the moisture from the bread. For longer storage, freeze the baked cookies for up to 2 months, though the texture is best when fresh.
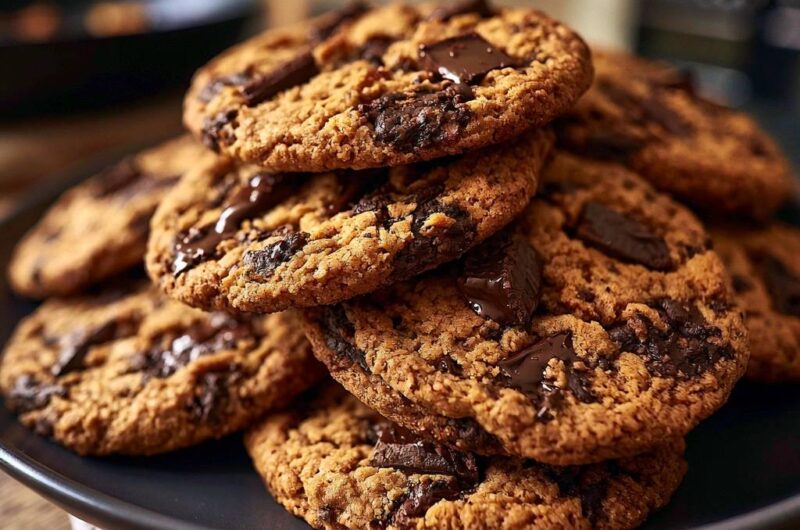
Bakery Style Chocolate Chunk Cookies
Course: DessertCuisine: AmericanDifficulty: easy18
cookies15
minutes12
minutes60
Minutes240
kcalAmerican
Ingredients
1 cup (2 sticks) unsalted butter
3/4 cup granulated sugar
3/4 cup packed dark brown sugar (for deeper color and moisture)
1 large egg + 1 egg yolk, room temperature
2 teaspoons vanilla extract
2 1/4 cups all-purpose flour
1 teaspoon baking soda
1/2 teaspoon sea salt
10 ounces high-quality dark chocolate, chopped into large, uneven chunks
Flaky sea salt for finishing (optional)
Directions
- Brown the Butter: In a small saucepan over medium heat, melt the butter. Continue cooking, swirling the pan occasionally, until the butter foams and then turns a deep amber color with a nutty aroma. Immediately pour into a large heat-proof bowl, scraping all the brown bits in. Let it cool for 10 minutes.
- In the bowl with the browned butter, whisk in the granulated sugar and dark brown sugar until well combined.
- Add the egg, egg yolk, and vanilla. Whisk vigorously for 1-2 minutes until the mixture lightens in color and becomes smooth and glossy.
- In a separate bowl, whisk the flour, baking soda, and salt. Fold the dry ingredients into the wet ingredients using a spatula until just a few streaks of flour remain.
- Fold in the large chocolate chunks.
- To ensure the “Anti-Soggy Bottom” and the thick texture shown in the image, chill the dough. Scoop 3-tablespoon sized balls onto a tray, cover, and refrigerate for at least 1 hour (or up to 24 hours).
- Preheat your oven to 375°F (190°C). Line a heavy-duty, light-colored baking sheet with parchment paper. Avoid silicone mats as they insulate the bottom too much, preventing the desired crispness.
- Place the chilled dough balls 3 inches apart.
- Bake for 10-12 minutes. For the ripples shown in the image: at the 8-minute mark, lift the side of the baking sheet 2 inches and let it drop against the oven rack. Repeat this 2-3 times during the final minutes of baking. This collapses the center and pushes the edges out, creating the craggy texture.
- Remove when the edges are deeply golden and the centers still look slightly soft.
- Let the cookies rest on the hot baking sheet for at least 5-10 minutes. This “carry-over” cooking on the hot metal is essential for setting the bottom crust to a perfect, snap-crisp finish. Transfer to a wire rack to cool completely.
Notes
- Avoid silicone mats to ensure a crisp bottom. The pan-banging technique involves lifting and dropping the pan against the oven rack to collapse the center and create ripples.