Mastering the Raspberry Custard Danish: The Anti-Soggy Bottom Method
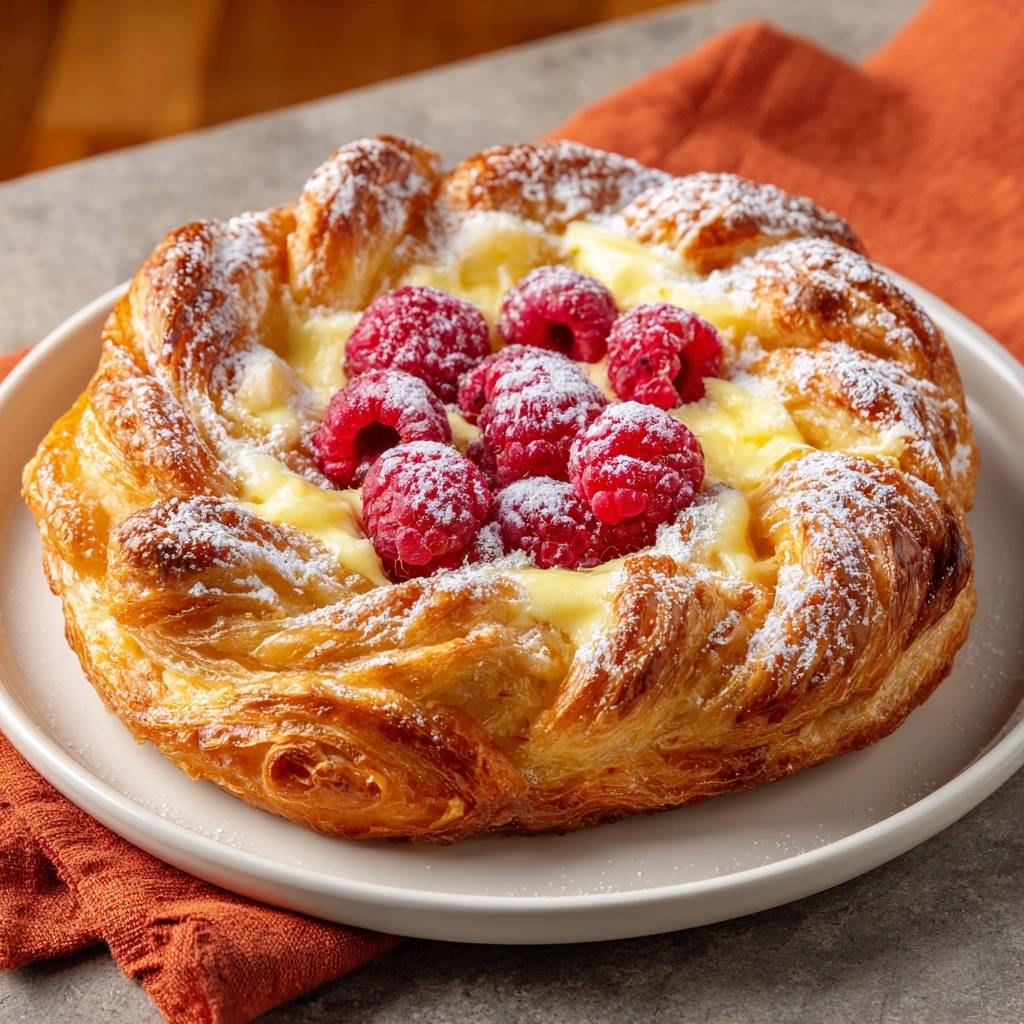
Nothing ruins a beautiful fruit pastry faster than a mushy, undercooked base that collapses under the weight of the filling. You’ve likely experienced that disappointment before: a gorgeous-looking Danish that turns out to be a limp, doughy mess once you take a bite. This recipe changes that by focusing on structural integrity and a shatteringly crisp mouthfeel.
The secret lies in a specific temperature-shock method and a twisted-braid border that keeps the custard contained. By using a screaming-hot baking surface, we ensure the bottom crust sets instantly. This creates a rigid, flaky foundation that can support the creamy vanilla custard and fresh raspberries without losing its crunch.
Expertise in pastry isn’t just about following steps; it’s about managing moisture and heat. The most critical tip I can give you is to keep your puff pastry cold until the very second it hits the oven. If that butter melts before it bakes, you lose the “lift” and end up with a greasy flatbread instead of a light, airy Danish.
Essential Components for a Professional Raspberry Custard Danish
Quality ingredients are the backbone of any successful pastry, especially when the list is this short. For the puff pastry, always look for an all-butter version if possible. Shortening-based doughs often leave a waxy film on the roof of your mouth and lack the rich, nutty aroma that defines a true bakery-style Danish.
This same pastry technique helps ensure the topping on these raspberry crumble bars stays perfectly crunchy.
The custard, or pastry cream, must be thick and fully chilled before you even think about assembling. If you use a runny pudding or a warm custard, the moisture will immediately soak into the delicate layers of the dough. A thick, cold custard stays put and acts as a creamy contrast to the crisp pastry rather than a source of sogginess.
Fresh raspberries are non-negotiable here. Frozen berries release far too much liquid as they thaw, which will bleed into your custard and turn the whole center purple and wet. Fresh berries provide a bright, tart pop of flavor and maintain their structural shape, ensuring your Danish looks as good as it tastes.
The Role of Cornstarch as a Moisture Barrier
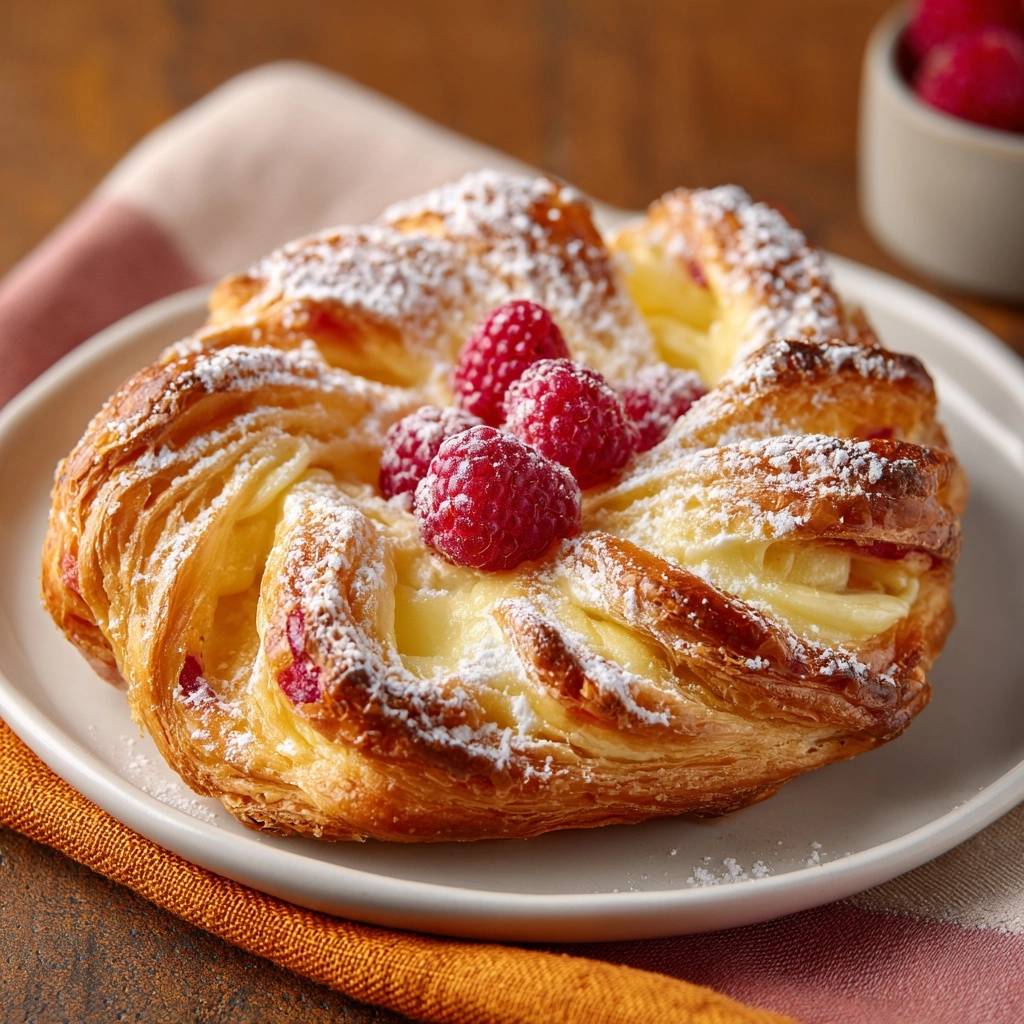
Cornstarch acts as a “dry shield” in this recipe, providing an extra layer of protection for your dough. By dusting a thin layer in the center of each pastry square, you create a barrier that absorbs any stray moisture from the custard during the initial bake. It’s a tiny step that makes a massive difference in the final texture.
As the heat rises, the cornstarch binds with any liquid that tries to migrate downward. This prevents the custard from seeping into the pastry fibers. Instead of a wet middle, you get a clean separation between the silky filling and the flaky crust.
Selecting and Preparing the Puff Pastry
Handling laminated dough requires speed and a light touch. You want the pastry to be thawed enough to handle but still very cold to the touch. If the dough starts to feel floppy or sticky, slide it back into the fridge for ten minutes to firm up the butter layers.
The heat from your hands is the enemy of lamination. Every time you touch the dough, you risk melting those microscopic layers of fat into the flour. If that happens, the steam won’t be able to push the layers apart, and you’ll lose that iconic “shatter” effect when you bite into the finished Danish.
The Science of the Preheated Baking Sheet
Most home bakers place their cold pastries on a cold baking sheet and slide them into the oven together. However, this allows the pastry to warm up slowly, giving the moisture in the custard plenty of time to soak into the dough. We want the exact opposite: an immediate blast of heat.
By preheating a heavy baking sheet inside the oven, you create a surface that acts like a pizza stone. The moment the cold pastry hits that 400°F metal, the bottom layer of butter flashes into steam. This creates an instant “sear” on the bottom of the dough, sealing it off before the custard can penetrate the surface.
This thermodynamics trick is the most effective way to prevent a soggy bottom. The intense heat from below ensures the base is just as crispy and well-cooked as the golden-brown edges. You’ll notice the difference the moment you pick one up; it will feel light and rigid rather than heavy and soft.
Step-by-Step: Engineering the Perfect Pastry Nest
Creating a “nest” for your custard isn’t just about aesthetics; it’s about engineering. A high, textured border acts as a dam, keeping the custard from spilling over the sides and burning on the tray. This structure also provides more surface area for the dough to crisp up and brown.
When you build the border correctly, you create a deep well that can hold a generous amount of filling. This ensures every bite has the perfect ratio of crunchy pastry to creamy custard. It also makes the Danish much easier to eat, as the filling stays securely tucked inside the braided walls.
Cutting and Braiding for Maximum Texture
To get that professional look, cut 1-inch strips from the edges of your pastry squares. Twist these strips tightly before coiling them around the perimeter of your base. This twisting action exposes more of the dough’s surface to the hot air of the oven.
More surface area means more Maillard reaction, which is the chemical process that creates those deep, savory flavors and “crunch” points. These twisted edges become the star of the show, offering a variety of textures from the lacquered exterior to the soft, buttery interior of the braid.
Docking the Center for Structural Stability
Docking is the process of pricking the center of the pastry with a fork. This allows steam to escape from the middle section so it doesn’t puff up like a balloon. If the center rises too much, it will push the custard out of the nest and over the sides.
You want the edges to rise high while the center stays relatively flat. This creates a stable “floor” for your custard to sit on. Be thorough with your docking, but don’t pierce all the way through the dough; you just want to vent the top layers.
Executing the High-Heat Bake Cycle
Baking at 400°F is essential for achieving the “shatter” effect. At lower temperatures, the butter in the puff pastry simply melts and leaks out, leaving you with a greasy, heavy mess. High heat is what forces the layers to separate and crisp up rapidly.
Keep a close eye on the oven during the last few minutes. You are looking for a deep mahogany brown, not just a light tan. That dark color indicates that the sugars in the butter and flour have fully caramelized, which provides the best flavor and the longest-lasting crunch.
The pastry should look puffed and dry. If it still looks shiny or pale in the crevices of the braids, it needs another minute or two. Don’t be afraid of a little color; that’s where all the flavor lives!
The Post-Bake Fruit Integration Strategy
One of the biggest mistakes people make is baking the raspberries inside the Danish from the start. Raspberries are delicate and full of water. When they hit 400°F, their cell walls collapse, and they release all their juice directly into your custard and pastry.
By adding the fresh berries immediately after the pastry comes out of the oven, you get the best of both worlds. The residual heat from the custard softens the berries just enough to release their aroma, but they stay whole and vibrant. This prevents “juice bleed” and keeps the pastry base perfectly dry.
Gently press the berries into the warm custard so they adhere. As the custard cools and sets, it will lock the berries in place. This technique ensures that the fruit tastes fresh and tart, providing a necessary contrast to the sweet, rich pastry cream.
Troubleshooting Your Raspberry Custard Danish
If your pastry didn’t puff up as much as you hoped, the dough likely got too warm during the assembly process. Next time, try chilling the assembled Danishes in the freezer for five minutes before sliding them onto the hot baking sheet. This ensures the butter is solid when it hits the heat.
If your custard seems to be “weeping” or releasing water, it might not have been cooked long enough to fully hydrate the starch. Always make sure your pastry cream reaches a thick, pipeable consistency and has cooled completely before use. A thin custard will always lead to a softer pastry.
Uneven browning is usually caused by an inconsistent application of egg wash. If the egg wash pools in the corners, those spots will burn, while dry spots will stay pale. Use a pastry brush to apply a thin, even coat over every inch of the exposed braided edges.
Preventing Pastry Shrinkage
Puff pastry has a “memory” due to the gluten strands within the flour. If you roll it out and immediately cut and bake it, the dough will try to snap back to its original shape. This often results in squares turning into awkward circles or shrinking significantly in size.
To prevent this, let the dough rest for a few minutes after rolling it out. This allows the gluten to relax. If you have time, chilling the cut shapes for ten minutes before adding the filling will also help them maintain their sharp, clean edges during the bake.
Achieving the Lacquered Bakery Glow
That professional, high-gloss finish comes entirely from the egg wash. Using a whole egg beaten with a teaspoon of water provides the perfect balance of protein for browning and fat for shine. The water thins the egg just enough so it doesn’t create a thick, “omelet-like” layer on your pastry.
For an even deeper glow, you can use just the egg yolk mixed with a splash of heavy cream. This creates an incredibly rich, dark finish that looks like it came straight from a high-end patisserie. Just be careful, as the higher fat content can cause the edges to brown much faster.
Make-Ahead Logistics and Storage Realities
These Danishes are at their absolute peak about 20 minutes after they come out of the oven. That is when the contrast between the hot, crunchy pastry and the cool, creamy center is most dramatic. However, you can prepare the components in advance to make serving easier.
You can assemble the pastry nests (without the custard) and freeze them on a tray. Once frozen solid, transfer them to a bag. When you’re ready to bake, just add the cornstarch and custard and pop them directly onto the preheated tray. You’ll just need to add a few extra minutes to the baking time.
If you have leftovers, avoid the microwave at all costs; it will turn the pastry into rubber. Instead, use a toaster oven or a regular oven at 350°F for about five minutes. This will recrisp the puff pastry without overcooking the custard or the berries.
Expert Tips for Customizing the Filling
While vanilla is the classic choice, you can easily customize the custard without ruining the recipe’s chemistry. Try whisking in some fresh lemon zest or a half-teaspoon of almond extract into the chilled pastry cream. These flavors pair beautifully with the tartness of the raspberries.
Avoid tossing the berries in sugar before adding them to the Danish. Sugar draws out moisture through osmosis, which will cause the berries to leak juice onto your crisp pastry. If you want extra sweetness, rely on the final dusting of powdered sugar, which sits on top of the fruit rather than breaking it down.
Frequently Asked Questions
Can I use homemade puff pastry for this recipe?
You certainly can, and the flavor will be incredible. However, keep in mind that homemade puff pastry often has a higher butter content and more irregular layers than commercial versions. You may need to be even more diligent about keeping the dough cold and ensuring your oven is truly at 400°F to handle the extra fat content without it leaking.
Why did my custard develop a tough skin on top?
Custard develops a skin when it is exposed to air while cooling. To prevent this, always place a piece of plastic wrap directly onto the surface of the pastry cream while it is still warm. This prevents evaporation and keeps the custard silky smooth from top to bottom. If a skin has already formed, you can usually whisk it back into the custard, though it may leave small lumps.
Can I substitute the raspberries for strawberries or blueberries?
Blueberries work very well because they have a thick skin that prevents juice from leaking. Strawberries are trickier because they have a very high water content. If you use strawberries, slice them thinly and pat them dry with a paper towel before placing them on the custard. Like the raspberries, add them after the bake to keep the pastry as crisp as possible.
My pastry is cooked on top but raw on the bottom—what happened?
This usually happens if the baking sheet wasn’t preheated long enough or if the rack was positioned too high in the oven. For the best results, place your rack in the bottom third of the oven. This puts the pastry closer to the heating element and ensures the preheated tray stays hot enough to finish the bottom crust at the same rate as the top.
How long will these stay crisp after baking?
Because of the moisture in the custard, these are best eaten within 4 to 6 hours. After that, the pastry will naturally begin to soften as it absorbs humidity from the air and the filling. If you need to make them ahead of time, store them in a cool, dry place but do not put them in an airtight container, as this will trap moisture and accelerate the softening process.
Raspberry Custard Danish
Course: DessertCuisine: EuropeanDifficulty: easy4
servings25
minutes22
minutes380
kcal47
MinutesA professional-grade fruit pastry featuring a creamy vanilla custard center and fresh raspberries, built on a puff pastry base designed to stay crisp and avoid the common soggy bottom.
Ingredients
1 sheet frozen puff pastry, thawed but very cold
1/2 cup thick vanilla pastry cream (chilled)
1 cup fresh raspberries
1 egg, beaten with 1 teaspoon water (egg wash)
1 tablespoon cornstarch
2 tablespoons powdered sugar (for dusting)
Directions
- Preheat your oven to 400°F (200°C). Place a heavy, flat baking sheet inside the oven while it preheats. This “screaming hot” surface is the secret to sealing the bottom crust instantly so it never gets soggy.
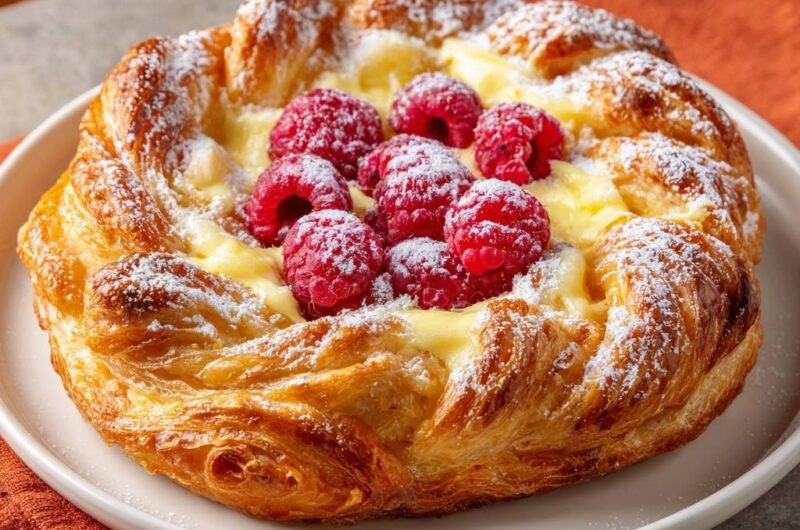
- Roll out the cold puff pastry on a lightly floured surface. Cut into four large squares. To achieve the braided look in the image, cut 1-inch strips from the edges of the pastry, twist them tightly, and coil them around the perimeter of a central pastry disc to create a high, textured nest.
- Use a fork to prick the center of the pastry (the “docking” method) to prevent the middle from rising too much.
- Dust the center of each pastry with a thin layer of cornstarch. This creates a moisture barrier between the dough and the custard.
- Spoon 2 tablespoons of thick, chilled pastry cream into the center of each nest.
- Brush the twisted outer edges of the pastry generously with the egg wash. This ensures the deep golden, lacquered finish seen in the image.
- Carefully slide the pastries (on parchment paper) onto the preheated baking sheet. Bake for 20-22 minutes until the edges are high, puffed, and a deep mahogany brown.
- Remove from the oven. While the pastry is still warm, place the fresh raspberries into the center, pressing them lightly into the custard. (Adding them mid-way or at the end prevents them from bleeding juice and making the pastry soggy).
- Once cooled, dust heavily with powdered sugar over the edges and fruit to match the visual finish. Serve immediately for maximum crunch.
Notes
- Preheating the baking sheet and using a cornstarch barrier are essential steps to prevent a soggy crust. Adding raspberries after baking keeps the pastry dry and the fruit fresh.