The Science of the Deep Dish Chocolate Chunk Cookie Cake
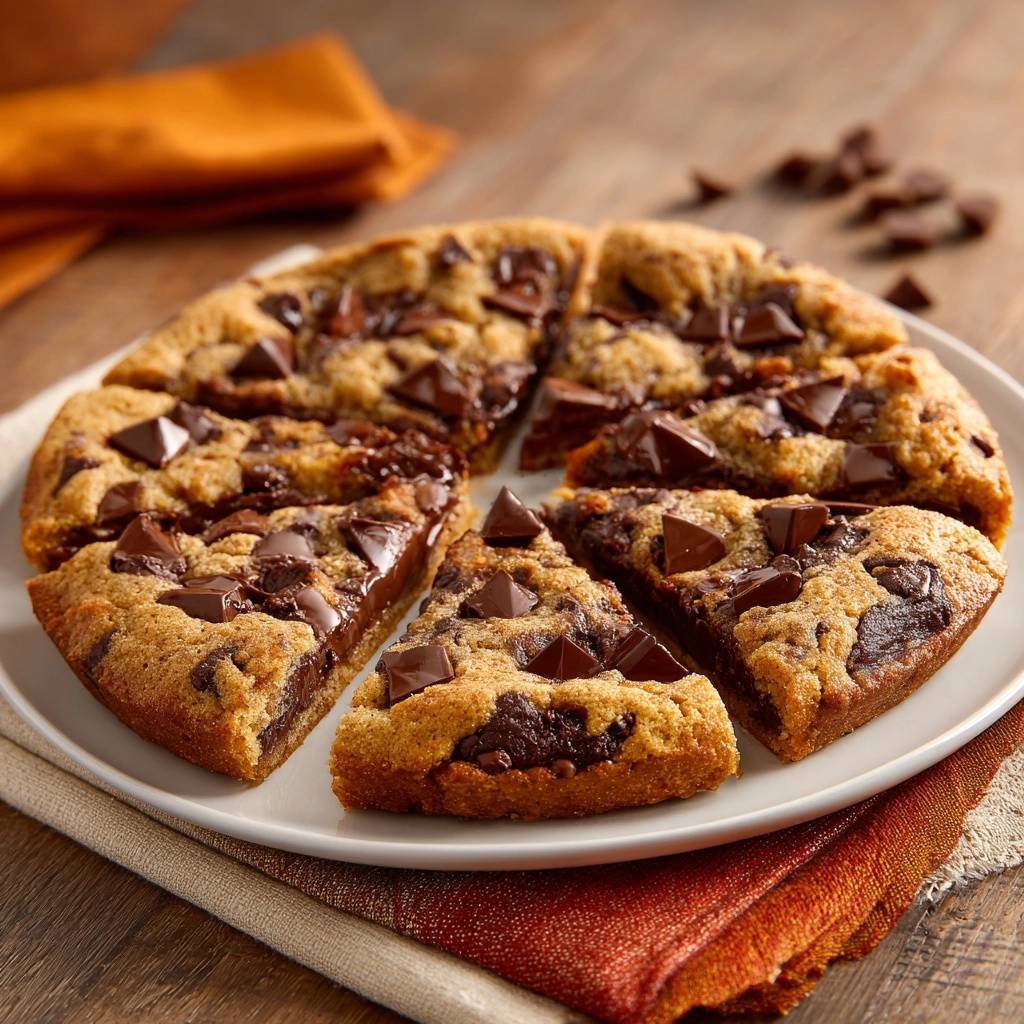
Imagine a dessert that combines the chewy, caramelized edges of a classic cookie with the dense, indulgent height of a layer cake. That is the magic of a Deep Dish Chocolate Chunk Cookie Cake. Unlike a thin, crispy biscuit, this bake relies on a massive volume of dough to create a soft, pillowy interior that feels more like a fudge-filled pastry than a standard snack.
However, the biggest challenge with a deep-dish format is the dreaded “gummy middle.” Most recipes leave you with a center that is either raw and collapsing or dry and overbaked. We solve this using the Anti-Soggy Center Secret. By layering the dough and using a specific temperature staging method, we ensure the cake is structurally sound while the chocolate stays in a glorious, molten state.
The real trick to this professional-grade texture is all about aeration during the initial mixing phase. You aren’t just stirring sugar and butter; you’re building a microscopic network of air bubbles. These bubbles expand in the oven, providing the lift needed to support nearly two cups of heavy chocolate chunks without the cake sinking into a dense, oily brick.
Anatomy of the Anti-Soggy Center Secret
The physics of this cake depends entirely on the Stuffed Layer Technique. Instead of mixing all the chocolate into the batter and hoping for the best, we build a structural barrier. By pressing a firm bottom layer of dough into the pan first, we create a heat-resistant foundation that prevents the heavy chocolate from sinking and burning against the metal.
Leaving a 1/2-inch border around the edges of the chocolate core is the most vital step. This “dough seal” allows the top and bottom layers to fuse together during the bake. It traps the steam inside the chocolate center, which keeps the cocoa solids fluid and prevents the middle of the cake from becoming a soggy, unbaked mess.
Essential Components for a Deep Dish Cookie
Quality ingredients are the backbone of a successful deep-dish bake. We use 3/4 cup of unsalted butter because it provides the perfect threshold for richness. If you use more, the cake becomes greasy and loses its height; if you use less, the crumb feels lean and bread-like rather than decadent.
The sugar ratio is equally intentional. We use a 1:1.5 ratio of granulated sugar to light brown sugar. The extra molasses in the brown sugar speeds up the Maillard reaction, giving you those deep, toffee-like flavors. Meanwhile, the white sugar ensures the edges get that signature “snap” that contrasts so well with the soft center.
The Role of the Extra Egg Yolk
Adding one whole egg plus an extra yolk is a total game-changer for the emulsification process. The extra yolk introduces more lecithin and fat into the dough. This creates a much more tender, velvety crumb that can easily support the weight of large chocolate chunks.
This extra fat also acts as a moisture barrier. It ensures that even after the cake cools, the interior remains soft and “fudgy” rather than turning crumbly or dry. You’ll notice the dough looks glossier and feels more elastic, which is exactly what you want for a stuffed cake.
Selecting the Right Chocolate Chunks
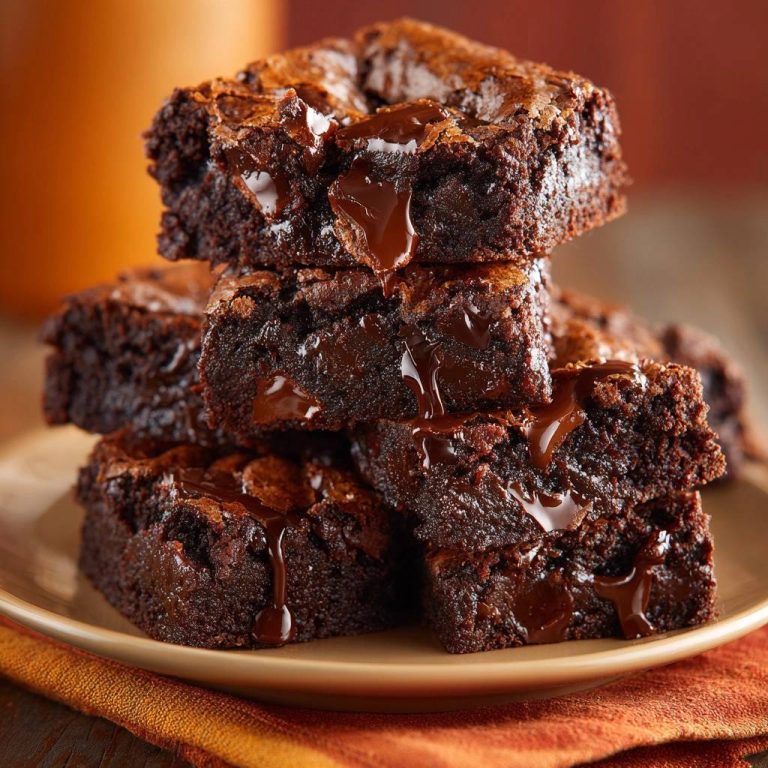
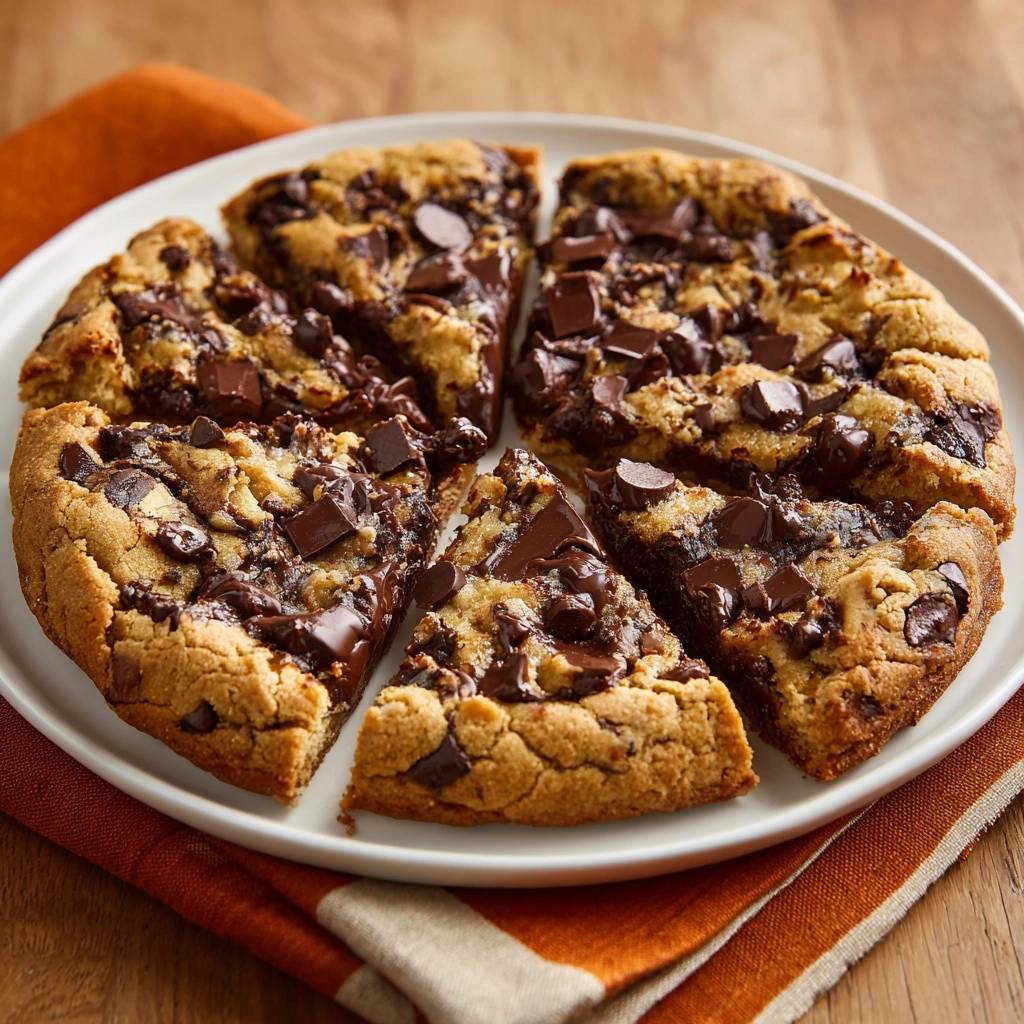
While standard chips are fine for a quick batch of cookies, this deep-dish masterpiece demands large dark chocolate chunks. Chunks have a higher cocoa butter content than stabilized chips. This means they melt into wide, pooling “veins” of chocolate rather than holding their shape in small, hard dots.
I highly recommend using a chocolate with 60% to 70% cocoa. This bitterness cuts through the sweetness of the dough perfectly. When that high-quality chocolate hits the oven heat, it transforms into the “lava” state that makes every slice feel like a restaurant-style dessert.
If you enjoy balancing rich chocolate with bright fruit, you’ll love this glazed blueberry lemon bundt cake.
Equipment: Why the Springform Pan Wins
Using an 8-inch springform pan is the best way to ensure your cake stays beautiful. Because this cake has a molten core, flipping it upside down to remove it from a standard cake pan is a recipe for disaster. The structural collapse would be immediate and messy.
The removable sides of a springform pan allow you to release the cake while it is still warm and delicate. Furthermore, the tall sides of these pans encourage the dough to climb upward. This results in a thicker, more impressive profile than you would get from a shallow tart tin or a wide sheet pan.
Step-by-Step: Building the Chocolate Core
Start by creaming your softened butter and sugars for at least three full minutes. You are looking for a “pale and fluffy” texture that looks almost like frosting. If the mixture is still gritty or dark brown, keep going; that aeration is what prevents a gummy, heavy result.
When you add your dry ingredients, switch to a folding motion. You want to mix just until the last white streaks of flour disappear. Over-mixing at this stage develops too much gluten, which will turn your tender cookie cake into something tough and bread-like. Keep it gentle!
Executing the Stuffed Layer Technique
Divide your dough into two equal halves. Take the first half and press it firmly into the bottom of your greased pan. You want a flat, even surface here to act as your “floor.” Sprinkle your chocolate chips and half of your chunks over the center, keeping that 1/2-inch border clear.
For the top layer, don’t try to plop the whole ball of dough on at once. Instead, flatten small pieces of dough in your hands and lay them over the chocolate like a puzzle. Pinch the edges where the top and bottom layers meet to seal the chocolate inside. This prevents any “lava” from leaking out the sides.
The Staged Bake: Mastering Carryover Heat
The most critical part of this recipe is the staged bake. After 20 minutes at 350°F, the edges will look golden and set, but the center will still look a bit soft. This is exactly where you want it. Turn the oven off entirely but do not open the door.
Let the cake sit in the cooling oven for another 5 to 7 minutes. This residual heat, or “carryover cooking,” gently finishes the dense center without drying out the exterior. It allows the dough surrounding the chocolate core to set perfectly while keeping the very middle gooey and warm.
Troubleshooting the Deep Dish Texture
If your cake spreads too much or loses its height, your butter was likely too warm or even melted. Butter should be soft enough to indent with a finger but still hold its shape. If it’s oily, the dough will collapse in the oven and lose that “deep dish” look.
Another common issue is a dry, crumbly texture. This usually happens if you measure your flour by scooping the measuring cup directly into the bag, which packs the flour down. Always fluff your flour with a spoon and level it off, or use a kitchen scale for the most accurate results.
Flavor Variations and Dough Swaps
You can easily customize this base to suit your cravings. A heavy sprinkle of flaky sea salt on top right after baking is a pro move. It balances the sugar and makes the dark chocolate flavors pop. You could also add a teaspoon of espresso powder to the dry ingredients to deepen the cocoa notes.
A pinch of flaky sea salt works just as well on a slice of this flourless dark chocolate torte.
If you want a different texture, try swapping half of the chocolate chunks for toasted walnuts or pecans. The crunch of the nuts against the molten chocolate core adds a sophisticated layer of contrast. Just make sure the nuts are chopped to a similar size as the chocolate chunks for even distribution.
Make Ahead and Storage Protocols
You can actually prep this entire cake a day in advance. Assemble the layers in the pan, cover it tightly with plastic wrap, and keep it in the fridge. When you’re ready to bake, let it sit on the counter for 20 minutes first so the butter can soften slightly before hitting the oven.
To store leftovers, keep them in an airtight container at room temperature for up to three days. If you want to restore that “just-baked” molten feel, pop a slice in the microwave for 10 to 15 seconds. Alternatively, use a 300°F oven for five minutes to crisp up the edges again without drying out the crumb.
Expert Tips for Clean Slicing
Patience is your best friend here. You must let the cake cool in the pan for at least 30 minutes. During this time, the internal structure firms up. If you cut into it immediately, the molten center will run everywhere, and the cake will lose its shape.
When you are ready to serve, use a sharp, thin knife. Run the blade under hot water and wipe it dry before each cut. The heat from the blade slices through the dense chocolate veins like butter, giving you those sharp, clean edges that look like they came from a high-end bakery.
Optimal Serving Temperatures
This cake is best served slightly warm, about 45 minutes after it comes out of the oven. At this temperature, the chocolate is still fluid, and the dough is at its most tender. The flavors of the butter and vanilla are much more pronounced when the cake isn’t ice cold.
What’s Next?
If you are putting together a spread around this chocolate chunk cookie cake, these two baked goods and savory sides fit the bill without stealing focus.
- For a savory counterpoint to all that chocolate, the rich mushroom gravy in Southern Biscuits and Mushroom Gravy makes it easy to turn this into a full brunch or dinner.
- If you want another baking project with a similar cozy vibe, the streusel topping and spiced crumb of this Cinnamon Streusel Coffee Cake is a natural companion for your cookie cake.
For the ultimate experience, pair a warm slice with a cold glass of milk or a big scoop of vanilla bean gelato. The contrast between the freezing cold cream and the warm, gooey chocolate core is incredible. It’s a simple way to make a home-baked treat feel like a five-star dessert.
Frequently Asked Questions
Can I use a 9-inch pan instead of an 8-inch pan?
Yes, you can use a 9-inch pan, but your cookie cake will be slightly thinner. Because the dough is spread over a larger surface area, it will bake faster. I recommend checking the cake at the 15-minute mark and reducing the “oven-off” time to about 4 minutes to prevent it from becoming too crunchy.
Why did my cookie cake turn out dry and hard?
Dryness is usually caused by over-baking or over-mixing the dough. If you leave the oven on for the full duration instead of using the “staged bake” method, the moisture evaporates too quickly. Also, ensure you aren’t using too much flour; always level your measuring cups for the most accurate ratio.
Can I substitute the dark chocolate chunks for milk chocolate?
You can, but keep in mind that milk chocolate has a much lower melting point and a higher sugar content. This means the “molten” center will be even more fluid and significantly sweeter. If you use milk chocolate, I highly recommend adding a pinch of sea salt to the dough to help balance the extra sugar.
How do I know the cake is done if the center is supposed to be gooey?
Look at the edges of the cake. They should be a deep golden brown and pulled slightly away from the sides of the pan. The top surface should look matte and set, not shiny or wet. If the edges are firm to the touch but the center has a slight jiggle when you shake the pan, it is perfect and ready for the carryover heat stage.
Can I freeze the baked cookie cake?
Absolutely! This cake freezes very well. Wrap individual slices tightly in plastic wrap and then foil. They will stay fresh for up to two months. To eat, thaw a slice at room temperature and then give it a quick zap in the microwave to melt the chocolate chunks again. Do not freeze the whole cake in the pan, as it can become difficult to thaw evenly.
Chocolate Chunk Cookie Cake
Course: DessertCuisine: AmericanDifficulty: medium8
servings20
minutes27
minutes450
kcal47
MinutesThis cookie cake solves the common problem of underbaked centers by using a layered dough technique and a staged baking method. It results in a rich, buttery cookie with a liquid chocolate ‘lava’ vein in the middle.
Ingredients
3/4 cup unsalted butter, softened
1/2 cup granulated sugar
3/4 cup packed light brown sugar
1 large egg + 1 egg yolk (for extra richness)
2 teaspoons vanilla extract
2 1/4 cups all-purpose flour
1 teaspoon baking soda
1/2 teaspoon salt
2 cups large dark chocolate chunks (divided)
1/2 cup semi-sweet chocolate chips (for the molten core)
Directions
- Preheat and Prep: Preheat your oven to 350°F (175°C). Generously grease an 8-inch round cake pan or springform pan.
- Cream the Base: In a large bowl, cream together the softened butter, white sugar, and brown sugar until pale and fluffy (about 3 minutes). This aeration prevents the heavy dough from collapsing into a gummy texture.
- Emulsify: Beat in the egg, egg yolk, and vanilla extract until fully combined and smooth.
- Mix Dry Ingredients: In a separate bowl, whisk the flour, baking soda, and salt. Gradually add to the wet ingredients, mixing just until no flour streaks remain. Do not overmix.
- The Stuffed Layer Technique: Divide the dough into two halves. Fold 1/2 cup of chocolate chunks into the first half and press it firmly into the bottom of the pan.
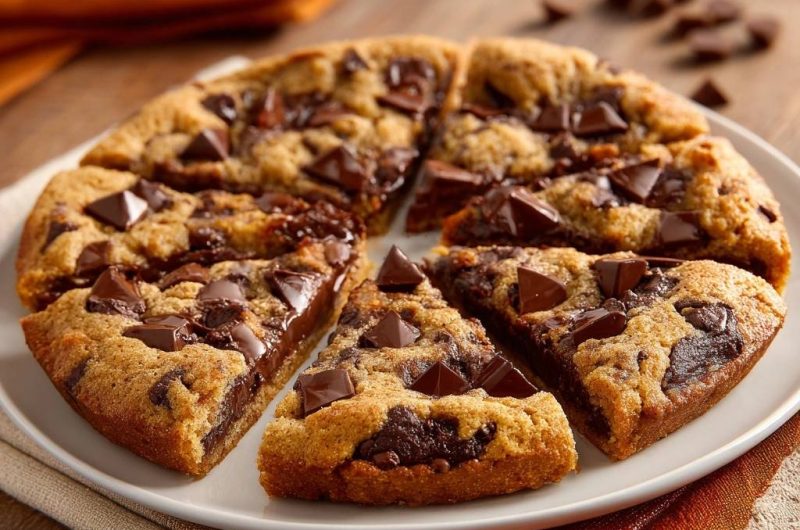
- The Molten Core: Sprinkle the 1/2 cup of chocolate chips and another 1/2 cup of chunks over the center of the bottom layer, leaving a 1/2-inch border at the edges. This creates the thick chocolate “vein” seen in the image.
- Seal the Cake: Fold 1/2 cup of chunks into the remaining dough. Flatten pieces of this dough in your hands and lay them over the chocolate layer, pinching the edges to seal the chocolate inside. Press the final 1/2 cup of chunks into the top.
- The Staged Bake: Bake for 20 minutes. The edges will be golden and firm. Turn the oven off, but leave the cookie inside for exactly 5-7 more minutes. This carryover heat sets the dough surrounding the chocolate core without drying out the cake.
- The Set: Remove from the oven. To achieve the clean, sharp slices shown in the image, you must let the cake cool in the pan for at least 30 minutes. This allows the internal structure to firm up while the chocolate center remains gooey. Slice with a sharp, warm knife.
Notes
- To achieve clean slices, let the cake cool for 30 minutes before cutting. Use a warm knife for the best results. The staged bake (turning the oven off for the last 5-7 minutes) is crucial for setting the dough without overcooking.