Classic Peanut Butter Cookies: Perfectly Soft & Chewy Every Time
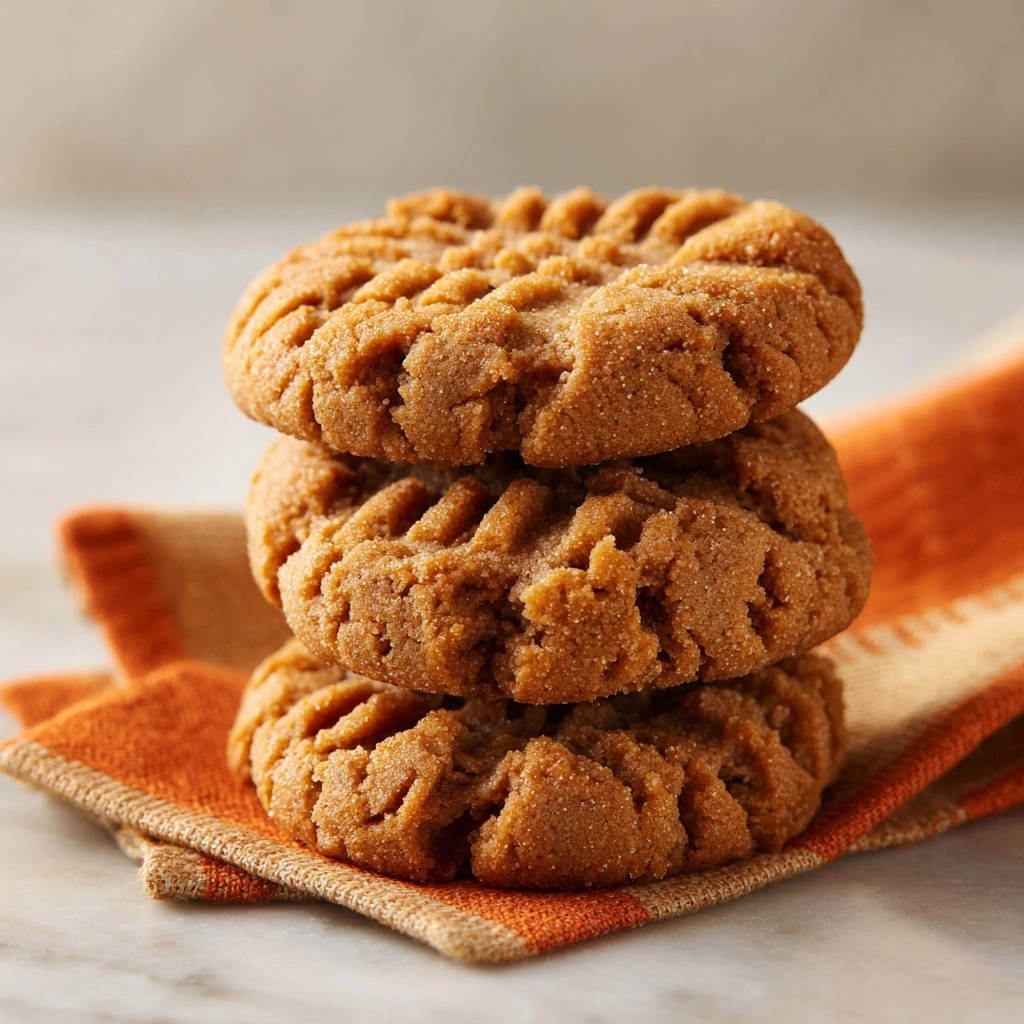
There’s nothing quite like a homemade classic peanut butter cookie. For years, I struggled to achieve that perfect melt-in-your-mouth chewiness, often ending up with dry, crumbly results.
But I’ve finally cracked the code to making these classic peanut butter cookies consistently soft and chewy, thanks to a simple, expert technique that transforms them into pure perfection.
The Secret to Irresistibly Soft & Chewy Peanut Butter Cookies (Unveiled!)
The magic behind our perfectly soft and chewy classic peanut butter cookies isn’t just in the ingredients; it’s in a precise, yet simple, technique.
Many recipes overlook the delicate balance required, leading to cookies that are either too crisp or disappointingly dry. This recipe focuses on gentle mixing and precise baking times to prevent over-developing gluten and preserve moisture.
By understanding these nuances, you’ll consistently create cookies with that desirable tender center and perfectly golden edges that define a truly exceptional homemade peanut butter cookie.
Gather Your Goodies: Essential Ingredients for Flawless Cookies
The Foundation: Flour, Baking Soda, and Salt
All-purpose flour provides the essential structure for our classic peanut butter cookies, ensuring they hold their shape without being overly dense.
Baking soda acts as our leavening agent, creating a delicate lift and contributing to that soft, tender crumb we’re after.
Salt is a flavor enhancer, balancing the sweetness of the sugars and deepening the rich taste of the peanut butter.
The Star of the Show: Creamy Peanut Butter
For this recipe, creamy, processed peanut butter (like Jif or Skippy) is absolutely crucial. Its consistent emulsification and higher sugar content are key to the cookie’s texture and moisture.
Avoid natural, oily peanut butter, as its oil separation can lead to a drier, more crumbly cookie that spreads unpredictably.
Sweetness & Structure: Sugars, Butter, Egg, and Vanilla
Softened unsalted butter is the base, providing richness and aiding in the creaming process for a light dough.
A blend of granulated sugar and light brown sugar offers the perfect balance: granulated for crisp edges and sweetness, and brown sugar for a distinct caramel note and essential chewiness.
The large egg acts as a binder, adding structure and moisture, while vanilla extract enhances all the flavors, creating a truly aromatic cookie.
Your Full Ingredient List:
- 1/2 cup (1 stick) unsalted butter, softened
- 1/2 cup granulated sugar, plus more for rolling
- 1/2 cup packed light brown sugar
- 1 large egg
- 1 teaspoon vanilla extract
- 1 cup creamy peanut butter
- 1 1/2 cups all-purpose flour
- 1 teaspoon baking soda
- 1/2 teaspoon salt
Whip Up Wonder: Essential Tools for Your Peanut Butter Cookie Journey
- Electric Mixer:
Crucial for creaming butter and sugars evenly, ensuring a light and fluffy dough.
- Large and Medium Bowls:
Separate bowls prevent overmixing and ensure dry and wet ingredients are well combined.
- Baking Sheets & Parchment Paper:
Parchment prevents sticking and ensures even baking without added grease.
- Wire Rack:
Allows air circulation for proper cooling, preventing soggy bottoms.
- Fork:
Essential for creating the classic criss-cross pattern and gently flattening cookies.
- Measuring Cups & Spoons:
Accuracy in ingredients is key to consistent results.
Your Step-by-Step Guide to Perfectly Chewy Peanut Butter Cookies
- Preheat & Prep:
Preheat your oven to 375 degrees F (190 degrees C) and line baking sheets with parchment paper.
Proper preheating ensures immediate leavening and even baking from the start.
- Cream the Base:
In a large bowl, cream together the softened butter, 1/2 cup granulated sugar, and brown sugar with an electric mixer until light and fluffy. This should take about 2-3 minutes.
Creaming incorporates air, which is vital for a tender cookie texture.
- Wet Ingredients Unite:
Beat in the egg and vanilla extract until well combined. Then, mix in the creamy peanut butter until the mixture is smooth and fully incorporated.
Ensure no streaks remain for uniform flavor and texture.
- Whisk the Dry:
In a separate medium bowl, whisk together the all-purpose flour, baking soda, and salt.
Whisking thoroughly disperses the leavening and salt, preventing pockets of unmixed ingredients.
- The Chewy Secret: Gentle Mixing:
Gradually add the dry ingredients to the wet ingredients, mixing on low speed just until combined.
Do not overmix the dough once the flour is added! Overmixing develops gluten, which can lead to tough, dry cookies. Stop mixing as soon as you no longer see streaks of flour.
- Shape & Sugar Coat:
Roll the dough into 1-inch balls. Roll each ball in the extra granulated sugar until evenly coated.
The sugar coating adds a delightful sparkle and a slight crispness to the exterior.
Place the sugared balls about 2 inches apart on the prepared baking sheets to allow for spreading.
- Classic Criss-Cross:
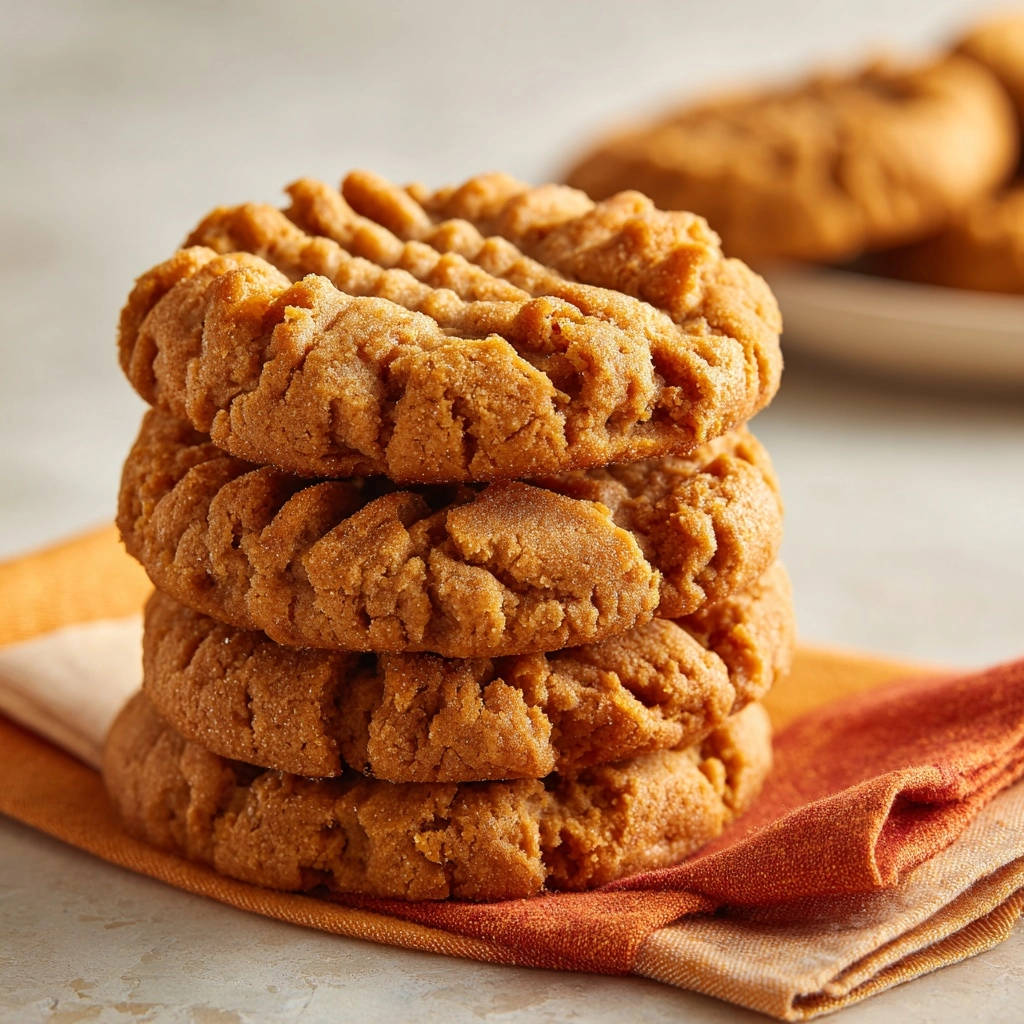
Use the tines of a fork to flatten each cookie ball, making a distinctive criss-cross pattern.
Dip the fork in sugar between each cookie if it starts to stick, ensuring clean lines.
- Bake to Perfection (Don’t Overbake!):
Bake for 8-10 minutes, or until the edges are lightly golden but the centers still look slightly soft.
Do not overbake! This is absolutely key to keeping them beautifully chewy. They will continue to set and firm up as they cool on the baking sheet, so pulling them out when slightly underdone is crucial.
- Cool & Enjoy:
Let the cookies cool on the baking sheets for 5 minutes before carefully transferring them to a wire rack to cool completely.
This allows them to firm up without breaking, preserving their tender texture.
Enjoy your perfectly soft and chewy peanut butter cookies!
Unlock the Golden Secrets: Pro Tips for Your Best Peanut Butter Cookies
The Power of Proper Mixing: Preventing Tough Textures
- Understand Gluten Development:
Overmixing flour activates gluten, leading to a tougher, more cake-like texture. Mix only until the flour streaks disappear – patience here is rewarded with supreme chewiness.
- The Role of Softened Butter:
Ensuring your butter is truly softened, not melted, is crucial for creaming. This process incorporates essential air, contributing to a light and fluffy cookie, which overmixing can destroy.
Precision Baking: Spotting the Perfect Doneness for Chewiness
- Look for Subtle Cues:
The perfect moment to remove peanut butter cookies from the oven is when the edges are just barely golden and the centers still appear slightly underbaked or soft. They will continue to cook on the hot baking sheet.
- The Carryover Cooking Effect:
Explain that cookies continue to bake for a few minutes after being removed from the oven. Removing them slightly early prevents them from becoming dry and hard, guaranteeing that signature chewy center.
Chilling the Dough: Why It Matters for Shape and Flavor
- Prevents Spreading:
Briefly chilling the dough for 20-30 minutes helps solidify the butter, which prevents the cookies from spreading too much in the oven, maintaining their thickness and chew.
- Enhances Flavor:
Chilling also allows the flavors to meld and deepen, resulting in a more pronounced peanut butter taste.
Perfect Criss-Cross: Techniques for a Classic Look
- Sugar Dip for a Clean Press:
Lightly dipping your fork in granulated sugar between each press prevents sticking and helps create those distinct, beautiful criss-cross lines that are characteristic of classic peanut butter cookies.
- Gentle, Even Pressure:
Apply enough pressure to flatten the cookie ball slightly and create the pattern, but not so much that you completely squash it. This ensures even baking and a consistent thickness.
Common Cookie Conundrums: Troubleshooting Your Peanut Butter Bake
Why Are My Peanut Butter Cookies Dry and Crumbly?
This is often due to overbaking. Remember to pull them from the oven when the edges are lightly golden and the centers still look soft. Overmixing the flour can also lead to a dry texture by developing too much gluten.
My Cookies Spread Too Much!
Excessive spreading can be caused by several factors: butter that was too soft or melted, not enough flour, or an oven that wasn’t preheated properly. Ensure your butter is softened, not melted, and consider chilling your dough briefly if you live in a warm environment or suspect your butter was too warm.
The Criss-Cross Pattern Isn’t Staying or Looks Messy
If your fork is sticking, make sure to dip it in granulated sugar between each cookie press. Also, if the dough is too warm, the pattern might lose definition. A brief chill can help solidify the dough for cleaner lines.
Cookies Are Too Hard After Cooling
Again, this points to overbaking. The cookies will continue to firm up as they cool. If they are already firm when you take them out of the oven, they will be hard once completely cooled. Trust the slightly soft center cue!
Beyond the Classic: Creative Twists & Serving Suggestions
Elevate the Flavor: Simple Add-Ins
- Chocolate Chip Swirl:
Fold in 1/2 cup of chocolate chips (milk, semi-sweet, or dark) during the last stage of mixing for a delightful chocolatey surprise, much like a good chocolate crumb cheesecake bar.
- Spice it Up:
Add 1/4 teaspoon of ground cinnamon or a pinch of nutmeg to the dry ingredients for a warm, aromatic twist.
- Nutty Crunch:
For extra texture, stir in 1/4 cup of finely chopped roasted peanuts (or other nuts) with the dry ingredients.
Perfect Pairings: How to Enjoy Your Classic Peanut Butter Cookies
- Milk’s Best Friend:
A tall, cold glass of milk is the quintessential companion for these rich, chewy cookies.
- Ice Cream Sandwich:
Sandwich a scoop of vanilla or chocolate ice cream between two cooled cookies for an indulgent treat.
- Coffee Break Bliss:
Enjoy alongside your morning coffee or afternoon tea for a comforting pick-me-up.
Keeping Them Fresh: Storage and Make-Ahead Tips
Storing Baked Peanut Butter Cookies
Once completely cooled, store your classic peanut butter cookies in an airtight container at room temperature for up to 5-7 days. Placing a slice of bread in the container can help keep them softer.
Can You Make the Dough Ahead?
Absolutely! The cookie dough can be prepared up to 2-3 days in advance. Store it tightly wrapped in plastic wrap in the refrigerator. Let it sit at room temperature for 10-15 minutes before rolling and baking.
Freezing Dough and Baked Cookies
To Freeze Dough: Roll the dough into balls, flatten with a fork, and freeze on a baking sheet until solid. Transfer to an airtight freezer bag and freeze for up to 3 months. Bake from frozen, adding a couple of minutes to the baking time.
To Freeze Baked Cookies: Allow cookies to cool completely. Freeze in a single layer on a baking sheet, then transfer to an airtight container or freezer bag for up to 3 months. Thaw at room temperature or gently warm in the oven.
Your Top Questions Answered: Classic Peanut Butter Cookies FAQs
Can I use natural peanut butter for these cookies?
While delicious for sandwiches, natural peanut butter (especially the “stir” kind with oil separation) often has a different fat-to-solids ratio. This can significantly change the cookie’s texture, making them drier or more crumbly. For best results with this recipe’s chewy promise, stick to creamy, processed peanut butter like Jif or Skippy. If you’re looking for another delightful peanut butter treat, consider trying a no-bake peanut butter fudge pie, where texture differences are less critical.
How do I know if my butter is softened enough?
Softened butter should be pliable and yield slightly when pressed with a finger, leaving an indentation, but it should not be greasy or melted. If it’s too warm, your cookies may spread excessively. If it’s too cold, it won’t cream properly with the sugars.
Can I make these cookies gluten-free?
Yes, you can often substitute a good quality 1:1 gluten-free all-purpose flour blend for the regular flour. Ensure your blend contains xanthan gum, or add 1/4 teaspoon separately if it doesn’t. Results may vary slightly in texture, but they generally turn out well.
Why do I need to make a criss-cross pattern?
The criss-cross pattern isn’t just for aesthetics! It serves a functional purpose by flattening the cookie dough slightly, which helps with even baking. Without this step, the cookies might not cook through properly and could remain doughy in the center, or they could puff up too much.
Ready to Bake Your Best Batch? Share Your Classic Peanut Butter Cookies!
Now that you’re armed with all the secrets to achieving perfectly soft and chewy classic peanut butter cookies, it’s time to get baking! This recipe is more than just a list of ingredients; it’s a guide to creating a beloved treat that truly melts in your mouth.
We encourage you to try this technique and experience the difference. Share your delicious creations with us – we love seeing your baking triumphs! And if you’re craving more delightful desserts, be sure to explore our collection of decadent dessert recipes.
Happy baking, and may your kitchen always be filled with the comforting aroma of freshly baked cookies!
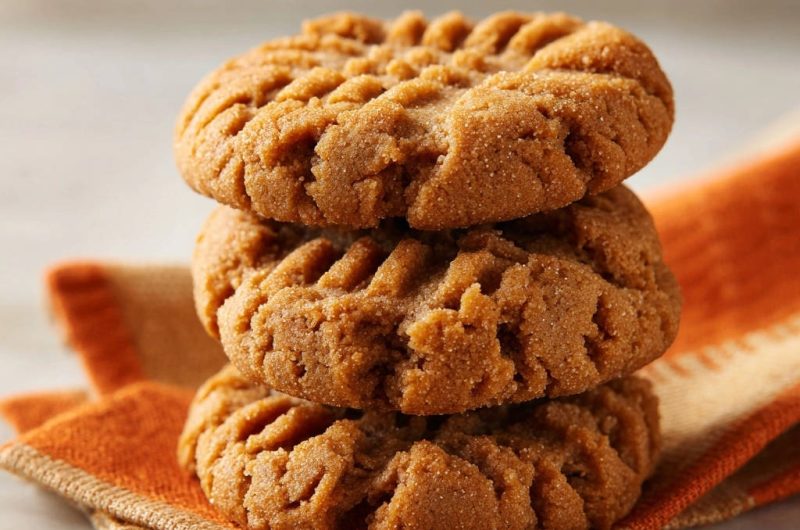
Peanut Butter Cookies
Course: DessertCuisine: AmericanDifficulty: easy24
cookies20
minutes10
minutes240
kcal35
minutesUnlock the secret to perfect, melt-in-your-mouth chewy peanut butter cookies. This recipe guarantees a soft center every time, avoiding dry or hard results with a simple mixing and baking technique.
Ingredients
1/2 cup (1 stick) unsalted butter, softened
1/2 cup granulated sugar, plus more for rolling
1/2 cup packed light brown sugar
1 large egg
1 teaspoon vanilla extract
1 cup creamy peanut butter
1 1/2 cups all-purpose flour
1 teaspoon baking soda
1/2 teaspoon salt
Directions
- Preheat your oven to 375 degrees F (190 degrees C). Line baking sheets with parchment paper.
- In a large bowl, cream together the softened butter, 1/2 cup granulated sugar, and brown sugar with an electric mixer until light and fluffy. This should take about 2-3 minutes.
- Beat in the egg and vanilla extract until well combined. Then, mix in the creamy peanut butter until smooth.
- In a separate medium bowl, whisk together the all-purpose flour, baking soda, and salt.
- The Chewy Secret: Gradually add the dry ingredients to the wet ingredients, mixing on low speed just until combined. Be careful not to overmix the dough once the flour is added. Overmixing develops gluten, which can lead to tough, dry cookies. Stop mixing as soon as you no longer see streaks of flour.
- Roll the dough into 1-inch balls. Roll each ball in the extra granulated sugar until evenly coated. Place the sugared balls about 2 inches apart on the prepared baking sheets.
- Use the tines of a fork to flatten each cookie ball, making a criss-cross pattern. Dip the fork in sugar between each cookie if it starts to stick.
- Bake for 8-10 minutes, or until the edges are lightly golden but the centers still look slightly soft. Do not overbake! This is absolutely key to keeping them beautifully chewy. They will continue to set as they cool.
- Let the cookies cool on the baking sheets for 5 minutes before transferring them to a wire rack to cool completely. Enjoy your perfectly soft and chewy peanut butter cookies!
Notes
- Avoid overmixing the dough and overbaking to ensure perfectly soft, chewy cookies. They will set more as they cool.