No-Bake Peanut Butter Pie: The Secret to a Perfectly Set Slice
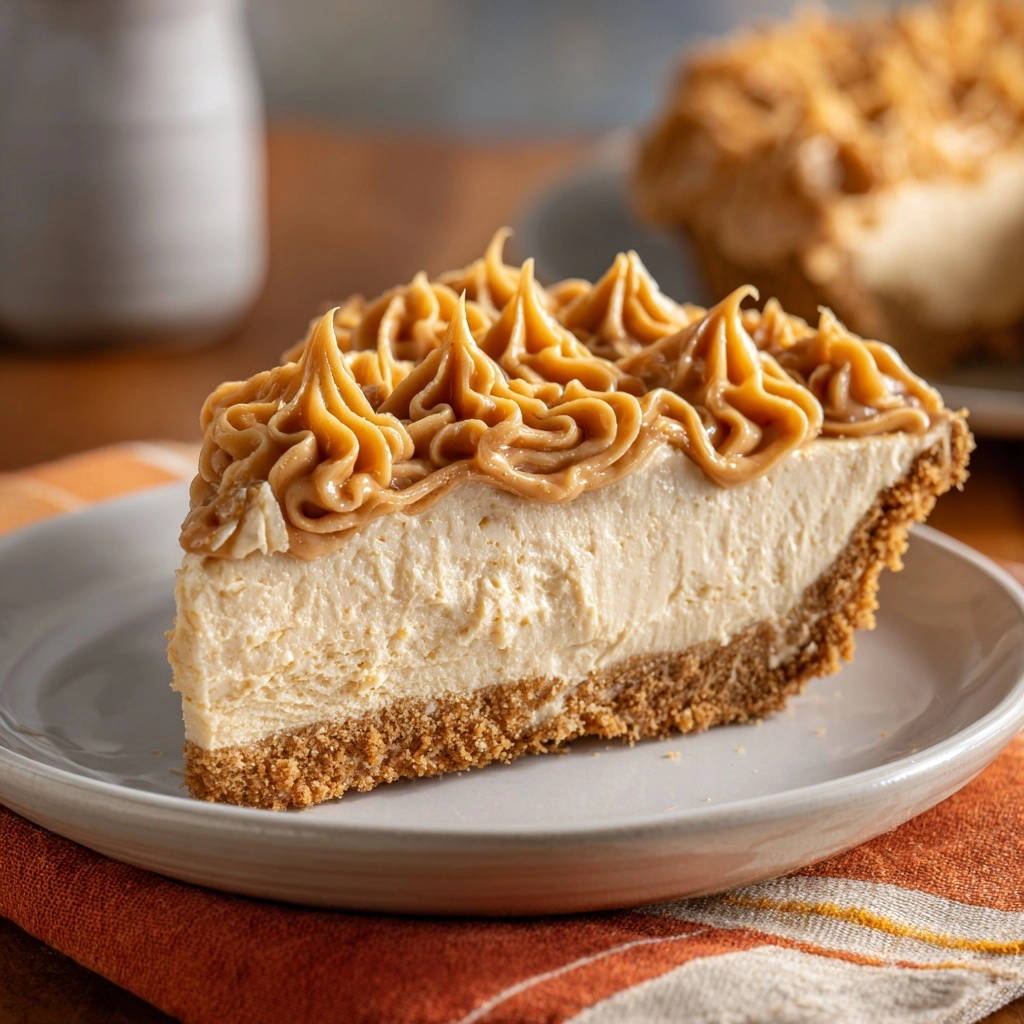
There’s nothing quite like a creamy, decadent slice of pie, yet achieving a truly firm no-bake dessert often feels like a kitchen enigma. I’ve certainly had my share of wobbly slices, but I’ve perfected this recipe for a No-Bake Peanut Butter Pie that delivers a beautifully firm, incredibly creamy result every single time.
This recipe unlocks the “fail-safe set secret,” ensuring your pie holds its shape effortlessly, making it the ultimate crowd-pleaser for any occasion.
Unlock the Secret to a Perfectly Set No-Bake Peanut Butter Pie
No More Wobbly Pies: Our Fail-Safe Setting Method
Wobbly, collapsing slices are a common no-bake pie nightmare. Our recipe combats this with a strategic combination of ingredients and an essential extended chill time.
This thoughtful approach guarantees a beautifully firm, yet delightfully creamy pie that slices cleanly and impresses every guest.
The Dream Team: Creamy, Airy, and Irresistible Texture
Forget dense, heavy pies. This No-Bake Peanut Butter Pie boasts an incredibly light, airy, and luscious texture that melts in your mouth.
The carefully balanced ingredients work in harmony to create this perfect, irresistible mouthfeel, making each bite a true pleasure.
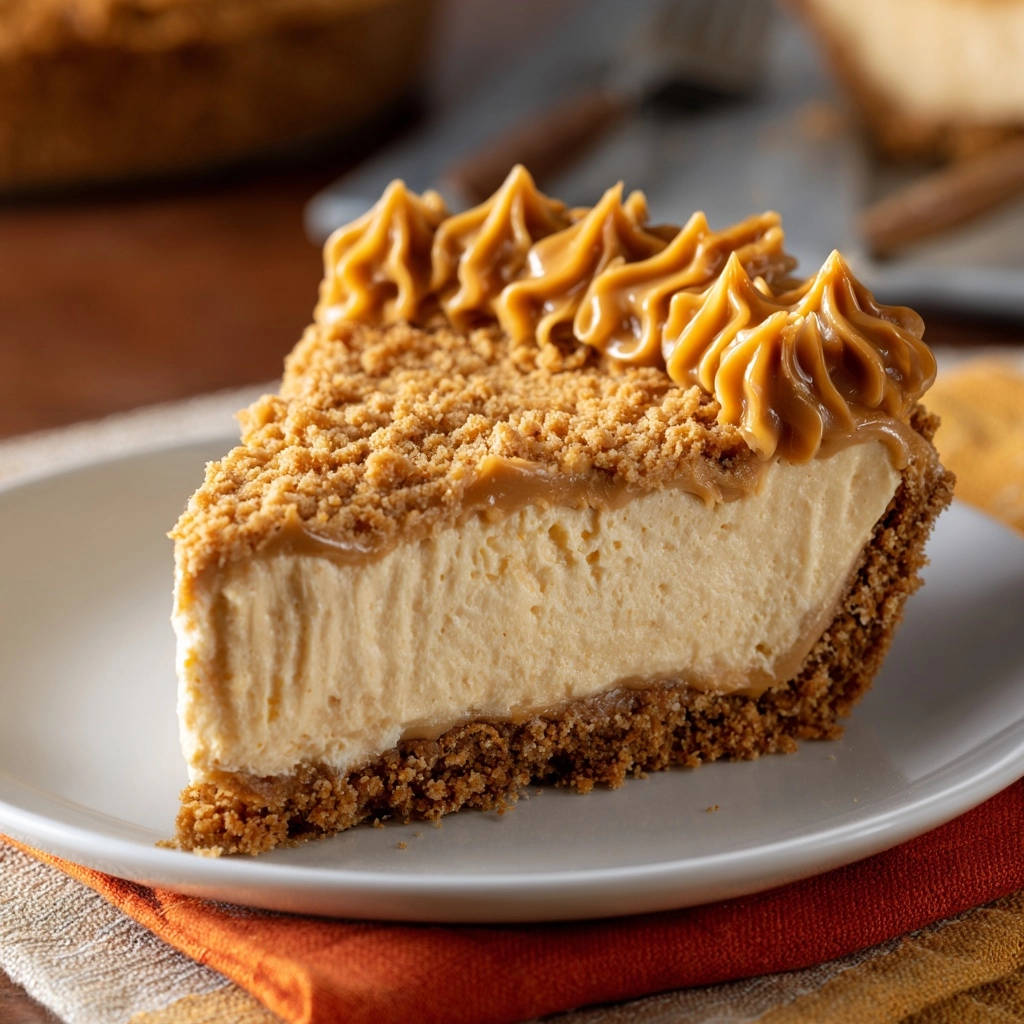
Effortless Elegance: Quick Prep, Impressive Results
This dessert proves that elegance doesn’t require hours in the kitchen. The quick preparation makes it ideal for busy schedules or spontaneous entertaining.
If you enjoy working with no-bake crusts, you’ll love these gooey pecan pie cheesecake bars.
You’ll achieve a show-stopping dessert with minimal fuss, leaving you more time to enjoy your guests and the delicious results.
Gather Your Culinary Cadre: Essential Ingredients for Success
For the Foundation: The Graham Cracker Crust
You’ll need graham cracker crumbs, granulated sugar, and unsalted butter, melted. Precise measurements for these components are crucial for a sturdy, buttery crust that holds together perfectly.
This base provides the ideal complement to the rich, creamy filling.
The Star of the Show: Our Fail-Safe Filling Formula
The filling combines softened cream cheese, creamy peanut butter, powdered sugar, vanilla extract, very cold heavy cream, and a touch of milk.
Each ingredient plays a vital role in both the luxurious flavor and the critical setting of this delightful No-Bake Peanut Butter Pie.
The Perfect Finishing Touch: Decadent Peanut Butter Topping
For the topping, gather creamy peanut butter, powdered sugar, softened unsalted butter, and milk.
The milk amount is adjustable, allowing you to achieve the perfect consistency for smooth spreading or elegant piping.
Essential Gear for No-Bake Peanut Butter Pie Success
Standard Kitchen Staples
You’ll need basic tools like mixing bowls of various sizes, reliable measuring cups and spoons, and a sturdy rubber spatula for mixing and smoothing.
A 9-inch pie dish is essential to perfectly shape your pie.
Electric Mixer: Your Best Friend for Fluffy Filling
An electric mixer, whether handheld or stand, is truly indispensable for this recipe.
It’s crucial for beating the cream cheese until flawlessly smooth and for whipping the heavy cream to those essential firm peaks that give the pie its structure.
Optional Tools for Professional Presentation
For a beautifully finished look, consider using a piping bag fitted with your favorite decorative tip for the topping.
A flat-bottomed glass or measuring cup is also excellent for compacting the graham cracker crust firmly and evenly.
Crafting Your Masterpiece: Step-by-Step No-Bake Peanut Butter Pie Guide
Phase 1: Building the Perfect Crust Foundation
Combine 1 1/2 cups graham cracker crumbs and 1/4 cup granulated sugar in a medium bowl. Pour in 1/2 cup melted unsalted butter and mix until the crumbs are evenly moistened. This ensures a consistent, buttery base that will hold its shape beautifully.
Press the mixture firmly into the bottom and up the sides of a 9-inch pie dish. Use the flat bottom of a glass or measuring cup to really compact it; this is key for creating a sturdy, crumble-free crust.
Place the crust in the refrigerator to chill while you prepare the filling. This initial chill helps the butter solidify, preventing the crust from becoming crumbly when sliced.
Phase 2: The “Fail-Safe” Filling Assembly
This meticulous phase is where the magic happens, developing that firm, yet incredibly creamy texture of your No-Bake Peanut Butter Pie.
Cream Cheese & Peanut Butter: The Flavor Base
In a large bowl, beat 8 ounces of softened cream cheese with an electric mixer until it is completely smooth and lump-free. Ensuring the cream cheese is truly softened to room temperature is vital for a silky, uniform texture.
Add 1 cup creamy peanut butter, 1 cup powdered sugar, and 1 teaspoon vanilla extract. Beat these ingredients until they are well combined and perfectly smooth, frequently scraping down the sides of the bowl to ensure no unmixed pockets remain.
Gradually add 1/4 cup milk and beat until just incorporated. The milk helps create a wonderfully creamy consistency in the base mixture, contributing significantly to the pie’s ultimate perfect set.
Whipping Heavy Cream: The Structure Secret
In a separate, thoroughly chilled bowl, whip 1 1/2 cups of very cold heavy cream with an electric mixer on high speed until firm peaks form. This step is absolutely crucial; the whipped cream provides essential structure and incorporates airiness, directly preventing a wobbly pie.
Always ensure your bowl and heavy cream are very cold for the most efficient and effective whipping results, yielding stable, firm peaks.
The same chilled bowl technique gives the cream in this no-bake Caramel Swirl Dream Pie its airy structure.
Gently Folding: Preserving the Airiness
Gently fold the whipped cream into the peanut butter cream cheese mixture in two additions. Be extremely careful and use a light hand to avoid deflating the delicate air you’ve incorporated into the whipped cream.
Mix until just combined and no streaks of either mixture remain. This careful folding is crucial for maintaining the airy, yet firm texture that is key for clean, elegant slicing of your finished No-Bake Peanut Butter Pie.
Phase 3: The Critical Chill for Ultimate Firmness
Pour the prepared filling into your chilled graham cracker crust and smooth the top evenly with a spatula. An even layer promotes consistent setting throughout the pie.
Cover the pie loosely with plastic wrap and refrigerate for at least 6 hours, or preferably overnight, to allow it to set completely. This extended chill time is absolutely vital for achieving the “fail-safe” firmness that guarantees a perfect, sliceable No-Bake Peanut Butter Pie.
Phase 4: Whipping Up the Rich Peanut Butter Topping
In a small bowl, combine 1/2 cup creamy peanut butter, 1/4 cup powdered sugar, and 2 tablespoons softened butter. Stir these ingredients vigorously until the mixture is smooth and all components are thoroughly integrated.
Add milk one tablespoon at a time, mixing well after each addition, until you reach a consistency that is perfectly suitable for piping. The topping should be thick enough to hold its shape beautifully, yet soft enough to flow easily through a piping bag.
Phase 5: Decorate, Slice, and Savor
Once your pie is fully set after its extended chill, spoon the prepared topping into a piping bag fitted with your favorite decorative tip. Pipe swirls, rosettes, or elegant dollops generously over the top of the pie for an appealing presentation.
Finally, slice and serve your perfectly set, wonderfully creamy No-Bake Peanut Butter Pie. Enjoy the delightful fruits of your labor!
Chef’s Notes: Elevating Your No-Bake Peanut Butter Pie
Mastering the Chill: Why Time is Your Ally. Do not rush the refrigeration step. An overnight chill truly makes all the difference in achieving that ultimate firm, clean slice. Patience ensures perfection for your No-Bake Peanut Butter Pie.
The Art of Whipping Cream: Peaks and Pitfalls. Always use a chilled bowl and very cold heavy cream. Watch for firm peaks – over-whipping can lead to a grainy texture, while under-whipping won’t provide enough structure for a stable pie.
Softening Cream Cheese & Butter: The Smooth Start. Ensure your cream cheese and butter are truly at room temperature. This prevents lumps in the filling and topping, guaranteeing a silky smooth and homogenous consistency.
Customizing Your Topping Consistency. The amount of milk for the topping is a guide. Adjust based on the creaminess of your specific peanut butter and your desired piping consistency. Always start with less milk and add slowly, mixing thoroughly after each addition.
Gentle Folding for Airiness. When folding in the whipped cream, use a spatula and a gentle hand. Overmixing at this stage will deflate the air you’ve incorporated, resulting in a denser, less airy pie that might not set as perfectly.
Troubleshooting Your No-Bake Peanut Butter Pie
Problem: My Pie Won’t Set Firmly
Common culprits include insufficient chill time, under-whipped heavy cream, or overmixing the filling after the whipped cream has been incorporated. Ensure you meet the minimum 6-hour chill and whip your cream to stiff, firm peaks for success.
Problem: Lumpy Filling
The primary cause of a lumpy filling is cream cheese that isn’t properly softened to room temperature. Always ensure it’s incredibly soft and beat it until completely smooth before adding any other ingredients to the bowl.
Problem: My Topping is Too Runny or Too Stiff
If your topping is too runny, incorporate a little more powdered sugar, a tablespoon at a time, until the desired thickness is achieved. If it’s too stiff, add milk one teaspoon at a time, mixing well after each addition, until it’s easily pipeable or spreadable.
Sweet Twists & Dietary Swaps: Customize Your Pie
Chocolate Lovers Rejoice: Add a Cocoa Kick
For an irresistible chocolate-peanut butter fusion, consider adding a tablespoon of unsweetened cocoa powder to your crust mixture. A decadent drizzle of chocolate ganache over the finished pie is another fantastic option, or try our chocolate crumb cheesecake bars for another chocolatey treat!
Gluten-Free & Dairy-Free Adaptations
To make this pie gluten-free, simply substitute regular graham crackers with a high-quality gluten-free variety. For a dairy-free version, look for plant-based cream cheese alternatives and use full-fat coconut cream (chilled overnight, only scoop the thick cream) in place of heavy cream.
Beyond Graham: Alternative Crust Ideas
While graham cracker is classic, feel free to experiment! Crushed Oreo cookies make a rich, chocolatey base that pairs beautifully with peanut butter. A shortbread cookie crust also offers a delightful buttery contrast and firm texture.
Serving Suggestions & Smart Storage for Freshness
Picture-Perfect Presentation
Elevate your No-Bake Peanut Butter Pie with simple garnishes. A sprinkle of chopped roasted peanuts adds textural contrast, while delicate chocolate shavings or a drizzle of chocolate syrup provides an extra touch of elegance and flavor.
Keeping Your Pie Perfect: Storage Tips
Proper storage ensures maximum freshness. Keep your pie covered loosely with plastic wrap or in an airtight container in the refrigerator. It will remain fresh and delicious for 3-4 days.
What to Serve with Peanut Butter Pie
That creamy peanut butter pie calls for something crunchy or bright on the side. Here are two recipes that fit the bill.
- If you want more peanut butter flavor with a salty-sweet crunch, try this Loaded Peanut Butter Toffee Dip for dipping pretzels or fruit.
- For a citrus contrast that cuts through the richness, these Glazed Lemon Poppy Seed Scones offer a bright, tender bite alongside the pie.
Make-Ahead Magic: Plan for Effortless Entertaining
This No-Bake Peanut Butter Pie is the ideal make-ahead dessert! Prepare it the day before your event and let it chill overnight. This guarantees optimal firmness and allows you to enjoy a stress-free entertaining experience.
Your No-Bake Peanut Butter Pie Questions Answered
Can I use crunchy peanut butter?
Yes, you can absolutely use crunchy peanut butter in the filling! It will introduce a delightful textural element and an extra burst of peanut flavor. However, for the topping, creamy peanut butter is generally preferred for its smooth, pipeable consistency.
How long does No-Bake Peanut Butter Pie last in the fridge?
When stored properly, covered loosely or in an airtight container, your No-Bake Peanut Butter Pie will stay fresh and delicious in the refrigerator for 3 to 4 days.
Can I freeze this pie?
This pie freezes exceptionally well! For best results, wrap it tightly in plastic wrap, then an additional layer of aluminum foil. It can be frozen for up to 1 month. Thaw the pie in the refrigerator overnight before slicing and serving, just like our other decadent no-bake fudge pies.
What if I don’t have an electric mixer?
While an electric mixer is highly recommended for achieving the best results, especially for whipping the heavy cream to firm peaks, you can use a sturdy whisk and a strong arm for the cream cheese mixture. Whipping cream by hand to firm peaks is very challenging and time-consuming but certainly possible with enough effort.
Your Slice of Perfection Awaits!
You now possess the secret to creating a truly spectacular No-Bake Peanut Butter Pie that is both effortlessly elegant and perfectly set. This recipe transforms a classic favorite into a foolproof masterpiece, ensuring every slice is a moment of pure bliss.
Don’t hesitate to bring this creamy, dreamy dessert to your next gathering or simply enjoy a quiet indulgence at home. We encourage you to try it, savor every bite, and share your delicious creations with us in the comments below!
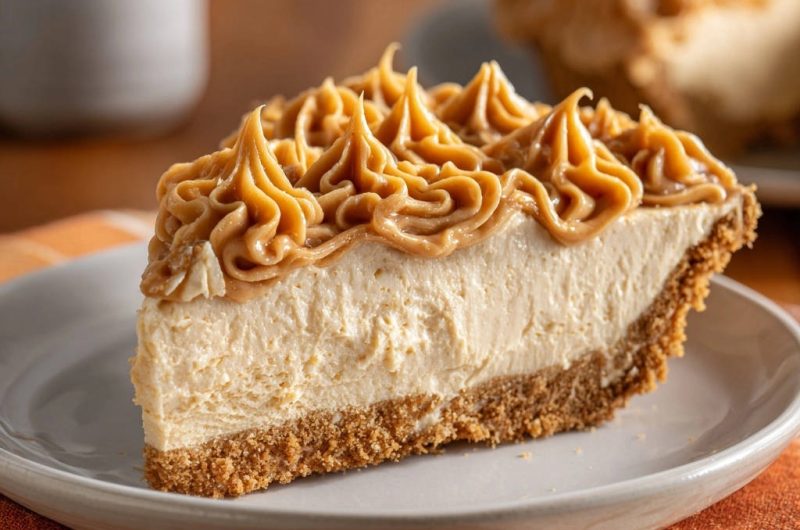
Peanut Butter Pie
Course: DessertCuisine: AmericanDifficulty: easy1
(9-inch) pie, 8-10 servings40
minutes550
kcal420
minutesDiscover the secret to a perfectly set, yet incredibly creamy No-Bake Peanut Butter Pie. This fail-safe recipe ensures firm slices every time, eliminating wobbly pie woes. Enjoy a rich, decadent dessert with minimal effort.
Ingredients
For the Crust:
1 1/2 cups graham cracker crumbs
1/4 cup granulated sugar
1/2 cup unsalted butter, melted
For the Filling:
8 ounces cream cheese, softened
1 cup creamy peanut butter
1 cup powdered sugar
1 teaspoon vanilla extract
1 1/2 cups heavy cream, very cold
1/4 cup milk
For the Topping:
1/2 cup creamy peanut butter
1/4 cup powdered sugar
2 tablespoons unsalted butter, softened
1-2 tablespoons milk
Directions
- For the Crust: In a medium bowl, combine graham cracker crumbs and sugar. Pour in the melted butter and mix until the crumbs are evenly moistened. Press the mixture firmly into the bottom and up the sides of a 9-inch pie dish. Use the flat bottom of a glass or measuring cup to really compact it. Place in the refrigerator to chill while you prepare the filling.
- For the Filling (The Fail-Safe Set Secret!): In a large bowl, using an electric mixer, beat the softened cream cheese until it is smooth and lump-free. Add the 1 cup creamy peanut butter, 1 cup powdered sugar, and vanilla extract. Beat until well combined and smooth, scraping down the sides of the bowl as needed. Gradually add the 1/4 cup milk and beat until just incorporated, ensuring the mixture is creamy but not thin.
- In a separate, chilled bowl, whip the 1 1/2 cups of very cold heavy cream with an electric mixer on high speed until firm peaks form. This is your foundation for a perfectly set pie because it adds crucial structure and airiness.
- Gently fold the whipped cream into the peanut butter cream cheese mixture in two additions, being careful not to deflate the whipped cream. Mix until just combined and no streaks remain. This step is crucial for maintaining the airy, yet firm texture that allows for clean slicing.
- Pour the filling into the chilled graham cracker crust. Smooth the top with a spatula. Cover loosely with plastic wrap and refrigerate for at least 6 hours, or preferably overnight, to allow it to set completely. This extended chill time is vital for the “fail-safe” firmness.
- For the Topping: In a small bowl, combine the 1/2 cup creamy peanut butter, 1/4 cup powdered sugar, and softened butter. Stir until smooth. Add milk one tablespoon at a time until you reach a consistency suitable for piping (thick enough to hold its shape, but soft enough to pipe easily).
- Once the pie is fully set, spoon the topping into a piping bag fitted with your favorite decorative tip. Pipe swirls or dollops generously over the top of the pie.
- Slice and serve your perfectly set, creamy peanut butter pie!
Notes
- The key to a perfectly set pie lies in very cold heavy cream and an extended chill time.