Cheesy Layered Pastry: Unlock Perfect Flaky Layers
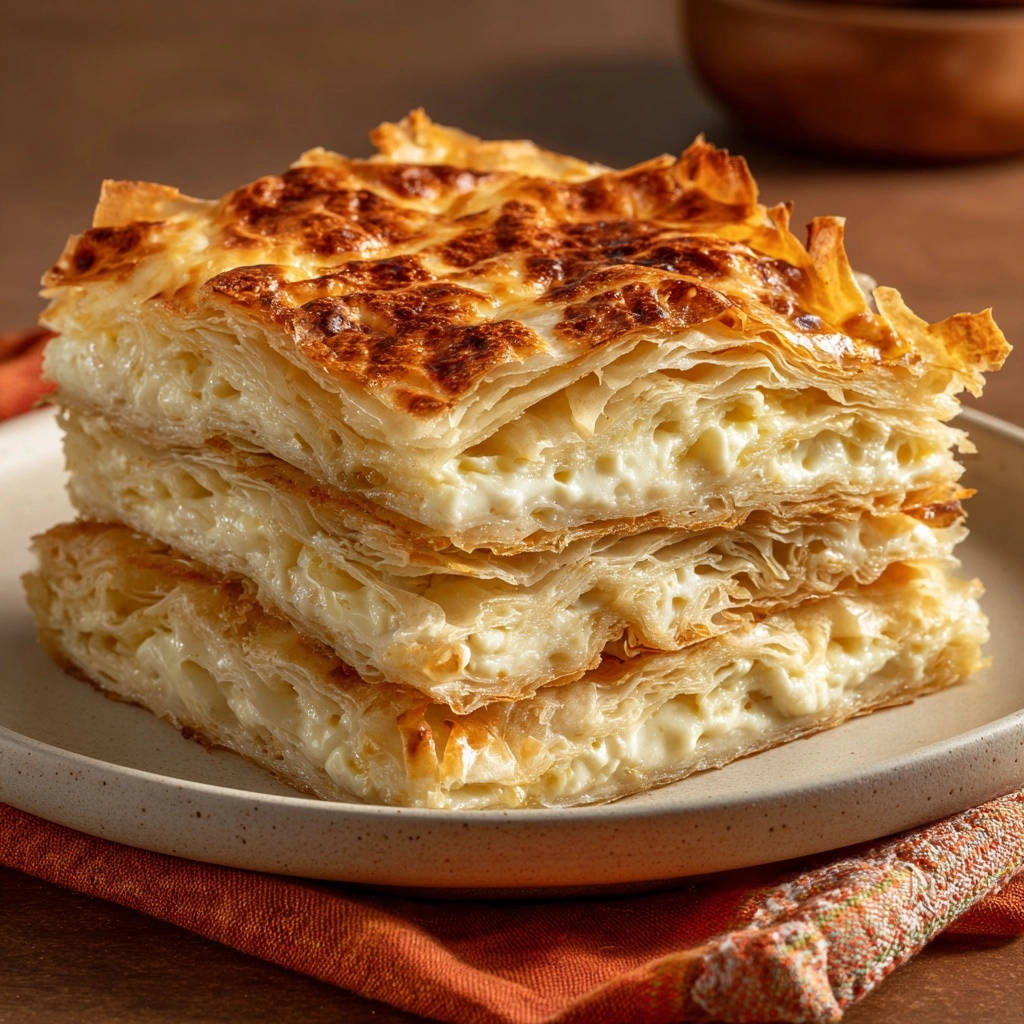
For years, creating a truly spectacular cheesy pastry with those elusive, distinct flaky layers felt like a culinary Everest. I often ended up with a beautiful-looking bake that was either too dry and brittle or, even worse, disappointingly soggy. However, discovering a specific technique transformed my Cheesy Layered Pastry into a consistently airy, golden masterpiece, proving that perfect layers are entirely achievable.
The Game-Changing Secret: Why Our Cheesy Layered Pastry Shines
This recipe for Cheesy Layered Pastry isn’t just another filo pie; it’s designed to eliminate common pitfalls and guarantee an incredible texture every time. Unlike many traditional methods, our approach ensures each delicate layer bakes up light, distinct, and wonderfully crisp, never dense or heavy.
The secret lies in a brilliant yet simple “magic soak” step that infuses moisture precisely where it’s needed. This ingenious technique prevents the pastry from drying out during baking while simultaneously creating internal steam that pushes the layers apart for an ethereal flakiness.
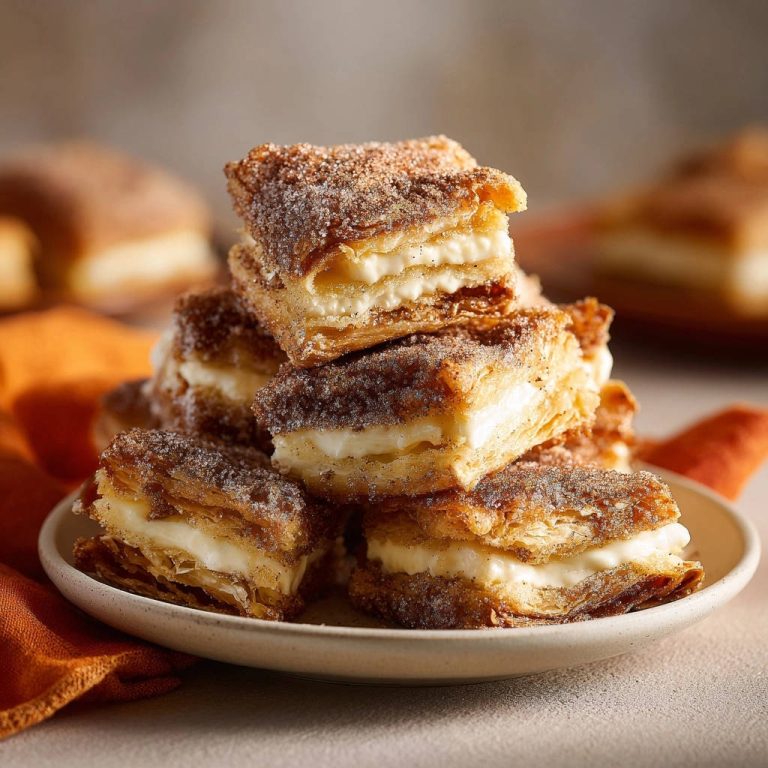
The result is a savory bake that boasts a golden-brown exterior and a tender, cheesy interior, free from any hint of sogginess. It’s a truly reliable recipe that delivers on its promise of perfect layers, ideal for any gathering or a delightful family meal.
Crafting Perfection: The Essential Ingredients
The Foundation: Filo Dough
Using high-quality filo dough is paramount for achieving those signature flaky layers. Opt for a brand you trust and ensure it’s fully thawed in the refrigerator overnight before use, or at room temperature for a few hours.
The dough needs to be pliable, not stiff or crumbly. Always keep unused sheets covered with a lightly damp kitchen towel as you work; filo dries out incredibly quickly, becoming brittle and hard to handle.
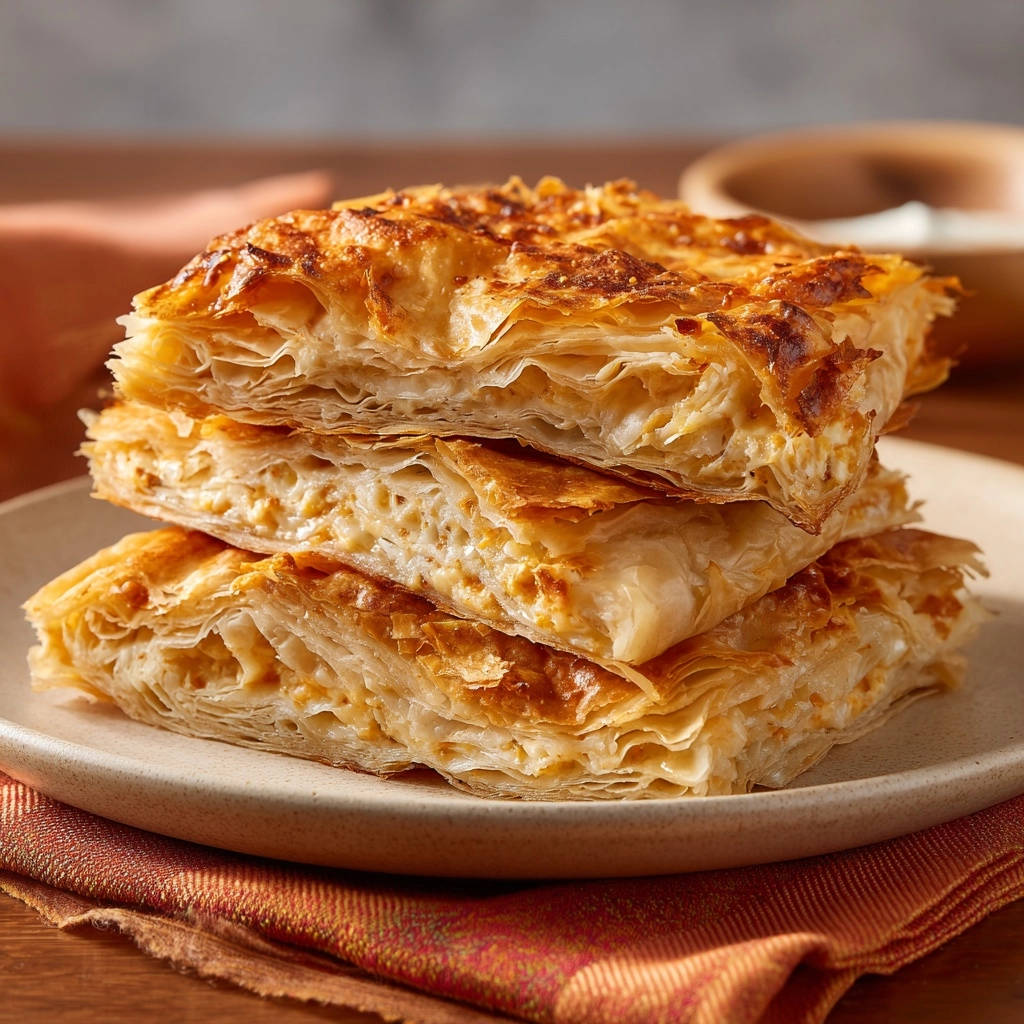
The Cheesy Heart: Ricotta and Feta
The combination of ricotta and feta provides a beautiful balance of creamy texture and tangy, salty flavor. Ricotta offers a smooth, mild base, while feta contributes a delightful crumbly texture and a salty kick.
It is absolutely crucial to drain the ricotta cheese thoroughly if it appears watery. Excess moisture can make your pastry soggy. For variations, consider adding a touch of grated Parmesan or a hint of sharp cheddar for extra depth to your cheese pie.
The “Magic” Liquid: Eggs and Milk
This humble mixture is the unsung hero of our Cheesy Layered Pastry, directly responsible for its remarkable texture. The egg binds the liquid and contributes to richness, while the milk provides essential moisture.
Together, they create the steam necessary during baking that separates the filo sheets, ensuring incredibly light, airy, and distinct layers. Use large eggs and any standard milk for best results.
Flavor Boosters & Seasoning
Fresh parsley adds a bright, herbaceous note that complements the rich cheese filling beautifully. While optional, it elevates the overall taste profile of this savory bake.
Salt and black pepper are essential for seasoning the cheese filling. Taste as you go, remembering that feta is already salty, so adjust accordingly to ensure a perfectly balanced flavor.
Essential Tools for Your Layered Pastry Journey
Having the right equipment on hand makes the preparation of this Cheesy Layered Pastry smooth and enjoyable.
9×13 Inch Baking Dish: This standard size is perfect for a generous, family-sized pastry, allowing for even baking and beautiful layers.
Mixing Bowls: You’ll need a medium bowl for combining the cheese filling ingredients and a small bowl for whisking the crucial egg and milk mixture.
Whisk: Essential for thoroughly combining the egg and milk, ensuring a homogenous liquid that soaks evenly into the filo layers.
Pastry Brush: A good pastry brush, either silicone or natural bristle, is indispensable for lightly and evenly coating each filo sheet with melted butter, crucial for flakiness.
Sharp Knife: A sharp knife is necessary for cleanly scoring the top layers of the pastry before baking, which helps in portioning and prevents cracking.
Your Path to Flaky Perfection: Step-by-Step Guide
- Preheat and Prepare Dish
Preheat your oven to 375 degrees Fahrenheit (190 degrees Celsius). Lightly grease a 9×13 inch baking dish. This ensures the pastry doesn’t stick and releases cleanly after baking.
- Combine Cheese Filling
In a medium bowl, combine the well-drained ricotta cheese, crumbled feta cheese, and finely chopped parsley (if using). Add one of the large eggs, salt, and black pepper. Mix thoroughly until all ingredients are evenly incorporated, creating a cohesive savory filling.
- Handle Filo Dough
Carefully unroll the thawed filo dough. Filo is delicate, so handle it gently to prevent tearing. Crucially, keep any unused sheets covered with a damp kitchen towel to prevent them from drying out and becoming brittle while you work.
- First Filo Layers (Bottom)
Lay one sheet of filo dough into the prepared baking dish. Lightly brush the entire surface with melted unsalted butter. Repeat this process with 4 to 5 more sheets of filo, layering and brushing each one with butter as you stack them. This forms the sturdy, flaky base.
- Apply First Cheese Layer
Evenly spread half of the prepared cheese filling over the buttered filo layers in the dish. Ensure the filling reaches the edges for consistent flavor in every bite of your Cheesy Layered Pastry.
- Mid-Filo Layers
Place another single sheet of filo directly over the cheese filling and brush it lightly with melted butter. Continue layering 4 to 5 more sheets of filo on top, brushing each individual sheet with butter before adding the next. These layers create the middle structure of your cheese pie.
- Apply Remaining Cheese Layer
Spread the remaining half of the cheese filling evenly over these newly buttered filo layers. Distribute it edge-to-edge for uniform cheesy goodness throughout the pastry.
- Top Filo Layers
Cover the second layer of cheese filling with the remaining filo sheets. Brush each sheet generously with melted butter as you stack them. Ensure the very top layer is exceptionally well buttered; this contributes to a beautiful golden-brown and crisp crust.
- Score the Pastry
Using a sharp knife, carefully score the top layers of the pastry into your desired serving squares or rectangles. Only cut through the top few layers of filo, not all the way to the bottom of the dish. Scoring helps in neat portioning after baking and allows the “magic soak” to penetrate.
- Prepare the “Magic Soak” (Egg and Milk Mixture)
In a small bowl, whisk together the remaining large egg and the half cup of milk until thoroughly combined. This simple mixture is the true secret behind achieving those incredibly distinct, airy, and golden layers in your savory bake.
- Pour and Soak
Slowly and evenly pour this egg and milk mixture over the entire scored surface of the pastry in the baking dish. Gently tilt the dish if needed to ensure the liquid distributes into all the scored lines. Allow the pastry to sit for about 5 to 10 minutes, giving the liquid time to soak down into the filo layers. This critical soaking time creates steam during baking, ensuring your layers are light, airy, and distinct, preventing them from drying out or becoming soggy.
- Bake to Golden Perfection
Bake the pastry for 40 to 50 minutes, or until the top is deeply golden brown, and the pastry is visibly puffed and cooked through. If the top begins to brown too quickly, loosely tent it with aluminum foil to prevent burning while the interior finishes baking.
- Cool and Serve
Remove the Cheesy Layered Pastry from the oven and let it cool slightly in the dish for about 10-15 minutes. This cooling period allows the layers to set, making it easier to cut along the scored lines for clean, beautiful servings. Enjoy your perfectly flaky, cheesy creation!
Mastering the “Magic Soak”: The Secret to Distinct Layers
The egg and milk mixture, often overlooked in other recipes, is the cornerstone of this Cheesy Layered Pastry’s success. It’s what transforms mere stacked filo into a truly impressive, multi-layered savory bake.
This same egg wash technique also gives the broccoli cheddar quiche its crisp, golden shell.
When this liquid is poured over the scored pastry, it seeps into the spaces between the buttered filo sheets. As the pastry bakes, the milk converts to steam, which gently pushes the delicate filo layers apart.
This internal steaming action is precisely what creates the incredibly light, airy, and distinctly separated layers we crave. Simultaneously, the egg helps set the structure and contributes to the beautiful golden crust, ensuring the pastry isn’t dry or brittle. Allowing it to soak for 5-10 minutes is key, giving the liquid ample time to fully permeate the filo.
Elevate Your Baking: Expert Tips for Success
Handling Filo Like a Pro
Filo dough is notorious for drying out. Always keep any sheets you’re not immediately working with covered under a lightly damp, clean kitchen towel. Work quickly but carefully to prevent tearing and maintain pliability.
Perfect Scoring Techniques
Scoring the top layers before baking is vital for neat serving portions and allows the magic soak to penetrate evenly. Use a very sharp, thin knife and cut only through the top few layers of filo, not all the way to the bottom of the baking dish.
Achieving Golden Brown Perfection
Keep a close eye on your Cheesy Layered Pastry during the last 15-20 minutes of baking. If it’s browning too quickly on top before the center is fully cooked, loosely tent the dish with aluminum foil. This protects the top while allowing the rest of the pastry to finish baking evenly.
Cooling for Best Results
Resist the urge to cut into your hot pastry immediately after it comes out of the oven. Allowing it to cool slightly, for about 10-15 minutes, gives the layers time to set and firm up. This results in cleaner cuts and a more stable structure for your savory pie.
Don’t Skimp on Butter (But Don’t Drown It)
Butter is essential for flavor and crispness between layers. Brush each sheet lightly but thoroughly. You want an even, thin coating, not pools of butter, which can make the pastry greasy. Aim for consistent coverage for the best flaky texture.
Troubleshooting Common Cheesy Pastry Challenges
Pastry Too Soggy or Dense?
Sogginess often comes from excess moisture. Ensure your ricotta cheese is very well drained; some brands are wetter than others. Also, avoid over-buttering the filo layers; a light, even brush is all that’s needed.
Insufficient baking time or not allowing the egg and milk mixture to properly soak in can also lead to a dense pastry. Make sure to bake until truly golden and puffed, and don’t skip the 5-10 minute soak.
Layers Not Flaking?
If your layers aren’t separating and flaking beautifully, it’s likely due to uneven buttering or issues with the “magic soak.” Ensure every single filo sheet gets a light, even coating of melted butter to create separation.
The egg and milk mixture is critical; ensure it’s whisked well and poured evenly over the scored surface. The 5-10 minute soak time is non-negotiable for the steam-creation process that makes layers distinct.
Cheese Filling Too Watery?
The primary culprit here is undrained ricotta. Place your ricotta in a fine-mesh sieve lined with cheesecloth or a coffee filter, and let it drain over a bowl in the refrigerator for at least an hour, or even overnight, for the best results.
Top Browning Too Quickly?
This is a common issue, especially with higher oven temperatures. If you notice the top turning a deep golden brown while the baking time still has a way to go, simply tent the baking dish loosely with aluminum foil. This will prevent further browning without hindering the internal cooking.
Serving Suggestions and Smart Storage Solutions
Ideal Serving Temperature & Pairings
This Cheesy Layered Pastry is absolutely delicious served warm, directly from the oven, allowing the cheeses to be perfectly gooey. It’s also excellent at room temperature, making it ideal for potlucks or picnics.
Pair this savory bake with a crisp green salad tossed in a light vinaigrette for a refreshing contrast. It also makes a wonderful side dish for roasted chicken or a comforting bowl of tomato soup.
Make-Ahead & Freezing Options
You can assemble the entire Cheesy Layered Pastry up to 24 hours in advance. Cover it tightly with plastic wrap and refrigerate until ready to bake. Add the egg and milk soak just before baking.
For longer storage, bake the pastry completely, then let it cool. Cut into individual portions and freeze them on a baking sheet until solid. Transfer to an airtight container or freezer bag for up to 2-3 months. Reheat from frozen in a preheated oven.
Storing Leftovers for Freshness
Store any leftover Cheesy Layered Pastry in an airtight container in the refrigerator for up to 3-4 days. To reheat, place portions on a baking sheet in a preheated oven at 350°F (175°C) for about 10-15 minutes, or until warmed through and the layers crisp up again.
Your Questions Answered: Cheesy Layered Pastry FAQs
Can I use different cheeses?
Absolutely! While ricotta and feta offer a classic flavor profile, you can experiment. Consider adding grated Parmesan, Gruyère, mozzarella, or even a smoked cheddar for different nuances. Ensure any added cheeses have a relatively low moisture content to avoid a watery filling.
Is it possible to make this gluten-free?
Yes, gluten-free filo dough is available in many specialty food stores or larger supermarkets. The rest of the recipe is naturally gluten-free. Just ensure you source high-quality gluten-free filo and follow the handling instructions carefully, as it can sometimes be more delicate.
How far in advance can I prepare Cheesy Layered Pastry?
You can assemble the pastry, including layering the filo and cheese fillings, up to a day in advance. Cover it tightly with plastic wrap and refrigerate. Crucially, wait to pour the egg and milk “magic soak” until just before you’re ready to bake it.
What if I don’t have filo dough? (Substitution)
Filo dough is unique for its incredibly thin layers and crispness. There isn’t a direct substitute that will yield the exact same flaky result. While puff pastry could be used for a cheesy pie, it would result in a different, more substantial, and less airy texture.
Can I make individual portions?
Certainly! You can adapt this recipe by using smaller individual baking dishes, ramekins, or even muffin tins for mini Cheesy Layered Pastries. Adjust baking time accordingly for smaller portions, typically 25-35 minutes, or until golden and puffed.
Ready to Bake Your Own Flaky Cheesy Masterpiece?
Now that you’re equipped with all the secrets, tips, and troubleshooting advice, you’re ready to create a truly exceptional Cheesy Layered Pastry. This recipe promises not just a delicious savory bake, but a rewarding experience that will impress anyone lucky enough to try a slice.
Don’t be intimidated by filo; with this guide, you’ll master those perfect golden layers with confidence. Give it a try, share your results, and let us know your favorite ways to enjoy this incredible cheese pie!
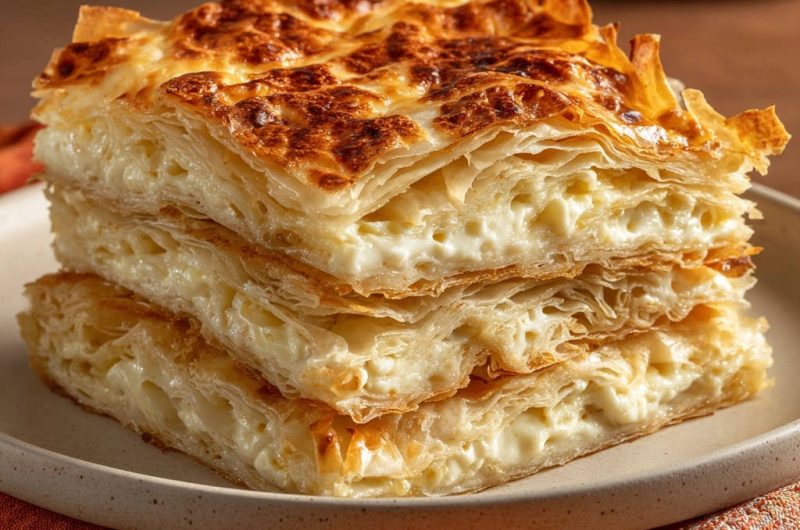
Cheesy Layered Pastry
Course: PastryCuisine: Eastern EuropeanDifficulty: medium8
servings25
minutes45
minutes240
kcal70
minutesUnlock the secret to perfectly airy, golden, and distinct flaky layers with this delicious cheesy pastry recipe. Featuring a rich ricotta and feta filling encased in crispy filo dough, it’s a game-changer for any occasion. Simple to make, beautiful to behold, and incredibly satisfying to eat.
Ingredients
1 pound (about 12-16 sheets) filo dough, thawed
1/2 cup unsalted butter, melted
2 cups ricotta cheese, well drained if watery
1 cup crumbled feta cheese
1/4 cup finely chopped fresh parsley (optional, for flavor)
2 large eggs
1/2 cup milk
Salt to taste
Black pepper to taste
Directions
- Preheat your oven to 375 degrees Fahrenheit (190 degrees Celsius). Lightly grease a 9×13 inch baking dish.
- In a medium bowl, combine the drained ricotta cheese, crumbled feta cheese, chopped parsley (if using), one of the eggs, salt, and black pepper. Mix well until everything is evenly combined.
- Carefully unroll the thawed filo dough. Keep the unused sheets covered with a damp kitchen towel to prevent them from drying out while you work.
- Lay one sheet of filo dough in the prepared baking dish. Brush it lightly with melted butter. Repeat this process with 4-5 more sheets of filo, brushing each layer with butter as you stack them.
- Spread half of the cheese filling evenly over the buttered filo layers in the dish.
- Place another single sheet of filo over the cheese filling and brush it with melted butter. Continue layering 4-5 more sheets of filo, brushing each with butter.
- Spread the remaining half of the cheese filling over these layers.
- Top the second layer of cheese filling with the remaining filo sheets, brushing each sheet generously with melted butter as you stack them. Ensure the top layer is well buttered.
- Using a sharp knife, carefully score the top layers of the pastry into desired serving squares or rectangles, cutting only through the top layers, not all the way to the bottom of the dish.
- In a small bowl, whisk together the remaining egg and the milk. This is the key step for ensuring those incredible flaky layers.
- Slowly and evenly pour this egg and milk mixture over the entire surface of the pastry in the baking dish. Allow it to sit for about 5-10 minutes so the liquid can soak into the layers. This creates steam during baking, ensuring your layers are light, airy, and distinct without drying out or becoming soggy.
- Bake for 40-50 minutes, or until the top is golden brown and the pastry is puffed and cooked through. If the top starts to brown too quickly, you can loosely tent it with aluminum foil.
- Remove from the oven and let it cool slightly before cutting along the scored lines and serving. Enjoy your perfectly flaky, cheesy creation!
Notes
- The egg and milk wash is key for incredibly flaky layers.