Homemade Apple Fritters: Light, Crispy, Never Greasy!
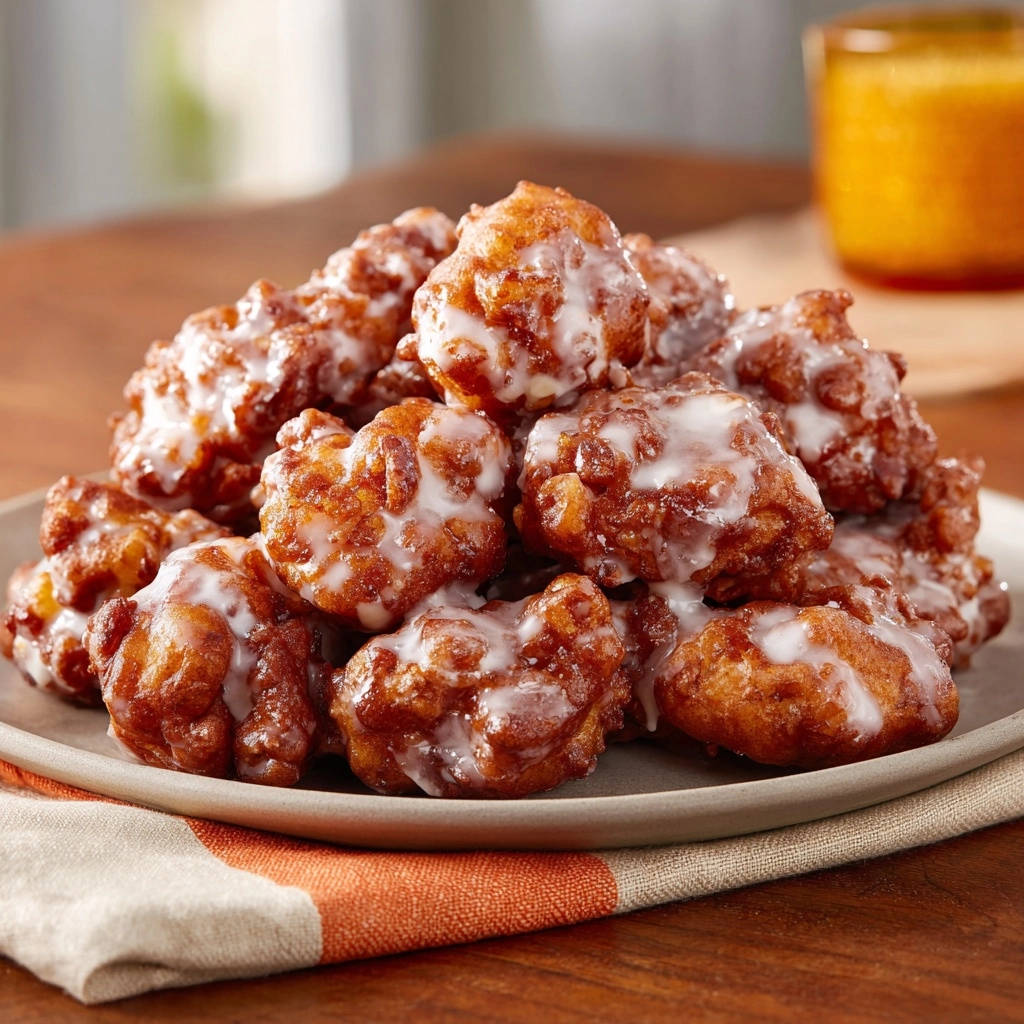
There’s nothing quite like a warm, freshly made apple fritter, but have you ever made them only to end up with a greasy, heavy mess? I used to face that exact frustration, constantly searching for the secret to a perfect fritter.
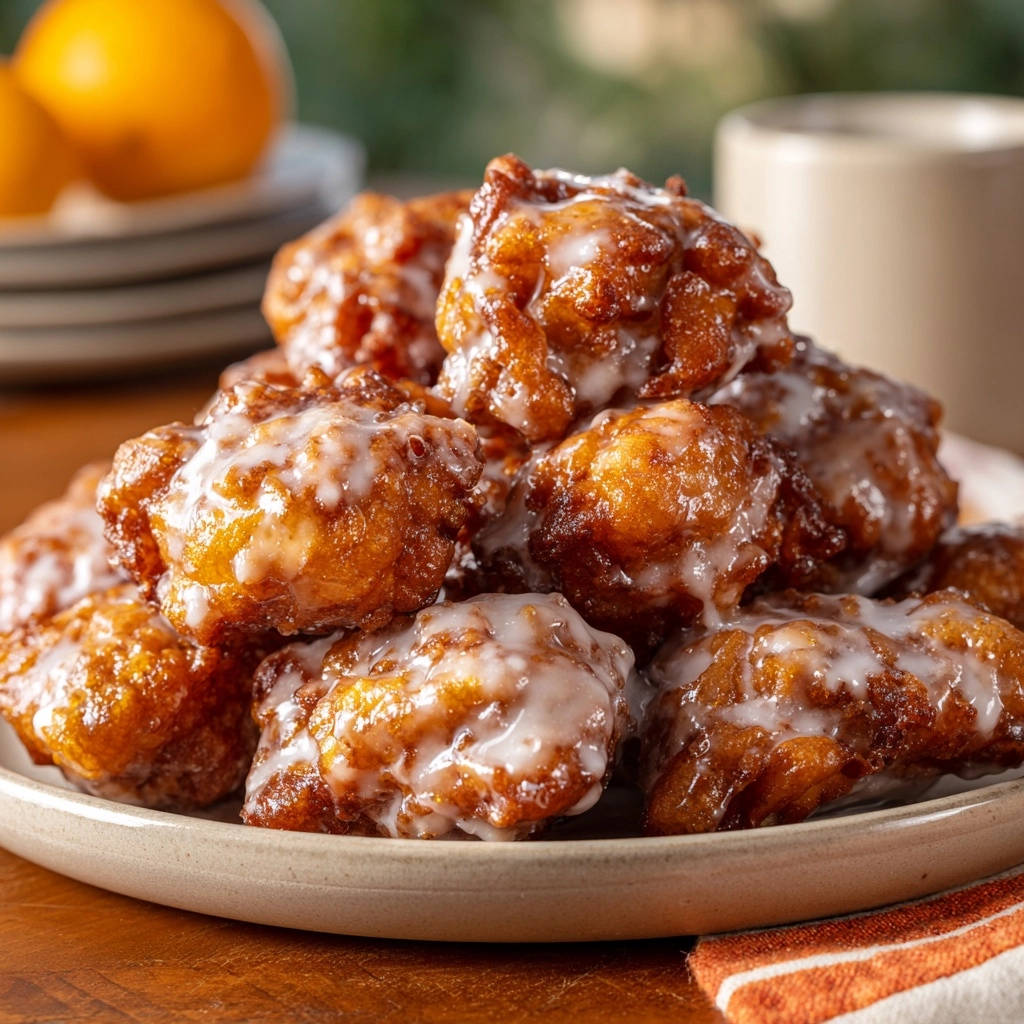
Through countless batches, I discovered the simple trick to achieving delightfully light, golden, and never-greasy Homemade Apple Fritters, and I’m thrilled to share it with you.
Why This Homemade Apple Fritters Recipe is Your New Favorite
This recipe for Homemade Apple Fritters isn’t just another sweet treat; it’s a guide to consistently perfect results, even for novice bakers.
The key lies in foolproof temperature control and a balanced batter, ensuring each fritter is crisp on the outside and wonderfully tender within, without a hint of greasiness.
It’s the ideal recipe for creating a comforting, family-favorite dessert or a special weekend breakfast that truly shines.
Gathering Your Essentials: Ingredients for Perfectly Light Fritters
Pantry Staples for the Batter Base
All-Purpose Flour: This provides the primary structure for your fritters. Measure it accurately by spooning it into your measuring cup and leveling it off, rather than scooping directly from the bag, to avoid a dense batter.
Granulated Sugar: Just enough to sweeten the batter without making it overly cloying, allowing the natural apple flavor to come through.
Baking Powder: The crucial leavening agent that gives these Homemade Apple Fritters their signature light and airy texture. Ensure it’s fresh for optimal rise.
Ground Cinnamon: This spice is the perfect aromatic companion to apples, adding warmth and depth to every bite.
Salt: A small amount enhances all the other flavors, balancing the sweetness and making the cinnamon and apple pop.
Large Egg, Milk, Vanilla Extract: These wet ingredients bind everything together, adding richness and moisture to the batter for tender fritters.
The Star of the Show: Choosing the Right Apples
A medium apple, peeled, cored, and finely diced, is the heart of these fritters. Choose firm, slightly tart apples that hold their shape well when cooked.
Granny Smith: Excellent for its tartness which beautifully balances the sweetness of the fritter and glaze, and it maintains its texture.
Honeycrisp or Fuji: These are great options if you prefer a sweeter, crisper apple that still holds up during frying.
Crafting the Irresistible Sweet Glaze
Powdered Sugar: Forms the base of our classic, quick-setting glaze, providing a smooth and sweet finish.
Milk or Water: Used to thin the glaze to the perfect pourable consistency. Start with less and add gradually to avoid making it too thin.
The Fry Oil Factor: Why Quality and Type Matter
Vegetable Oil (or Canola, Peanut Oil): Use a neutral-flavored oil with a high smoke point for frying. This ensures your fritters cook evenly without absorbing unwanted flavors or burning.
The depth of oil (about 3 inches) is important for the fritters to float and cook evenly, developing that perfect golden crust.
Essential Tools for Your Fritter-Making Adventure
Large and Medium Mixing Bowls: Essential for separating dry and wet ingredients before combining, ensuring a smooth batter.
The same technique that keeps these fritters light also works beautifully for perfectly puffy golden fried dough bites.
Whisk and Spatula: For combining ingredients thoroughly and gently folding in the apples without overmixing.
Large, Heavy-Bottomed Pot or Dutch Oven: Provides stable heat distribution, crucial for maintaining consistent oil temperature during frying.
Deep-Fry Thermometer: Absolutely crucial for maintaining the precise oil temperature (350°F / 175°C) needed for non-greasy Homemade Apple Fritters. This is your best friend for perfect results.
Slotted Spoon or Spider: For safely turning and removing the fritters from the hot oil.
Wire Rack with Baking Sheet: Indispensable for draining excess oil, ensuring your fritters stay crisp and don’t become soggy after frying.
Step-by-Step: Your Guide to Homemade Apple Fritters Success
- Combine Dry Ingredients:
In a large bowl, whisk together the flour, granulated sugar, baking powder, cinnamon, and salt.
This ensures all leavening agents and flavorings are evenly distributed, which is key for a consistent rise and taste in your Homemade Apple Fritters.
- Prepare Wet Ingredients:
In a separate medium bowl, whisk the egg, milk, and vanilla extract until they are thoroughly combined.
Ensure the mixture is smooth before combining with dry ingredients to ensure a uniform batter.
- Combine Wet and Dry & Fold in Apples:
Pour the wet ingredients into the dry ingredients. Mix with a spoon or spatula just until combined and no dry streaks of flour remain.
It’s crucial not to overmix the batter, as this develops gluten and can lead to tough, rather than light, Homemade Apple Fritters. Gently fold in the finely diced apple last, distributing them evenly.
- Heat the Frying Oil (The “Never Greasy” Secret):
In a large, heavy-bottomed pot or Dutch oven, pour the vegetable oil to a depth of about 3 inches. Attach a deep-fry thermometer to the side of the pot.
Heat the oil over medium-high heat until it reaches a consistent temperature of 350°F (175°C). Maintaining this precise temperature is the absolute key to non-greasy, perfectly cooked Homemade Apple Fritters. If the oil is too cool, the fritters will absorb too much oil; if it’s too hot, they’ll burn outside and be raw inside.
- Fry in Batches:
Carefully drop the fritter batter by rounded tablespoons into the hot oil. Work in batches of 4-5 fritters at a time to avoid overcrowding the pot.
Overcrowding can significantly lower the oil temperature, leading to soggy, oily fritters. Giving them space allows for even cooking and a beautiful golden-brown crust.
- Cook Until Golden Brown:
Fry the fritters for about 2-3 minutes per side, or until they are deep golden brown and cooked through. Use a slotted spoon or spider to gently turn them as needed.
Keep a constant eye on the thermometer and adjust the heat as necessary to maintain that critical 350°F, ensuring consistent results.
- Drain Excess Oil:
Once golden brown, remove the fritters from the oil and transfer them immediately to a wire rack placed over a baking sheet to drain any excess oil.
If you enjoy making fried dough treats, try these fluffy cinnamon sugar donuts for another non-greasy option.
This step is also crucial for preventing greasiness and ensuring a crisp exterior for your Homemade Apple Fritters. Do not skip it!
- Prepare the Glaze:
While the fritters are cooling slightly, prepare the glaze: In a small bowl, whisk together the powdered sugar and 2 tablespoons of milk or water until smooth.
Add more milk or water a little at a time if needed to reach a pourable, yet still thick, consistency that will beautifully coat your fritters.
- Glaze and Serve:
Dip each warm fritter into the glaze, or drizzle the glaze generously over all the fritters.
Serve immediately and enjoy the warm, sweet, and perfectly textured Homemade Apple Fritters!
Mastering the Fry: Chef’s Secrets for Fluffy, Non-Greasy Results
Temperature Control is King (The 350°F Golden Rule)
Maintaining a consistent oil temperature of 350°F (175°C) is the most critical factor in achieving non-greasy Homemade Apple Fritters. Too low, and they soak up oil; too high, and they burn before cooking through.
Invest in a good deep-fry thermometer and monitor it constantly, adjusting your heat as needed, to ensure success.
Don’t Overcrowd the Pot
Frying in small batches (4-5 fritters at a time) is essential. Overcrowding drops the oil temperature quickly, leading to soggy, oily fritters that don’t cook evenly.
Give each fritter enough space to swim and crisp up beautifully, ensuring uniform golden results.
The Importance of Immediate Draining
As soon as fritters come out of the hot oil, transfer them to a wire rack set over a baking sheet. This allows excess oil to drip off freely, preventing them from becoming greasy as they cool.
Avoid placing them directly on paper towels, which can trap oil and make the fritters soggy on the bottom.
Gentle Folding, Light Fritters
When combining your wet and dry ingredients, and especially when folding in the apples, mix just until no dry streaks remain.
Overmixing develops gluten, which results in tough, dense fritters rather than the delightfully light texture we’re aiming for with these Homemade Apple Fritters.
Choosing the Right Frying Oil
Opt for neutral, high smoke point oils like vegetable oil, canola oil, or peanut oil. These won’t impart unwanted flavors and can handle the high temperatures required for frying Homemade Apple Fritters without breaking down.
Using fresh oil for each batch also contributes to cleaner flavors and better frying performance.
Elevate Your Fritters: Serving, Storing, and Enjoying Every Bite
Creative Serving Suggestions for Your Homemade Apple Fritters
While delicious on their own, Homemade Apple Fritters can be elevated with various toppings. Consider a light dusting of extra cinnamon sugar, a dollop of fresh whipped cream, or a warm drizzle of caramel sauce for an extra special treat.
They also pair wonderfully with a scoop of vanilla bean ice cream for a decadent dessert. For another delightful apple-inspired treat, consider making Perfect Apple Crumble Bars.
Storing Your Homemade Apple Fritters
For best results, Homemade Apple Fritters are best enjoyed fresh and warm, right after glazing. The crisp exterior is at its peak immediately after frying.
Pair These With Your Apple Fritters
If you are making a batch of those light apple fritters, a couple of other baked goods fit right in for a fuller spread.
- A tart and citrusy Glazed Lemon Blueberry Loaf offers a bright contrast to the sweet, cinnamon-spiced fritters.
- For a spiced cookie with a chewy center, the Soft Ginger Molasses Cookies share that warm, cozy flavor profile without repeating the apple.
If you have leftovers, store them in an airtight container at room temperature for up to 1-2 days. For longer storage, refrigerate for up to 3-4 days.
Reheating for Freshness
To restore some of their crispness, reheat leftover Homemade Apple Fritters in a toaster oven or air fryer at 300°F (150°C) for a few minutes until warmed through and slightly re-crisped.
Avoid reheating in a microwave, as this will make them soft and chewy rather than crispy.
Make-Ahead Tips for Easy Fritter Prep
While fritters are best fresh, you can dice your apples and prepare your dry ingredient mix in advance. Store diced apples in a bowl of lightly salted water to prevent browning (rinse well and pat dry before using).
The dry mix can be stored in an airtight container at room temperature until ready to use, streamlining your morning prep for fresh Homemade Apple Fritters.
Common Apple Fritter Questions Answered
Can I use different types of apples in my Homemade Apple Fritters?
Yes, absolutely! While Granny Smith is popular for its tartness (which balances the sweetness of the fritter and glaze), you can use a mix of apples like Honeycrisp, Fuji, or Braeburn for varied flavor and texture.
Just ensure they are firm and don’t turn mushy when cooked at high heat.
My fritters are soggy or greasy, what went wrong?
The most common culprit is incorrect oil temperature. If the oil is too cool, the fritters absorb too much oil, becoming greasy. If it’s too hot, they burn on the outside and remain raw inside.
Ensure you maintain 350°F (175°C) with a thermometer. Also, ensure you don’t overcrowd the pot and drain them on a wire rack immediately after frying to prevent greasiness.
Can I make Homemade Apple Fritters gluten-free?
Yes, you can often substitute all-purpose flour with a 1:1 gluten-free baking flour blend (ensure it contains xanthan gum).
Results may vary slightly in texture, but many blends work well for fritters. Always check your specific GF flour blend’s recommendations.
What if I don’t have a deep-fry thermometer?
While a thermometer is highly recommended for consistent, non-greasy results, you can test the oil by dropping a small piece of batter into it. If it immediately sizzles and floats to the top, the oil is likely hot enough.
If it sinks or barely bubbles, it’s too cool. If it browns too quickly, it’s too hot. However, this method is less precise and requires careful observation, making a thermometer a worthwhile investment.
Can I use milk alternatives in the batter or glaze?
Yes, you can substitute dairy milk with unsweetened almond milk, soy milk, or oat milk in both the batter and the glaze. The taste and texture of the Homemade Apple Fritters will be very similar, making them suitable for those with dairy sensitivities.
For another delicious, comforting breakfast alternative, consider trying Fluffy Oatmeal Pancakes.
Unleash Your Inner Baker: Ready to Fry?
Making Homemade Apple Fritters at home is a truly rewarding experience, transforming simple ingredients into a delightful treat that far surpasses anything store-bought.
With the tips and precise instructions in this guide, you’re now equipped to achieve perfectly light, crispy, and non-greasy fritters every single time. It’s easier than you think!
Gather your ingredients, preheat your oil, and get ready to enjoy the incredible aroma and taste of your own freshly made, golden-brown masterpieces. Share your fritter triumphs in the comments!
Apple Fritters
Course: DessertCuisine: AmericanDifficulty: medium12
fritters20
minutes35
minutes120
kcal55
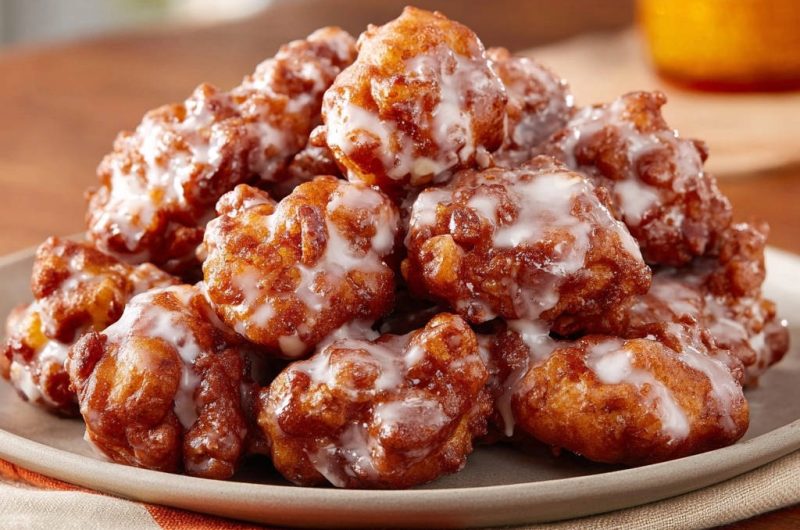
minutesDiscover the simple trick to making perfectly golden, light, and non-greasy apple fritters every single time. Say goodbye to heavy, oily messes and hello to your best batch yet, featuring tender apples and a delightful glaze.
Ingredients
2 cups all-purpose flour
1/4 cup granulated sugar
2 teaspoons baking powder
1 teaspoon ground cinnamon
1/2 teaspoon salt
1 large egg
1 cup milk
1 teaspoon vanilla extract
1 medium apple, peeled, cored, and finely diced
4 6 cups vegetable oil, for frying
For the Glaze:
1 cup powdered sugar
2 3 tablespoons milk or water
Directions
- In a large bowl, whisk together the flour, granulated sugar, baking powder, cinnamon, and salt.
- In a separate medium bowl, whisk the egg, milk, and vanilla extract until well combined.
- Pour the wet ingredients into the dry ingredients. Mix with a spoon or spatula just until combined and no dry streaks of flour remain. Be careful not to overmix the batter. Gently fold in the finely diced apple.
- In a large, heavy-bottomed pot or Dutch oven, pour the vegetable oil to a depth of about 3 inches. Attach a deep-fry thermometer to the side of the pot. Heat the oil over medium high heat until it reaches a consistent temperature of 350°F (175°C). Maintaining this temperature is the key to non-greasy fritters. If the oil is too cool, the fritters will absorb too much oil; if it’s too hot, they’ll burn outside and be raw inside.
- Carefully drop the fritter batter by rounded tablespoons into the hot oil, working in batches of 4 5 fritters at a time to avoid overcrowding the pot, which can lower the oil temperature.
- Fry the fritters for about 2 3 minutes per side, or until they are deep golden brown and cooked through. Use a slotted spoon or spider to gently turn them as needed. Keep an eye on the thermometer and adjust the heat as necessary to maintain 350°F.
- Once golden brown, remove the fritters from the oil and transfer them to a wire rack placed over a baking sheet to drain any excess oil. This step is also crucial for preventing greasiness.
- While the fritters are cooling slightly, prepare the glaze: In a small bowl, whisk together the powdered sugar and 2 tablespoons of milk or water until smooth. Add more milk or water a little at a time if needed to reach a pourable consistency.
- Dip each warm fritter into the glaze, or drizzle the glaze generously over all the fritters. Serve immediately and enjoy!
Notes
- Maintaining oil temperature at 350°F (175°C) is crucial for non-greasy fritters.