Caramel Apple Dream Bars: No More Soggy Crust!
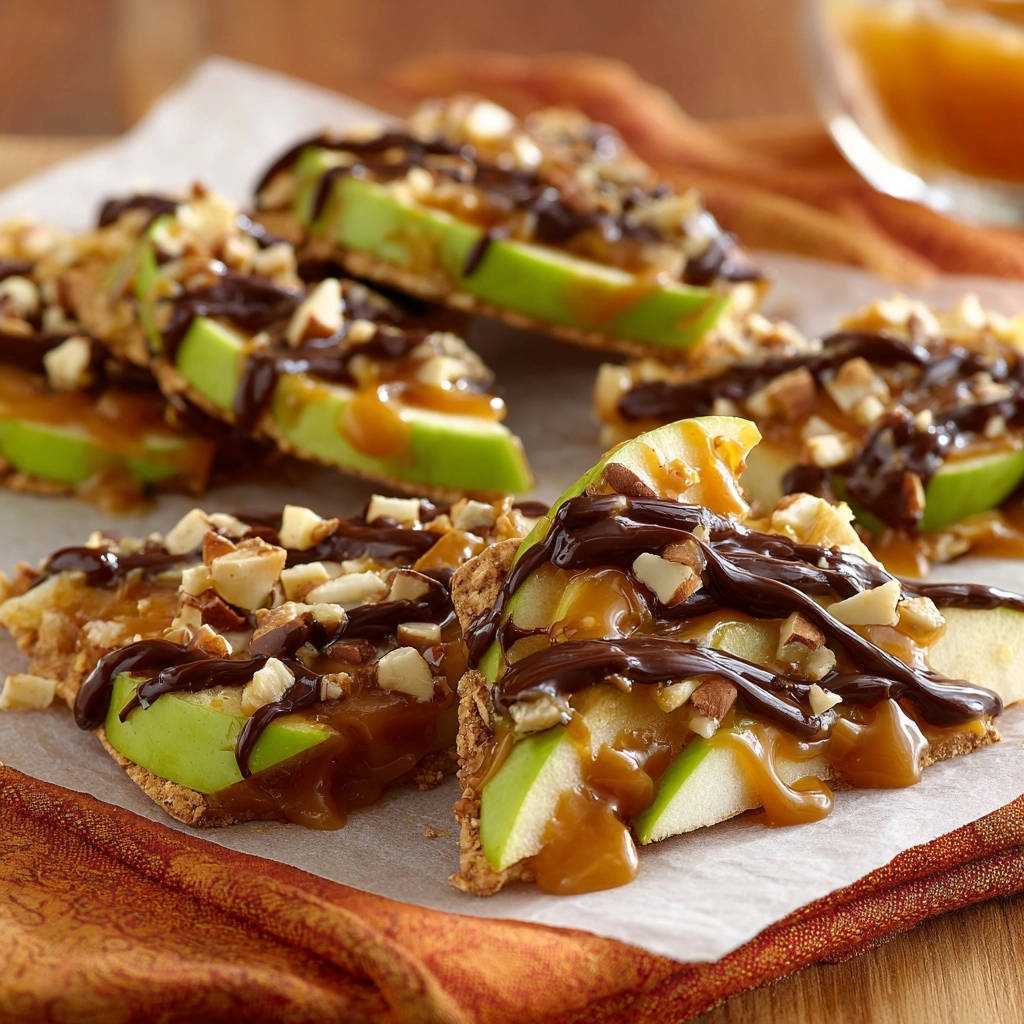
There’s nothing more frustrating than envisioning a perfectly crisp dessert bar, only to slice into a soggy, disappointing crust. I’ve been there countless times, but after years of experimenting, I finally cracked the code to achieving truly spectacular Caramel Apple Dream Bars with a base that stays beautifully firm and crunchy. This recipe isn’t just a dessert; it’s a testament to a simple yet genius trick that transforms your baking from good to absolutely glorious, making these dreamy bars your new go-to for irresistible autumn flavors.
Why These Caramel Apple Dream Bars Will Be Your New Favorite (No More Soggy Crust!)
The Ingenious Chocolate Barrier: A Game-Changer for Crispy Bases
The secret to these Caramel Apple Dream Bars lies in a thin, expertly applied layer of chocolate between the crust and the apple-caramel topping. This ingenious barrier acts as a shield, preventing any moisture from the juicy apples or gooey caramel from ever reaching and softening your perfectly baked graham cracker crust. Say goodbye to soggy bottoms forever!
Effortless Elegance: Simple Steps, Stunning Results
Despite their impressive appearance and complex layers of flavor, these Caramel Apple Dream Bars are surprisingly simple to assemble. Each step is straightforward, allowing even novice bakers to achieve a professional-looking and tasting dessert with minimal fuss. It’s a recipe designed for maximum impact with minimum effort.
The Perfect Fall Treat, Delightful Any Time of Year
With their warm apple, cinnamon, and caramel notes, these bars evoke the cozy essence of autumn. However, their refreshing crispness and balanced sweetness make them a truly versatile treat, delightful for potlucks, parties, or simply a sweet indulgence any time you crave a taste of pure comfort.
Gathering Your Flavor Foundation: The Essential Ingredients
For the Irresistible Graham Cracker Crust
Graham Cracker Crumbs: The foundation of our crust, providing a classic, slightly sweet crunch that pairs wonderfully with apples and caramel.
Granulated Sugar: A touch of sweetness that perfectly balances the graham crackers and aids in creating a delightfully tender yet sturdy texture.
Unsalted Butter, Melted: Crucial for binding the crumbs together, ensuring a rich flavor and a firm crust that holds its shape beautifully.
The Star of the Show: Crisp Apple Slices
Granny Smith Apples: Their tartness beautifully cuts through the richness of the caramel and chocolate, preventing the bars from being overly sweet. Their firm texture also holds up exceptionally well during chilling, maintaining a pleasant bite.
Luxe Layers: Caramel, Chocolate, and Toppings
Prepared Caramel Sauce: The gooey, sweet heart of the bars. Using a high-quality prepared sauce saves time without sacrificing that essential buttery caramel flavor.
Semi-Sweet Chocolate Chips: Forms the crucial protective barrier and introduces a delightful, balanced chocolatey note that complements the apples and caramel. Semi-sweet prevents the bars from becoming cloyingly sweet.
Neutral Oil (Coconut or Vegetable): Key for melting the chocolate chips smoothly. It ensures the chocolate spreads thinly and sets perfectly as a firm, flexible protective layer that won’t crack easily.
Chopped Almonds or Pecans: Adds a delightful crunch and nutty flavor, providing a wonderful textural contrast that enhances the overall experience of these Caramel Apple Dream Bars.
Pro Tip: Ingredient Quality Matters
While the steps are simple, the quality of your ingredients significantly impacts the final taste and texture of your Caramel Apple Dream Bars. Opt for fresh, crisp Granny Smith apples and a caramel sauce you genuinely enjoy for the best results.
Your Toolkit for Caramel Apple Dream Bars Success
8×8 Inch Baking Dish: The ideal size for these bars, ensuring proper thickness and perfectly proportioned servings.
Parchment Paper: Absolutely essential for easy, clean removal of the entire slab of bars from the dish without sticking or breaking.
For a perfect pairing, try our Mastering Layered Turtle Cheesecake Bars with a Crisp Crust.
Mixing Bowls: For combining ingredients cleanly and efficiently, ensuring proper mixing of each component.
Offset Spatula or Back of a Spoon: Perfect for spreading the melted chocolate layer thinly and evenly across the crust, creating a uniform barrier.
Microwave-Safe Bowl: For quick and gentle melting of the chocolate chips, allowing for precise temperature control.
Crafting Your Dream Bars: A Step-by-Step Guide to Perfection
Preheat and Prepare Your Dish
Preheat your oven to 350F (175C). Line an 8×8 inch baking dish with parchment paper, making sure to leave an overhang on the sides. This parchment paper overhang is your secret weapon for a clean, effortless lift later.
Mix and Press the Graham Cracker Crust
In a medium bowl, combine the graham cracker crumbs, granulated sugar, and melted butter. Mix until the crumbs are thoroughly moistened and well combined, resembling wet sand.
Press this mixture very firmly and evenly into the bottom of the prepared baking dish. Use a flat-bottomed glass or your clean hands to compact it tightly, creating a dense, sturdy base.
Bake the Crust to Golden Perfection
Bake the crust for 10 minutes, or until you see it turn a lightly golden brown around the edges. This crucial pre-baking step is what guarantees a firm, non-soggy base, setting the stage for perfectly structured Caramel Apple Dream Bars.
Remove from the oven and let it cool slightly while you prepare the other delicious components.
Melt the Chocolate with Oil
While the crust cools, melt the semi-sweet chocolate chips with the neutral oil in a small microwave-safe bowl. Heat in short 20-second intervals, stirring thoroughly after each, until the chocolate is smooth and glossy.
The addition of oil is key here; it helps thin the chocolate, making it easier to spread and ensuring a beautiful, firm set that won’t crack easily.
Apply the Protective Chocolate Barrier
Once the pre-baked crust is slightly cooled, pour the melted chocolate evenly over the crust. Using an offset spatula or the back of a spoon, quickly spread it into a thin, uniform layer, ensuring it covers the entire surface.
This layer is your anti-soggy secret! It acts as an impenetrable moisture barrier, protecting the crust from the apples and caramel. Immediately place the baking dish in the refrigerator for 10-15 minutes to allow the chocolate layer to firm up completely.
Arrange the Apples
Evenly arrange the thinly sliced Granny Smith apples over the set chocolate layer. Aim for a single, slightly overlapping layer for the best texture and a beautiful presentation.
Drizzle with Caramel Sauce
Gently pour the prepared caramel sauce over the arranged apples, making sure it’s distributed as evenly as possible. A spoon can help guide the caramel into any bare spots.
That extra drizzle of chocolate would be a great finishing touch on these salted caramel pretzel shortbread bars.
Sprinkle with Nuts
Generously sprinkle the chopped almonds or pecans over the caramel layer. This addition provides both a delightful nutty flavor and a wonderful textural contrast to the soft apples and gooey caramel.
Chill to Set and Cut
Return the baking dish to the refrigerator for at least 2 hours, or until the caramel has completely set and the bars are firm enough to cut without squishing. This step is critical for clean, beautiful slices.
Patience is a virtue here; sufficient chill time ensures perfectly formed Caramel Apple Dream Bars that hold their shape.
Lift, Cut, and Serve
Once firm, use the parchment paper overhang to gently lift the entire slab of bars from the dish. Place them on a cutting board and use a sharp knife (wiping it clean between cuts) to slice into uniform squares or elegant triangles.
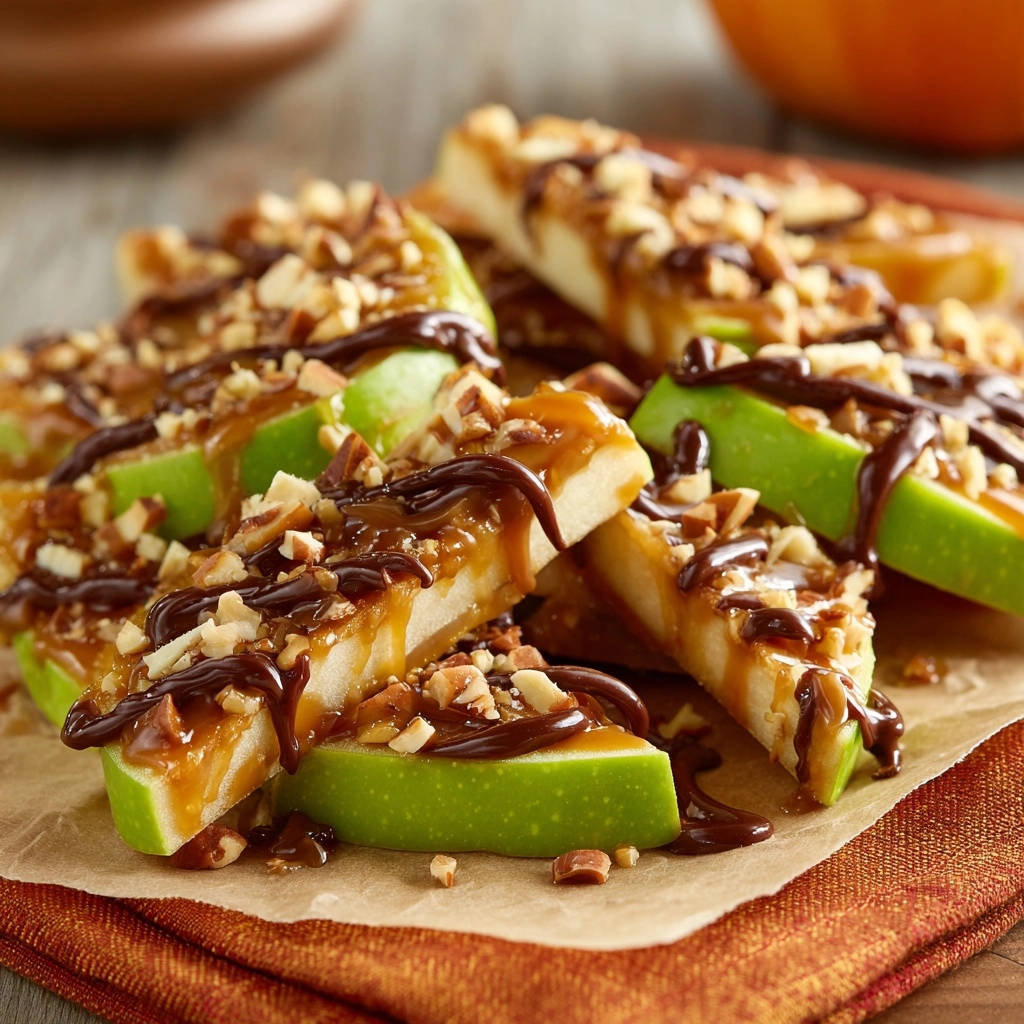
If desired, melt a few more chocolate chips and drizzle extra chocolate over the top for an elegant finish before serving. Store any delicious leftovers in an airtight container in the refrigerator.
Chef’s Secrets: Elevating Your Caramel Apple Dream Bars Experience
Achieving the Crispiest Crust Every Time
Press Firmly: Ensure your graham cracker crust is pressed very firmly and evenly into the pan. This tight compaction prevents it from crumbling and creates a sturdy, cohesive base.
Don’t Skip Pre-Baking: That initial 10-minute bake time isn’t optional; it toasts the crumbs and sets the butter, forming the crucial initial barrier against moisture and developing a deeper flavor.
Mastering the Chocolate Barrier
Use Neutral Oil: The neutral oil (like coconut or vegetable) added to the chocolate is absolutely crucial. It thins the chocolate, making it much easier to spread a thin, even layer, and helps it set smoothly without unsightly cracking.
Work Quickly: Once melted, chocolate sets fast. Have your offset spatula ready and spread the chocolate barrier immediately after pouring it onto the cooled crust to ensure full, even coverage.
Ensure Full Coverage: Make sure the chocolate layer extends all the way to the edges of the crust. This ensures an impenetrable shield, protecting every bit of your delicious base from moisture.
Apple Perfection: Slicing and Arrangement
Slice Apples Thinly: Uniform, thin apple slices are key to these Caramel Apple Dream Bars. They ensure the apples soften just enough from the caramel and are easy to bite through. Too thick, and they’ll be unpleasantly crunchy and difficult to cut.
Arrange Evenly: A single, even layer of apples allows the caramel to distribute beautifully over them and ensures a balanced bite in every single bar.
Caramel Consistency and Topping Choices
Warm Caramel Slightly: If your prepared caramel sauce is particularly thick, microwave it for 10-15 seconds. This makes it more pourable, ensuring a smooth, even coating over the apples.
Experiment with Nuts: While almonds and pecans are classic and delicious, feel free to try other options like toasted walnuts, cashews, or even toasted coconut flakes for a different and exciting flavor profile.
More Ways to Fill Your Kitchen with Warm, Sweet Scents
If you like the buttery crust and caramelized apple filling in those dream bars, these two recipes share that same cozy, bakery-style appeal.
- For a tender crumb that pairs nicely with coffee or tea, try this Sheet Pan Almond Coffee Cake – the nutty topping adds a nice crunch alongside the soft cake.
- When you want something swirled with cinnamon sugar and a caramelized bottom, these Sugared Cinnamon Morning Buns have a crisp base that echoes the texture you work so hard to get in your apple bars.
The Importance of Chill Time
Patience is Key: Do not rush the chilling process for your Caramel Apple Dream Bars. The full 2 hours (or even more) allows the caramel to firm up completely, making the bars incredibly easy to lift and slice cleanly without oozing or falling apart. This step guarantees a perfect presentation.
Troubleshooting Common Dream Bar Dilemmas
“Why is My Crust Soggy?”
This common issue is almost always due to either skipping the crucial pre-baking step for the crust or an incomplete chocolate barrier. Ensure you bake the crust until lightly golden, and then spread the chocolate layer thoroughly, making sure it fully seals the crust from edge to edge against moisture.
“My Chocolate Layer Cracked!”
Cracking can occur if the chocolate layer is too thick or if it chills too rapidly. Adding neutral oil helps immensely with flexibility, and ensuring a thin, even spread will minimize this. Always allow it to firm up in the fridge, not the freezer, for a more gradual set.
“The Bars Aren’t Setting Firmly.”
Insufficient chill time is the most common culprit when your Caramel Apple Dream Bars aren’t firm. These bars rely on the refrigerator to firm up the caramel and chocolate layers. Allow at least 2 hours, or even longer, for a perfectly set result. Also, ensure your caramel sauce isn’t overly runny to begin with.
“My Apples Turned Brown.”
Apples oxidize quickly when exposed to air, which causes them to brown. To prevent this, prepare your apple slices just before you are ready to assemble the bars. A quick toss in a tiny bit of lemon juice can also help, though be aware it might subtly alter the flavor of your Caramel Apple Dream Bars.
Serving, Storage, and Make-Ahead Magic
Elegant Serving Suggestions
Caramel Apple Dream Bars are truly delightful on their own, showcasing all their beautiful layers. For an extra touch of decadence, a light dusting of cinnamon, a dollop of fresh whipped cream, or a scoop of premium vanilla bean ice cream can elevate them further. Consider a delicate drizzle of extra melted chocolate or a sprinkle of flaky sea salt for a gourmet finish.
Storing Your Leftover Dream Bars
To keep your delicious Caramel Apple Dream Bars at their best, store any leftovers in an airtight container in the refrigerator for up to 5-7 days. The airtight container is essential to prevent them from drying out and absorbing any other odors from your fridge.
Can You Make Them Ahead?
Absolutely! These Caramel Apple Dream Bars are an excellent make-ahead dessert, perfect for entertaining or meal prep. You can prepare them a day or two in advance and store them, uncut, in the refrigerator. For optimal enjoyment, let them sit at room temperature for about 15-30 minutes before serving, allowing the flavors to soften and deepen slightly.
Frequently Asked Questions About Caramel Apple Dream Bars
Can I use other types of apples?
While Granny Smith apples are highly recommended for their ideal tartness and firm texture that holds up well during baking and chilling, you can experiment with other firm, tart varieties like Honeycrisp or Braeburn. For another fantastic apple dessert, you might enjoy our recipe for perfect apple crumble bars. Avoid overly sweet or soft apples, as they might make your Caramel Apple Dream Bars too sweet or mushy.
What if I don’t have parchment paper?
Parchment paper is strongly recommended for its superior non-stick properties and ease of removal, ensuring your Caramel Apple Dream Bars come out pristine. If you absolutely don’t have it, you can try lining the dish with aluminum foil, leaving a generous overhang, and greasing it very well. However, parchment paper provides the best, most reliable non-stick insurance.
Can I make these gluten-free?
Yes, making these Caramel Apple Dream Bars gluten-free is quite simple. Just substitute regular graham cracker crumbs with certified gluten-free graham cracker crumbs. Always ensure all other ingredients, especially your chosen caramel sauce, are also verified as gluten-free if strict dietary requirements are in place.
Is homemade caramel sauce better?
Homemade caramel sauce often offers a richer, more nuanced flavor and a delightful depth that’s hard to beat. However, using a high-quality prepared caramel sauce is perfectly acceptable and significantly speeds up the process, making these Caramel Apple Dream Bars truly a “dream” to prepare without extra fuss. For another delightful bar recipe, consider our raspberry crumb bars.
How long do they last in the fridge?
When stored properly in an airtight container in the refrigerator, these delicious Caramel Apple Dream Bars will stay fresh and maintain their wonderful texture and flavor for about 5 to 7 days.
Ready to Indulge? Your Caramel Apple Dream Bars Await!
There you have it – the ultimate guide to creating Caramel Apple Dream Bars that are truly show-stoppers, complete with a perfectly crisp crust every single time. This recipe is more than just a dessert; it’s a delightful experience waiting to be shared, a symphony of sweet, tart, and crunchy textures that will captivate everyone who tastes them.
So, gather your ingredients, follow these expert steps, and prepare to impress yourself and your loved ones. We’d absolutely love to hear about your baking adventures and see your beautiful creations. Share your Caramel Apple Dream Bars masterpieces with us in the comments below!
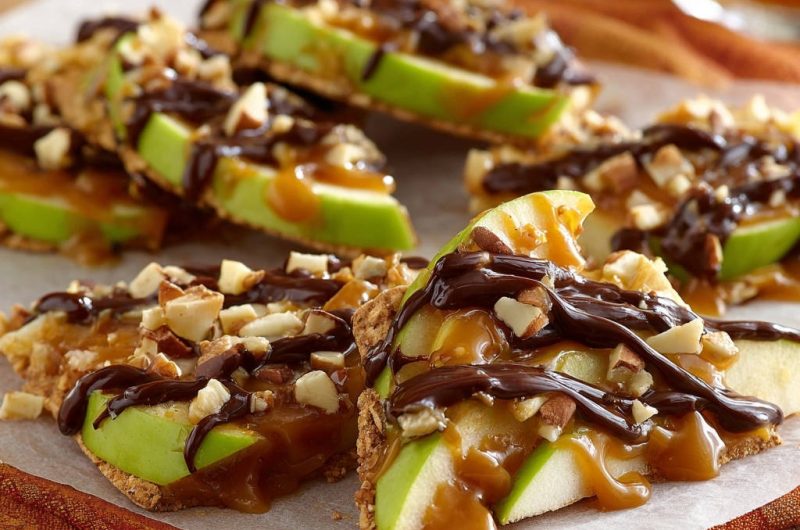
Caramel Apple Bars
Course: DessertCuisine: AmericanDifficulty: easy9
bars30
minutes10
minutes200
kcal40
minutesSay goodbye to soggy bottoms! This game-changing recipe for Caramel Apple Dream Bars guarantees a perfectly crisp and sturdy base, preventing the common disappointment of a soft crust. Layers of graham cracker, chocolate, apple, and caramel topped with nuts make these dreamy bars your new go-to treat.
Ingredients
1 1/2 cups graham cracker crumbs
1/4 cup granulated sugar
1/2 cup unsalted butter, melted
2 large Granny Smith apples, thinly sliced
1 cup prepared caramel sauce
1/2 cup semi-sweet chocolate chips
1 tablespoon neutral oil (like coconut or vegetable oil)
1/2 cup chopped almonds or pecans
Directions
- Preheat your oven to 350F (175C). Line an 8×8 inch baking dish with parchment paper, leaving an overhang on the sides for easy removal.
- In a medium bowl, combine the graham cracker crumbs, granulated sugar, and melted butter. Mix until well combined and the crumbs are moistened. Press this mixture firmly and evenly into the bottom of the prepared baking dish.
- Bake the crust for 10 minutes, or until lightly golden brown. This pre-baking step is crucial for achieving a firm base. Remove from the oven and let cool slightly while you prepare the other components.
- While the crust cools, melt the semi-sweet chocolate chips with the neutral oil in a small microwave-safe bowl in 20-second intervals, stirring until smooth. The oil helps the chocolate spread thinly and set well.
- Once the pre-baked crust is slightly cooled, pour the melted chocolate evenly over the crust. Using an offset spatula or the back of a spoon, quickly spread it into a thin, uniform layer, covering the entire surface. This layer will act as a protective barrier, preventing moisture from the apples and caramel from reaching and softening the crust. Place the baking dish in the refrigerator for 10-15 minutes to allow the chocolate layer to firm up completely.
- Arrange the thinly sliced Granny Smith apples evenly over the set chocolate layer.
- Gently pour the caramel sauce over the apples, making sure it’s distributed as evenly as possible.
- Sprinkle the chopped almonds or pecans generously over the caramel.
- Return the baking dish to the refrigerator for at least 2 hours, or until the caramel has set and the bars are firm enough to cut.
- Once firm, use the parchment paper overhang to lift the entire slab of bars from the dish. Place on a cutting board and cut into squares or triangles. If desired, you can melt a few more chocolate chips and drizzle extra chocolate over the top before serving. Store leftovers in an airtight container in the refrigerator.
Notes
- Pre-baking the crust and adding a melted chocolate barrier layer are crucial steps to prevent a soggy bottom.