Caramel Apple Hand Pies: Foolproof Sealing for No-Mess Bites
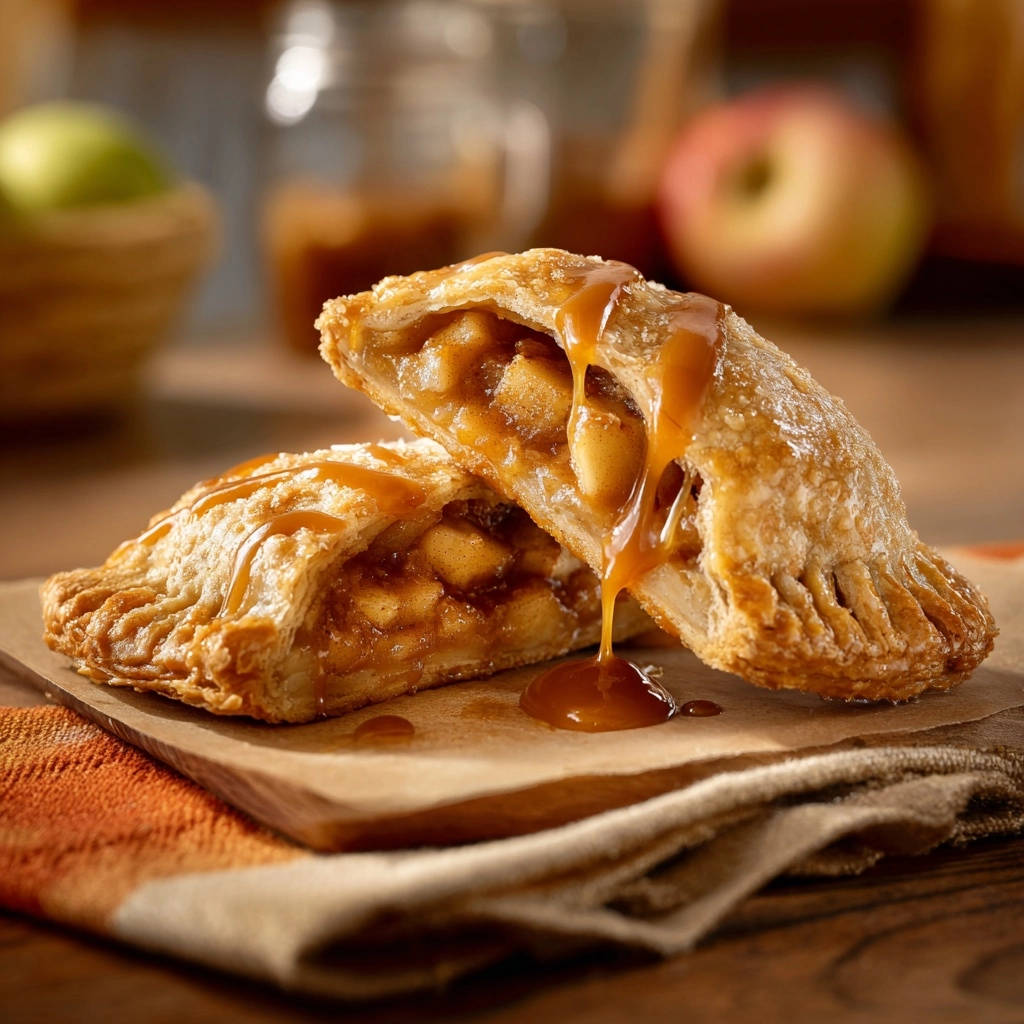
There’s nothing quite like a warm, flaky apple hand pie, especially one generously drizzled with gooey caramel. Yet, the common frustration of leaky fillings and sticky messes during baking often deters home bakers from making these delightful Caramel Apple Hand Pies. I’ve perfected a simple, yet game-changing method that guarantees a perfectly sealed, no-mess treat every single time, bringing back the joy of this portable indulgence.
Why These Caramel Apple Hand Pies Are Your New Go-To Recipe
Say Goodbye to Leaky Fillings: The Secret Revealed
The biggest challenge with hand pies is preventing that delicious filling from oozing out during baking. This recipe incorporates specific techniques, like a properly thickened and cooled filling, a strategic egg wash, and a robust fork crimp, to ensure a completely sealed pie every time.
You’ll enjoy beautifully intact, golden-brown Caramel Apple Hand Pies without any caramelized sugar crusting your baking sheet.
Effortless Elegance: Gourmet Taste, Simple Process
Don’t let the gourmet taste fool you; these hand pies are surprisingly simple to make. By utilizing readily available refrigerated pie crusts, we streamline the process without compromising on that coveted flaky texture.
The result is a homemade treat that tastes like it came from a specialty bakery, but with a fraction of the effort.
The Joy of Homemade: Perfectly Portable Indulgence
Imagine a warm, tender apple filling encased in a golden, crisp crust, finished with a rich caramel drizzle. These hand pies are more than just a dessert; they are a comforting experience, perfect for cozy evenings, lunchbox treats, or on-the-go snacking.
For another bakery-style treat with a flaky crust, try these flaky cranberry apple hand pies.
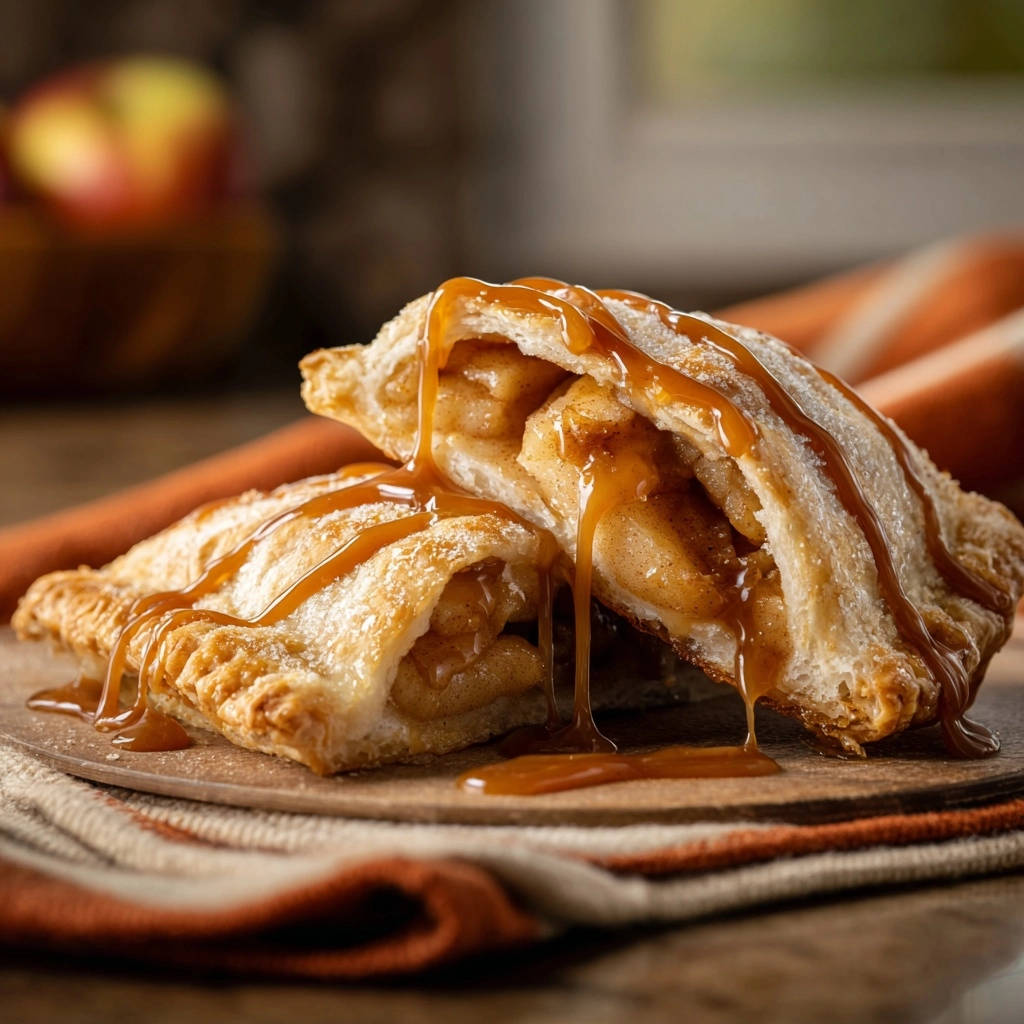
Their individual size makes them ideal for sharing or savoring solo, bringing a touch of homemade magic to any moment.
The Heart of the Treat: Essential Ingredients for Your Hand Pies
Crafting the Luscious Apple Filling
The choice of apples significantly impacts your pie. Honeycrisp or Granny Smith apples are recommended for their firm texture, which holds up well during cooking, and their balanced tartness that cuts through the sweetness.
Ground cinnamon and nutmeg provide the classic warm, autumnal spice notes that perfectly complement the apples. The unsalted butter enriches the flavor of the filling, adding a creamy depth.
Crucially, the cornstarch slurry thickens the apple mixture, preventing it from becoming too watery. This ensures a stable, leak-proof filling that won’t compromise your crust.
The Perfect Crust: Ready-Made for Convenience
Refrigerated pie crusts are a fantastic shortcut, delivering consistent flakiness without the fuss of making dough from scratch. They provide a sturdy, delicious wrapper for your apple filling.
A beaten large egg serves as an essential egg wash, both for sealing the pies and for brushing on top to achieve that irresistible golden-brown finish and subtle sheen.
The Irresistible Drizzle: Finishing Touches
Caramel sauce is the crowning glory of these Caramel Apple Hand Pies. Its sweet, buttery, and slightly salty notes perfectly harmonize with the spiced apple filling, elevating each bite into a truly decadent experience.
A generous drizzle adds visual appeal and a layer of rich flavor that makes these treats utterly irresistible.
Your Baking Arsenal: Tools for Hand Pie Success
Basic Kitchen Essentials
You’ll need a medium saucepan for cooking the apple filling, along with a whisk and spatulas for stirring and mixing. Measuring cups and spoons ensure accurate ingredient proportions.
A baking sheet is essential for cooking your hand pies, and parchment paper is highly recommended to prevent sticking and make cleanup a breeze.
Specialty Tools for Perfect Shapes and Seals
A 5-6 inch round cutter, or even a small plate and a knife, helps create uniform pie circles for a professional look and consistent baking. This ensures each Caramel Apple Hand Pie is perfectly sized.
A wire rack is crucial for cooling the pies, allowing air circulation all around to prevent sogginess and help them set properly.
Step-by-Step Perfection: Crafting Your Caramel Apple Hand Pies
- Preparing the Aromatic Apple Filling:
Start by melting butter over medium heat in a medium saucepan. Add your finely diced apples, granulated sugar, cinnamon, and nutmeg, cooking for 8-10 minutes until the apples are slightly softened but still retain some shape. This foundational step builds the robust flavor for your hand pies.
In a small bowl, whisk together cornstarch and water to create a smooth slurry. Pour this into the apple mixture, stirring constantly, and cook for an additional 1-2 minutes until the filling visibly thickens. It’s crucial to remove the filling from heat and allow it to cool completely; a thick, cool filling is essential for preventing leaks and bursting during baking.
- Shaping the Dough and Building Your Pies:
Unroll your refrigerated pie crusts on a lightly floured surface. Use a 5-6 inch round cutter, or a small plate and knife, to cut out 8 uniform circles (4 from each crust). Consistent sizing ensures even baking and a beautiful presentation.
Lightly brush the inner edges of each pie circle with the beaten egg. This egg wash acts as a powerful adhesive, vital for achieving a robust, leak-proof seal on your hand pies.
Carefully spoon about 2 tablespoons of the completely cooled apple filling onto one half of each circle. Remember to leave a clear border around the edge, as overfilling is a primary cause of messy leaks.
Fold the other half of the pie crust over the filling, forming a neat half-moon shape. Gently press down along the straight edges with your fingers to establish an initial seal, ensuring the filling is enclosed.
- The “No-Leak” Seal: Crimping and Venting:
Using the tines of a fork, firmly crimp all around the curved edges of each hand pie. Pressing down firmly with the fork creates a strong, decorative, multi-layered seal that is much less likely to break open during baking.
Place the formed hand pies on a baking sheet lined with parchment paper. Cut 2-3 small slits on the top of each pie with a sharp knife. These essential vents allow steam to escape during baking, preventing internal pressure buildup that can cause your beautiful Caramel Apple Hand Pies to burst.
- Baking to Golden Perfection:
Brush the tops of the hand pies with any remaining egg wash for a beautiful, uniformly golden-brown crust. This adds both color and a desirable slight sheen to your finished treats.
Bake in a preheated oven at 375°F (190°C) for 18-22 minutes. You’ll know they’re done when the crust is visibly golden brown and you can see the filling gently bubbling through the vents.
- Cooling and Caramel Drizzle:
Allow the baked Caramel Apple Hand Pies to cool on the baking sheet for a few minutes. This initial cooling helps them set and prevents them from sticking to the parchment paper.
Carefully transfer the pies to a wire rack to cool slightly further. Once cooled enough to handle (but still warm is often preferred!), drizzle generously with your favorite caramel sauce. This adds the perfect final touch of sweetness and gooey indulgence.
Chef’s Secrets: Elevating Your Hand Pie Game (and Preventing Leaks!)
Mastering the Thick, Cool Filling: The single most critical step for leak-free hand pies is ensuring your apple filling is both thick and completely cooled before it touches the dough. The cornstarch slurry is your secret weapon for thickening, creating a stable filling that won’t melt through or burst the crust.
The Power of the Egg Wash Adhesive: Don’t skip brushing the inner edges of your pie crusts with egg wash before sealing! This creates a powerful, edible glue that virtually guarantees a strong, impenetrable bond between the two dough halves, locking in that delicious apple goodness.
The Art of Not Overfilling: It’s tempting to maximize the filling, but overfilling is a primary culprit for leaks. Stick to the recommended 2 tablespoons per pie; this amount allows for proper sealing and prevents excessive pressure from building during baking.
The Fork Crimp: Your Best Defense Against Oozing: The fork crimp isn’t just for aesthetics. Pressing down firmly with the tines creates a robust, multi-layered seal, far more secure than a simple finger press. This extra step significantly reinforces the edges against any potential oozing.
Venting for Victory: Preventing Bursts: Those small slits on top of each hand pie are absolutely essential. They act as steam vents, releasing internal pressure that builds up as the filling heats. Without them, your beautiful pies are prone to bursting open in the oven.
Achieving That Perfect Golden Crust: For a uniformly golden-brown, flaky crust, ensure you brush the tops of your hand pies with egg wash just before baking. This not only promotes even browning but also gives them a lovely, inviting sheen that truly makes them shine.
Solving Common Hand Pie Challenges
My Filling is Too Runny!
Ensure your cornstarch slurry is fully incorporated and cooked until the mixture visibly thickens. Allow the apple filling to cool completely before using; warm filling will make the dough soggy and more prone to leaks.
If your apples released a lot of liquid, cook them a bit longer to reduce moisture before adding the slurry.
Why Did My Hand Pies Burst Open?
Common culprits include a warm or overly runny filling, overfilling, or an insufficient seal. Ensure you’ve brushed the edges with egg wash, crimped firmly with a fork, and most importantly, cut the essential steam vents on top of each pie.
Without proper venting, steam buildup creates pressure that will inevitably cause the crust to rupture.
My Crust Isn’t Golden
Make sure you generously brush the tops of your Caramel Apple Hand Pies with egg wash just before baking. Verify your oven temperature is accurate; an oven thermometer can help. If needed, extend the baking time by a few minutes, keeping a close eye on them to prevent burning.
The Dough is Hard to Handle
Refrigerated pie crusts can become sticky if they get too warm. If you find the dough difficult to work with, place it back in the refrigerator for 10-15 minutes to chill. Lightly flouring your work surface and your hands can also help prevent sticking.
Enjoying Your Caramel Apple Hand Pies: Make-Ahead, Storage & Serving Ideas
Can I Make These Ahead?
Absolutely! You can prepare the apple filling up to 2-3 days in advance and store it in an airtight container in the refrigerator. You can also assemble the entire hand pies, place them on a parchment-lined baking sheet, and freeze them until solid.
Once frozen, transfer them to a freezer-safe bag for up to 1 month. Bake from frozen, adding a few extra minutes to the baking time.
Storing Leftover Hand Pies
Cooled Caramel Apple Hand Pies can be stored in an airtight container at room temperature for up to 2 days. For longer storage, keep them in the refrigerator for up to 4 days.
They can be gently reheated in a microwave for 15-20 seconds or in a toaster oven for a few minutes to restore some crispness.
Creative Serving Suggestions
These hand pies are fantastic on their own, especially when warm with that luscious caramel drizzle. For an extra special treat, serve them alongside a scoop of vanilla bean ice cream or a dollop of fresh whipped cream.
For a perfect pairing, try our No-Bake Caramel Swirl Dream Pie: Effortless & Stunning Results!.
A sprinkle of sea salt flakes over the caramel drizzle can beautifully enhance the flavors. You might also enjoy similar comforting flavors in perfect cinnamon sugar apples as a lighter option.
Your Top Questions About Caramel Apple Hand Pies, Answered
What kind of apples are best for hand pies?
For the best texture and flavor, choose firm, slightly tart apples that hold their shape well when cooked. Honeycrisp, Granny Smith, Fuji, or Braeburn are excellent choices. Using a mix can offer a more complex flavor profile.
More Ways to Use Cinnamon and Apples
If you have leftover apples or just want to keep the warm, spiced theme going, these two recipes fit right in.
- Start your morning with these Sugared Cinnamon Morning Buns – they share the same buttery pastry and cinnamon filling as the hand pies, but bake up as individual rolls with a crunchy sugar coating.
- For a quick, no-bake option that uses the same apple and cinnamon combination, try the Cinnamon Apple Walnut Yogurt Bowl – the walnuts add crunch and the yogurt cuts through the sweetness of the hand pies.
Can I use homemade pie crust?
Yes, homemade pie crust works wonderfully! Ensure your homemade dough is well-chilled and handle it gently to maintain its flakiness. The sealing techniques (egg wash, fork crimp) are just as vital with homemade crusts.
Can I freeze unbaked hand pies?
Yes, you can! After assembling and crimping the hand pies, but before brushing with egg wash or cutting vents, place them on a parchment-lined baking sheet and freeze until solid. Transfer them to a freezer bag.
When ready to bake, place them on a baking sheet, cut vents, brush with egg wash, and bake from frozen, adding about 5-10 minutes to the baking time until golden and bubbly.
Is there a dairy-free option for the caramel?
Absolutely! Many delicious dairy-free caramel sauces are available in stores, often made with coconut milk or other plant-based creams. You can also make your own using coconut milk or a similar substitute. For other delightful dairy-free treats, consider trying our no-bake peanut butter fudge pie!
Your Journey to Perfectly Sealed Caramel Apple Hand Pies Awaits!
With these expert tips and a clear, detailed guide, you’re now equipped to create the most delicious and perfectly sealed Caramel Apple Hand Pies you’ve ever imagined. Say goodbye to messy baking sheets and hello to effortlessly elegant, portable, and utterly satisfying treats.
Embrace the joy of homemade goodness and share these irresistible delights with your loved ones. We can’t wait to see your perfectly crimped, golden-brown creations!

Caramel Apple Hand Pies
Course: PastryCuisine: AmericanDifficulty: easy8
hand pies30
minutes30
minutes180
kcal60
minutesEnjoy warm, flaky apple hand pies drizzled with gooey caramel. This recipe offers a simple trick to guarantee a perfectly sealed, no-mess treat every single time.
Ingredients
1 tablespoon unsalted butter
4 medium apples, peeled, cored, and finely diced (like Honeycrisp or Granny Smith)
1/4 cup granulated sugar
1/2 teaspoon ground cinnamon
1/4 teaspoon ground nutmeg
1 tablespoon cornstarch
2 tablespoons water
1 package (14.1 ounces) refrigerated pie crusts (2 crusts)
1 large egg, beaten (for egg wash)
1/4 cup caramel sauce, for drizzling
Directions
- In a medium saucepan, melt the butter over medium heat. Add the diced apples, granulated sugar, cinnamon, and nutmeg. Cook for 8-10 minutes, stirring occasionally, until the apples are slightly softened but still hold their shape.
- In a small bowl, whisk together the cornstarch and water until smooth. This is your cornstarch slurry. Pour the slurry into the apple mixture, stirring constantly. Cook for another 1-2 minutes, until the filling thickens. Remove from heat and let the apple filling cool completely. This step is crucial for preventing leaks, as a thick, cool filling won’t melt through the crust or burst during baking.
- Unroll the pie crusts on a lightly floured surface. Using a 5-6 inch round cutter or a small plate and knife, cut out 4 circles from each crust, for a total of 8 circles.
- Lightly brush the edges of each pie circle with the beaten egg. This egg wash acts as a strong adhesive, ensuring your pies seal properly.
- Place about 2 tablespoons of the cooled apple filling onto one half of each pie circle, leaving a clear border around the edge. Avoid overfilling, as this is a common cause of leaks.
- Fold the other half of the pie crust over the filling, creating a half-moon shape. Gently press down along the edges with your fingers to seal.
- Use the tines of a fork to firmly crimp all around the edges of each hand pie. Pressing down firmly with the fork creates a robust seal that won’t easily break open.
- Place the hand pies on a baking sheet lined with parchment paper. Cut 2-3 small slits on the top of each pie with a sharp knife. These vents allow steam to escape, preventing pressure buildup that can cause the pies to burst.
- Brush the tops of the hand pies with any remaining egg wash for a golden crust.
- Bake in a preheated oven at 375 degrees Fahrenheit (190 degrees Celsius) for 18-22 minutes, or until the crust is golden brown and the filling is bubbly.
- Let the hand pies cool on the baking sheet for a few minutes before transferring them to a wire rack to cool slightly.
- Once cooled enough to handle, drizzle generously with caramel sauce before serving. Enjoy your perfectly sealed, delicious hand pies!
Notes
- Ensure apple filling cools completely and use egg wash for a perfect, leak-proof seal.