Cheesy Beef Sliders: Never Dry, Always Delicious
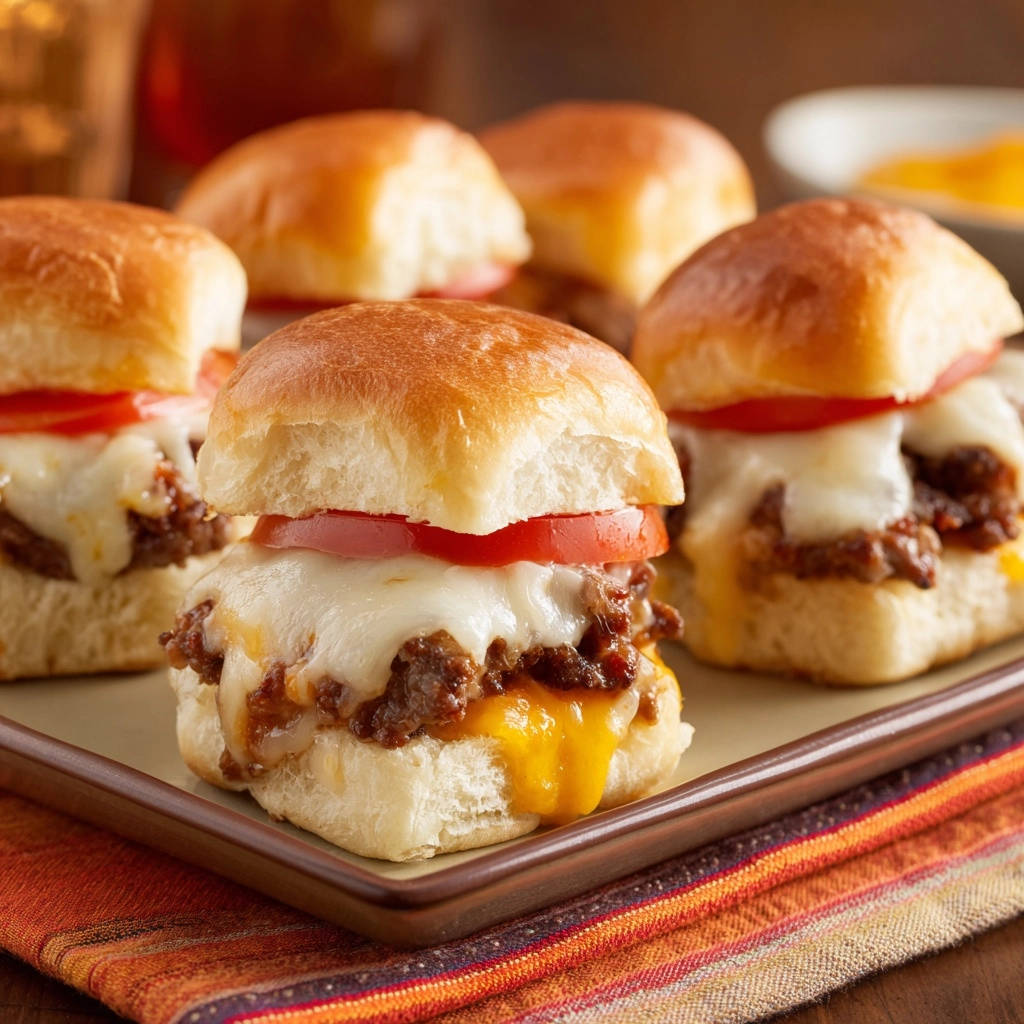
I remember struggling to create the perfect slider – often ending up with dry, crumbly beef that just didn’t hit the mark. My quest for truly juicy, flavorful Cheesy Beef Sliders led me to a simple yet transformative technique that guarantees tender, mouth-watering results every time.
This recipe isn’t just about assembling ingredients; it’s about mastering a secret to moisture that elevates these beloved mini-sandwiches from good to unforgettable. Get ready to experience a burst of savory beef and melty cheese in every single bite, making them ideal for gatherings or a satisfying family meal.
Unlock the Secret to Perfectly Juicy Cheesy Beef Sliders
This Cheesy Beef Sliders recipe stands out because it tackles the most common slider dilemma: dry meat. Our unique method infuses the ground beef with incredible moisture and flavor right on the stovetop, ensuring every bite is succulent.
If you love these juicy sliders, you’ll also enjoy this tender, never-dry classic meatloaf.
You’ll discover how simple it is to achieve that coveted tender texture, making these sliders a consistent crowd-pleaser. They’re quick to assemble, bake beautifully, and deliver a harmonious blend of savory beef and gooey cheese.
Beyond their deliciousness, these sliders are incredibly versatile, adapting easily to your family’s preferences while remaining effortlessly impressive for any occasion.
Building Blocks: The Essential Ingredients for Flavorful Sliders
For the Irresistible Beef Filling
Starting with lean ground beef provides a great base without excessive grease, allowing the other flavors to shine. Finely chopped yellow onion and minced garlic are crucial aromatics that build a deep, savory foundation for the beef.

The true game-changer here is the combination of beef broth and Worcestershire sauce. The broth infuses moisture and rich beefy flavor, while Worcestershire adds a tangy, umami depth that makes the filling incredibly savory and juicy.
Chili powder and ground cumin bring a warm, earthy spice blend that complements the beef without overpowering it, creating a balanced and inviting flavor profile.
The Perfect Cheese Duo
We use both provolone and cheddar cheese for a reason. Provolone offers a fantastic melt and mild, slightly tangy flavor that drapes beautifully over the beef.
Cheddar provides that classic sharp, comforting cheese taste and a delightful golden hue when melted, creating a rich, gooey experience that perfectly complements the savory beef.
Slider Buns and Fresh Toppings
Soft slider buns are essential, providing the perfect vehicle for our juicy filling. Look for ones that are fresh and sturdy enough to hold up to the ingredients.
A thin slice of fresh tomato added right before serving introduces a burst of bright, acidic freshness. This simple touch cuts through the richness of the beef and cheese, adding a lovely textural contrast.
Your Kitchen Toolkit for Slider Success
Essential Cooking Equipment
A large skillet is your primary tool for browning the beef and simmering the flavorful sauce. This ensures even cooking and allows for proper reduction of the liquids.
You’ll also need a sturdy spoon or spatula for breaking up the beef and stirring. Measuring spoons and cups are essential for precise ingredient quantities, especially for the spices and liquids.
Baking & Serving Essentials
A baking dish, preferably a 9×13 inch size, is perfect for arranging and baking your sliders. This allows them to heat through evenly and for the cheese to melt perfectly.
Finally, a serving platter makes it easy to present your golden, cheesy creations right from the oven, ready for everyone to enjoy.
From Skillet to Sheet Pan: Crafting Your Sliders Step-by-Step
Preparing the Juicy Beef Mixture
- Brown the Beef:
Heat olive oil in a large skillet over medium-high heat. Add ground beef and cook, breaking it up with a spoon, until it is fully browned.
Ensure to drain off any excess fat from the skillet to keep the mixture light and prevent greasiness, which can lead to soggy buns later.
- Sauté Aromatics and Spices:
Add the chopped onion to the skillet with the beef and cook until softened, about 3 to 5 minutes. The onion should become translucent, releasing its sweet aroma.
Stir in the minced garlic, chili powder, and ground cumin, cooking for 1 minute more until fragrant. This brief cooking time toasts the spices, significantly deepening their flavor.
- The Juiciness Factor: Simmer for Perfection:
This is the critical step for unbelievably moist beef: Pour in the beef broth and Worcestershire sauce.
Stir everything well, making sure to scrape up any browned bits from the bottom of the pan. These “fond” bits are packed with savory flavor and will dissolve into your sauce.
Bring the mixture to a gentle simmer and cook for 5 to 7 minutes, or until most of the liquid has been absorbed, leaving the beef moist and flavorful but not watery. The goal is a rich, slightly thickened sauce clinging to the beef.
Season with salt and black pepper to your taste, adjusting as needed after tasting. Remember, you can always add more, but you can’t take it away!
Assembling the Layers of Deliciousness
- Prepare the Buns:
Preheat your oven to 350F (175C). This ensures the oven is ready to go as soon as your sliders are assembled.
Arrange the bottom halves of the slider buns in a single layer in a baking dish, ensuring they fit snugly. This arrangement helps them bake evenly and makes serving easy.
- Spoon on the Beef:
Evenly spoon the moist beef mixture onto each bottom bun, ensuring a generous, consistent layer on all sliders.
Try to get a good amount on each bun so every slider feels substantial.
- Layer the Cheese:
Place a half slice of cheddar cheese over the beef on each slider, then top with a half slice of provolone cheese.
This double-cheese layer creates a perfect melt and rich flavor, with the cheddar providing sharpness and the provolone its signature stretch.
- Top with Buns:
Carefully place the top halves of the slider buns over the cheese-topped beef, completing the slider assembly.
Press down gently to secure them in place.
Baking to Golden, Cheesy Perfection
- Bake Until Melty:
Bake for 10 to 12 minutes, or until the cheese is beautifully melted and bubbly, and the buns are lightly toasted.
Keep an eye on them; ovens vary, and you want golden buns, not burnt ones.
The Finishing Touch: Serving Up Freshness
- Add Fresh Tomato:
Remove the sliders from the oven. Carefully lift the top bun of each slider and place a thin slice of tomato on the beef and cheese.
This adds a vibrant burst of freshness and a touch of acidity that perfectly balances the rich, savory flavors.
- Serve Immediately:
These sliders are best enjoyed warm, straight from the oven, while the cheese is still wonderfully gooey.
Chef’s Secrets: Elevate Your Cheesy Beef Sliders Game
Mastering the Moist Beef Technique
The key to preventing dry beef is the careful balance of beef broth and Worcestershire sauce. Ensure you simmer the mixture until most of the liquid is absorbed, but don’t cook it until it’s completely dry.
The beef should be moist and glossy, not swimming in liquid, and certainly not crumbly. This technique locks in moisture and flavor, creating that irresistible juicy texture.
Customizing Your Sliders: Beyond the Basic
Feel free to experiment with your cheese selection. Swiss, Monterey Jack, or even a spicy pepper jack can add a new dimension.
Consider mixing in finely diced bell peppers with the onion for extra vegetable goodness. A pinch of smoked paprika in the beef mixture can also introduce a subtle smoky note.
Smart Prep for Stress-Free Serving
Chop your onion and mince your garlic in advance to save time during assembly. You can even prepare the beef mixture a day ahead and refrigerate it.
This allows flavors to meld further and makes quick assembly and baking a breeze when you’re ready to serve.
Perfect Pairings: What to Serve with Your Cheesy Beef Sliders
Classic Sides and Salad Companions
Cheesy Beef Sliders pair wonderfully with classic comfort food sides. Crispy French fries or a creamy potato salad are always a hit.
If you want the same juicy result with a buttery, crisp bun, check out these gooey cheeseburger sliders.
For a lighter option, a simple green salad with a vinaigrette dressing or a vibrant coleslaw can provide a refreshing contrast. A delicious side of skillet street-style corn also adds a fantastic pop of flavor and color.
Creative Condiment Upgrades
Beyond the traditional ketchup and mustard, consider offering a tangy aioli or a spicy mayonnaise for dipping. Pickled red onions can add a sharp, zesty counterpoint.
A drizzle of barbecue sauce or a homemade “special sauce” (mayo, ketchup, relish, and a dash of hot sauce) can elevate the flavor profile even further.
Plan Ahead: Storage and Make-Ahead Tips
Keeping Leftovers Fresh and Delicious
Allow any leftover Cheesy Beef Sliders to cool completely before storing. Place them in an airtight container in the refrigerator for up to 3 days.
For reheating, a quick warm-up in the oven at 300°F (150°C) for about 10-15 minutes will restore their warmth and meltiness, much better than a microwave which can make the buns soggy.
Freezing for Future Feasts
While the cooked sliders can be frozen, the buns might become slightly dry upon thawing. It’s best to freeze the cooked beef mixture separately.
Store the cooled beef in an airtight freezer-safe container for up to 3 months. Thaw overnight in the refrigerator, then reheat gently on the stovetop before assembling fresh sliders.
Common Slider Challenges & Quick Fixes
Why is My Beef Not Juicy Enough?
If your beef isn’t juicy, you might have cooked it for too long after adding the broth, or drained too much fat initially. Ensure you only drain excess fat, not all of it, and simmer the liquid until absorbed but not completely evaporated.
The goal is moist, not dry. Adjust the simmering time based on how quickly the liquid reduces.
Soggy Buns or Runny Cheese?
Soggy buns usually indicate too much moisture from the beef or not preheating the oven adequately. Make sure your beef mixture is moist but not watery before spooning it onto the buns.
Runny cheese often happens if the cheese quality isn’t ideal or if the baking time is too short. Using a good quality cheese and ensuring the sliders bake until the cheese is fully melted and bubbly will prevent this.
Your Top Cheesy Beef Sliders Questions Answered
Can I Substitute Different Cheeses?
Absolutely! While provolone and cheddar offer a classic blend, feel free to experiment. Mozzarella provides a milder, stretchier melt, while Monterey Jack offers a creamy texture. Swiss or even a smoked Gouda could add unique flavor notes.
How Can I Make These Spicier?
To add heat, incorporate a pinch of cayenne pepper with the other spices in the beef mixture. You could also add finely diced jalapeños (deseeded for less heat) to the beef when you sauté the onions. Serving with a spicy mayo or sriracha drizzle is another easy way to kick up the heat.
Are They Good for Meal Prep?
Yes, these sliders can be adapted for meal prep, especially the beef filling. Cook the beef mixture entirely and store it in an airtight container in the fridge for up to 3-4 days. When ready to eat, simply warm the beef, assemble fresh sliders, and bake. This makes for a super quick weeknight dinner or game-day snack, much like preparing components for cheesy ham and spinach breakfast bites in advance.
Ready to Impress? Share Your Cheesy Beef Sliders Masterpiece!
Now that you’re armed with the secrets to perfectly juicy Cheesy Beef Sliders, it’s time to bring this crowd-pleasing dish to your table. You’ll love how simple yet impactful this recipe is, delivering incredible flavor with every bite.
What to Serve With Cheesy Beef Sliders
These sliders are rich and savory, so you want sides that add creaminess, tang, or a bit of crunch without stealing the spotlight. A cold potato salad and a warm, pull-apart bread both fit the bill.
- The Loaded Creamy Potato Salad brings a cool, tangy contrast to the hot, cheesy sliders, and the bacon-like crunch (from smoked turkey) echoes the beef’s savory notes.
- For a shareable starter that shares the same cheesy indulgence, tear into the Spinach Artichoke Pull-Apart Bread — its creamy dip and soft bread are a natural companion to the slider’s melted cheese and soft buns.
Don’t wait to try this family favorite! Whip up a batch of these irresistible sliders and watch them disappear. Share your creations and let us know how your juicy sliders turned out in the comments below!
Cheesy Beef
Course: Main CourseCuisine: AmericanDifficulty: easy12
sliders15
minutes25
minutes150
kcal40
minutesDiscover the secret to incredibly juicy and flavorful beef sliders. This recipe ensures tender meat every time, thanks to a simple tweak in the filling preparation, making dry sliders a thing of the past.
Ingredients
1 pound lean ground beef
1 tablespoon olive oil
1/2 cup finely chopped yellow onion
2 cloves garlic, minced
1/2 cup beef broth
1 tablespoon Worcestershire sauce
1 teaspoon chili powder
1/2 teaspoon ground cumin
Salt to taste
Black pepper to taste
12 slider buns
6 slices provolone cheese, halved
6 slices cheddar cheese, halved
1 medium tomato, thinly sliced
Directions
- Heat olive oil in a large skillet over medium-high heat. Add ground beef and cook, breaking it up with a spoon, until it is fully browned. Drain off any excess fat from the skillet. Cook until no pink remains and it reaches 160°F (71°C).
- Add the chopped onion to the skillet with the beef and cook until softened, about 3 to 5 minutes. Stir in the minced garlic, chili powder, and ground cumin, cooking for 1 minute more until fragrant.
- This is the key to incredibly juicy meat: Pour in the beef broth and Worcestershire sauce. Stir everything well, making sure to scrape up any browned bits from the bottom of the pan. Bring the mixture to a gentle simmer and cook for 5 to 7 minutes, or until most of the liquid has been absorbed, leaving the beef moist and flavorful but not watery. Season with salt and black pepper to your taste.
- Preheat your oven to 350F (175C). Arrange the bottom halves of the slider buns in a single layer in a baking dish.
- Evenly spoon the moist beef mixture onto each bottom bun.
- Place a half slice of cheddar cheese over the beef on each slider, then top with a half slice of provolone cheese.
- Place the top halves of the slider buns over the cheese-topped beef.
- Bake for 10 to 12 minutes, or until the cheese is beautifully melted and bubbly, and the buns are lightly toasted.
- Remove the sliders from the oven. Carefully lift the top bun of each slider and place a thin slice of tomato on the beef and cheese before serving immediately.
Notes
- The beef broth and Worcestershire sauce are key to keeping the beef filling incredibly moist and flavorful.