Mastering the Crispy Stuffed Chicken Cordon Bleu
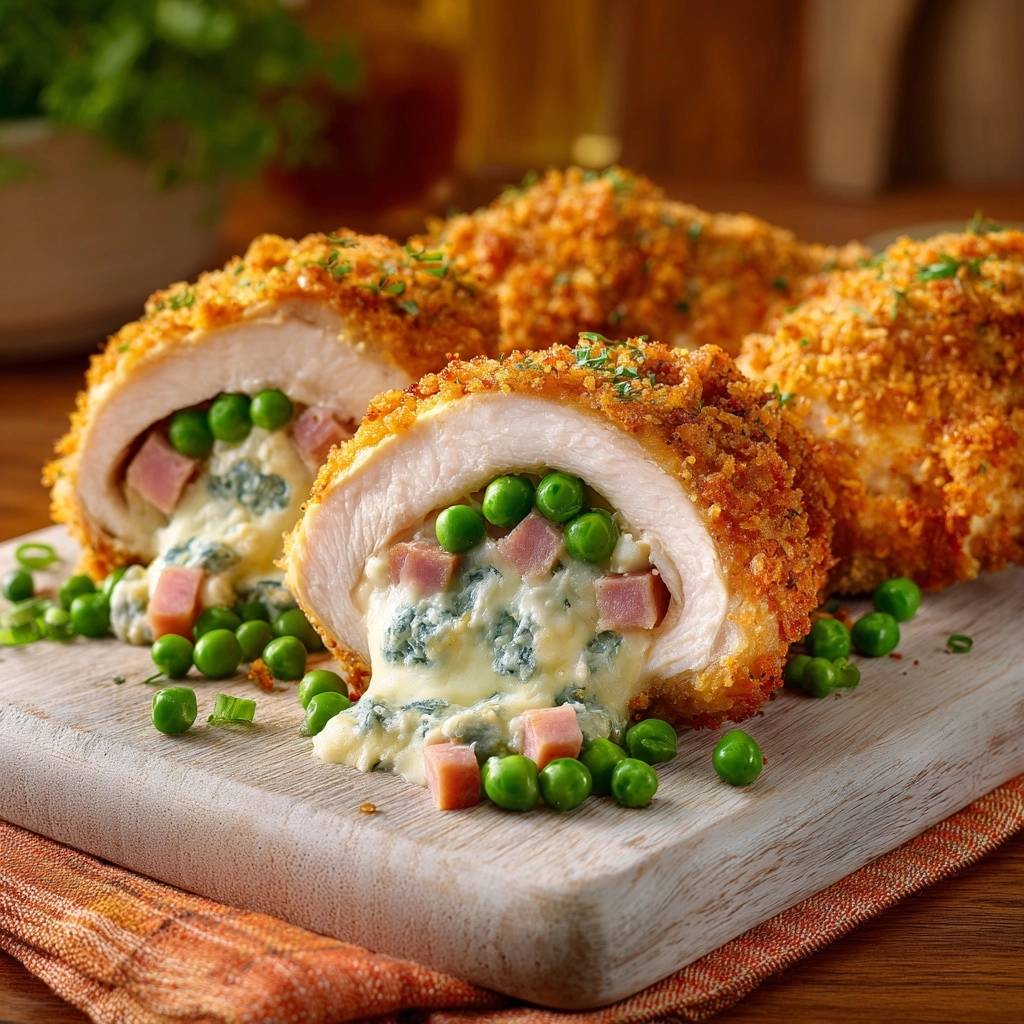
Imagine slicing into a golden, shatteringly crisp chicken breast and finding a molten center of savory ham and nutty Swiss cheese that stays exactly where it belongs. Most versions of this classic dish end in heartbreak, with the cheese escaping onto the baking sheet and leaving the meat dry and hollow. This recipe changes that by focusing on a specific technical seal that guarantees a perfect, gooey cross-section every single time.
The secret lies in the contrast between the textured Panko exterior and the creamy, herb-flecked interior. By using a unique chilling method, we ensure the chicken and filling bond together before they ever hit the heat. This isn’t just dinner; it’s a masterclass in texture that brings restaurant-quality results to your home kitchen without the need for deep frying.
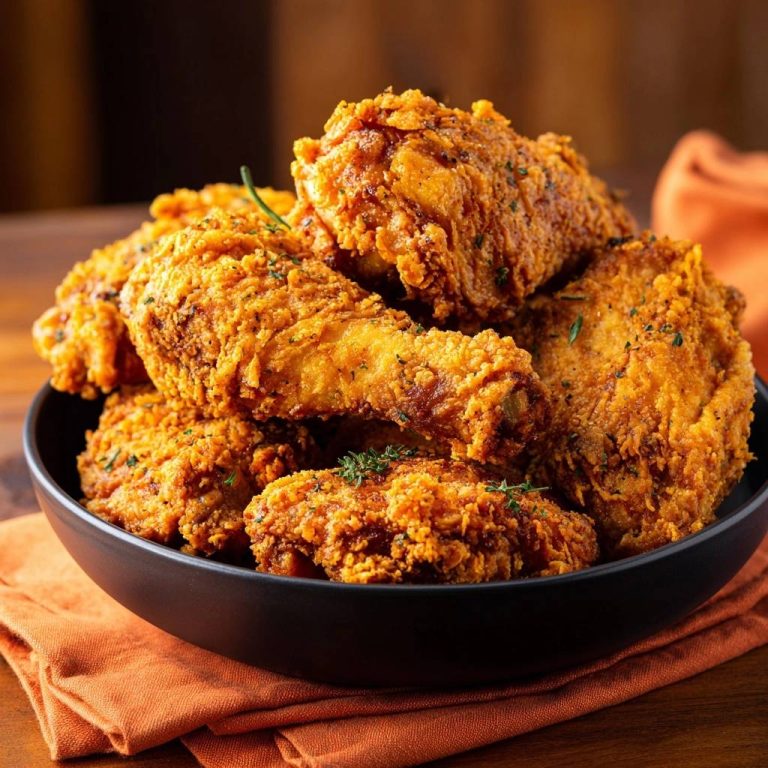
To get that professional finish, you must use a wire rack for baking. Elevating the chicken allows hot air to circulate entirely around the meat, which prevents the dreaded soggy bottom. This simple equipment swap ensures your Crispy Stuffed Chicken Cordon Bleu is just as crunchy on the underside as it is on the top.
The Anatomy of a Leak-Proof Chicken Breast
Structural integrity is the most important factor when you’re stuffing poultry. You need to start with large, boneless skinless chicken breasts because they provide enough surface area to create a secure “envelope” for the filling. If the breast is too small, you won’t have enough meat to overlap, which is usually where the cheese finds its escape route.
The real magic happens with the “candy wrapper” technique. After rolling the chicken around the ham and cheese, you wrap it tightly in plastic wrap and twist the ends until the meat compresses into a uniform log. This physical pressure forces the chicken fibers to knit together, creating a solid barrier that holds up during the breading and baking process.
Chilling these wrapped logs in the freezer for twenty minutes is a non-negotiable step. This brief cold snap firms up the cream cheese and Swiss mixture so it doesn’t liquefy the moment it enters the oven. It also sets the shape of the chicken, making it much easier to handle during the dredging process without the roll falling apart or losing its shape.
Essential Components for the Filling and Crust
Quality ingredients make a massive difference in a dish with so few components. For the cheese, Gruyere or a high-quality Swiss is the gold standard because they offer a sophisticated, nutty flavor and a reliable melt point. However, these cheeses can be oily when melted alone, which is why we incorporate softened cream cheese as a stabilizer to keep the filling lush and cohesive.
The addition of sweet peas and fresh parsley provides a necessary pop of color and a burst of freshness that cuts through the richness of the dairy. When you mix these into the cheese, you create a vibrant, green-flecked interior that looks stunning when sliced. Make sure your peas are patted dry after thawing, as any excess moisture can create steam and cause the chicken to burst.
For the exterior, Panko breadcrumbs are superior to standard crumbs because of their large, jagged surface area. They don’t absorb as much oil, which results in a lighter, crunchier crust. When combined with melted butter, the Panko toasts into a deep, mahogany brown that provides a satisfying “crunch” in every single bite.
Selecting and Preparing the Poultry
Try to select chicken breasts that are roughly the same size so they cook at the same rate. Before you start pounding, trim away any loose bits of fat or the tough silver skin. These connective tissues don’t stretch, and they can cause the meat to shrink or curl unevenly in the oven, which might break your seal.
If your chicken breasts are particularly thick, you can butterfly them slightly before pounding. This gives you a head start on creating a wide, flat surface. The goal is a uniform sheet of protein that acts as a blank canvas for your savory ham and cheese filling.
If you love the creamy filling here, you’ll also appreciate these swirled pumpkin cheesecake bars.
The Role of Smoked Paprika and Aromatics
We don’t rely on a long marination process here because the flavor is built directly into the breading. Garlic powder and onion powder provide a savory, “rotisserie-style” depth that permeates the crust. These aromatics are essential for making the chicken taste seasoned from the outside in.
Smoked paprika is the secret weapon in this spice blend. It adds a very subtle earthiness and, more importantly, helps the Panko achieve a rich, golden color. Since the chicken only bakes for about 25 minutes, the paprika provides that “sun-kissed” look that usually requires much longer cooking times.
The Science of the 20-Minute Freezer Chill
This technical step is what separates an amateur Cordon Bleu from a professional one. When you place the compressed chicken rolls in the freezer, you are essentially “resetting” the protein. The cold temperature causes the fat in the cheese to solidify and the chicken fibers to tighten around the filling, creating a pressurized seal.
Unlike the traditional method of using toothpicks, which creates holes where cheese can leak out, compression creates a seamless bond. This method also ensures even heat distribution. Because the roll is uniform in thickness and density, the heat travels through the meat at a steady pace, preventing the outside from overcooking before the center is hot.
Furthermore, the chilled surface of the chicken helps the flour and egg wash adhere better. A cold protein surface creates less “slip” than room-temperature meat. This ensures your breading stays glued to the chicken rather than sliding off in the oven, giving you a perfect, unbroken crust.
Step-by-Step: Engineering the Perfect Roll
Assembly begins with the pounding process. Place your chicken between plastic wrap to prevent the meat from tearing or sticking to the mallet. You want to achieve a consistent 1/4-inch thickness across the entire breast. You’ll feel the meat become more pliable and elastic as it thins out, which is exactly what you need for a tight roll.
When adding the filling, resist the urge to overstuff. Place a generous scoop in the center, then use the “envelope fold” by tucking the sides inward first before rolling from the bottom up. This ensures the ends are completely capped by meat. As you roll, keep the tension tight, similar to how you would roll a sleeping bag or a burrito.
Once the chicken is rolled, the tactile sensation should be firm and bouncy. If it feels loose, the plastic wrap compression step will fix it. Twisting the ends of the plastic wrap tightly is what really “engineers” the shape, turning a loose bundle of meat into a professional-looking culinary cylinder.
Achieving Uniformity with the Meat Mallet
Always use the flat side of the meat mallet rather than the spiked side. The spikes are for tenderizing tough cuts of beef, but they will shred delicate chicken breast fibers. Start from the thickest part of the center and work your way outward with firm, even strokes.
If you don’t have a mallet, a heavy rolling pin or even the bottom of a small cast-iron skillet works in a pinch. The key is to be patient. If you rush and hit the meat too hard, you’ll create “windows” or holes in the chicken that the cheese will definitely find later.
The same ham and cheese filling turns into crispy, flaky pastry in these Cheesy Ham & Chive Pastry Bites.
The Three-Stage Dredging Station Protocol
To keep your kitchen from becoming a sticky mess, use the “wet hand/dry hand” technique. Use one hand for the dry flour and Panko, and the other hand for the egg wash. This prevents your fingers from becoming breaded along with the chicken, allowing for a much cleaner and more efficient workflow.
When you move the chicken from the flour to the egg, shake off every bit of excess flour. You only want a microscopic layer to help the egg stick. If the flour layer is too thick, it creates a barrier that causes the crust to separate from the meat during baking, leading to “bald spots” on your finished dish.
Optimizing Heat: The Wire Rack Advantage
Physics plays a huge role in how crispy your chicken becomes. In a standard oven, heat rises, but the bottom of a baking sheet stays relatively shielded. If the chicken sits directly on the metal, the moisture from the meat pools underneath, steaming the bottom crust and making it soggy.
By using a wire rack, you allow for 360-degree convection. The hot air can flow underneath the chicken, drying out the Panko on all sides simultaneously. This creates a uniform crunch that mimics the effects of a deep fryer without all the extra oil and mess.
Additionally, the wire rack prevents the chicken from sitting in its own rendered fat or any small amount of cheese that might escape. This keeps the exterior clean and sharp. The result is a professional, “lifted” appearance that makes the dish look as good as it tastes.
Troubleshooting Common Cordon Bleu Failures
If you notice a small tear in the chicken while pounding, don’t panic. You can usually “patch” it by overlapping the meat when you roll it. As long as the tear isn’t in the very outer layer of the final roll, the breading and the freezer-chill method will likely hold everything together.
If your rolls feel loose even after the freezer step, you might not have twisted the plastic wrap tight enough. Ensure the “candy wrapper” ends are very firm. Another common issue is the chicken being too dry. This usually happens if you skip the butter drizzle or overcook the meat past the 165°F mark.
Using a meat thermometer is the only way to be 100% sure of success. You want the internal temperature to hit exactly 165°F. This ensures the chicken is safe and juicy, the peas are tender, and the cheese has reached that perfect, flowing consistency without breaking down into oil.
Side Dish Pairings to Balance Richness
Because this dish is quite rich and savory, you want to pair it with something bright and acidic. A simple arugula salad tossed in a sharp lemon vinaigrette is a perfect companion. The peppery bite of the greens and the hit of citrus cut right through the creamy Swiss cheese and buttery Panko.
Roasted asparagus or steamed green beans with a touch of Dijon mustard also work beautifully. These vegetables provide a crisp-tender texture that complements the soft interior of the chicken. Avoid heavy, cream-based sides like mashed potatoes unless you are looking for a very decadent, “comfort food” style meal.
What’s Next?
Try these delicious pairings:
- Mastering Roasted Butternut Squash with Feta and Cranberries
- Mastering the Loaded Creamy Potato Salad
If you want to keep things light, a quick cucumber and radish salad provides a refreshing crunch. The goal is to provide a “palate cleanser” between bites of the rich Cordon Bleu. A splash of apple cider vinegar or a squeeze of fresh lime on your side dish can make the whole meal feel much more balanced.
Make-Ahead Strategies and Storage
You can easily prep these chicken rolls up to 24 hours in advance. Simply keep them tightly wrapped in the plastic wrap in the refrigerator. When you’re ready to eat, proceed with the dredging and baking steps. This makes it an excellent option for dinner parties where you want to do the “heavy lifting” early.
If you have leftovers, store them in an airtight container in the fridge for up to three days. To maintain the crispy crust, avoid the microwave. Instead, reheat the chicken in an air fryer at 350°F for about 5-7 minutes, or in a toaster oven until the center is hot and the exterior crisps back up.
Expert Tips for Professional Presentation
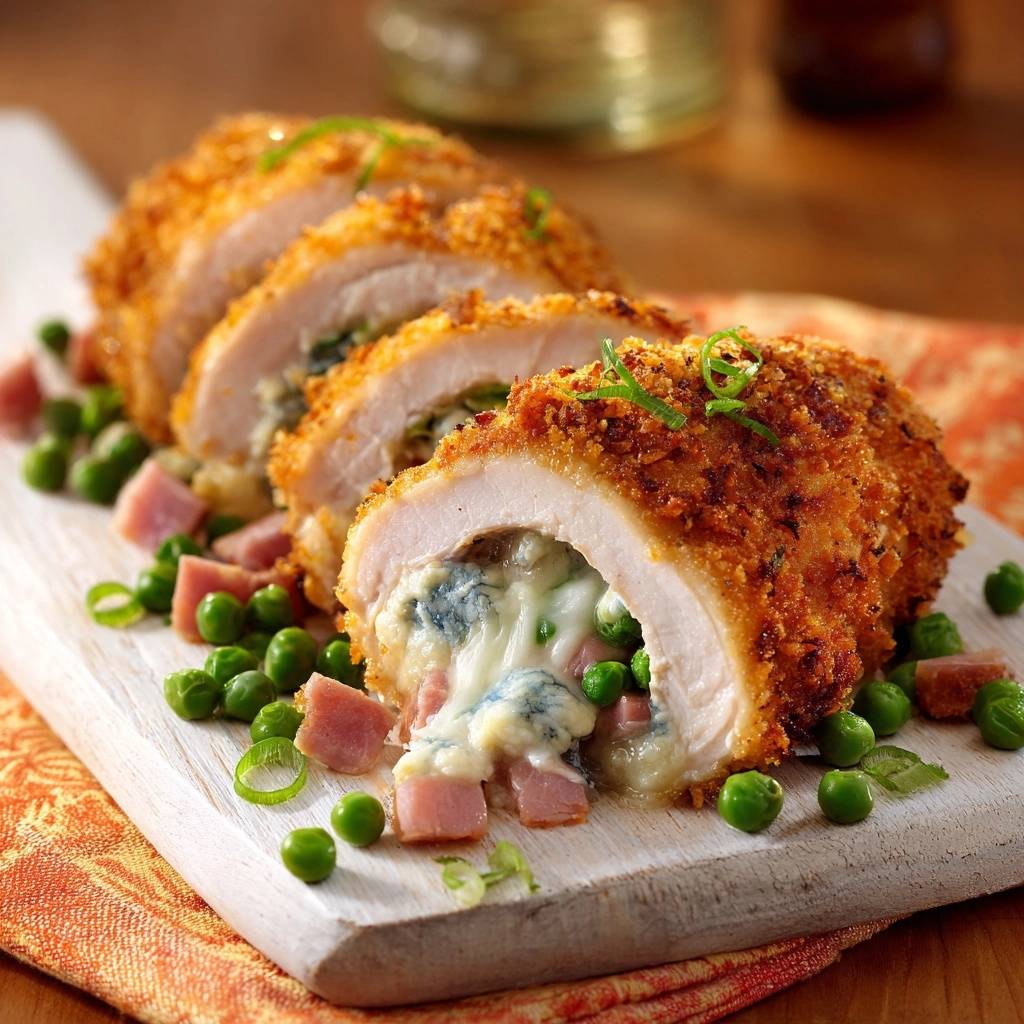
The most important tip for a beautiful presentation is the resting period. Let the chicken sit for 5 to 8 minutes after it comes out of the oven. This allows the juices to redistribute and, more importantly, lets the molten cheese stabilize. If you cut it immediately, the cheese will run out like water; if you wait, it will flow like thick lava.
When you’re ready to serve, use a very sharp serrated knife to slice the chicken on a slight bias (diagonal). This shows off the beautiful spiral of ham, cheese, and green peas. Garnish the plate with a few extra peas and a sprinkle of fresh parsley to highlight the ingredients hidden inside the golden crust.
How do I prevent the cheese from leaking out?
The most effective way to prevent leakage is the 20-minute freezer chill. By wrapping the stuffed chicken tightly in plastic wrap and chilling it, you compress the meat and firm up the cheese. This creates a physical seal that holds together during baking. Additionally, ensure you are using the “envelope fold” to cap the ends of the roll with meat before breading.
Can I use a different type of cheese?
Yes, you can substitute the Swiss or Gruyere with other good melting cheeses like Provolone, Fontina, or even a sharp White Cheddar. However, avoid very soft cheeses like Brie or fresh Mozzarella, as they have a much higher water content and are more likely to burst through the chicken and create a mess on your baking sheet.
What if I don’t have a meat mallet?
If you don’t have a mallet, you can use any heavy, flat-bottomed object. A small cast-iron skillet, a heavy rolling pin, or even a sturdy saucepan will work. Just be sure to place the chicken between sheets of plastic wrap or in a large zip-top bag to protect the meat from tearing and to keep your workspace clean.
How do I store and reheat leftovers?
Store leftovers in an airtight container in the refrigerator for up to 3 days. For the best results, do not use a microwave to reheat, as it will make the breading soggy. Instead, use an air fryer at 350°F for 5 minutes or a conventional oven at 375°F until the chicken is heated through and the crust is crispy again.
Can I make this recipe gluten-free?
Absolutely. You can substitute the all-purpose flour with a gluten-free flour blend and use gluten-free Panko-style breadcrumbs. Most major grocery stores carry gluten-free Panko made from rice flour that provides a very similar crunch to the original. Ensure your ham is also certified gluten-free, as some brands use grain-based fillers.
Why is my chicken dry even though the cheese is melted?
This usually happens if the chicken is overcooked. Because the meat is pounded thin, it cooks much faster than a whole breast. Use an instant-read thermometer and pull the chicken out of the oven the moment it hits 165°F. Also, ensure you don’t skip the butter drizzle, as the fat helps insulate the meat and adds essential moisture to the crust.
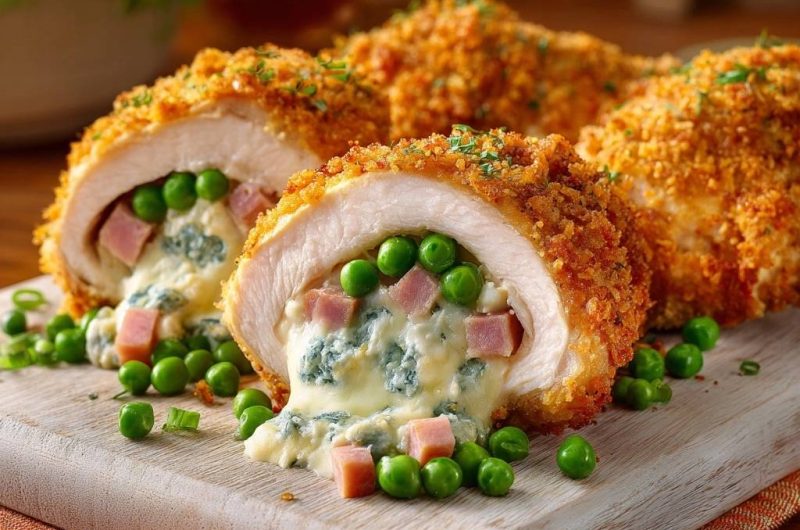
Chicken Cordon Bleu
Course: Main CourseCuisine: AmericanDifficulty: medium4
servings30
minutes25
minutes510
kcal55
MinutesThis recipe uses a specific chilling and sealing technique to ensure that the creamy cheese, savory ham, and sweet peas stay locked inside the golden, crunchy crust until the very first bite.
Ingredients
4 large boneless skinless chicken breasts
1 cup thick-cut diced cooked ham
1 cup frozen peas, thawed and patted dry
4 ounces cream cheese, softened
1 cup shredded Swiss or Gruyere cheese
1/4 cup finely chopped fresh parsley or spinach (for the green-flecked cheese visual)
2 cups Panko breadcrumbs
1/2 cup all-purpose flour
2 large eggs, beaten with 1 tablespoon water
1 teaspoon garlic powder
1 teaspoon onion powder
1/2 teaspoon smoked paprika
Salt and black pepper to taste
4 tablespoons melted butter (for a deep golden crust)
Extra peas and parsley for garnish
Directions
- Place each chicken breast between two sheets of plastic wrap. Use a meat mallet to pound them to an even 1/4 inch thickness. This uniform thickness is vital for a tight, professional seal.
- In a small bowl, mix the softened cream cheese, shredded Swiss cheese, and chopped parsley/spinach until smooth. Fold in the diced ham and 1/2 cup of the peas.
- Place a generous scoop of the filling in the center of each flattened chicken breast. Fold the sides in and roll the chicken tightly around the filling, ensuring no gaps are visible.
- The No-Leak Secret: Wrap each stuffed chicken roll tightly in plastic wrap, twisting the ends like a candy wrapper to compress the meat into a uniform log. Place these in the freezer for 20 minutes. This “sets” the shape and firms the filling, preventing it from expanding and leaking during the cooking process.
- Preheat your oven to 400°F (200°C). Set up three shallow bowls: one with flour seasoned with salt and pepper; one with the beaten egg wash; and one with Panko breadcrumbs mixed with garlic powder, onion powder, and smoked paprika.
- Remove the chicken from the plastic wrap. Dredge each roll in flour (shake off excess), dip thoroughly in egg, and coat in Panko. Press the crumbs firmly into the meat to create a thick, textured crust.
- Place the chicken on a wire rack set over a baking sheet. This allows hot air to circulate, ensuring the bottom is as crispy as the top. Generously drizzle or brush the melted butter over the Panko.
- Bake for 22 to 25 minutes until the crust is deep golden brown and the internal temperature reaches 165°F.
- Let the chicken rest for 5 to 8 minutes before slicing. This is crucial; it allows the cheese to stabilize so it flows like lava rather than running out like water. Garnish with the remaining peas and fresh parsley.
Notes
- The chilling step in the freezer is the secret to preventing cheese leakage. Resting the chicken for 5 to 8 minutes after baking allows the cheese to stabilize for the perfect texture.