Chocolate Chip Cookie Pie: Gooey Perfection, Every Time

For years, I chased that elusive, perfectly gooey center in a homemade cookie pie-sometimes it was too firm, other times simply not melted enough. After countless trials and adjustments, I finally cracked the code to deliver a Chocolate Chip Cookie Pie with a wonderfully soft, unbelievably gooey center every single time.
This recipe isn’t just about deliciousness; it’s designed to be incredibly easy, transforming your dessert experience with minimal effort but maximum impact.
Why This Chocolate Chip Cookie Pie Will Be Your New Favorite
The Promise of Unbelievably Gooey Goodness
This recipe focuses on the ultimate indulgent experience: a center that is molten, tender, and deeply satisfying.
We specifically craft the baking and cooling process to lock in that incredible gooey texture, ensuring every slice delivers on its promise.
Simple Steps, Spectacular Results
Don’t let the decadent outcome fool you; preparing this pie is surprisingly straightforward.
Each step is clear and concise, making it perfect for both novice bakers and seasoned pros seeking a reliable dessert.
No More Dense Disappointments!
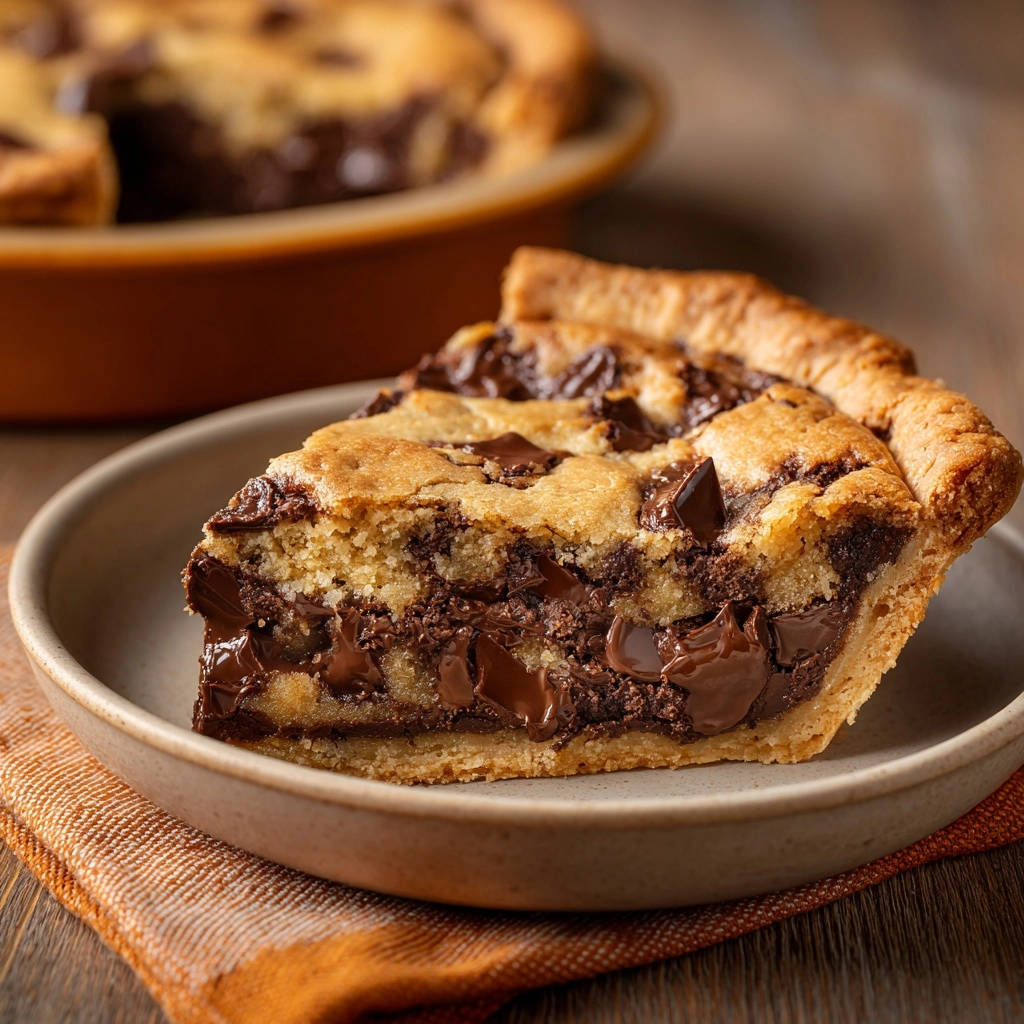
Say goodbye to the common pitfalls of overly firm or dry cookie pies. Our method precisely guides you to avoid those “dense disappointments.”
You’ll achieve a perfectly balanced texture where the edges are set and golden, but the heart of the pie remains incredibly soft and yielding.
Gather Your Goodness: Essential Ingredients for the Perfect Pie
Buttery Foundation: Unsalted Butter
Softened unsalted butter is crucial for creaming effectively with the sugars, creating an airy base.
It also provides richness and moisture, contributing to the pie’s tender crumb.
Sweet Duo: Granulated and Brown Sugars
Granulated sugar adds crispness and sweetness, while light brown sugar provides moisture, chewiness, and subtle caramel notes.
This combination is key for both flavor and the desirable texture of your Chocolate Chip Cookie Pie.
Binding & Boosting: Egg and Vanilla Extract
A large egg acts as a binder, lending structure and richness to the dough.
Pure vanilla extract elevates all the other flavors, adding a warm, aromatic depth that is indispensable in any classic cookie.
Flour Power: All-Purpose Flour
All-purpose flour provides the necessary structure for the cookie pie.
Measure it correctly by spooning it into the cup and leveling off, avoiding scooping directly from the bag to prevent a dense pie.
The Leavening Lift: Baking Soda and Salt
Baking soda reacts with the brown sugar to create lift, ensuring a tender, slightly chewy texture.
Salt balances the sweetness and enhances all the other flavors, making them truly sing.
Chocolatey Heart: Semi-Sweet Chocolate Chips
Semi-sweet chocolate chips offer a balanced sweetness and melt beautifully, creating those irresistible gooey pockets.
Feel free to experiment with a mix of milk, dark, or even white chocolate chips for varied flavor profiles.
Crust Canvas: The 9-inch Pie Crust
An unbaked 9-inch pie crust forms the perfect vessel for our cookie masterpiece.
Whether store-bought for convenience or homemade for an extra touch, ensure it’s ready to be filled.
Your Toolkit for Cookie Pie Creation
Essential Mixing Bowls & Whisk
Using different sized bowls, one for wet ingredients and one for dry, ensures proper mixing and integration.
A whisk helps evenly distribute dry ingredients like flour, baking soda, and salt, preventing clumps.
The Right Spatula or Spoon
A sturdy spatula or wooden spoon is ideal for gently mixing the dough, particularly when incorporating dry ingredients.
This helps avoid overmixing, which can lead to a tough cookie pie.
Your Go-To 9-inch Pie Plate
A standard 9-inch pie plate, whether glass, ceramic, or metal, will work perfectly.
Glass and ceramic retain heat well, which can contribute to even baking and a beautiful golden crust.
The Cooling Companion: Wire Rack
A wire rack is crucial for allowing air to circulate around the pie as it cools.
This ensures even cooling and prevents the bottom crust from becoming soggy.
Baking Brilliance: A Step-by-Step Guide to Your Pie
- Step 1: Preheat for Perfection
Set your oven to 350°F (175°C) to ensure an accurately heated environment before the pie enters.
This consistent temperature helps the pie start baking evenly from the very first minute.
- Step 2: Creaming the Classics
In a large bowl, combine the softened unsalted butter, granulated sugar, and light brown sugar.
Beat them with an electric mixer until the mixture is light, fluffy, and visibly paler, which typically takes about 2-3 minutes.
This creaming process incorporates essential air, contributing significantly to the pie’s tender and airy texture.
- Step 3: Egg and Vanilla Harmony
Add the large egg and vanilla extract to the creamed butter and sugar mixture.
Beat these until they are fully incorporated and the mixture appears well combined, ensuring no visible streaks remain.
- Step 4: Whisking the Dry Foundation
In a separate, medium-sized bowl, whisk together the all-purpose flour, baking soda, and salt.
This step is vital for evenly distributing the leavening agent and seasoning, which prevents dense pockets in the final cookie pie.
- Step 5: Gentle Integration of Dry and Wet
Gradually add the whisked dry ingredients into the wet ingredients, mixing only until they are just combined.
Critical Tip: Do not overmix the dough! Overmixing develops gluten, leading to a tough, less tender cookie pie, so stop as soon as the flour streaks disappear.
- Step 6: Stirring in the Chocolate Chips
Gently fold in the semi-sweet chocolate chips using a spatula or spoon until they are evenly distributed throughout the cookie dough.
Ensure every bite promises a rich burst of chocolatey goodness.
- Step 7: Pressing into the Crust
Press the prepared cookie dough evenly into your unbaked 9-inch pie crust.
Spread it to thoroughly fill the entire crust, ensuring a uniform thickness for consistent baking.
- Step 8: The Critical Bake & The Gooey Center Clue
Bake for 25-30 minutes. This precise baking window is pivotal for achieving that perfectly gooey center.
You want the edges to be beautifully golden brown and set, but the very center should still look slightly soft and even a little jiggly when gently nudged.
Remember, the pie will continue to set as it cools, retaining its irresistible gooeyness without becoming firm.
- Step 9: The Patience of Cooling
Remove the Chocolate Chip Cookie Pie from the oven and immediately place it on a wire rack to cool completely.
This vital cooling period should last at least 2 to 3 hours before you attempt to slice and serve.
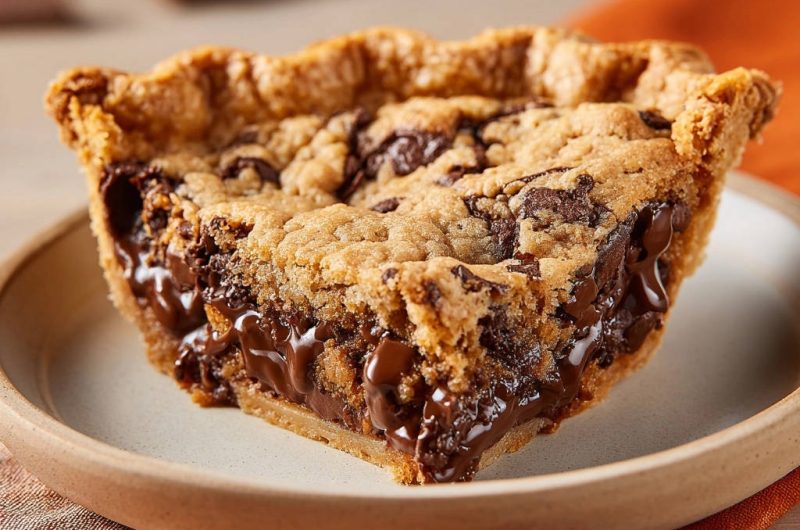
This slow cooling process is absolutely key. It allows residual heat to gently finish cooking the center without drying it out, ensuring the chocolate remains wonderfully melted and gooey, preventing a hard or crumbly texture.
The Magic of the Cool Down: Achieving That Signature Gooey Center
Decoding the Bake: What to Look For in the Oven
The visual cues are everything for a perfectly baked cookie pie. You’re looking for a delightful golden-brown hue around the edges, indicating they are fully set.
Crucially, the center should still have a slight jiggle; it won’t be perfectly firm yet, which signals ideal gooeyness to come.
The Patience Principle: Why Cooling is Key
The 2-3 hour cooling time is not just a suggestion-it’s the secret to success for this Chocolate Chip Cookie Pie.
During this period, residual heat continues to gently cook the pie from within, preventing it from becoming raw, while simultaneously locking in moisture.
This slow setting process is what preserves the incredibly melted and gooey texture of the chocolate, ensuring your pie remains luscious and never dry or crumbly.
Elevate Your Bake: Expert Tips & Creative Twists
Customizing Your Chocolate Chips
Don’t limit yourself to just semi-sweet! For a dynamic flavor profile, try a mix of different chocolate types.
Combine milk, dark, and white chocolate chips, or even incorporate chocolate chunks for varied melty pockets.
Beyond Basic Vanilla: Flavor Boosters
While vanilla is classic, a pinch of cinnamon can add warmth, or a touch of almond extract can introduce a subtle nutty note.
For an extra decadent touch, swirl in a tablespoon of caramel sauce just before baking.
Make-Ahead Mastery for Busy Bakers
You can prepare the cookie dough a day in advance and keep it covered in the refrigerator.
For even greater convenience, press the dough into the pie crust, then wrap and freeze the unbaked pie for up to one month, baking from frozen with an extra 10-15 minutes of bake time.
Achieving a Beautiful Slice
For perfectly clean slices, ensure your Chocolate Chip Cookie Pie is completely cool.
Using a warm, sharp knife (run it under hot water and wipe dry between slices) makes a significant difference in presentation.
Tackling Baking Blunders: Troubleshooting Common Cookie Pie Issues
Problem: My Pie is Too Dry/Firm
This often indicates overbaking. Keep a close eye on the bake time, especially during the last few minutes, and trust the “slightly jiggly” center cue.
Ensure adequate cooling, as cutting too early can also lead to a less gooey texture.
Problem: My Pie Crust Burned
If your pie crust edges brown too quickly, shield them with aluminum foil or a reusable pie crust protector during the last half of the baking time.
This protects the delicate edges while allowing the center to bake perfectly.
Problem: My Pie Spreading Too Much
Excessive spreading can be caused by butter that’s too soft or even melted before creaming, or an oven temperature that’s too low.
Ensure your butter is softened but still cool to the touch, and verify your oven temperature with an oven thermometer.
Serving Suggestions & Storage Smarts
The Perfect Slice: Serving Warm or Cool
For an ultimate indulgence, serve your Chocolate Chip Cookie Pie slightly warm with a scoop of premium vanilla bean ice cream.
If you love the rich chocolate flavor here, you’ll want to try these sea salt dark chocolate chunk cookies for a similar treat.
If you prefer a firmer slice with less ooze, allow it to cool completely and even chill for an hour or two in the refrigerator.
Delightful Pairings to Enhance the Experience
Beyond ice cream, consider a dollop of freshly whipped cream or a rich drizzle of homemade caramel sauce for an extra layer of decadence.
For a perfect pairing, try our Mastering Loaded Almond Chocolate Chunk Cookies.
A sprinkle of sea salt can also beautifully enhance the chocolate notes.
How to Store Your Leftovers
Store any leftover cookie pie tightly covered at room temperature for up to 2-3 days.
Serve These Alongside
That chocolate chip cookie pie is rich and gooey, so round out the dessert table with something light and fruity. Here are two bakes that share the sweet-baked vibe but bring their own texture and flavor.
- For a tender, tropical bite that balances the cookie pie’s density, try these Coconut Dream Muffins with their airy crumb.
- If you want another chocolate-accented option with a tart twist, the Cranberry Chocolate Chip Loaf delivers a tangy contrast and a sliceable texture.
For longer storage, refrigerate for up to 5 days, or wrap individual slices tightly and freeze for up to 1 month.
Your Cookie Pie Questions, Answered!
Can I use different types of chocolate chips?
Absolutely! This recipe is incredibly versatile. Feel free to use milk, dark, or white chocolate chips, or even a delightful combination for a more complex flavor profile.
Chocolate chunks also work wonderfully, providing bigger pockets of melted chocolate. For another delightful chocolate dessert, consider our chocolate crumb cheesecake bars.
Can I make this Chocolate Chip Cookie Pie gluten-free?
Yes, you can! Substitute the all-purpose flour with a 1:1 gluten-free baking flour blend that contains xanthan gum.
The texture might be slightly different, but you can still achieve a delicious gluten-free cookie pie. For other dessert ideas, explore our no-bake peanut butter fudge pie.
What if I don’t have a store-bought pie crust?
No problem at all! You can easily make a simple homemade pie crust from scratch, which often adds an extra layer of flavor.
Many basic pie crust recipes require just flour, butter, salt, and ice water.
Can I freeze the baked cookie pie?
Yes, you can! Once the cookie pie has completely cooled, wrap it tightly in plastic wrap and then in foil.
Freeze for up to 1 month. To reheat, thaw overnight in the refrigerator, then warm in a 300°F (150°C) oven until heated through.
How do I know when the center is perfectly gooey?
The key visual cues are golden-brown, set edges and a center that still looks slightly soft and has a gentle wobble when the pie plate is lightly shaken.
Trust your instincts and these cues, as the pie will continue to set as it cools, retaining that irresistible gooey texture.
Ready to Indulge? Your New Go-To Dessert Awaits!
You now possess all the secrets to baking the ultimate Chocolate Chip Cookie Pie – a dessert so effortlessly delicious, it’s destined to become a cherished favorite.
Go ahead, preheat that oven, gather your ingredients, and prepare to delight everyone with this wonderfully gooey creation. Share your triumphs with us, and happy baking!
Chocolate Chip Cookie Pie
Course: DessertCuisine: AmericanDifficulty: easy1
(9-inch) pie (8-10 servings)20
minutes30
minutes450
kcal180
minutesWho doesn’t love a warm, gooey chocolate chip cookie, now reimagined in a pie? This recipe guarantees a wonderfully soft, unbelievably gooey center every single time, achieved with an easy technique. You won’t believe how simple it is to make this delicious dessert!
Ingredients
1/2 cup (1 stick) unsalted butter, softened
1/2 cup granulated sugar
1/4 cup packed light brown sugar
1 large egg
1 teaspoon vanilla extract
1 1/4 cups all-purpose flour
1/2 teaspoon baking soda
1/4 teaspoon salt
1 1/2 cups semi-sweet chocolate chips
1 (9-inch) unbaked pie crust (store-bought or homemade)
Directions
- Preheat your oven to 350°F (175°C).
- In a large bowl, cream together the softened butter, granulated sugar, and light brown sugar until the mixture is light and fluffy.
- Beat in the egg and vanilla extract until they are fully incorporated and the mixture is well combined.
- In a separate medium bowl, whisk together the all-purpose flour, baking soda, and salt.
- Gradually add the dry ingredients to the wet ingredients, mixing only until just combined. Be careful not to overmix the dough.
- Stir in the semi-sweet chocolate chips until they are evenly distributed throughout the cookie dough.
- Press the prepared cookie dough evenly into your unbaked 9-inch pie crust, spreading it to fill the entire crust.
- Bake for 25-30 minutes. This is the critical step for achieving that perfectly gooey center: you want the edges to be golden brown and set, but the very center should still look slightly soft and even a little jiggly. It will continue to set as it cools.
- Remove the cookie pie from the oven and place it on a wire rack to cool completely for at least 2 to 3 hours before slicing and serving. This slow cooling process is key as it allows the residual heat to gently finish cooking the center without drying it out, ensuring the chocolate remains wonderfully melted and gooey, preventing a hard or crumbly texture.
Notes
- Cooling for 2-3 hours is critical for the center to set perfectly and remain gooey, preventing a hard or crumbly texture.