Crispy Chicken Fried Chicken: Your Guide to No-Soggy Perfection
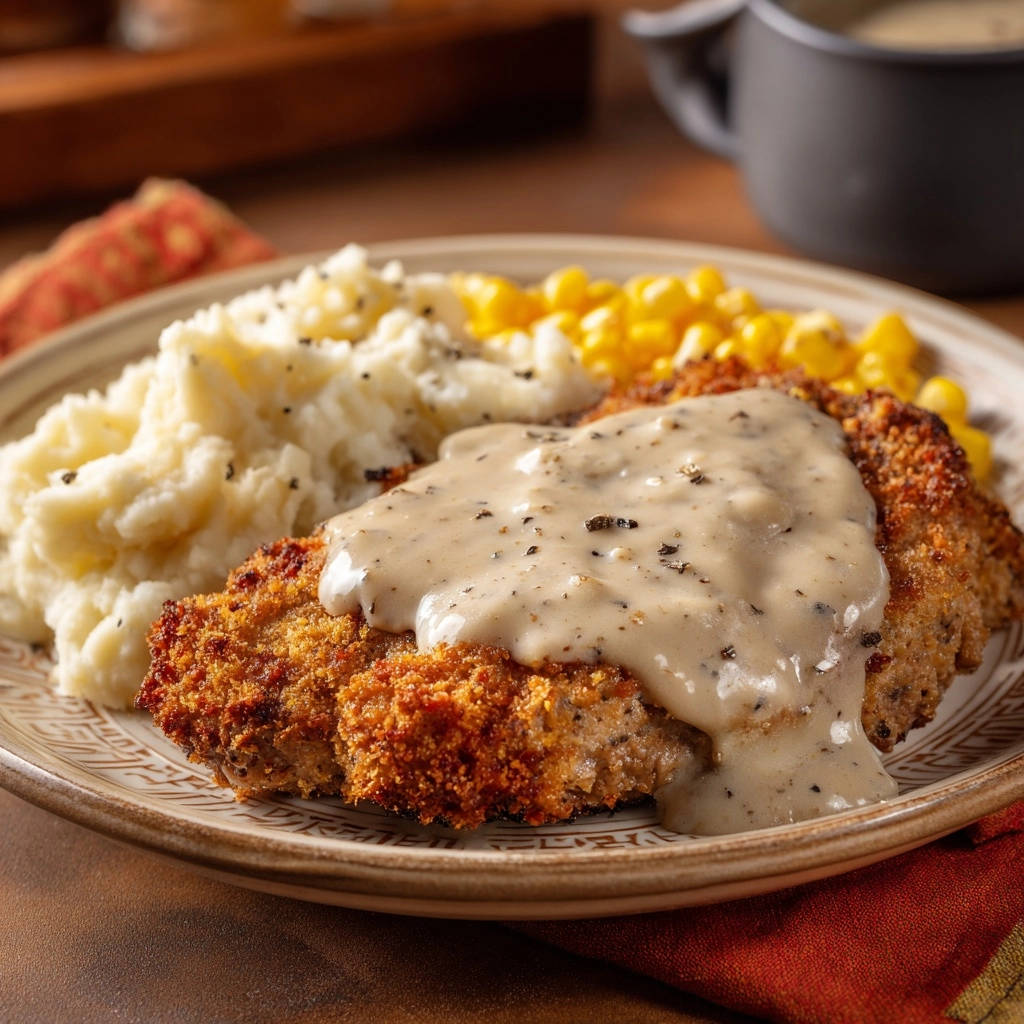
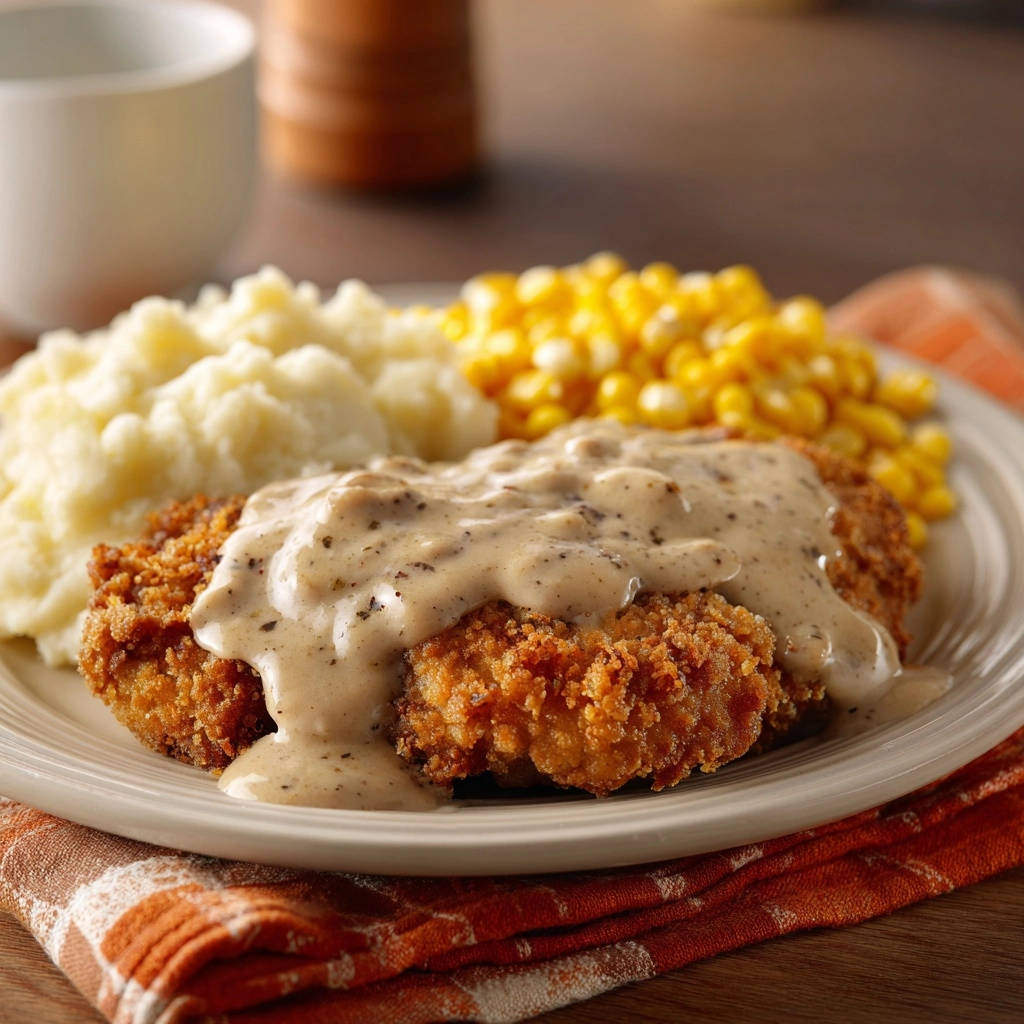
For years, achieving that truly golden, irresistibly crispy coating on homemade fried chicken felt like a culinary Everest. The heartbreak of a soggy crust, even when paired with the most delicious gravy, was a common tale in my kitchen. However, after extensive experimenting, I’ve finally cracked the code to making the perfect Crispy Chicken Fried Chicken that consistently delivers a satisfying crunch, every single time.
This recipe transforms a comfort food classic into a simple, reliable triumph, ensuring your coating remains gloriously crisp and stands up beautifully to all that rich, velvety gravy. Prepare to redefine your expectations for homemade fried chicken and enjoy a dish that is both familiar and unexpectedly superior.
Why This Crispy Chicken Fried Chicken Recipe Stands Out
Beyond the Basic: What Makes Our Method Special?
Our method goes beyond simple breading and frying, focusing on a synergistic combination of techniques. From precise chicken preparation to a critical resting phase, each step builds towards a consistently crunchy, golden result.
These intentional choices ensure your Crispy Chicken Fried Chicken maintains its structural integrity and delightful crispness, even when generously smothered in hot gravy.
Solving the Soggy Crust Dilemma Once and For All
The common frustration of a soggy crust is directly addressed and eliminated in this recipe. We prioritize thorough moisture removal and a dedicated breading rest, preventing steam buildup that can ruin texture.
Coupled with precise oil temperature control, these steps guarantee a dry, adhere-to-chicken coating that locks in juiciness and delivers maximum crispiness.
Your Pantry Essentials for Crispy Fried Chicken Greatness
The Star Protein: Boneless Chicken Breasts
Selecting fresh, high-quality boneless, skinless chicken breasts is fundamental for this recipe. Their consistent texture and quick cooking time make them ideal for creating tender, juicy fried chicken.
Using this cut also simplifies the pounding process, ensuring an even thickness that cooks uniformly and perfectly.
The Crispy Coating Foundation: Flours & Spices
All-purpose flour forms the essential initial layer of our crispy coating. It provides the perfect base for the egg wash and breadcrumbs to adhere.
A blend of salt, black pepper, garlic powder, onion powder, and paprika infuses deep, savory flavors directly into the crust. Plain breadcrumbs are then paramount for achieving that classic, irresistible crunch and golden brown perfection.
The Perfect Adhesion: Egg Wash Components
Large eggs serve as the primary binder, creating a sticky bridge between the seasoned flour and the breadcrumbs. This ensures the coating adheres robustly throughout the frying process.
A touch of milk thins the egg wash slightly, allowing for a more even and thorough coating, which contributes to a more tender and cohesive crust.
The Frying Medium: Choosing the Right Oil
Vegetable oil is the ideal choice for frying due to its neutral flavor and high smoke point. This allows the chicken to cook thoroughly without imparting unwanted tastes or burning the oil prematurely.
Maintaining the correct oil temperature is crucial; it ensures the coating crisps beautifully without becoming greasy, preventing a no-soggy crust.
If you enjoy the crispy coating here, try it on this juicy fried chicken for waffles for another satisfying meal.
Crafting the Velvety Gravy: Dairy & Broth
Butter and a portion of the flour are combined to create a foundational roux, which is essential for thickening the gravy and adding a rich, nutty flavor. This provides the structure for a smooth sauce.
Milk and chicken broth are gradually whisked in, contributing to the gravy’s creamy body and savory depth. Extra black pepper and the remaining salt season the gravy, balancing its flavors and making it the perfect accompaniment to the Crispy Chicken Fried Chicken.
Essential Tools for Your Crispy Chicken Fried Chicken Success
Meat Mallet or Rolling Pin
This tool is essential for pounding chicken breasts to an even 1/2-inch thickness. Uniformity ensures consistent cooking and prevents dry spots or undercooked areas.
Wire Rack & Baking Sheet
A wire rack, placed over a baking sheet, is critical for two stages: allowing the breaded chicken to rest for coating adhesion, and draining excess oil from fried chicken to maintain crispiness.
Heavy-Bottomed Skillet
A heavy-bottomed skillet ensures superior heat retention and even heat distribution across the cooking surface. This consistency is vital for frying chicken to a uniform golden brown perfection.
Digital Meat Thermometer
This tool is indispensable for guaranteeing the chicken is cooked to a safe internal temperature of 165°F (74°C) without overcooking. It also helps monitor oil temperature for optimal crispiness.
Whisk
A good whisk is invaluable for smoothly combining ingredients in your breading stations and for crafting a perfectly lump-free, velvety gravy. It ensures even textures throughout the dish.
From Prep to Plate: Mastering Crispy Chicken Fried Chicken (Step-by-Step)
Preparing the Chicken for Optimal Breading
Pound Evenly: Place each boneless chicken breast between two sheets of plastic wrap. Use a meat mallet or heavy rolling pin to pound them evenly to approximately 1/2 inch thick.
Pat Dry Thoroughly: Liberally pat the chicken pieces completely dry with paper towels. This step is absolutely crucial for the breading to adhere properly and prevents a soggy crust from forming.
Setting Up Your Efficient Breading Stations
Station 1 (Seasoned Flour): On a wide, shallow plate, combine 3/4 cup all-purpose flour, 1/2 teaspoon salt, 1/2 teaspoon black pepper, 1/2 teaspoon garlic powder, 1/2 teaspoon onion powder, and 1/4 teaspoon paprika.
Station 2 (Egg Wash): In a second shallow plate, whisk together 2 large eggs and 2 tablespoons milk until well combined. This creates our sticky binding layer.
Station 3 (Breadcrumbs): Place 1 1/2 cups of plain breadcrumbs on a third separate plate. This will form the exterior crispy coating.
The Art of Breading: Ensuring Even Coverage
Flour First: Dredge each chicken piece generously in the seasoned flour mixture, ensuring it is fully coated. Gently shake off any excess flour.
For the same reasons, these tips apply directly to making shatteringly crisp chicken thighs.
Egg Wash Dip: Next, dip the floured chicken into the egg wash, allowing any excess to drip back into the plate. Ensure the entire surface is moistened.
Breadcrumb Press: Finally, press the chicken firmly into the breadcrumbs, making sure the entire surface is completely covered. Gently press the breadcrumbs onto the chicken with your hands to help them adhere securely.
The Secret to Unbeatable Crispiness: The Resting Phase
Rest and Set: Carefully place the breaded chicken pieces on a wire rack set over a baking sheet. Allow them to rest undisturbed at room temperature for a minimum of 15 minutes.
This critical resting period allows the moisture from the chicken and egg wash to hydrate the flour and breadcrumbs, creating a firm bond. This prevents the coating from falling off during frying and ensures a supremely crispy, golden brown perfection.
Frying to Golden Perfection: Temperature and Technique
Heat the Oil: In a large, heavy-bottomed skillet, heat 3 cups of vegetable oil over medium-high heat until it reaches a consistent temperature of 350°F (175°C). Use a digital thermometer for accuracy; a pinch of flour should sizzle immediately but not burn if a thermometer isn’t available.
Fry in Batches: Carefully place one or two pieces of the breaded Crispy Chicken Fried Chicken into the hot oil, ensuring you do not overcrowd the pan. Overcrowding significantly lowers the oil temperature, leading to greasy, less crispy results.
Cook Until Golden: Fry the chicken for 4-5 minutes per side, until it reaches a beautiful, deep golden brown and is cooked through. The internal temperature should register 165°F (74°C) with a meat thermometer.
Drain and Season: Once cooked, remove the chicken from the oil and transfer it back to the wire rack to drain any excess oil. Immediately season generously with a pinch of the remaining salt and black pepper for enhanced flavor.
Whipping Up the Rich, Velvety Gravy
Create the Roux: Carefully pour off all but 2 tablespoons of the oil from the skillet. Add 2 tablespoons of butter to the skillet and melt it over medium heat. Whisk in the remaining 1/4 cup of all-purpose flour until a smooth paste, or roux, forms, cooking for 1-2 minutes until it turns a light golden color.
Gradually Whisk Liquids: Gradually whisk in 1 1/2 cups of milk and 1/2 cup of chicken broth, stirring constantly to prevent any lumps from forming. This slow addition ensures a smooth, uniform base for your gravy.
Thicken and Season: Bring the gravy mixture to a gentle simmer, continuing to stir frequently, until it thickens to your desired consistency. Season generously with extra black pepper and the remaining salt to taste, adjusting as needed for perfect flavor.
Chef’s Corner: Pro Tips for Your Crispy Chicken Fried Chicken
Achieving Maximum Crispiness: Beyond the Rest
While the resting period is paramount, always ensure your frying oil is at precisely 350°F before adding the chicken. Additionally, resist the urge to overcrowd the pan; this maintains optimal oil temperature and ensures every piece gets that ultimate crispy coating.
Flavor Boosters and Customization
Elevate your Crispy Chicken Fried Chicken with subtle flavor additions. Consider whisking a pinch of cayenne pepper into your flour mixture for a gentle warmth, or a dash of dried thyme to introduce an aromatic, herby dimension that complements the chicken beautifully.
What’s Next?
Try these delicious pairings:
Gravy Gurus: Avoiding Lumps and Adjusting Consistency
To guarantee a silky-smooth, lump-free gravy, always incorporate your liquids (milk and broth) gradually into the roux while whisking continuously. If your gravy is too thick, thin it with a small splash of warm milk or broth; if too thin, simmer gently, stirring constantly, to reduce it to your preferred consistency.
Perfect Pounding for Even Cooking
Strive for a uniform 1/2-inch thickness across the entire chicken breast when pounding. This critical step ensures that each part of the chicken cooks evenly and at the same rate, preventing one area from drying out while another remains undercooked, delivering perfectly juicy results every time.
Troubleshooting Your Crispy Chicken Fried Chicken: Common Fixes
Why is My Coating Falling Off?
Ensure the chicken is thoroughly patted dry before applying any breading; moisture is the enemy of adhesion. Do not skip the crucial 15-minute resting period after breading, as this allows the coating to set firmly.
My Chicken Isn’t Crispy Enough!
The most common culprits are incorrect oil temperature and overcrowding. Always use a thermometer to maintain 350°F (175°C) and fry chicken in small batches to keep the oil hot, ensuring optimal crispiness.
The Gravy is Lumpy or Too Thin/Thick
For lumpy gravy, whisk vigorously to break up lumps or strain it through a fine-mesh sieve for a perfectly smooth texture. If the gravy is too thin, simmer gently to reduce and thicken; if it’s too thick, whisk in small amounts of warm milk or broth until it reaches your desired consistency.
Frequently Asked Questions About Crispy Chicken Fried Chicken
Can I Use Other Cuts of Chicken?
Yes, while this recipe highlights boneless chicken breasts, you can certainly use boneless, skinless chicken thighs for a richer flavor. Keep in mind that cooking times will vary, so always rely on a digital meat thermometer to ensure an internal temperature of 165°F (74°C).
How Do I Store Leftover Crispy Chicken Fried Chicken?
Store any leftover Crispy Chicken Fried Chicken in an airtight container in the refrigerator for up to 3-4 days. For the best reheating results that revive its crispiness, use an air fryer or reheat it in an oven at 375°F (190°C) until warmed through.
Can I Make This Gluten-Free?
Absolutely! To make this recipe gluten-free, simply substitute the all-purpose flour with a high-quality 1:1 gluten-free all-purpose flour blend. Additionally, ensure you use certified gluten-free breadcrumbs. The rest of the preparation and cooking process remains identical.
What Can I Do with Leftover Frying Oil?
Once the frying oil has completely cooled, carefully strain it through a fine-mesh sieve or several layers of cheesecloth to remove any food particles. Store the filtered oil in an airtight container in a cool, dark place, and it can typically be reused 1-2 more times, depending on how clean it remains.
Serving Suggestions & Perfect Pairings
This classic Crispy Chicken Fried Chicken, especially when drenched in its rich, velvety gravy, is truly a comforting meal. For the ultimate Southern-inspired experience, serve it alongside a generous helping of creamy mashed potatoes, which are perfect for soaking up every drop of that delicious gravy.
Complement the richness with a refreshing side of steamed green beans, sweet corn, or a crisp garden salad dressed with a tangy vinaigrette. Don’t forget some warm, fluffy biscuits to complete this quintessential comfort food classic.
Ready to Cook? Share Your Crispy Chicken Fried Chicken Creation!
Now that you’re armed with the secrets to crafting truly crispy, golden, and utterly delicious Crispy Chicken Fried Chicken, it’s time to bring this comfort food classic to your own kitchen! This recipe promises to deliver that ultimate satisfying crunch and flavor you’ve been craving, banishing soggy crusts forever.
We’re excited to see your culinary masterpiece! Share your Crispy Chicken Fried Chicken photos and experiences in the comments below, or tag us on social media. Happy cooking, and get ready to enjoy some of the best homemade fried chicken you’ve ever tasted!
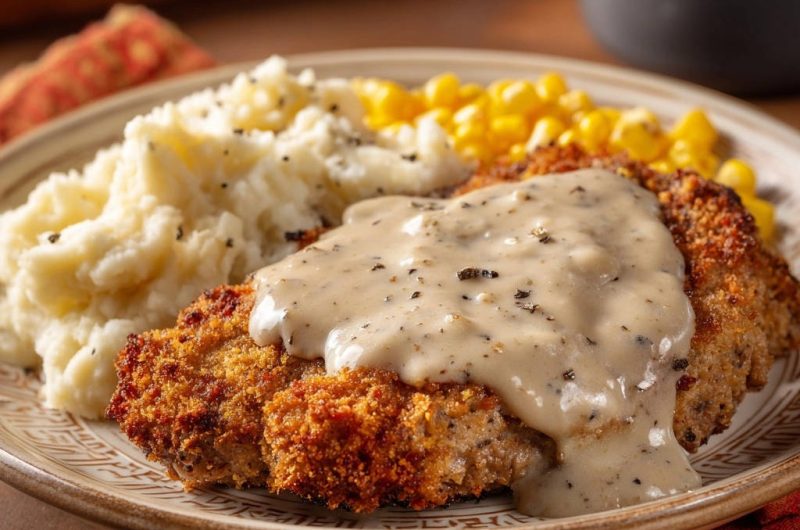
Crispy Chicken Fried Chicken
Course: Main CourseCuisine: AmericanDifficulty: medium2
servings20
minutes20
minutes1500
kcal55
minutesAchieve the ultimate comfort food experience with this foolproof Crispy Chicken Fried Chicken recipe. Say goodbye to soggy crusts and hello to a perfectly golden, crunchy coating that stands up to delicious gravy. It’s simpler than you think and guaranteed to be a family favorite!
Ingredients
2 boneless, skinless chicken breasts
1 cup all-purpose flour, divided
1 teaspoon salt, divided
1 teaspoon black pepper, divided
1/2 teaspoon garlic powder
1/2 teaspoon onion powder
1/4 teaspoon paprika
2 large eggs
2 tablespoons milk (for egg wash)
1 1/2 cups plain breadcrumbs
3 cups vegetable oil (for frying)
2 tablespoons butter
1 1/2 cups milk (for gravy)
1/2 cup chicken broth (for gravy)
Extra black pepper (for gravy)
Directions
- Prepare the chicken: Place each chicken breast between two sheets of plastic wrap. Using a meat mallet or heavy rolling pin, pound them evenly to about 1/2 inch thick. Pat them completely dry with paper towels. This is key for the coating to stick.
- Set up breading stations:
- Plate 1: Combine 3/4 cup flour, 1/2 teaspoon salt, 1/2 teaspoon black pepper, garlic powder, onion powder, and paprika.
- Plate 2: Whisk eggs and 2 tablespoons milk together.
- Plate 3: Place breadcrumbs on a plate.
- Bread the chicken: Dredge each chicken piece generously in the seasoned flour, shaking off excess. Then dip it into the egg mixture, allowing excess to drip off. Finally, press firmly into the breadcrumbs, ensuring the entire surface is well coated. Gently press the breadcrumbs onto the chicken to help them adhere.
- Crucial step for crispiness: Place the breaded chicken on a wire rack set over a baking sheet and let it rest at room temperature for at least 15 minutes. This allows the coating to set and stick firmly, preventing it from falling off and ensuring maximum crispness during frying.
- Fry the chicken: Heat 3 cups of vegetable oil in a large, heavy-bottomed skillet over medium-high heat until it reaches 350 degrees Fahrenheit. If you don’t have a thermometer, a sprinkle of flour should sizzle immediately but not burn.
- Carefully place one or two pieces of chicken into the hot oil, ensuring you do not overcrowd the pan, as this lowers the oil temperature and makes the coating less crispy. Fry for 4-5 minutes per side, until deeply golden brown and cooked through (internal temperature of 165 degrees Fahrenheit).
- Remove the chicken from the oil and place it back on the wire rack to drain any excess oil. Season immediately with a pinch of the remaining salt and pepper.
- Make the gravy: Carefully pour off all but 2 tablespoons of the oil from the skillet. Add butter to the skillet and melt over medium heat. Whisk in the remaining 1/4 cup flour until a smooth paste (roux) forms, cooking for 1-2 minutes until lightly golden.
- Gradually whisk in 1 1/2 cups milk and 1/2 cup chicken broth, stirring constantly to prevent lumps. Bring the gravy to a simmer, stirring frequently, until it thickens to your desired consistency. Season generously with extra black pepper and the remaining salt to taste.
- Serve the crispy chicken fried chicken immediately, smothered in warm gravy.
Notes
- Resting the breaded chicken on a wire rack for 15+ minutes is crucial for the coating to set and ensure maximum crispiness during frying.